CABRI G2
The Cabri helicopter sample can be downloaded from the Help menu in DevMode. This sample contains a complete helicopter project, with all the files required by the simulation for it to fly, as well as all the source files which can be examined to see how the model was created and the flight files are set up. Once downloaded and installed, it can be found in the same folder as the other samples. It is worth noting that the Sources folder contain 2 3Ds Max model files:
CABRI_G2_exterior.maxCABRI_G2_interior.max
These can be used as reference projects when creating your own models for the simulation.

You can expand the link below to see the Cabri file and folder structure:
+ Cabri_G2
|---+ PackageDefinitions
|   |---+ asobo-aircraft-cabri-g2-sdk
|   |   |---+ ContentInfo
|   |   |   |---- Thumbnail.jpg
|   |   |---- Business.json
|   |---- asobo-aircraft-cabri-g2-sdk.xml
|---+ PackageSources
|   |---+ SimObjects
|       |---+ Airplanes
|           |---+ Asobo_Cabri_G2_SDK
|               |---+ Checklist
|               |   |---- Cabrig2_Checklist.xml
|               |   |---- Library.xml
|               |---+ effects
|               |   |---+ Texture
|               |   |   |---- fx_0.png
|               |   |---- LIGHT_ASOBO_CockpitSpot.fx
|               |   |---- LIGHT_ASOBO_CockpitSpotNarrow.fx
|               |   |---- LIGHT_ASOBO_Landing.fx
|               |   |---- LIGHT_ASOBO_NavigationGreen.fx
|               |   |---- LIGHT_ASOBO_NavigationRed.fx
|               |   |---- LIGHT_ASOBO_NavigationWhite.fx
|               |   |---- LIGHT_ASOBO_StrobeSimple.fx
|               |---+ Localization
|               |   |---- aircraft.loc
|               |---+ model
|               |   |---- Cabri_G2.xml
|               |   |---- Cabri_G2_Interior.xml
|               |   |---- Cabri_G2_INTERIOR_LOD00.bin
|               |   |---- Cabri_G2_INTERIOR_LOD00.gltf
|               |   |---- Cabri_G2_INTERIOR_LOD01.bin
|               |   |---- Cabri_G2_INTERIOR_LOD01.gltf
|               |   |---- Cabri_G2_INTERIOR_LOD02.bin
|               |   |---- Cabri_G2_INTERIOR_LOD02.gltf
|               |   |---- Cabri_G2_INTERIOR_LOD03.bin
|               |   |---- Cabri_G2_INTERIOR_LOD03.gltf
|               |   |---- Cabri_G2_INTERIOR_LOD04.bin
|               |   |---- Cabri_G2_INTERIOR_LOD04.gltf
|               |   |---- Cabri_G2_INTERIOR_LOD05.bin
|               |   |---- Cabri_G2_INTERIOR_LOD05.gltf
|               |   |---- Cabri_G2_INTERIOR_LOD06.bin
|               |   |---- Cabri_G2_INTERIOR_LOD06.gltf
|               |   |---- Cabri_G2_LOD00.bin
|               |   |---- Cabri_G2_LOD00.gltf
|               |   |---- Cabri_G2_LOD01.bin
|               |   |---- Cabri_G2_LOD01.gltf
|               |   |---- Cabri_G2_LOD02.bin
|               |   |---- Cabri_G2_LOD02.gltf
|               |   |---- Cabri_G2_LOD03.bin
|               |   |---- Cabri_G2_LOD03.gltf
|               |   |---- Cabri_G2_LOD04.bin
|               |   |---- Cabri_G2_LOD04.gltf
|               |   |---- Cabri_G2_LOD05.bin
|               |   |---- Cabri_G2_LOD05.gltf
|               |   |---- Cabri_G2_LOD06.bin
|               |   |---- Cabri_G2_LOD06.gltf
|               |   |---- model.cfg
|               |---+ panel
|               |   |---- panel.cfg
|               |   |---- panel.xml
|               |---+ RTC
|               |   |---+ animations
|               |   |   |---- PlaneShowcase_COCKPIT.bin
|               |   |   |---- PlaneShowcase_COCKPIT.bin
|               |   |   |---- PlaneShowcase_HANGER.bin
|               |   |   |---- PlaneShowcase_HANGER.bin
|               |   |---+ definitions
|               |       |---- RTC_Hanger.xml
|               |---+ sound
|               |   |---- CabriG2_SDK_AIRCRAFT.PC.PCK
|               |   |---- sound.xml
|               |---+ soundAI
|               |   |---- CabriG2_SDK_AIRCRAFT_AI.PC.PCK
|               |   |---- soundAI.xml
|               |---+ texture
|               |   |---- < various PNG and FLAGS files >
|               |   |---- texture.cfg
|               |---- ai.cfg
|               |---- Aircraft.cfg
|               |---- apron.flt
|               |---- cameras.cfg
|               |---- cockpit.cfg
|               |---- cruise.flt
|               |---- engines.cfg
|               |---- flight_model.cfg
|               |---- gameplay.cfg
|               |---- hangar.flt
|               |---- Notice.txt
|               |---- runway.flt
|               |---- systems.cfg
|               |---- target_performance.cfg
|---+ Sources
|   |---+ Art
|       |---+ Max
|           |---+ Textures
|           |   |---- < various PNG files >
|           |---- CABRI_G2_exterior.max
|           |---- CABRI_G2_interior.max
Loading And Building The Project
In order to load and build the project in Microsoft Flight Simulator, you must have previously enabled Developer Mode (see here for more information). Once enabled, simply follow these steps:
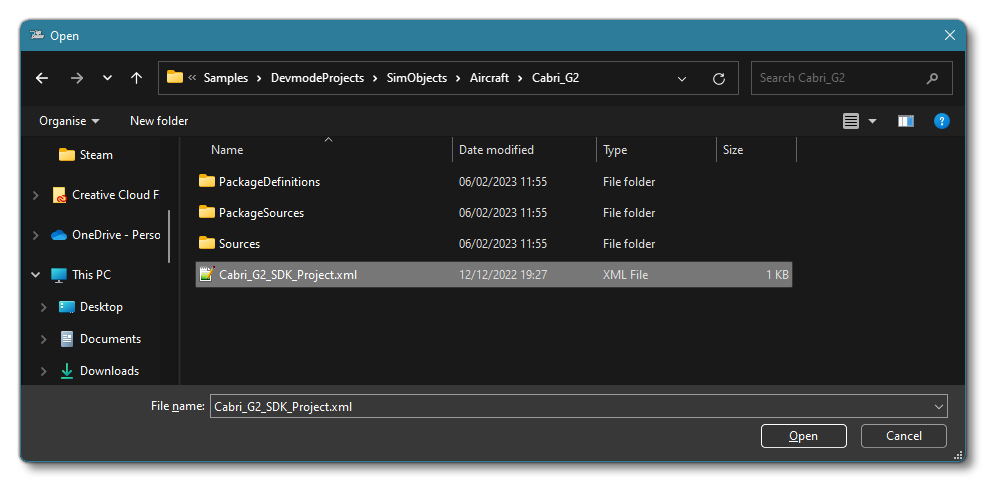
- Use the Open project... command from the File menu.

- Select the file
asobo-aircraft-cabri-g2-sdk.xmlfrom theCabri_G2sample project.
- The Project Editor should open automatically and show you the project
asobo-aircraft-cabri-g2-sdk(if the Project Editor doesn't open, then you can open it from the Developer Mode Editors menu)
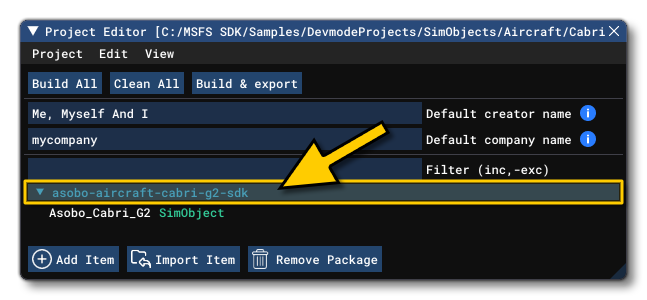
- Clicking on the project in the Project Editor will open the Inspector Window, and here you need to click the
Build Packagebutton (if the Inspector Window does not open automatically, go to the View menu in the Project Editor and open it from there).
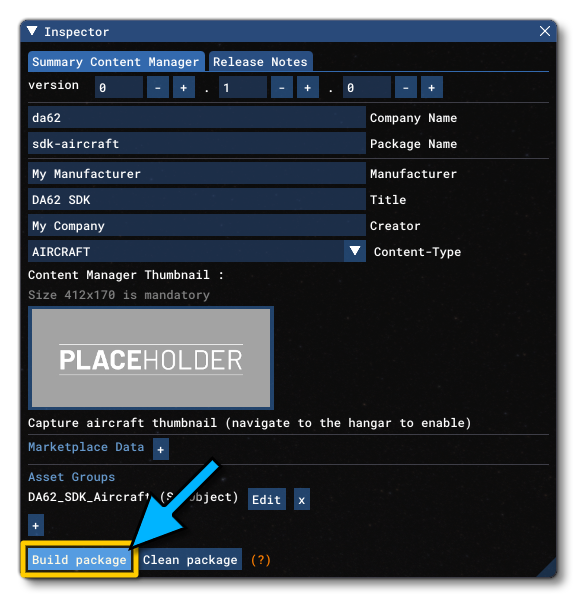
- This will build a package from the files specified in your project. This package will be named
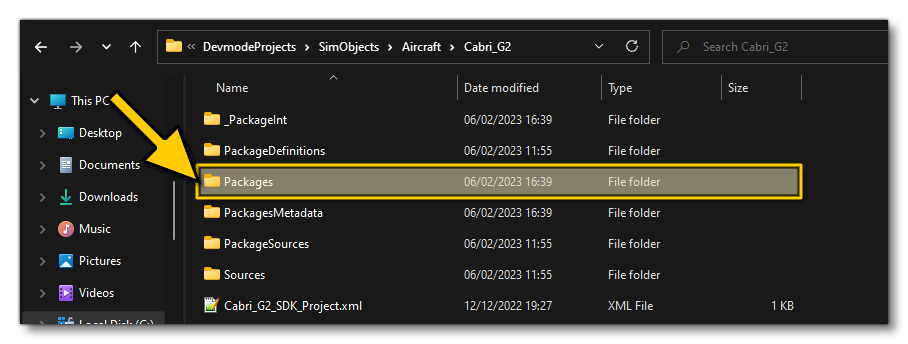
asobo-aircraft-cabri-g2-sdkand will be output in the Packages folder created in the same directory asCabri_G2_SDK_Project.xml:
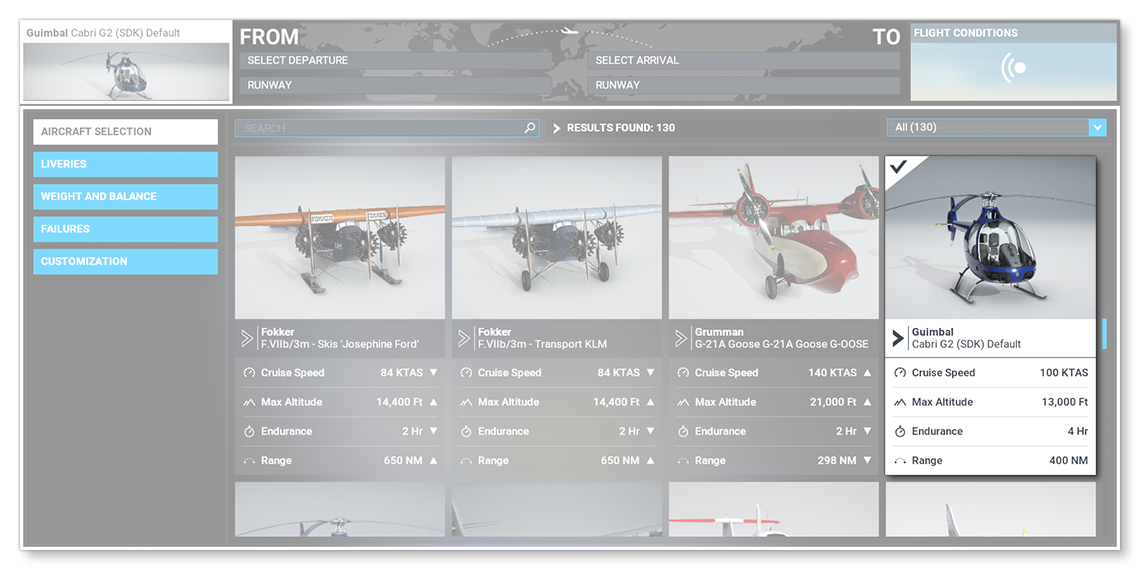
- Building the package will also install it into Microsoft Flight Simulator and so you can now proceed to the aircraft selection screen and see your newly created helicopter:
