PackageInstaller
The PackageInstaller sample is a Visual Studio 2019 solution which demonstrates how users can create installers for add-ons through the WiX Toolset (based on Windows Installer). This sample is a working example of how the WiX Toolset can be used - together with a specific VS extension for Wix - to install one or more packages into The Community Folder of both the OneStore and Steam versions of Microsoft Flight Simulator.
You can expand the link below to see the PackageInstaller file and folder structure:
|---+ PackageInstaller
    |---+ DetectMSFS
    |   |---- CustomAction.cpp
    |   |---- CustomAction.def
    |   |---- DetectMSFS.vcxproj
    |   |---- stdafx.cpp
    |   |---- stdafx.h
    |   |---- targetver.h
    |---+ PackageInstaller
    |   |---- CustomAction.wxs
    |   |---- PackageFiles.wxs
    |   |---- PackageInstaller.wixproj
    |   |---- Product.wxs
    |---+ Packages
    |   |---+ mycompany-module-standalone
    |       |---+ modules
    |       |   |---- StandaloneModule.wasm
    |       |---- layout.json
    |       |---- manifest.json
    |---- PackageInstaller.sln
Requirements
This project has the following requirements for it to be used to create installer packages:
- Visual Studio 2019 (it should be possible to port the solution to VS2017 fairly easily)
- WiX Toolset
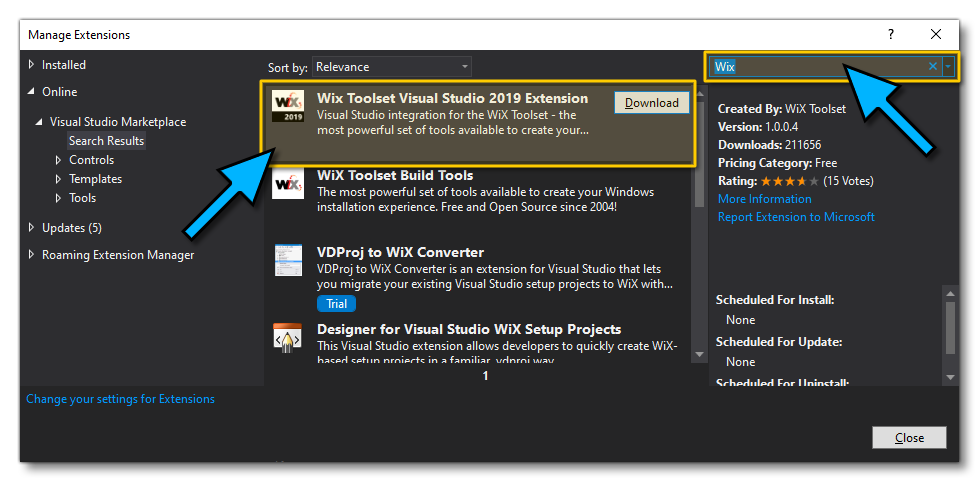
IMPORTANT! You must ensure you are using Wix Toolset +3.x.x or below. Higher versions will not work. - WiX Toolset Visual Studio 2019 Extension - This can be found by opening the Extensions Manager (from the Extensions menu) and then searching for WiX:
Using This Sample
To use this sample you first need to have installed the above listed tools and then opened the PackageInstaller.sln in Visual Studio. Without editing anything, simply go to the Build menu and then select Build Solution. This will take the contents of the Packages folder, and build it as an MSI installer. The final installer - PackageInstaller.msi - can be found in the following directory:
<root directory>\PackageInstaller\PackageInstaller\bin\Debug\PackageInstaller.msi
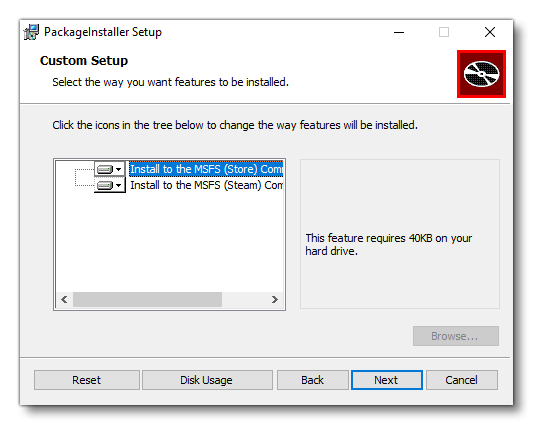
You can then double-click on this and the installer will open so you can install the test package to the OneStore and/or the Steam Community folder:
Customising The Installer
This example uses the default settings for creating the installer, but this will obviously not be what you want for your own packages. The installer itself is 100% configurable and you can find details of how to change the licence file and bitmaps used - as well as other details - from the following link:
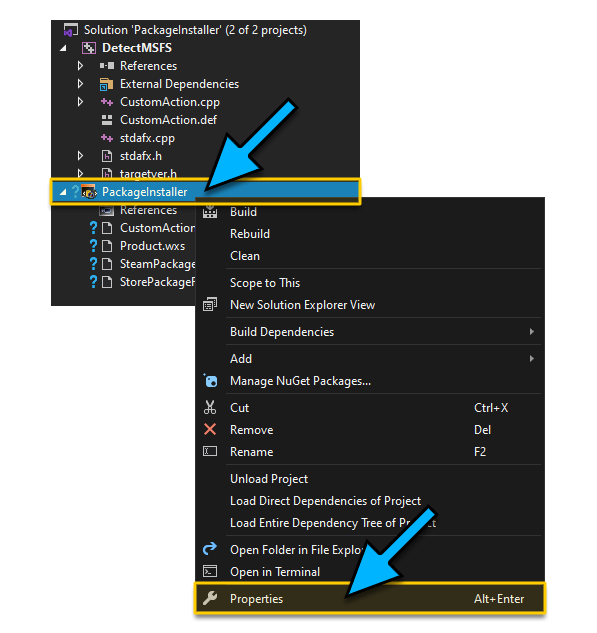
To change the name of the built MSI exectuable, you can do this from Visual Studio by selecting the Properties for the PackageInstaller:
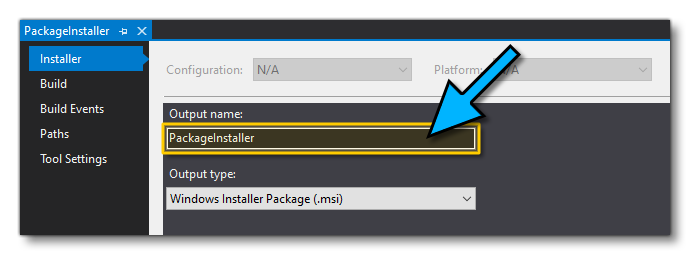
From here you can then change the name of the MSI exectuable that is created:
It is also worth noting that you are not limited to having a single package within the installer, and you can have multiple packages included if required. For this, simply ensure that each package you want to include is added to the Packages folder, and it they will all be built as part of the installer, eg:
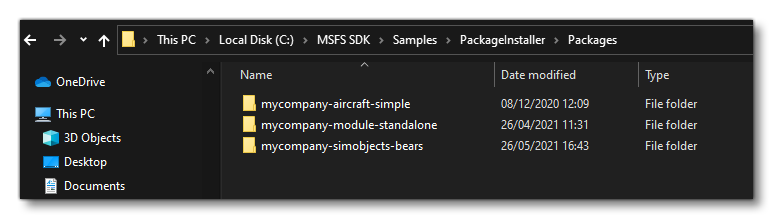
In this case, all three packages will be installed by the user when the run the MSI file.