IMPLEMENTING A CHECKLIST
A checklist is a list of tasks that should be performed and validated by pilots and aircrew before flying, and its purpose is to improve flight safety by ensuring that no important tasks are forgotten. Therefor, in Microsoft Flight Simulator, aircraft that you make will also need to have a checklist defined. The important thing to note, however, is that in the simulation checklists aren't just a list of tasks, but also a teaching aid for new users, since the UI will give helpful hints as to how a checklist task can be performed and completed. This means that users who have no time for (or are not interested in) finding out the technical subtleties of how to operate an aircraft for themselves, will find that the in-game checklist is an operational abstract of the aircraft handbook, as well as a tool that for guiding them interactively inside the cockpit. This makes checklists a very powerful asset that can contribute in attracting casual players into flying more complex aircraft and also raise their interest for aeronautics in general.
Given how important checklists are, in this tutorial we'll help you create a checklist that is as well designed as possible and that offers the user the best experience when flying your aircraft.
Overview
Given the complexity of creating a good checklist, it's better to have a good schematic idea of how they function and the following graphic is a good base to start from. It offers a visual representation of the different parts of the checklist and how it should flow:
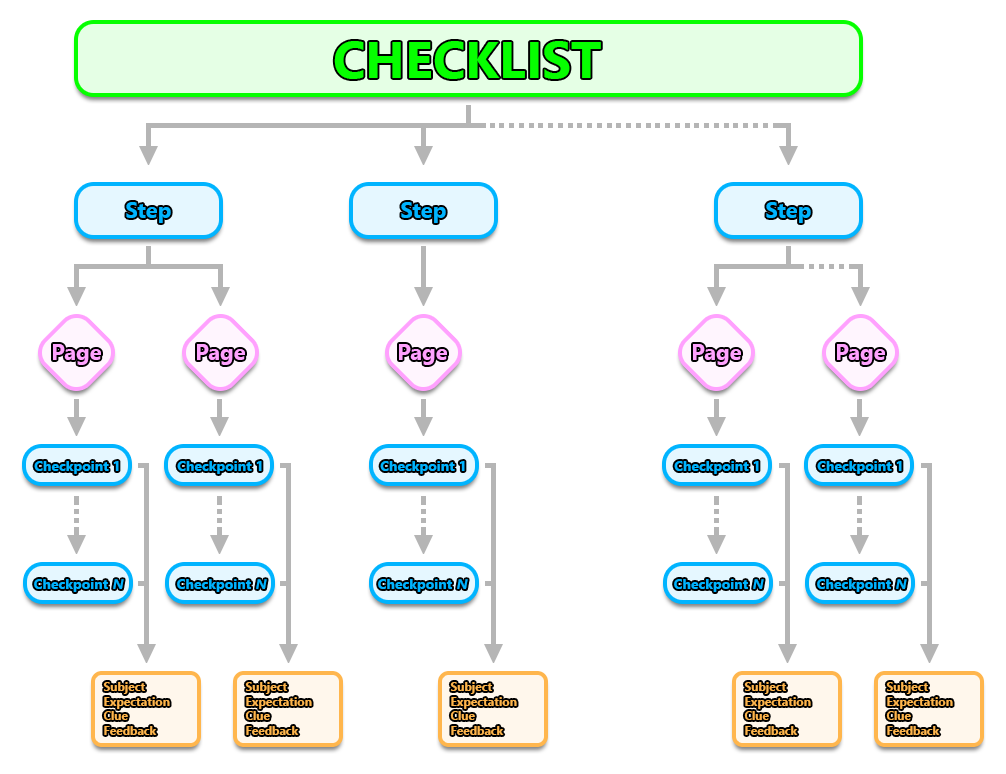
NOTE: "Steps" do not appear in the UI of the simulation. However, their use is mandatory while creating the checklist XML file. Also note that - as shown above - a "Page" must be part of a "step" and you can include a custom number of "pages" per step.
NOTE: "Checkpoints" can also be grouped in a "Block", which we'll discuss a little further down this page.
So, once a flight is started, the checklist of the selected aircraft is accessible through the toolbar by clicking on the Checklist icon:

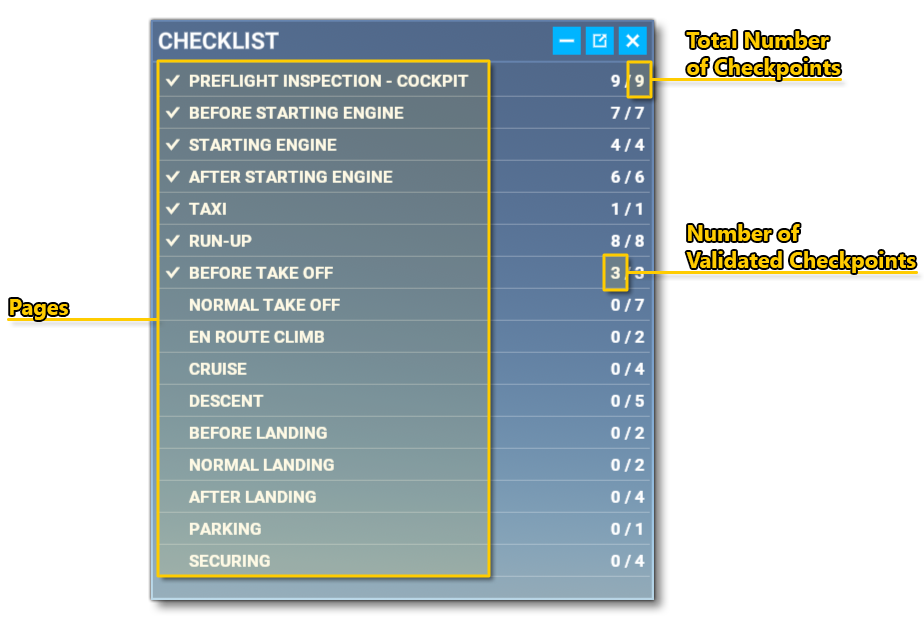
And the checklist window will first display the list of available (named) pages, as well as the total number of checkpoints and the validated number of checkpoints within each page:
Checkpoints
In the simulation, each item on a checklist can be selected to show the different checkpoints associated with it. Each of these checkpoints needs to be completed for the checklist page to be finished. Below is an example image of a single page and its associated checkpoints, with the main parts that will need to be defined in the checklist XML highlighted:
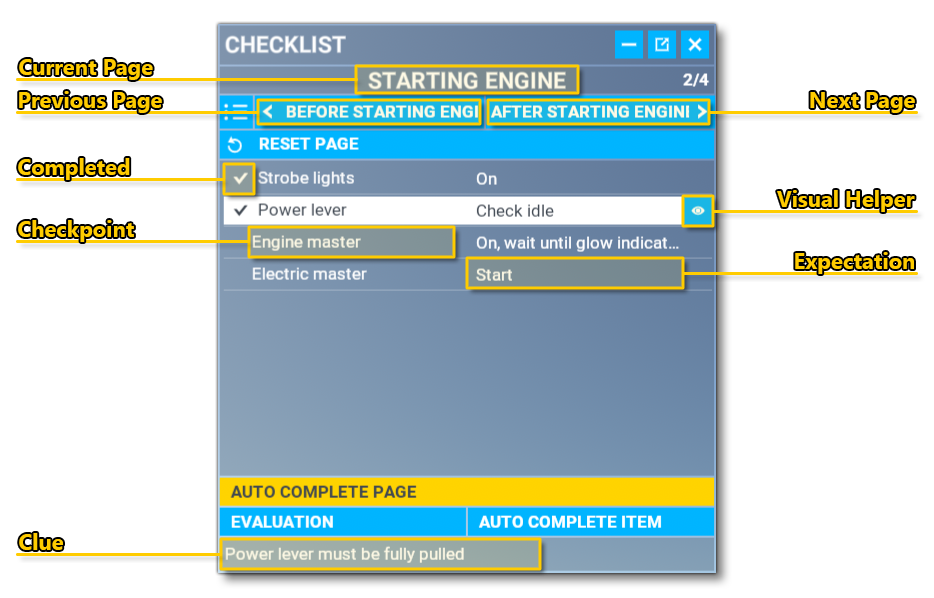
The most important parts of the image above are:
- The Checkpoint, which is considered the subject of the user attention.
- The Expectation, which is the action that is associated with the subject and that the user is expected to perform.
- The Clue, which is an area that contains text to help the user identify correctly the subject and expectation. Note that this may be replaced with feedback which is discussed below.
The page also has various options related to the checklist page and checkpoint evaluations at the bottom (above the Clue):
- Auto Complete Page: This will tell the copilot to go through and complete the checkpoints on this page for the user.
- Evaluation: This will move the camera briefly to the switch, or screen, or whatever needs done and highlight it for them in blue.
- Auto Complete Item: This will tell the copilot to complete the item that is currently selected by the user.
NOTE: Using the Evaluation or Auto Complete Item buttons will also trigger the visual .
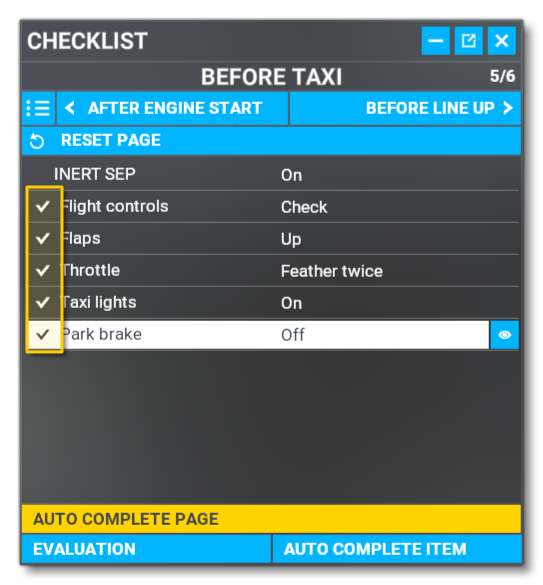
When using the Auto Complete options, if the current checkpoint is validated according to its XML tests and the current state of the simulation, it will automatically be checked. Otherwise the user should go through the checklist and manual perform each of the checkpoints, using the Evaluation button if they can't find something. The user can then verify that everything has been done correctly by the fact that there will be checkmark on each of the checkpoints.
Feedback
Feedback will be shown in the same area of the checklist window as the "clue":

Feedback is text which is displayed when certain automated helpers - namely and are being performed. Feedback will replace the Clue until the current checkpoint is validated, with the purpose of informing the user on what is going on, while they are waiting for the automated feature to complete. Note that if no Feedback text is defined, "Copilot processing..." will be displayed as the default text.
Blocks of checkpoints
Sometimes, a page of checklist might contain a subsection of checkpoints with a title, called a block. This may simply be a convenient way to group together similar checkpoints, or it may signify a part of the checklist that is to be evaluated only under certain conditions, or all together as a whole. For example, some aircraft have a different startup procedure depending on the engine starting temperature (e.g. if the aircraft flew recently, and engines are still warm), so you would have two "blocks": one for a cold stratup, and one for a warm startup, and only the checkpoints within the block that is applicable need to be evaluated.
NOTE: It should be noted that blocks can be nested, with checkpoints defined at any depth in the block hierarchy.
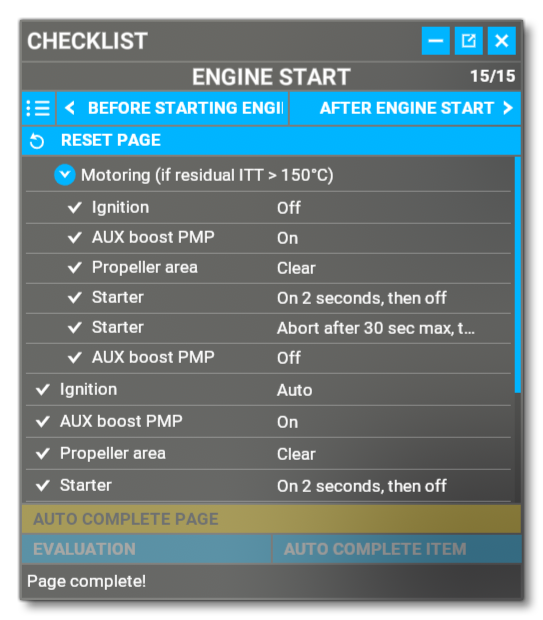
The image below shows a block - "Motoring", shown here expanded but it can be collapsed by clicking the "˅" button - that contains 6 additional checkpoints that will only be used if the engine temperature conditional check shows the temperature as greater than 150°C:
Helpers
As part of the creation of checklists, you can define various helpers as part of the checklist file contents. These helpers are explained in the sections below.
Visual Assistance
To help the user to find the right instrument to operate, the camera can be moved and the instrument can be highlighted. This help is mainly useful for beginners so they can learn where the instruments are located and how to operate them. For a user to activate this system they simply need to click on the "eye" icon within the simulation UI;
![]()
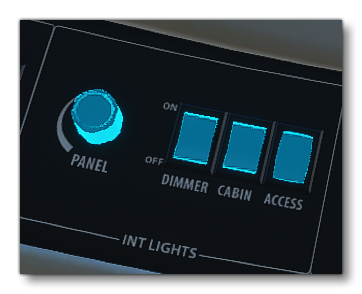
Once this icon is clicked, the UI highlights the instrument in blue and the related camera view is set to focus on the appropriate instrument, button or knob:
Automatic Validation
Checkpoints can be customized, so Microsoft Flight Simulator can itself validate them if the right settings exist or the task is done. For this, an automated test - or tests, or even sequences of tests - can be defined for each checkpoint. The whole sequence of tests must be validated in order to validate the corresponding checkpoint.
Automatic Action (Copilot)
The copilot helper allows Microsoft Flight Simulator to validate the checklist instead of the user. This will complete actions needed to validate all the tests. However, if no copilot actions are defined in a test, this test will be skipped while in Copilot mode, but they will also be considered validated for exterior purposes.