THE BLENDER EXPORTER
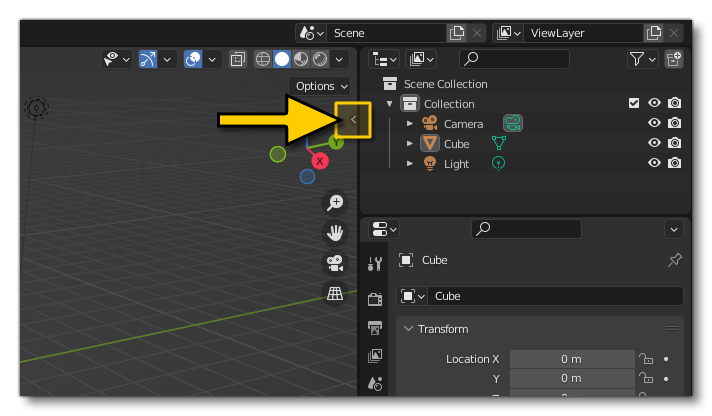
The Blender plugin also has a multi-export tool for glTF files. This tool can be accessed from the sub menu available from the side of a scene in any of the views by clicking the tiny arrow button shown in the image below (mouse over the image to see an example):
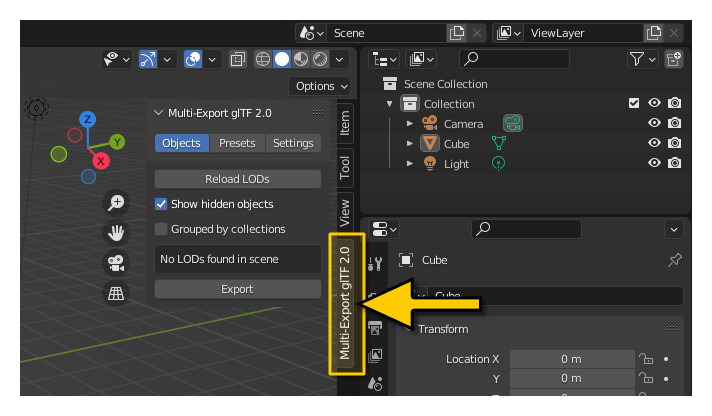
Here you have the following three sub-panels:
- Objects: This panel has been developed for environmental artists that like to organize their scenes as a selection of root objects and their children. Each object that is direct child of the scene represents a glTF that will normally be part of some environment package.
- Presets: This panel has been developed with the plane modeler in mind, as they tend to organise their scenes using multiple layers. A glTF is then exported for every LOD of the plane - adding/subtracting the required layers.
- Settings: Here you can find the various different export settings for geometry, animation, etc...
Exporting Using The Objects Panel
This panel relies on the names of your root nodes in the scene. If your object's name starts with x0_ or ends with _LOD0 it will be considered a LOD0 (x1_ and _LOD1 will be LOD1, etc...). The rest of its name defines its category so that all the objects from the same family (ie: different LODs of the same asset) will be sorted together.
If you click on Reload LODs button, it will group your objects with LOD(s) as shown down bellow:

After that you will need to set the Export Path to define where you want the LODs exported to:
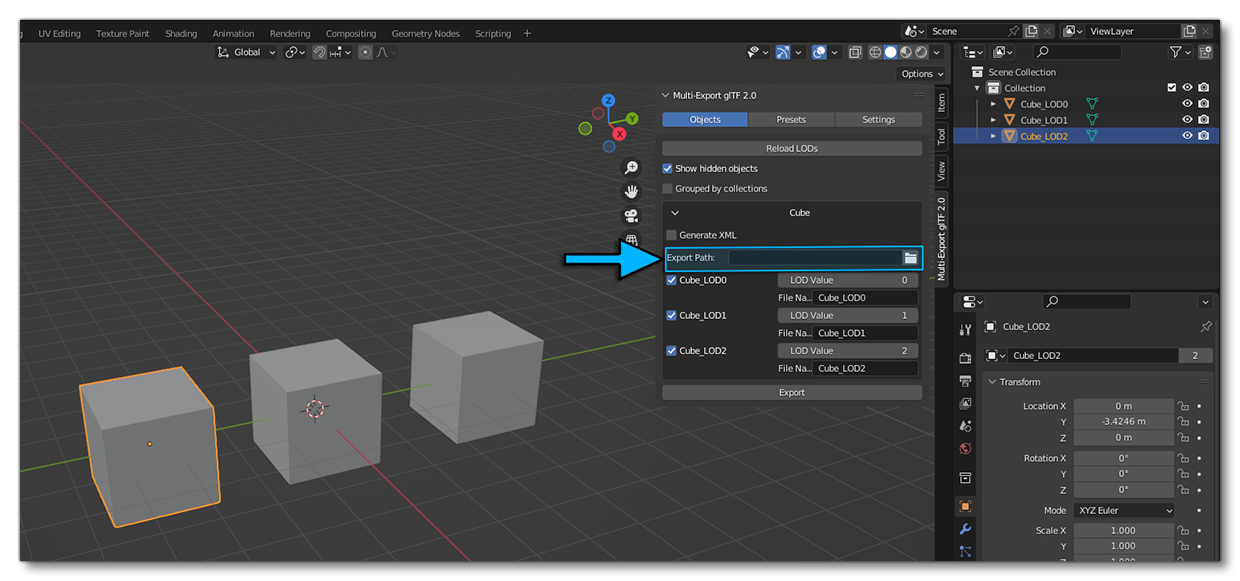
If you tick the "Generate XML" checkbox, the exporter will also create the XML file for the families of LOD selected. For example, in the images above, selecting Cube, Cube_LOD0 or all of the Cube LODs will produce the same result and generate one single XML file - "Cube.XML" - for the Cube family of objects. Note that you can also work with multiple families at once.
Below you can see a sample of the XML output which can then form the basis for the model.xml file used by the final Microsoft Flight Simulator 2020 add-on (as explained here: Model Definitions):
<?xml version="1.0" encoding="utf-8"?>
    <ModelInfo guid="{1b7127b5-7223-4980-8cc0-3b5417cb2412}" version="1.1">
        <LODS>
            <LOD minSize="0" ModelFile="Cube_LOD0.gltf"/>
            <LOD minSize="1" ModelFile="Cube_LOD1.gltf"/>
            <LOD minSize="2" ModelFile="Cube_LOD2.gltf"/>
        </LODS>
    </ModelInfo>
Exporting Using The Presets Panel
The Presets panel allows you to create Export Presets that will make it easier to export a large numbers of different objects, animations and more, without having to constantly repeat the same steps over and over. This exporter relies on Collections to be selected and added to a Preset, so you will need your scene to be split into relevant collections.
When you click on the Add Preset Button, a new element will be added to the view (see the image below). You can set its name, the folder to export it to, and then enable it for export:

You will need to define which collections are applied to this Preset by clicking on Edit Layers Button:

When all your presets are set up you can then go ahead and click on the Export button:

The Settings Panel
Here you can find the various export settings like geometry, animations, materials, etc... for the Blender glTF export, and these can be edited as required for the project being exported. It is also worth noting that here you can disable the Microsoft Flight Simulator 2020 add-ons if you want to export your models as pure glTF that follow the Khronos Schemas.
