TELEPORT WINDOW
The Teleport Window is opened from the [DevMode] Tools menu. This window is used to transport you to any place in the world, instantly.

The following teleport options are available:
- Click on the
Go to Airportbutton - This button will open up the Select Airport Window: Here you can start to type in an ICAO or airport name and the list will filter out those airports that don't meet the criteria. Once you have found the airport you want to go to, you can click the
 Select Airportbutton to be taken there. - Use the
Go To LatLonbutton - This permits you to input a latitude and longitude (for example 48.8584,2.2945), which will teleport you to a new point on the world corresponding to the input coordinates. - Click the
Go to POIbutton - This button will open up the Select POI window:
 This window permits you to search a regular term (like "tower", "lake" or "bridge") or the name of a city or a town, and then select what you want from the list, and click on the
 Go To POIbutton to be taken there. Note that this window will accept localized input based on the language chosen for Microsoft Flight Simulator 2020. So - for example - if you have the simulation set to Spanish (Español), you can search for "torre" or "lago" and get the results for that language.
Note that using any of the above the three options will automatically change the camera to Slew Mode which you can disable again by un-checking the Slew Mode checkbox after teleportation.
Camcodes
The Teleport Window also has a set of buttons associated with camcodes. A Camcode is a string of digits and numbers that Microsoft Flight Simulator 2020 can interpret as a camera location. To create a camcode, first you need click on the Add Marker button, and then click somewhere in the world to generate a marker:
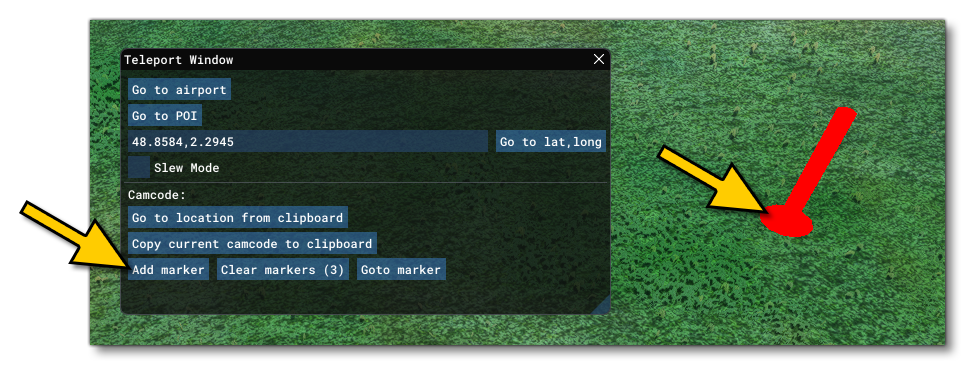
Each marker you add will have it's own camcode associated with it, and you can cycle between the markers by repeatedly clicking on the Goto Marker button to select the one you want (each time you click the button, the camera will move to the next stored marker in the list). Once you have selected a marker, you can then click on the Copy Current Camcode To Clipboard to copy the camcode string, which can then be stored independently for anything you need. The string itself will be something like this:
AADJkXLZUgAAAHvlOASiAaOyEEQAAAAAkXsCAABfc+vXUgAAAC5vJa+iAQAAiN9y2VIAAADkZTgEogE=
NOTE: One important use of these strings is for reporting an issue to the development team. You can create a marker at the location where you have found an issue, then include this camcode in the report to the developers and they will know exactly where the problem that you've found is.
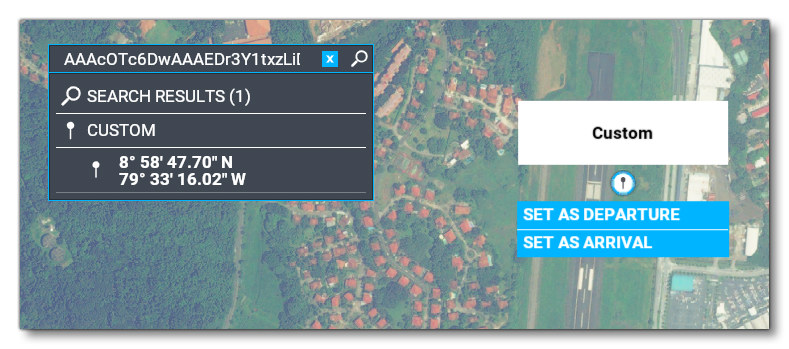
These camcodes can also be copied to the clipboard then pasted back into the simulation in two different places:
- You can use the
Go To Location From Clipboardbutton, which will simply check the contents of the clipboard and if it's a camcode it will take the camera to the location - You can paste the camcode into the Search window in the main world map of Microsoft Flight Simulator 2020 and then go to that location in the world map
Finally, you can clear all your markers using the Clear Markers button.