PARALLAX WINDOWS

An important optimisation that is available for larger airframes is the ability to use a parallax effect to "fake" an aircraft interior using specifically set up window textures. This effect is ideal for airliners, as it means you do not have to model the airliner interior, saving time on the modelling process and also improving overall performance for the aircraft.
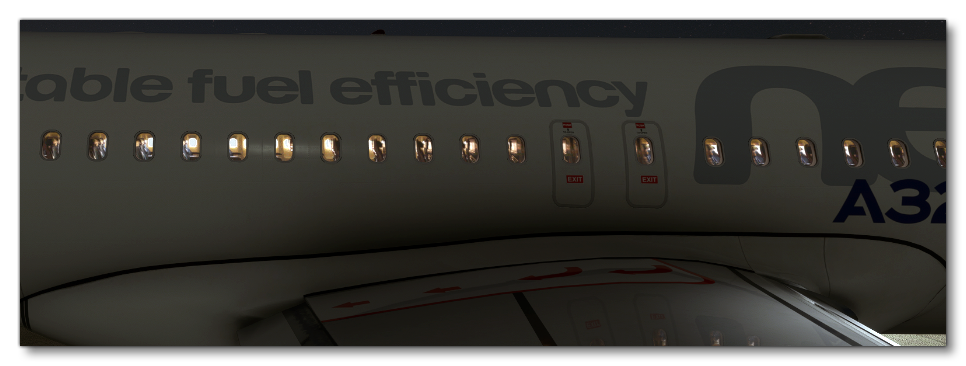
Example Of An Airliner With Parallax Windows


The Porthole Material

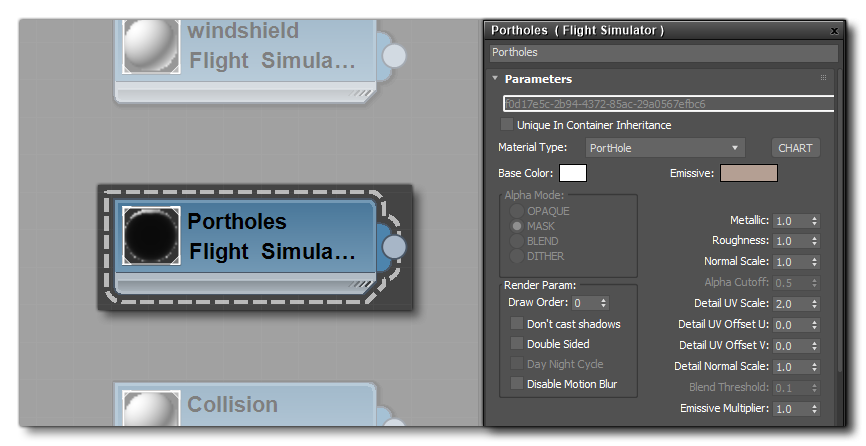
Since we will are creating the parallax effect for the aircraft portholes, we will need to make a dedicated Porthole FlightSim material:

The Porthole Material In 3DsMax


The important things to note about this material are that the material type must be set to "PortHole", and that the Emissive colour is used to give a global "tint" to the interior parallax effect. For example, the following image shows a Boeing 737 with a bluish emissive colour, which you can compare to the example at the top of the page:
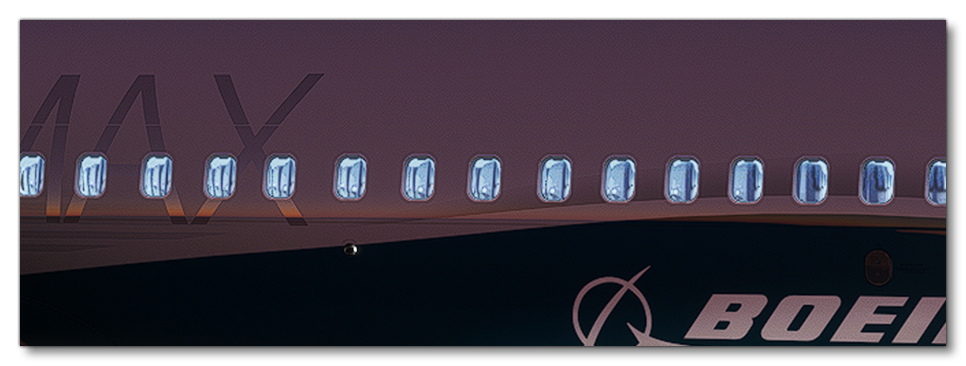
An Example Of The PortHole Material With A Blue Emissive


Texture Slots

For this material to work correctly you will need four textures:
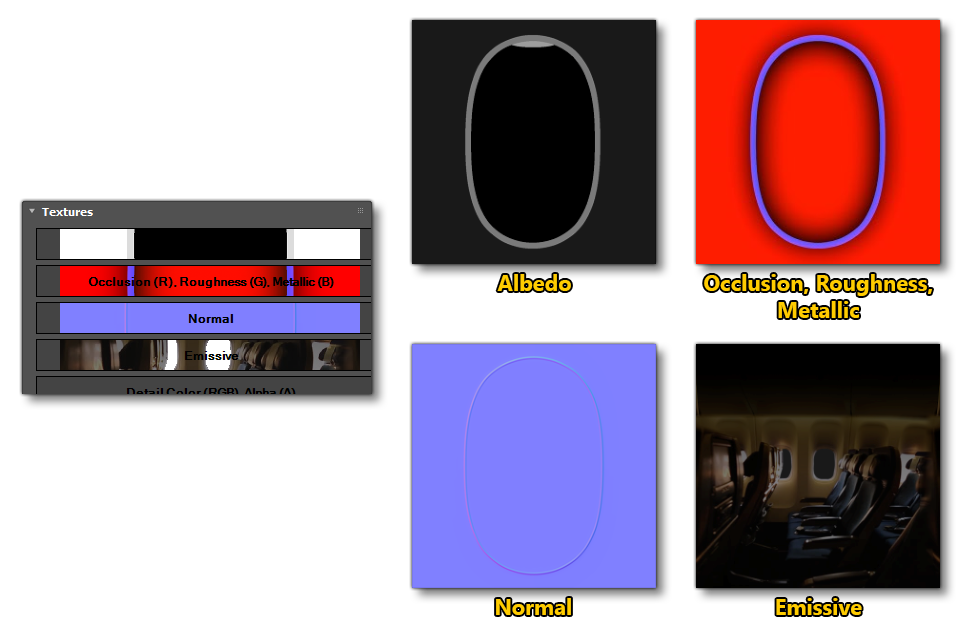
The Textures Required By The PortHole Material


  • Albedo: this texture is used for the colours of the airframe and any glass tinting, and the alpha channel is used to give depth to the frame and to the window itself. The general values that you should be looking at for the alpha channel are as follows:
    • Glass: alpha between 0.8 and 1

    • Frame: alpha between 0.5 and 0.75

    • Invisible: alpha of 0

    The image below shows an ideal albedo texture (shown rendered over a chequered background to illustrate the alpha values):
    An Albedo Texture Showing Correctly Applied Alpha


  • Occlusion, Roughness, Metallic: There is nothing of note about this texture and it works the same as with other PBR materials.


  • Normal: Only required if you wish to add normal mapping to the frame. Note that You need to create normals only for the exterior part of the porthole, and not add anything to the interior, otherwise you will get the effect applied to the glass. The image below shows correct vs. incorrect normal maps:
    An Example Of Good And Bad Normal Maps


  • Emissive: The emissive texture is this one that will be projected at the back of the parallax and is the heart of the effect. This texture should show the interior of the aircraft and needs to be tileable along the horizontal axis, and also be done such that the seats and opposing windows are at the correct height. The image below shows an example of the emissive texture:
    An Example Of The Emissive Texture For A Parallax Porthole In the image above, you'll notice that we have set the alpha of the opposing portholes to 0. If there is any areas of 0 alpha in the emissive texture, it will act "transparent’" and will receive the global lighting on the other side of the aircraft.


Editing

You can apply this parallax material on any surface you want, for example, to create airport windows that show some of the airport interior. However, most of the time you will be applying the material onto aircraft along curved planes to give the topology of the fuselage underneath.

Example Of Placement Of Parallax Windows For An Airliner


To ensure that the parallax is oriented correctly, you must ensure that the normals of the mesh that the material has been applied to are oriented horizontally. You can edit the normals by hand by adding an "edit normals" modifier in 3Ds Max.

Correctly Oriented Normals For Parallax Materials


Known Issues

When creating parallax windows it's important to understand some of the limitations and issues that may arise with the effect. To start with, this effect is good but will not withstand close scrutiny, especially when viewed from an extreme angle, as illustrated below:

The Parallax Effect Breaking When Viewed At Extreme Angles


Another potential issue you may have is distortion of the glass with an "embossed" effect in the window, as shown below:

Example Of An Error "Embossing" The Window Glass


This is caused by incorrect application of the alpha channel to the albedo texture. In general you need to ensure that alpha values match in all the appropriate areas. The image below illustrates the issue, and the fix:

Alpha Channel Error On The Albedo Texture


Finally, you may find that the interior of the porthole has a thick black border, as illustrated here:

Example Of Interior Border Error


This is simply fixed by changing the your occlusion texture such that the exterior side of your window is done in white on the occlusion channel (R) of the texture:
Example Showing Erroneous And Fixed Occlusion Maps