BUTTON, KNOB, AND LEVER ANIMATION
This page goes covers the details related to animating the buttons, switches and levers of the aircraft cockpit.
When it comes to animating the different buttons, switches, knobs and levers in the cockpit, you should make sure that the object's local pivot is correctly configured so that you always animate rotation or translation on the X axis. Also ensure that the the object has a correct scale (100,100,100), and that the object is detached and animated on LOD0.
Buttons / Switches
Buttons and switches should be animated using the following frames:
| Type | Frame | Position |
|---|---|---|
| Push Button | 0 | Default Position |
| 1 | Pushed Position | |
| Switch (2 Positions) |
0 | Down Position |
| 1 | Up Position | |
| Switch (3 Positions) |
0 | Up Position |
| 1 | Middle Position | |
| 2 | Down Position |
NOTE: The order of the positions can change if required to suit the decals and the way the button/switch operates. For example, if the swtich decal is OFF/Mid/ON, then start frame 0 with the OFF position, then have frame 1 as the middle pose and finally frame 2 as the ON pose.
Knobs
When animating any rotating knobs, the objective is to have it do a full 360° rotation, and for this we recommend that you put a keyframe every 120° over the space of 36 frames. For example:
| Frame | Position |
|---|---|
| 0 | 0° (Default Position) |
| 12 | 120° |
| 24 | 240° |
| 36 | 360° |
If the knob/rotating button, has markings and shows a start position for the rotation, then you should make sure that the default pose is on the starting mark, and then do the animation.
Graduations
If there are graduations around the knob/button then the rotation should use the graduation number for the animation keyframes. For example, if there are 5 graduations around the button then frame 0 is the default (initial) graduation, then frame 1 would be the second graduation, frame 2 would be the third graduation etc...
Levers / Throttle
Levers (and the throttle control) follow the same convention as for a simple on/off button (this can be reversed where required):
| Frame | Position |
|---|---|
| 0 | Off (Default) Pushed Position |
| 1 | On Fully Pulled Position |
However, you may also create a lever or a throttle with more than 2 frames of animation if required, for example if the lever has notches or decals indicating position, you may add in extra keyframes at those positions. The important thing to remeber is to ensure that the animation is linear as the simulation will will normalise the frames into a value between 0% and 100% to create the animation, and non-linear animations will mean that the the keyframes will be "off".
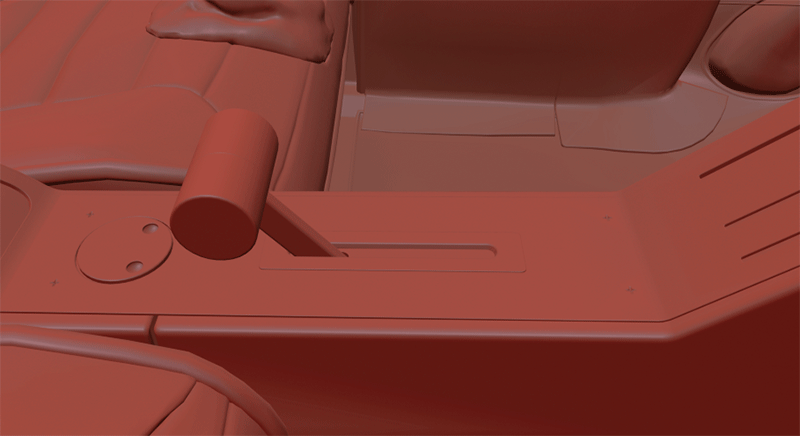
In cockpits, you can find lots of different levers, and they all have different shapes and very different uses. However they are almost always going to be animated using two frames, or - at most - a few frames of linear animation, as shown in the images above. Just keep in mind that they need to have the first frame of their animation at the position where they are not yet engaged, and the last frame of their animation where they are fully engaged.
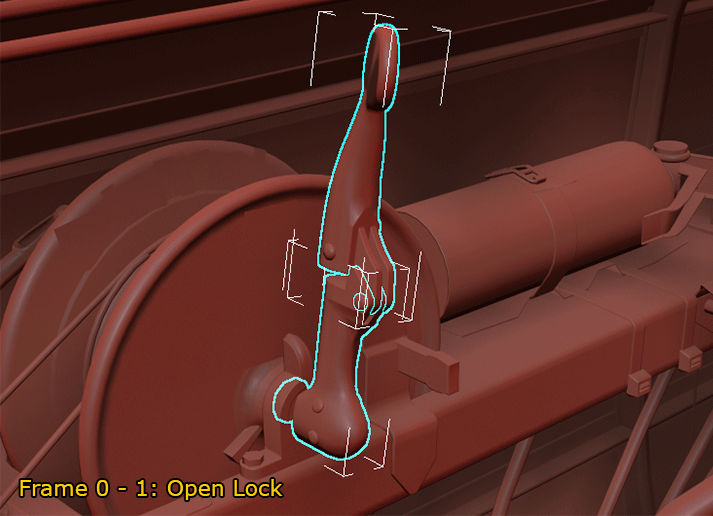
Landing Gear Levers
Most landing gear levers will have some sort of lock system which will need to be included in the animations used for the lever. However care whould be taken when setting this up to ensure that - when interpolated over time from 0% to 100% - the locking/unlocking doesn't take a disproportionate number of frames. For example, using a linear approach, common sense would suggest:
- Frame 0 to Frame 1 - Unlock Handle
- Frame 1 to Frame 2 - Push (or Pull) Lever
- Frame 2 to Frame 3 - Lock Handle
However this division of frames would actually give us the following percentages of animation, which is just not correct:
- Frame 0 to Frame 1 - 33.3% of the animation
- Frame 1 to Frame 2 - 33.3% of the animation
- Frame 2 to Frame 3 - 33.3% of the animation
We can't have the same time to unlock the handle as we do to pull / push the lever and deploy landing gears! To resolve this issue, we just have to space out frames a little bit more, for example:
- Frame 0 to Frame 1 - Unlock Handle
- Frame 1 to Frame 9 - Push (or Pull) Lever
- Frame 9 to Frame 10 - Lock Handle
This division of frames gives us a much better result when looking at the interpolated percentages:
- Frame 0 to Frame 1 - 10% of the animation
- Frame 1 to Frame 8 - 80% of the animation
- Frame 9 to Frame 10 - 10% of the animation