AMBIENT OCCLUSION
To simulate natural light, ambient occlusion on it's own is not quite good enough for the cockpit interior, and it has to be combined with the exterior light that is getting into the inside of the airplane. In order to achieve this we'll be baking a lightmap using the 3Ds Max Arnold renderer.
To get an idea of why we want to do things this way, lets compare the AO from just Substance Painter with the AO using an Arnold lightmap:
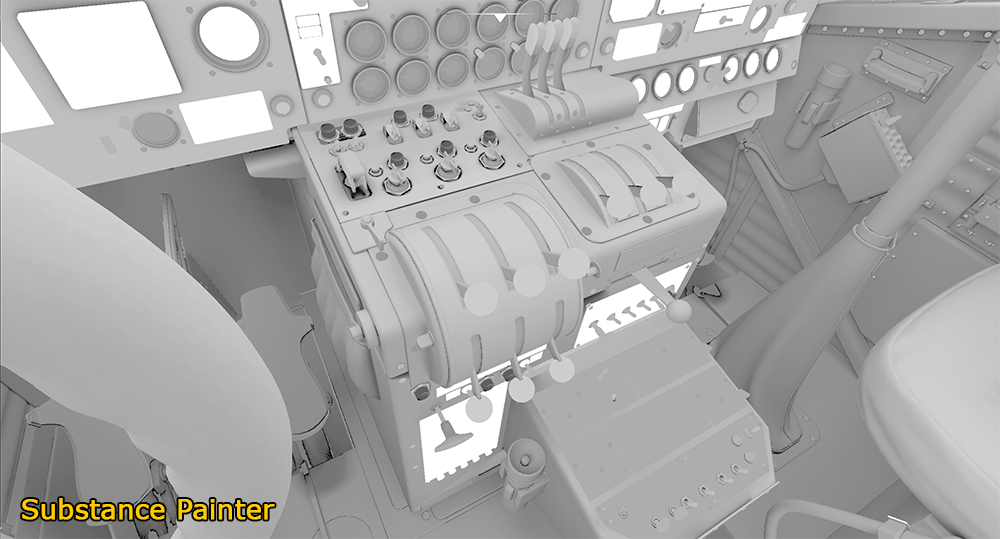
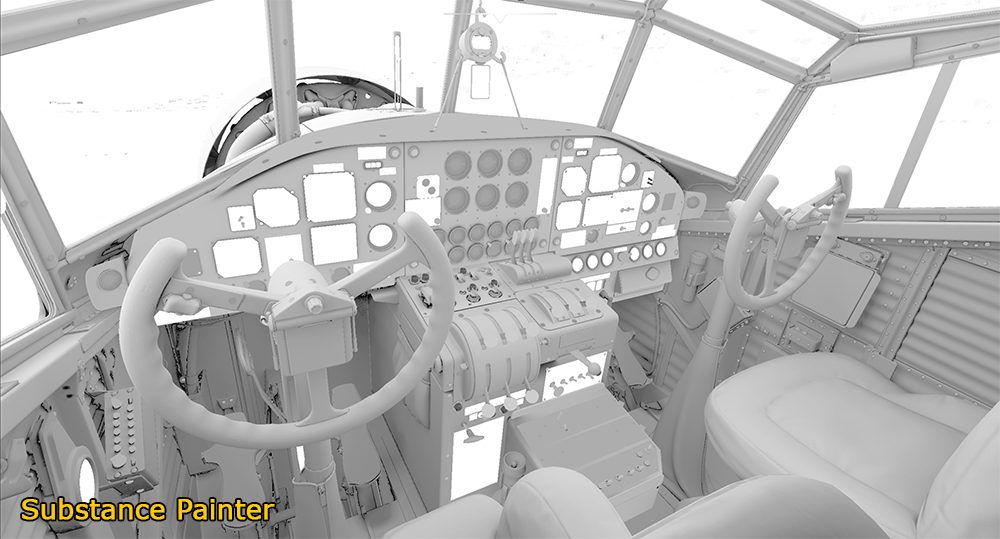
In these examples you can see that the bottom part of the cockpit receives a lot less light in a lightmap render than in a standard ambient occlusion baking, and that everything looks a lot less neutral and has more depth than the Substance Painter AO.
Setting Up 3DS Max / Arnold
To ensure that you can bake the lightmap correctly, you will need ensure that you are on at least 3DS Max 2019.3, and you will also need to install Arnold for 3DS Max 3.2.57 (even if it doesn't seem mandatory to have this version installed).
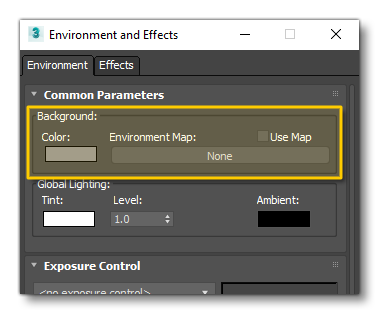
To bake the lightmap in the best conditions you will need to create a separate .max file. Once you have your new file opened, go into the "Environment and Effects" settings and set the background to white:
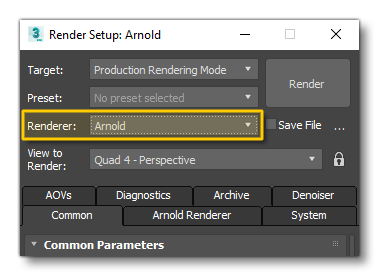
Next you'll need to go to the "Render Setup" window and select Arnold:
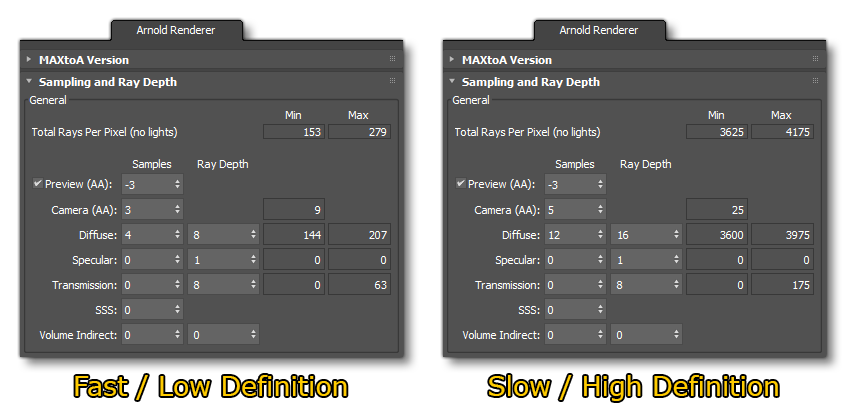
The following images show the essential setup values for the renderer: one for low definition/fast rendering, and the other for high definition/slow rendering:
Prepare The Scene
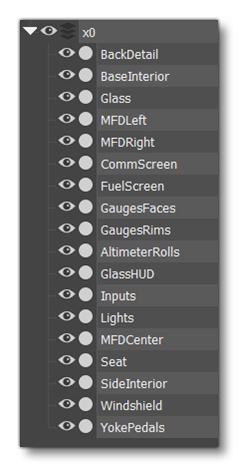
Once the 3DS Max file is ready and the Arnold renderer set up, you should import the cockpit model into it. Once imported, you'll need to make sure to delete all the LODs, since only LOD0 will be getting baked. Also, don't forget to delete the elements that you don't want to bake, like the collision meshes and the helpers, etc... You'll also want to remove animations and parenting at this point, and maybe take the opportunity to clean the materials and save the scene.
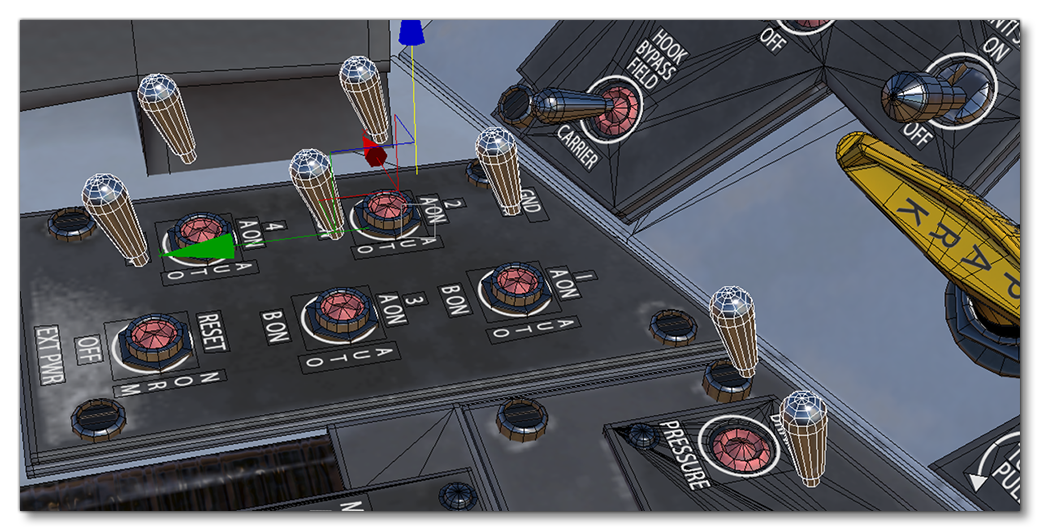
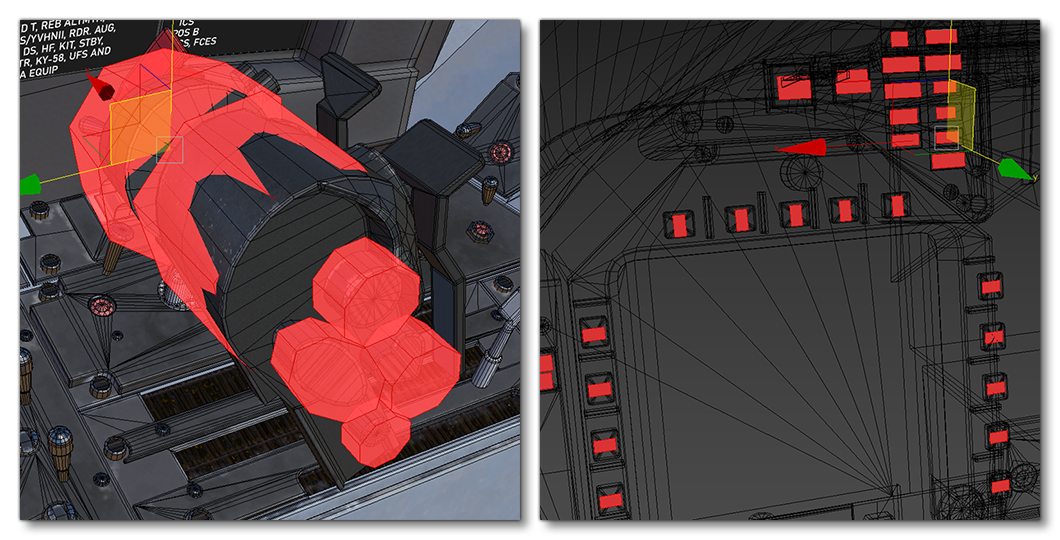
At this point you'd need to go through the elements that move and separate them slightly from the surrounding meshes so they're "floating" in space. We do this in order to avoid any black areas on the sections under them, and also to ensure that they themselves are correctly shaded:
Once that's all prepared, you should select everything and use a Reset Xform, then convert everything back into polygons.
Scene Preparation
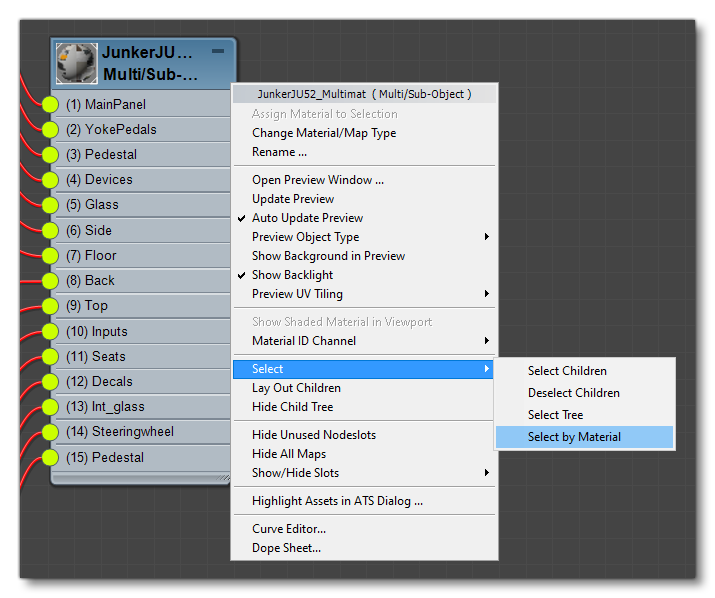
For the actual baking you will have to make one render for each material, and this will require some setting up too. To start with, you should select all the elements of the main multi-material and attach all the elements of it together.
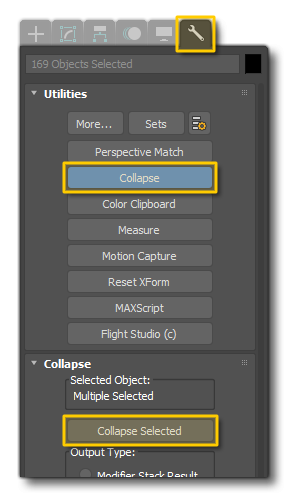
With that done you would go to the Utilities and then select Collapse and press the Collapse Selected button:
The idea here is to end up with 1 object per material. When you have that, you'll now need to select all the IDs of the mesh and detach them one by one, which will give you a list of meshes something like this:
Now you can delete the last elements that you don't want to bake into the lightmap like any remaining collision meshes and decals:
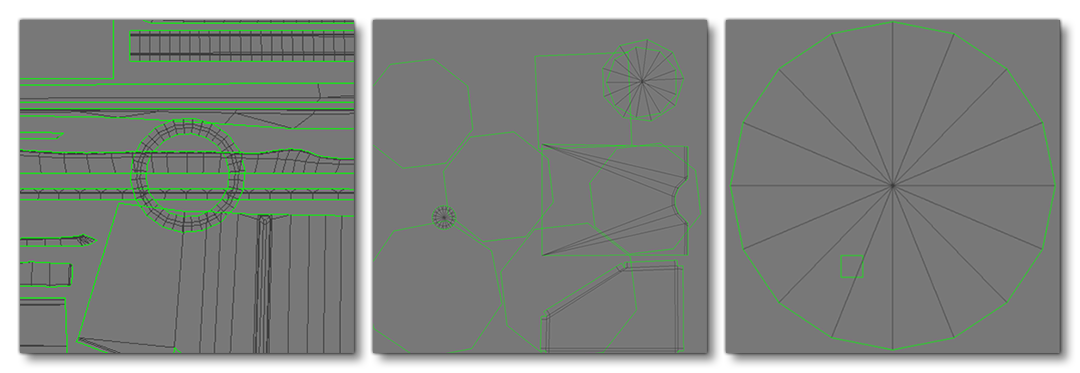
Before applying new materials for the baking, it's important to check that there are no mapping issue like elements poorly overlapped, or elements not unwrapped at all:
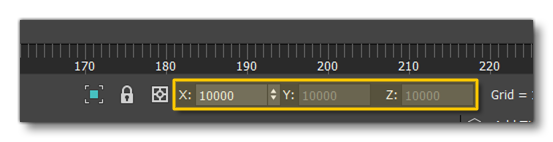
At this point in the preparation process you will have to import the airframe for the cockpit, so that it's not baked without anything around it. Once you have done that, you'll need to select all the objects, set their pivot to (0,0,0) and then upscale them all to 10,000. This step is important as without it the render texture will lack of resolution!
Now you can reset the Xform for everything one last time, and save the .max file.
Material Setup
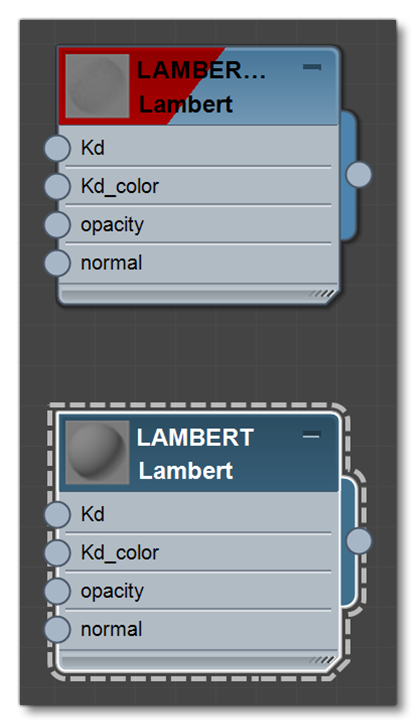
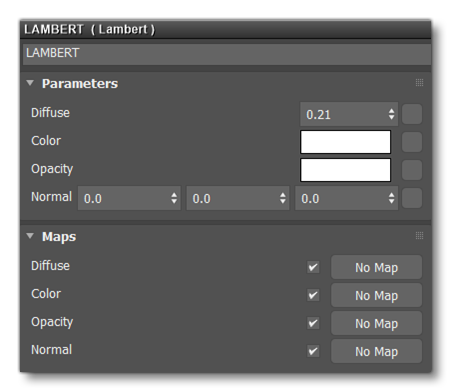
With everything now clean and correctly prepared, we're almost ready for the baking. However we need to create the materials to receive the light map before continuing. For this you will have to create Lambert materials - one for opaque elements and one for elements with alpha - and then we'll apply them to the meshes.
The image below shows the setup of the Lambert material, and note that it is obligatory to have a diffuse value of 0.21 which is a neutral grey. The Lambert for alpha will have an opacity of 0.21 as well.
Baking
At this point your scene is prepared and all the objects and materials are ready to be baked. So, now we have to set up the render and bake it.
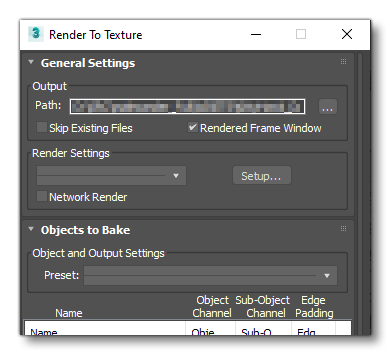
To start with, you should open the render to texture window where you'd first set the output path for the textures to be saved to:
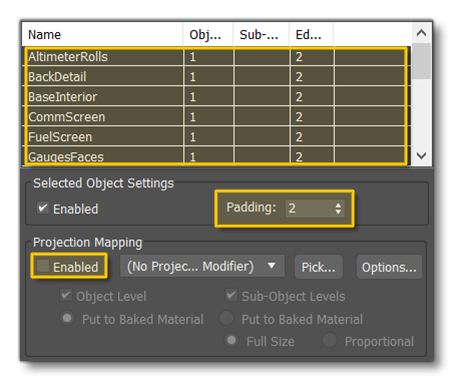
With that window open, yuou will need to select all the objects you want to bake, set the padding to 2, and disable the Projection Mapping as there is no projection required:
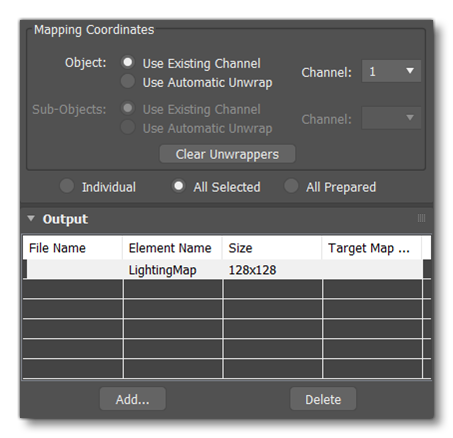
We want to set the Mapping Coordinates to make the render to texture on Channel 1, and in the Output section we will add the lightmap:
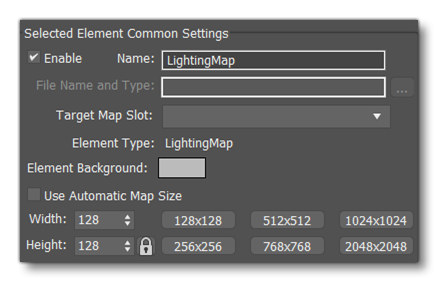
In the output window you also need to set the element background to black or grey and - to start with - set the resolution to 128*128px for a first test. After making sure everything is ok at that resolution, you will be able to bump it up to 2048*2048px:
Once finished, you can go and add the newly baked lightmaps into the red channel of each corresponding texture.