Output

The Output block is the final stage of particle creation and is used to define the final “look” of the particles that will be output by the Visual Effect. This block must be a child of an Update block, and you can only have one Output block per emitter. Once an Update block has been linked to the Output block, the Referenced From section of the Inspector will show a button: . Clicking this will pan the Node Graph to the Update block that is the parent of the Output block.
When you add an Output block item to the VFX Node Graph, the Inspector window will change to show a list properties that can be edited, as well as a child attribute that can be added to the block:

The following properties can be changed for the block:
PrimitiveType:
From this menu you can change the type of primitive that is to be used for the particles being output by the emitter. The choice is Quad (which is a simple textured 2 triangle quad), Ribbon (which is a strip of triangles), or a GroundRibbon (see the Ground Ribbons section, below, for more information).
Quad Billboard Type:
This option is only for particles that are Quad types. It has the following three settings:
Spherical: this is the default behavior, the quad has no orientation constraint and will always face the camera.
Cylindrical: this behaviour means that the particule has a rotation constraint on one axis. The axis can be set for each particle using the Init or Update ParticuleQuadBillboardAxis parameter.
NoBillboarding: this behaviour means that the orientation of the particle will be fixed, using 2 axes that can be set for each particle using the Init or Update ParticuleQuadBillboardAxis and ParticuleQuadBillboardUp parameters.
UVMode:
This menu lets you set the UVMode which will set how the particles are textured. The Default mode means that the entire material texture will be used, and the AtlasSize settings will be ignored. However if you set this to Atlas, then the material texture will be sub-divided based on the AtlasSize values. Consider the following texture atlas:
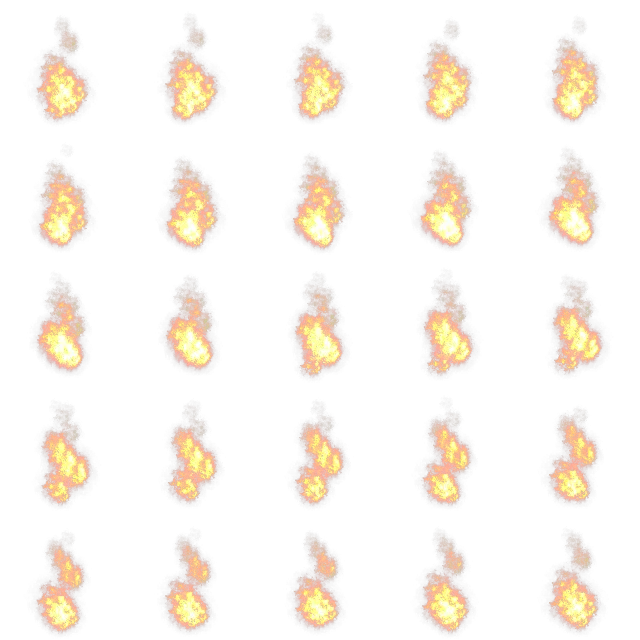
Image Courtesy Of Highwizard (CC0) OpenGameArt.org(opens in a new tab)
To be able to use this atlas as an animated sprite for each particle, you would select the Atlas mode, then set the AtlasSize values to (5, 5) - 5 images along the width and 5 images in height. You may also want to set the Update block to use the AtlasPlayer input for the TextureIndex if you want to fully animate the texture.
AtlasSize:
Here you can set the U/V sub-divisions for when the material being used is a texture atlas of sprite images. For example, if the material texture has 25 images evenly spread over the texture page, then you would set the U/V values to (5, 5) - 5 images wide and 5 images in height (as explained in more detail, in the UVMode section, above).
Material:
This section shows a button which will be labelled with the current material that is being used to texture the particles being output. You can click this button to open The Material Editor, and from the Material Editor you can then click and drag different materials onto the button to change it. Note that certain materials may also have Material Specific Properties that can be edited or have node inputs.
IMPORTANT!Materials used for effects are instanced, which means that it’s actually a copy of the material that is used when an effect is spawned. The consequence of this is that if you change the properties of a material, any effects that use it will not show any changes, and will require that you cancel the current spawn and then re-spawn them again. The respawned particles will use now use instances of the updated material.
The following buttons also exist (for information on how to dynamically edit these values, please see the Block Input section, below):
Colour (RGBA)
Clicking the button will add the particle Color property to the block, which defines the color and alpha of the particle as it is output from the emitter. Note that this will override any color settings that have been added to the Update block.
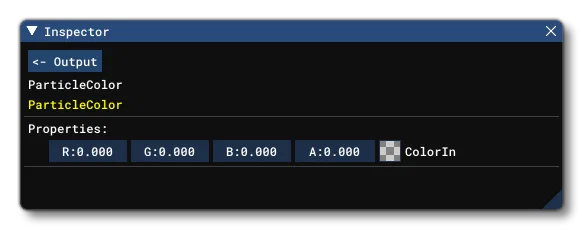
Material Diffuse
This is an optional property that is used to set the Diffuse Colour value for the material. This property must be explicitly added to the node by clicking on the button. This button will take the inspector to the parameters for this property and here you can modify the RGBA components of the colour to use.
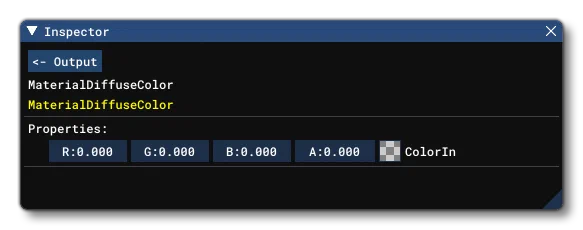
Material Emissive
This is an optional property that is used to set the Emissive Colour value for the material. This property must be explicitly added to the node by clicking on the button. This button will take the inspector to the parameters for this property and here you can modify the RGBA components of the colour to use.
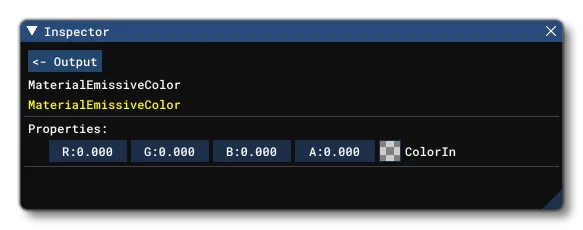
After clicking these buttons, the block will show the given attribute and permit it to be edited, either within the block itself or within the Inspector window (click the button again to change the Inspector to the attribute properties). You can remove an attribute from the block at any time by clicking the button beside it.
Ground Ribbons
This type of output primitive is a bit different to the other types, as it will perform a certain amount of internal pre-processing on the particles before they are emitted. When this primitive type is used, the visual effects system will sample the ground normal directly below the position of the emitter (following the gravity vector from the emitter to the ground). This normal will then be used to set the orientation of the particles being emitted, instead of the usual approach of using the direction to the camera from the particles for orientation. This results in a ribbon that willbe fixed and parallel to the ground below the aircraft.
Typically when using this type of primitive you would also want to plug the GetGroundAttirubte (Position) node into the Init (Position) block of the node graph. Doing this will ensure that the particles of the ribbon will be offset along the sampled normal and prevent z-fighting. This offset will also scales with the distance to the camera to prevent depth precision problems when the camera is far from the effect.
It is worth noting that this primitive type requires the simulation to sample the ground orientation once per frame, directly below the emitter. This means that with rates of emission that spawn more than one particle per frame, all particles spawned in the same frame will use the same normal despite being offset. Also note that using the GroundRibbon primitive type above areas in the world with lots height variations over a short distance, you will be required to ensure the effect has a higher emission rate to avoid the ribbon clipping through any ground features.
Material Specific Properties
The Output block may have additional properties depending on the material Type that has been selected:

These properties override the values set for them in the material itself, and will themselves be overridden if any Additional Block Inputs are supplied.
Power
This is an optional property that is used to set the “power” value for the afterburner material, which controls the colour, length and scale of the afterburner effect. This property is only visible when the material type is
CODE_AFTERBURNER.Deformation
This is an optional property that is used to deform the heat distortion material along the X and/or Y axis. This property is only visible when the material type is
CODE_HEATDEFORM.Blur
This is an optional property that is used to blur the heat distortion material. This property is only visible when the material type is
CODE_HEATDEFORM.
Block Input

The Output block permits input from other Nodes to set the following values:
Colour: This input requires a 4 value vector to define the color and alpha of the particle. The vector values should be ordered as RGBA, and should be between the values of 0 and 1. You can click the color swatch on the node to open The Colour Picker and edit the color directly if required. Note this will only be visible if you’ve added the colour option clicking the button in the Output Inspector properties.
AtlasSize: This input requires 2 value vector which can be used to set the U/V sub-divisions for when the material being used is a texture atlas of sprite images. For example, if the material texture has 25 images evenly spread over the texture page, then you would set the U/V values to (5, 5) - 5 images wide and 5 images in height (as explained in more detail, in the UVMode section, above).
Material Diffuse: This is an optional property that is used to set the Diffuse Colour value for the material and requires a 4 value vector to define the color and alpha of the particle diffuse colour. This property must be explicitly added to the node by clicking on the button in the Output Inspector properties.
Material Emissive: This is an optional property that is used to set the Emissive Colour value for the material and requires a 4 value vector to define the color and alpha of the particle emissive colour. This property must be explicitly added to the node by clicking on the button in the Output Inspector properties.
Additional Block Inputs
The Output block may have additional inputs depending on the material Type that has been selected:

Adding nodes to these inputs will override any values input in the Block/Inspector properties, and will also override any value set in the material itself.
Deformation
This is an optional input that is used to deform the heat distortion material along the X and/or Y axis. This property is only visible when the material type is
CODE_HEATDEFORM, and requires a Vec2 input.Blur
This is an optional input that is used to blur the heat distortion material. This property is only visible when the material type is
CODE_HEATDEFORM, and requires a float input.Power
This is an optional input that is used to set the “power” value for the afterburner material, which controls the colour, length and scale of the afterburner effect. This property is only visible when the material type is
CODE_AFTERBURNER, and requires a Float input.