ANIMATED MATERIALS
Microsoft Flight Simulator 2024 permits you to use animated materials when texturing your aircraft models. However these matrials require a specific setup and can only be used with the correct material type and parameters.
NOTE: This is currently not supported when using The Blender Plugin.
If you wish to use animated materials in Blender, we recommend that you split the Blender layout in the following manner, showing the drop sheet editor and the non linear animation editor:

Using this initial starting point we'll animate the Albedo / Base Colour material component of an object (in this example, we'll be using the SDK DA62 sample project "fuselage" object).
The first thing we'll do is add a keyframe by right-clicking on the Base Colour material property and selecting Insert Keyframe. This will add a new keyframe into the dope sheet for the object:

You can then move the dope sheet timeline to frame 30, change the Base Colour (we'll use green in our example), and then add in another keyframe using the same process outlined above:

If you move the timeline marker along the frames you can see how the colour will now animate from frame 0 to frame 30:

You can go ahead and animate further material properties at this point, following the same steps given here for each of them.
When your animation is ready you'll have to push it down in the NLA editor, and you can rename it for clarity (note that after you click on "push down", you will no longer see your animation in the dropsheet editor):

Once you have animated the materials and reached the export stage, the only thing related to the material animation that you have to be aware of is to have the Animation Mode set to NLA Tracks in the Settings:

For more information on exporting, please see here:
Before creating any animated materials in 3DS Max, it is important that you are aware of these main rules governing their creation and use:
- The material must have a unique GUID
- The material must be a FlightSim Material
- The material must be assigned to a node
- The material cannot be part of a multi-material
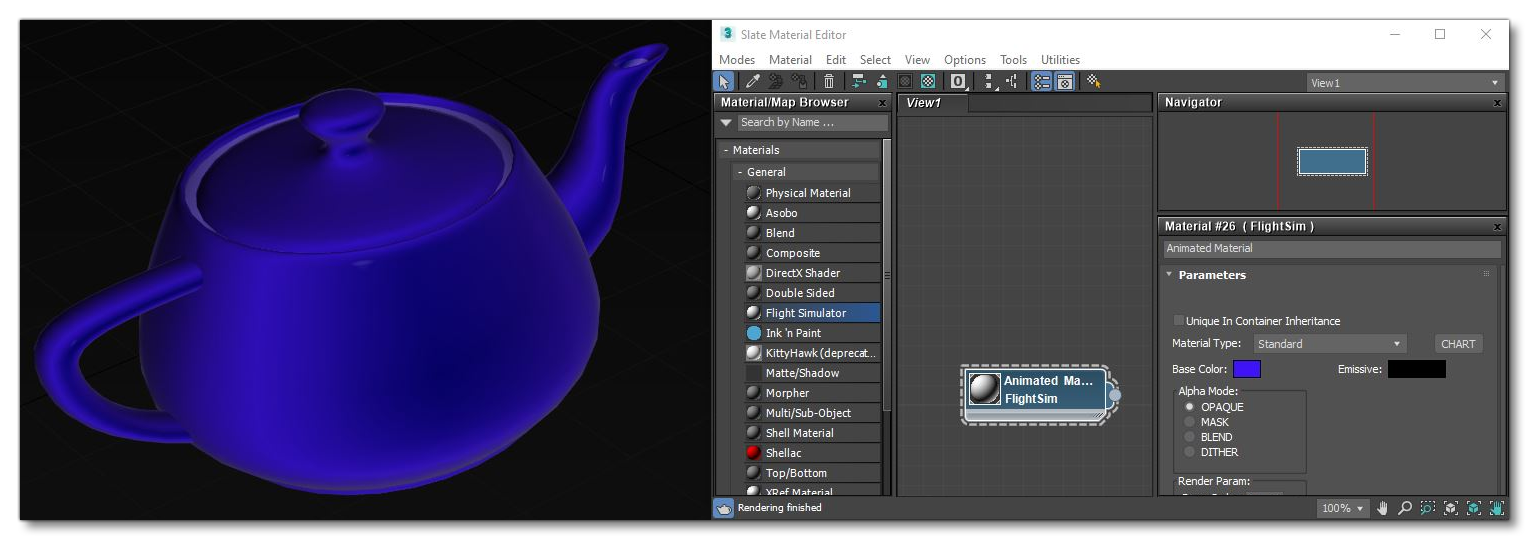
To set this up in 3Ds Max you should first create a "FlightSimulator Material" and assign it to a node:
Once that's been created, you need to open the Animation Groups panel from the right-click menu in the scene:
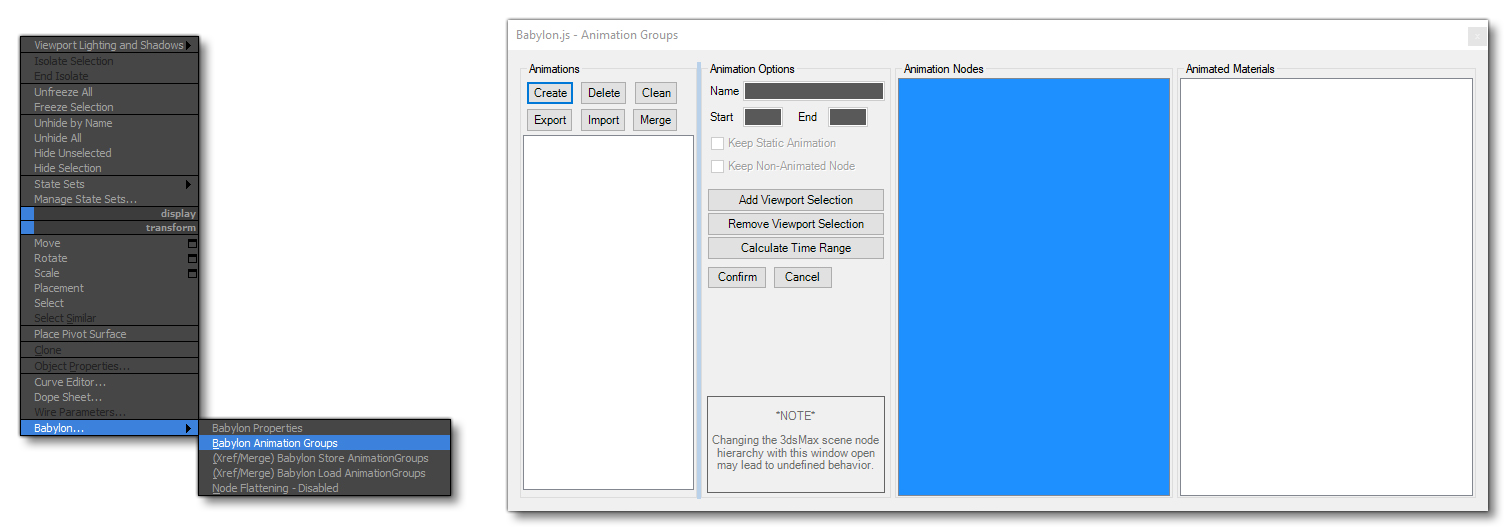
Here you should do the following:
- Create an animation group in the Animation Group Panel
- Enable Keep Static Animation
- Assign the node with the animated material to the animation group:
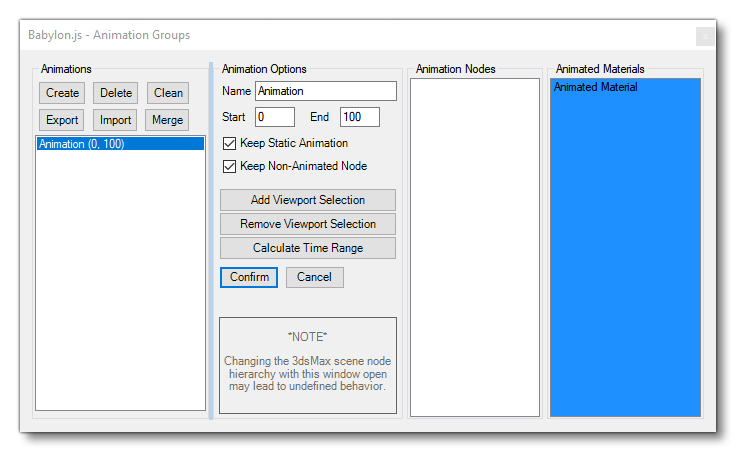
- Select the node with the animated material.
- Click the button
Add Viewport SelectionandConfirm. - Select the Animated Materials area so that it is highlighted.
- Click the button
Add Viewport SelectionandConfirm.
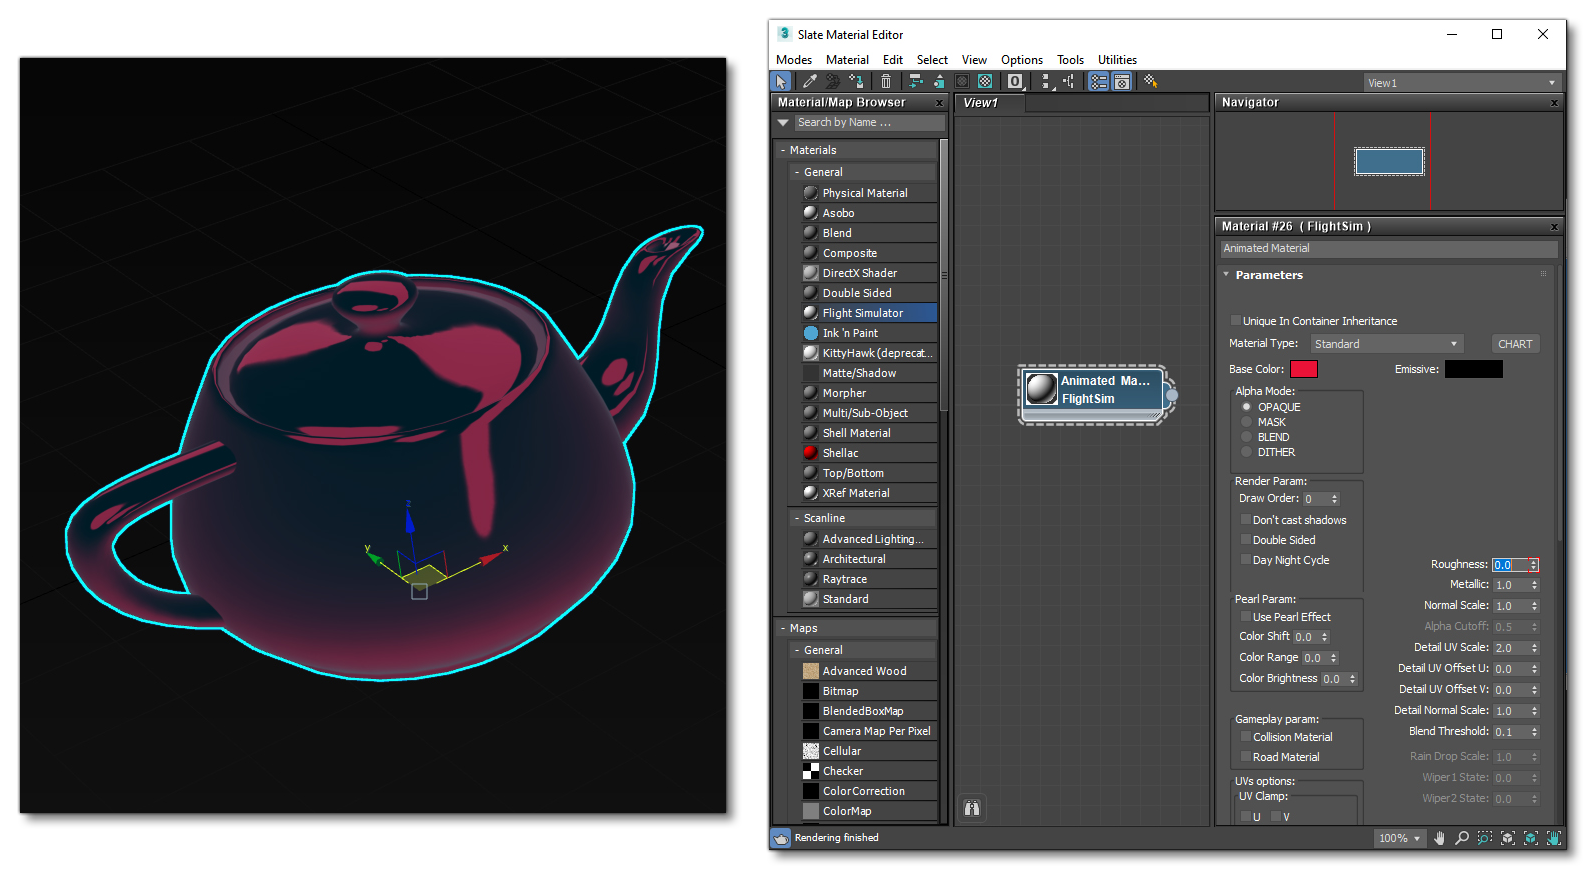
At this point, you would then use the standard 3Ds Max workflow to animate the material property (or properties) that you require to animate:
When finished with the animated materials and the modelling, you can go ahead and export the aircraft for the simulation. You can get more information on this process from the following page:
It is important to note that - for both 3DS Max and Blender - only the following parameters will be recognised by Microsoft Flight Simulator 2024:
- Albedo / Base Colour
- Emissive / Emissive Colour
- Offset U/V
- Tiling U/V
- Rotation / UV Rotation
- Roughness Factor / Roughness
- Metallic Factor / Metallic
Related Topics