
Creating Or Replacing An Airport
In this brief tutorial we’ll take you through the steps required to either:
- create a new, custom airport
- replace an existing airport with one of your own
Before getting started, you should open Microsoft Flight Simulator 2024 and then start a free flight (the aircraft and destination you choose are irrelevant to this tutorial). Once in the simulator, you’ll need to enable Developer Mode before continuing.
Once in Developer Mode, you will need to create a New Project. This can be done by going to the File menu and selecting New Project, or you can open the Project Editor (from the Tools menu) and then select New Project from the Project menu. Give the new project a name and select a location to save it to, then click the button to open the following Package Wizard window. Here you should select the Airport option:

After that you click the button and then give the package a name and display title, before clicking again.
When creating scenery, the user aircraft must be located near or within the zone being edited otherwise you may find that placed assets won’t be displayed.
Creating A New Airport
The Airport Wizard will show you different options depending on whether you want to create a custom airport or override an existing airport. For a custom airport it will look like this:
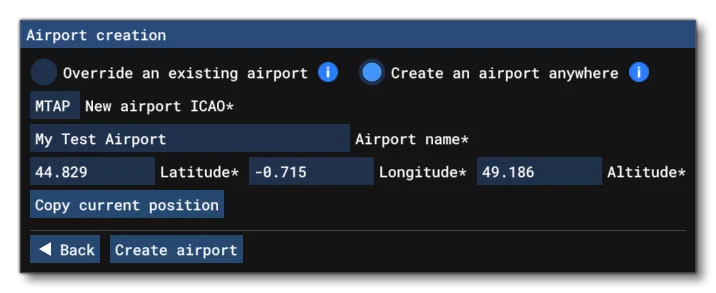
Here you want to ensure that you have selected Create An Airport Anywhere, and then give the following details:
New Airport ICAO: This is the 4-8 character ICAO code for the airport. This should be unique and not be used by any existing airport (a message will be shown if the ICAO is invalid).
Airport Name: The name that you want the airport to have.
Latitude and Longitude: The position within the world of the airport. Note that you can click the button to use the position of the aircraft in the world as the center point for the airport you are creating.
Once you have given the details, you can click on the button. The new asset group for the airport will be added to the package and at this point you should save the project. Then you can select the “scenery” asset group and load it into The Scenery Editor by clicking the button in the Inspector:
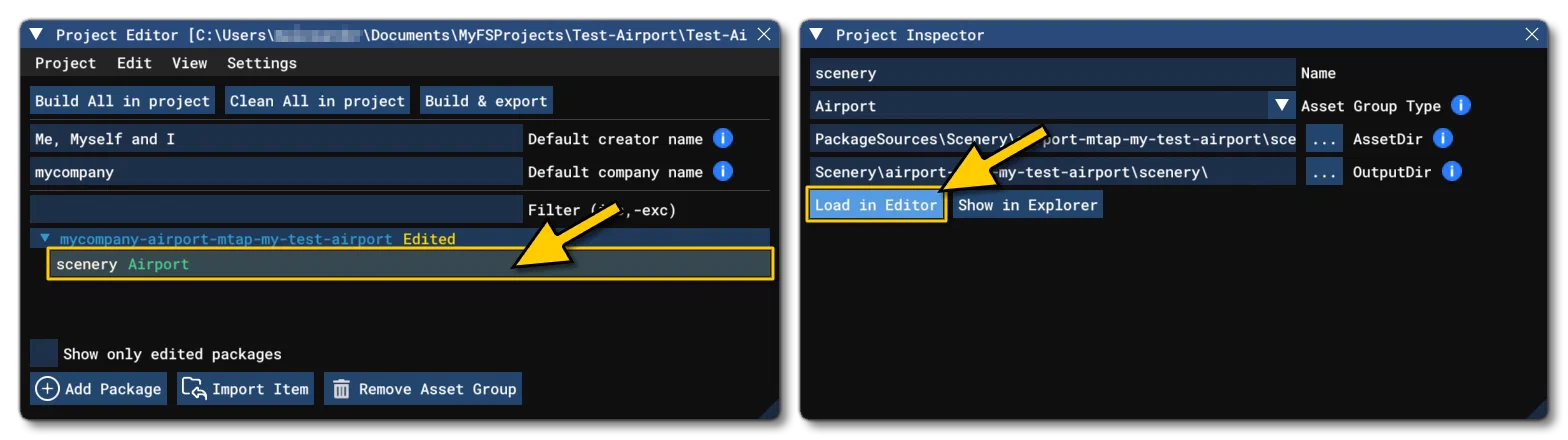
This will open the scenery editor, and in the Content List of the editor, you will see the new airport group listed. You can then double-click on the airport itself and the simulation will pan to an overhead view of the airport in the world:

The airport is shown in the world as a blue circular area, and the circle shows the currently set boundary for the airport. You can add airport scenery elements within this boundary to have them be considered part of the airport.
If the Scenery Editor doesn’t open, you can open it from the Tools Menu at the top of the screen.
You can now start Adding Objects To The Airport.
Replacing An Existing Airport
When you want to overwrite an existing airport the Airport Wizard will look like this:

Here you need to click on the field labeled . This will open another window where you can input an ICAO code and get filtered options that match:

Once you have the airport you want to replace (in this case MYNN, for Lynden Pindling International), click the button to add this to the Airport Wizard. The rest of the details for the airport will be filled in automatically, and so you can then press the button.
The new asset group for the airport will be added to the package and at this point you should save the project. Then you can then select the “scenery” asset group and load it into The Scenery Editor by clicking the button in the Inspector:

This will open the scenery editor, and in the Content List of the editor, you will see the new airport group listed. You can then double-click on the airport itself and the simulation will pan to an overhead view of the airport in the world:

If the Scenery Editor doesn’t open, you can open it from the Tools Menu at the top of the screen.
Exclude Elements
In order to be able to replace an airport in Microsoft Flight Simulator 2024, it is necessary to exclude the 3D models and other things that are already present inside the simulation for the airport, including TIN and vegetation. We’ll do this using Polygon Objects to define the boundaries of the elements that we want to remove.
To add a polygon shape, you need to go to the Objects menu and select “Polygon” from the drop down Object Type list, then click on the :

This will add the polygon shape to the sim world, however, in the Scenery Editor you’ll see it’s marked in red, and that’s because we haven’t added any points to the polygon yet (it needs a minimum of 3 points). For that, simply hold down the ⌃ Ctrl key and then left-mouse click on the terrain in the sim world to place a point. You want to outline the entire airport, as illustrated in the image below:

To end the polygon definition, simply hit the ⏎ Enter key. The line will go from red to purple, as shown above.
You now need to set the properties for the polygon, and in this case we want it to exclude all the buildings that are applicable, as well as all the vegetation. For that, in the Properties window, select Buildings: Exclude All, then the other Exclude options for roads, lights, etc…, and finally check Vegetation and set the all the vegetation sliders to 0:

This will remove all the 3D elements from the defined polygon area:
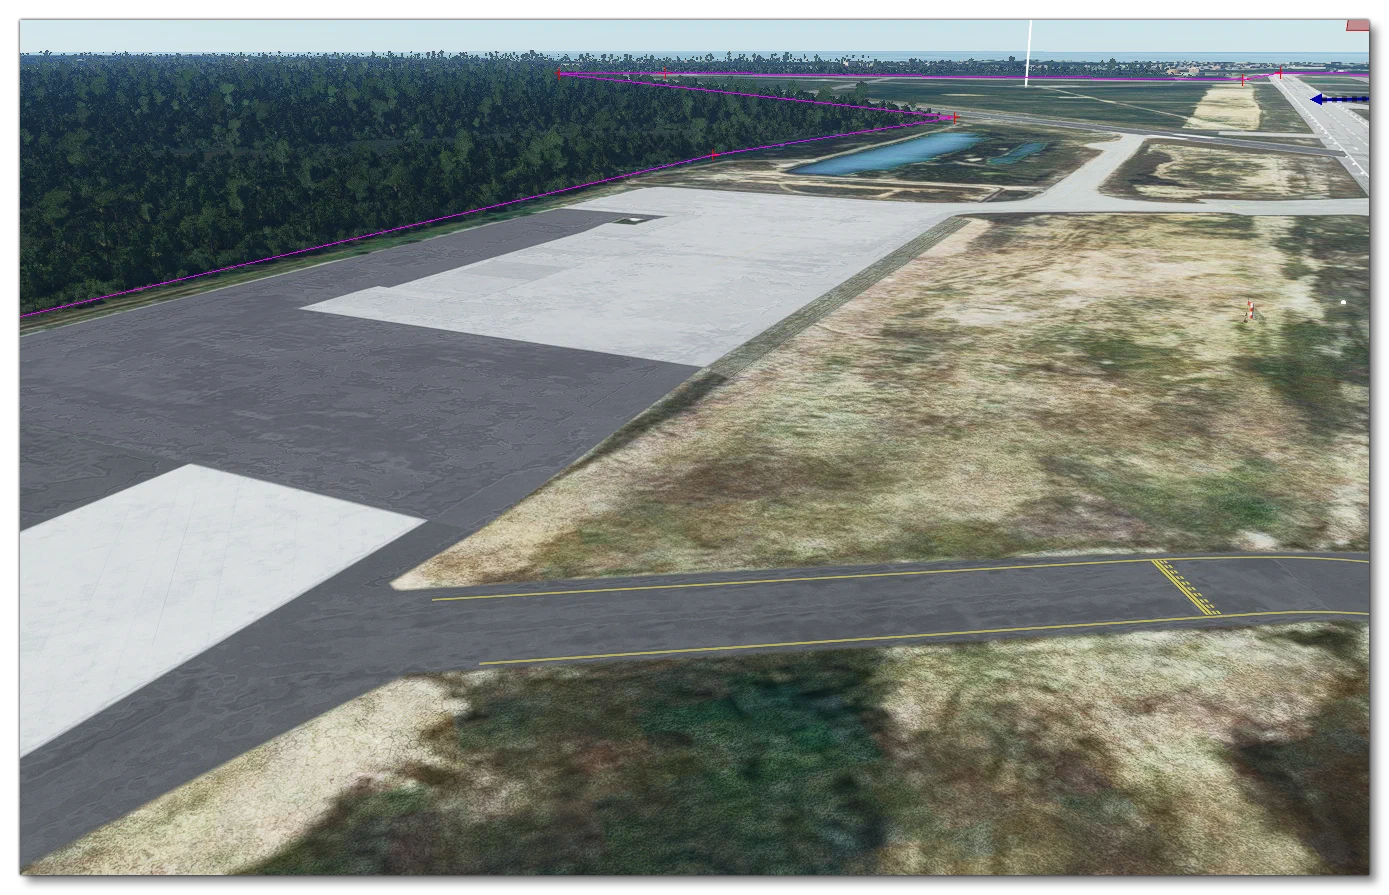
Some airports and areas will have special “developer buildings” on them that won’t be removed using the polygon tool. To remove them use ExclusionRectangle Objects, creating them from the Objects editor the same way as you created the polygon object, and then placing it over the developer building to be removed.
You should now save this part of the scenery to your PackageSources folder (click on the button in the Scenery editor) and make sure to give it a unique name, for example nassau-override-scenery-poly.
Adding Objects To The Airport
You can now start to add different elements into the airport, like Runway Objects, Apron Objects, Windsock Objects and any other of the available Scenery Objects that are required. You can get full details on how this can be achieved from the section on Adding An Element To The Scene.
Build The Package
With all that done, you can now build the package which will include it in the simulation. This is done using the button in the Project Editor window:
