DECAL OBJECTS
A Decal object is an object element that is used to add detail elements to a scene or SimProp Container to give texture and uniqueness to whatever is being rendered. These objects can be placed on both the ground and on scenery objects.
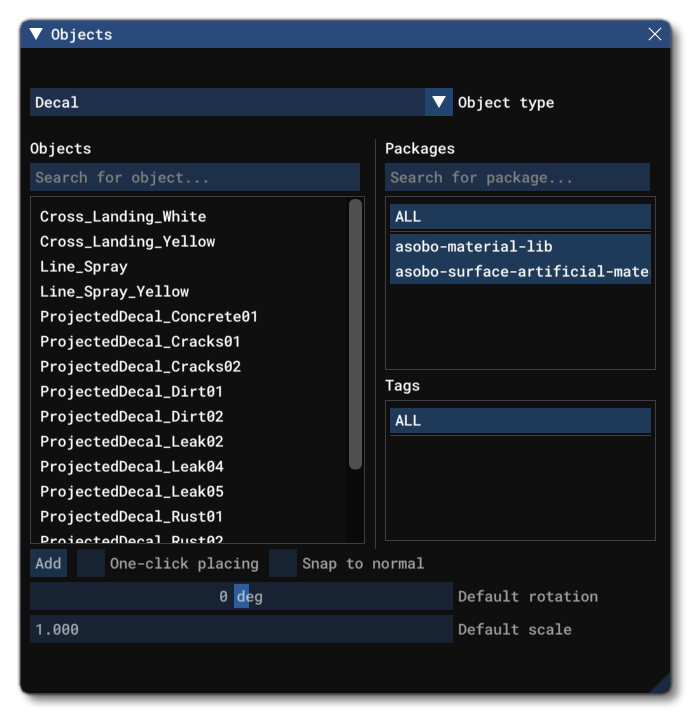
When you select this object type, the Objects window will not show any different object elements as currently there is only one type of decal and how it looks is defined through its Properties:

To place a Decal object element in the scene you can click the Add button, and then use the Translate Gizmo to position the object where you want, or you can enable One-Click Placing and simply click in the world to place it. You may also use the Rotation Gizmo to change the angle the element is shown at, as well as the Scale Gizmo to change its size.
NOTE: Decal objects do not require an airport object to be placed in the world to use them, and when added to the world, they will be added to the Scenery group.
When placing a decal object, it will be rendered on a plane with a visible bounding box, drawn in white.

Placing decals on the ground is simple thanks to the Snap To Ground option which will maintain the decal flush with the terrain, however decals can also be placed on scenery objects. This may seem quite tricky to achieve, however the Scenery Editor helps with this by placing the decal along the plane of intersection between the visible bounding box and the scenery model, which means you don't have to be too precise with the positioning to get the desired effect (mouse over the image below to see how this looks in the simulation):


Changing the size of the bounding box can also help when to comes to making the placement of the decal object easier. Alternatively, you can use the Snap To Building option which works like Snap To Ground
Decal Properties
Decal objects have the following Properties which can be edited:

-
Name
This is the name of the decal object element as defined from its file.
-
Display Name
This is the name of the decal as it will be displayed in the The Scenery Contents List. This can be edited and is helpful for identifying elements when you have a lot of items in the content list.
-
Assign Instance ID
Clicking this button will create a GUID-formatted Instance ID unique to the instance of the decal placed within the simulation. This instance ID will be unique to each instance of the decal objects.
-
Material
This permits you to assign a material to the decal itself. You can drag a material from the list in The Material Editor onto the
...button to add it, and clicking the button again will remove the material.
-
Apply On Scenery
When this option is checked the decal object will detect scenery and use the scenery geometry for intersection checks with the bounding box.
-
Apply On Ground
When this option is checked the decal object will detect the ground and use the ground geometry for intersection checks with the bounding box.
-
Box Size X
Sets the size of the bounding box along the X-axis.
-
Box Size Y
Sets the size of the bounding box along the Y-axis.
-
Box Size Z
Sets the size of the bounding box along the Z-axis.
-
Opacity
Sets the opacity (alpha) of the decal. Note that the slider is clamped to between 0 and 1, but you can hold
Ctrland click on it to input a value greater than 1. Values greater than 1 will raise the opacity threshold and gradually force the alpha of ALL pixels towards 1, so transparent and semi-transparent areas will become more opaque the higher the value.
-
Fade Angle
This option has a slider that can be used to set the fade out range of the decal based on the angle between the decal's backward direction and the vertex normal of the receiving surface. You can hold
Ctrland click on the slider to input an exact value.
-
Fade Depth
This option has a slider which is used to control how quickly the decal will fade it's opacity relative to the the center plane of the bounding box. A value of 1 will show the decal almost from the moment the bounding box intersects the opposing plane, while a value of 0 will fade the decal in/out as the bounding box moves through the opposing plane. You can hold
Ctrland click on the slider to input an exact value.
-
Priority
With this value you can set the priority of the decal. This is important if you have multiple decal objects that are overlapping, as it permits you to set the render order based on the priority.
-
Override Normal
When this is checked, the scenery/ground normal map will be overridden by the normal map for the decal object.
-
Snap To Ground
This option is enabled by default, and will "snap" the decal to the ground so that - regardless of the terrain height - the element will always be at ground level, even when moving it. Enabling this means that the altitude Gizmo does nothing, while disabling this will permit you to change the altitude. When this is disabled, you will have a new option present in the Properties window:
-
Offset To Ground
This value is the altitude from the ground for the object, and editing it will raise or lower the element (and changing the altitude using the Translate Gizmo will also change this value automatically).
-
-
Snap To Normal
When enabled, the decal object will change orientation based on the terrain surface normal underneath the center-point of the bounding box. When disabled, it will maintain the default orientation regardless of the terrain underneath (or the orientation which is set using the Rotation Gizmo, and note that - when enabled - the Rotation Gizmo will only affect the horizontal axis around the center of the element). This option is disabled by default.
-
Snap To Building
When enabled, the decal object will change orientation based on the surface normal of any procedural building with which the the center point of the bounding box is in contact. When disabled, it will maintain the default orientation regardless of the building beside it (or the orientation which is set using the Rotation Gizmo, and note that - when enabled - the Rotation Gizmo will only affect the horizontal axis around the center of the element). This option is disabled by default.
IMPORTANT! This option will only work when the object is placed on a procedural building. No other building type will permit it
-
Use Low Resolution Altitude
This option, when checked, will force the simulation to use a lower resolution altitude calculation when calculating the placement of the decal in relation to the camera. In general this option only needs to be checked when the decal is placed on a slope and you can see it "bounce" up or down in altitude as the camera gets closer/farther from it. Enabling this option should stop this changing visual altitude.
-
Hide on TIN
When checked, this option will hide the decal object element unless the TIN data is unavailable, for example when the user is offline, at which point it will be visible. The option is disabled by default.
SimProp Container Only Properties

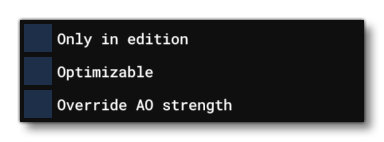
If the Decal object is being added to a SimProp Container, the properties will show the following additional 3 options:
-
Only In Edition
When this is checked, the decal will only be visible when the the simprop is being edited, but not when placed in the simulation.
-
Optimizable
Checking this option means that the decal object can be "optimised" - ie: the simulation will modify the spawn probability - based on the user graphics settings and platform:- Ultra: 100 %
- High: 50 %
- Medium: 25%
- Low: 12%
- xbox: 12%
-
Override AO Strength
When checked, this option will show a slider that permits you to override the automatic ambient occlusion settings. This can let you better match the lighting on the object with the rest of the scene.
Related Topics