BABYLON UTILITIES
Microsoft Flight Simulator makes use of a modified version of Babylon JS for 3DS Max, which is redistributed with the SDK. This enables use of specific material features, required when creating add-ons for the sim. This page briefly outlines how to use the exporter that uses Babylon JS to create the glTF files that are appropriate for use with add-on packages in Microsoft Flight Simulator.
Babylon Exporter
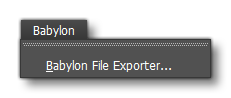
To open the Babylon exporter go to the Babylon File Exporter option in the 3DS Max menu:
This will open the following window:
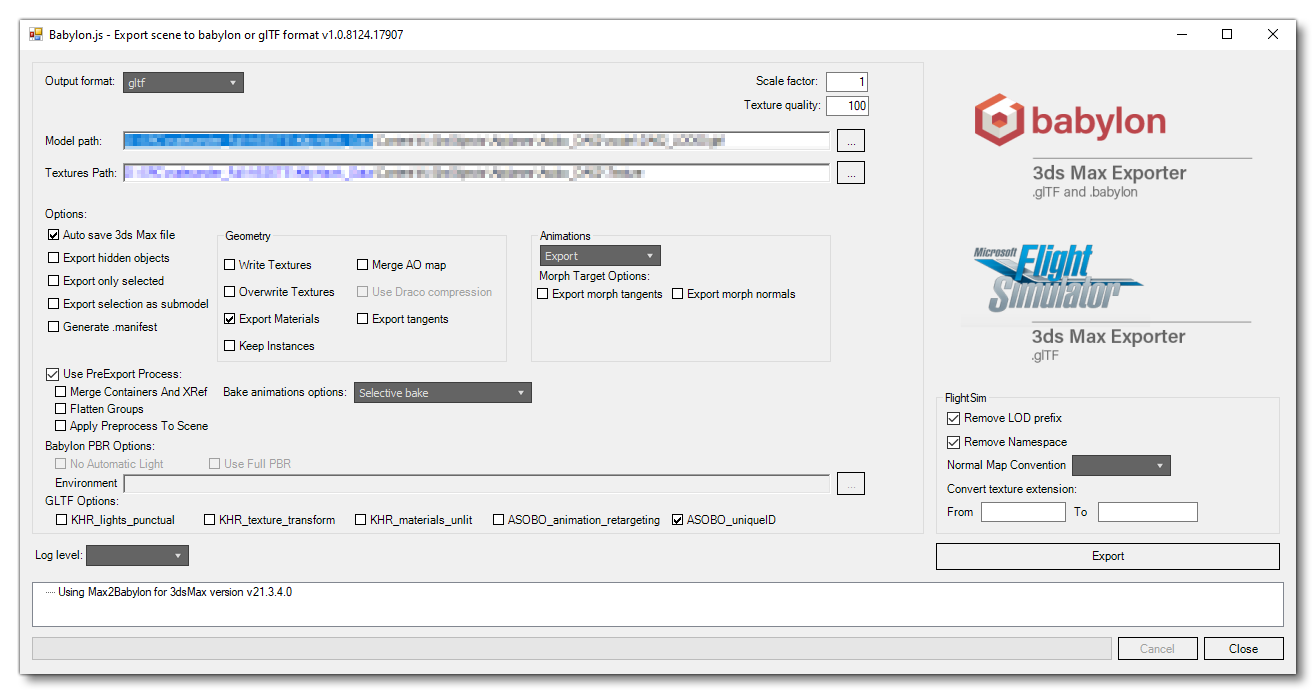
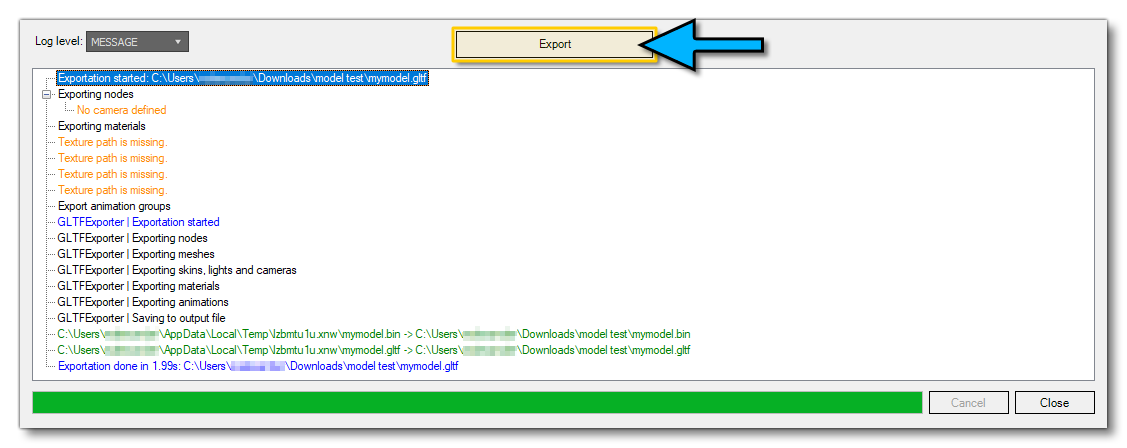
Once you have set all the parameters, file paths, and other settings (all explained below), you can click on the Export button to have the exporter create the glTF file. At the bottom of the window you will be shown any potential issues (in orange, but they can be ignored), actual issues (in red, these need to be addressed), as well as other details of the output process for the glTF:
Exporter parameters
Below we explain the different output parameters that you should set when exporting using Babylon.
General Settings
- Output Format: The file format used in the project (always glTF).
- ModelPath: The destination file path for the model when exported.
- TexturePath: The destination path for the textures that have been used in the model. This is only required when Write Textures (in the Geometry section) is checked.
- Scale Factor: This sets a multiplier value for the root node, meaning that the entire glTF scale will be multiplied by this value on export.
- Texture Quality: This is a percentage quality modifier, where 100% means the texture will be exported "as is", and then lower values will scale the texture quality down. Note that this value is only appropriate when Write Textures or OverWrite Textures (in the Geometry section) is checked
Options
- Autosave 3dsmax File: Select this to save the 3DS Max file before exporting
IMPORTANT! Do not set this option when Use PreExport Process is checked - see Exporting A Container for more information.
- Export hidden objects: Selecting this will export all the hidden objects in the scene as part of the glTF.
- Export only selected:This will export only the currently selected objects.
- Export Selection as sub-model: This will export only the currently selected objects as a sub-model. This should only be checked if creating sub-models (see the section on Submodel Merging for more information).
- Generate .manifest: When enabled, a maniferst file will be created.
NOTE: Not currently used by Microsoft Flight Simulator.
Geometry
- Write Textures: When checked, this will allow the exporter to write textures to the path defined in the General Settings settings.
- Merge AO map: When checked this enables the merging of the Ambient Occlusion shadow map (stored on Diffuse Roughness slot) with the Metalness and Roughness map.
NOTE: Not currently used by Microsoft Flight Simulator.
- Overwrite Textures: When enabled, this permits the export to overwrite any textures already in the output directory.
- Export Materials: When enabled, this will write Material data into the glTF file.
- Export Tangents: This, when enabled, will calculate the model tangents and write them to the glTF.
NOTE: Not currently used by Microsoft Flight Simulator.
- Keep Instances: Maintain instanced geometry in the exported model (see the section on Instances for more information).
Animations
- Export type: Sets the type of export in relation to animations, with the following options:
- Export: export both the model and the animation information.
- Not Export: export only the model information, and omit any animation data.
- AnimationsOnly: export only the animation data, and omit any model data.
- Export Morph Tangents: Exports the tangents associated with the morph target.
- Export Morph Normals: Exports the normals associated with the morph target.
PreExport Process
- Use PreExport Process: When enabled, this option will do the following:
- lock the file
- execute modifications on the file
- export the file
- fetch the *.max file
The following options will only be enabled if the Use PreExport Process option is enabled as well:
- Merge Containers and XRef: This option will merge into the scene any containers and Xref, export them, then reopen original scene.
- Bake Animations Options: This setting will define how animations are treated in the export, with the following options:
- Bake all animations: This will bake all 3DS Max animation nodes into the glTF.
- Do Not Bake: This will prevent anything being baked into the glTF.
- Selective bake: This will only bake those nodes with the object property
[Bake Node Animations](and their children).
- Flatten Groups: When enabled, this will flatten all groups in the model before exporting the glTF.
- Apply Preprocess To Scene: When enabled, this will keep the scene, as modified by the export, loaded in the editor after exporting (useful for debugging issues).
FlightSim
- Remove LOD prefix: This will remove LOD prefixes when the following naming convention is respected -
xN_yourNode
- Remove Namespace: This will remove namespaces when the following naming convention is present -
namespaces:xN_yourNode
- Normal Map Convention: This can be used to specify which graphic API convention should be used for exported assets.
- Convert Texture Extension: This can be used to convert the file extension used by the model textures.
NOTE: Not currently used by Microsoft Flight Simulator.
GLTF Options
- KHR_lights_punctual: Supports specification of point light sources and addition of such sources to the scenegraph node.
- KHR_texture_transform: Specifies that object low-resolution textures should be packed into a single large texture atlas.
- KHR_materials_unlit: Specifies that a material should not be affected by light. Useful for pre-lit materials (e.g. photogrammetry).
- ASOBO_animation_retargeting: extension used to be able to split animations file from model data, and eventually share animations between different models (see the section on Submodel Merging for more information).
- ASOBO_UniqueID: Checking this option will mean that when you export a glTF using the Babylon exporter, each node will automatically have a unique ID assigned to it and these IDs will be validated as part of the export process. Usually these IDs are created from the object name, however if the model uses objects that share a name then the exporter will stop and give you a warning, since this means that there will also be node names that are the same and not unique.
 When this happens you should go to the Babylon menu and then select the Babylon Resolve UniqueIDs option:
  Alternatively, you can manually assign the ID values using the Object Properties.
Exporter Notes:
The bullet points listed below are some extra notes to consider when exporting using the Babylon exporter:
- Models for Microsoft Flight Simulator should be in the
.gltfformat as currently the SDK/sim does not support.glbfiles with embedded textures. - Node (sub)trees that do not have a Mesh, Camera, Light or Dummy will be IGNORED by the exporter.
- Copy textures to output copies all textures to the output directory and converts them to
.pngor.jpg, with the exception of distance field textures (.dds). - There is a known issue where multi-materials do not always correctly export. One known cause for this is unused materials and/or material slots.
Configuration notes:
- Textures don't need to be relative to the model file and should go in the appropriate folders (e.g. the
\texture\or\texture.variation\folder that belongs to the aircraft). - The texture and model directories for the variations are defined in
aircraft.cfg. For example:texture=VAR1>\texture.VAR1\model=1>\model.1\
- The model file name should match the name in
model.cfgin the\model\folder(s).- Alternatively, you can of course change the name in
model.cfg.
- Alternatively, you can of course change the name in
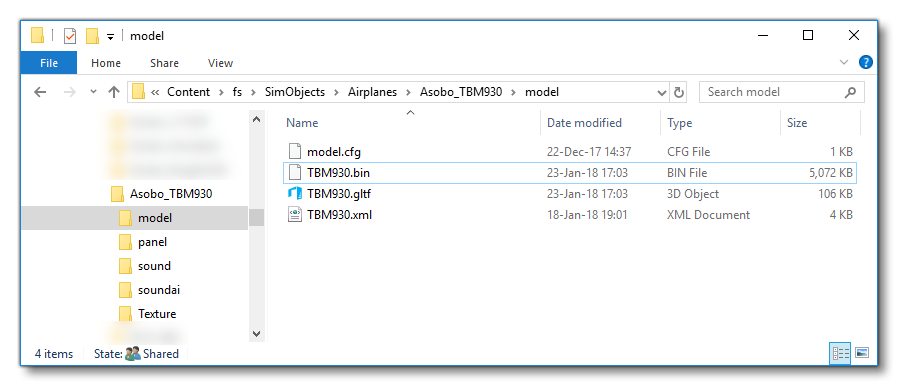
A model folder may look like this:
Babylon Animation Groups
To open the Babylon Animation Groups utility, right click anywhere in the scene then select the Babylon Animation Groups option:
This will open the following window:
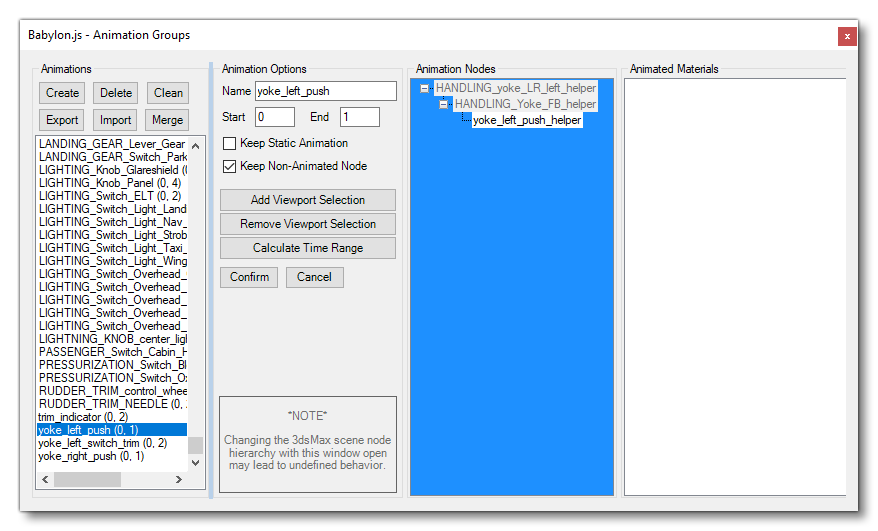
IMPORTANT! Currently, when using linear animations on a node, there have to be animation keys on the start- and end-frames matching the animation group it belongs to.
The animation names must match the animation names in the .xml file that the game uses to know how to use the model animations. The plane-specific .xml must be next to the model file and have the same name as the model file (except for the extension). In the future it will be possible to specify the name of this .xml in the model.cfg.
The .xml defines link with the simulation variables, as well as GUIDs, for use with the Microsoft Flight Simulator animation system. You can find more information on this here:
Babylon Scene Properties
The Babylon Scene Properties utility can be opened by doing the following:
- Deselect all objects > right-click scene > Babylon... > Babylon Properties
NOTE: Most of these options are not used in the SDK pipeline.

If "Do not optimize animations" is unchecked (default), Babylon will try to prevent exporting keyframes that are similar (and thus export less animation data). However, if you notice "jaggy" animations, you may want to check this option.
Note that because of easing out combined with the animation optimization, some animations may be a few frames shorter than you expect . For Sim animations, this is usually not a problem, because they animate relative to the model's animation length.
Object Properties
To open the Babylon Object Properties utility, take the following steps:
- Select objects > right-click scene > Babylon... > Babylon Properties
NOTE: Most of these options are not used in the SDK pipeline.
NOTE: These options are per node.
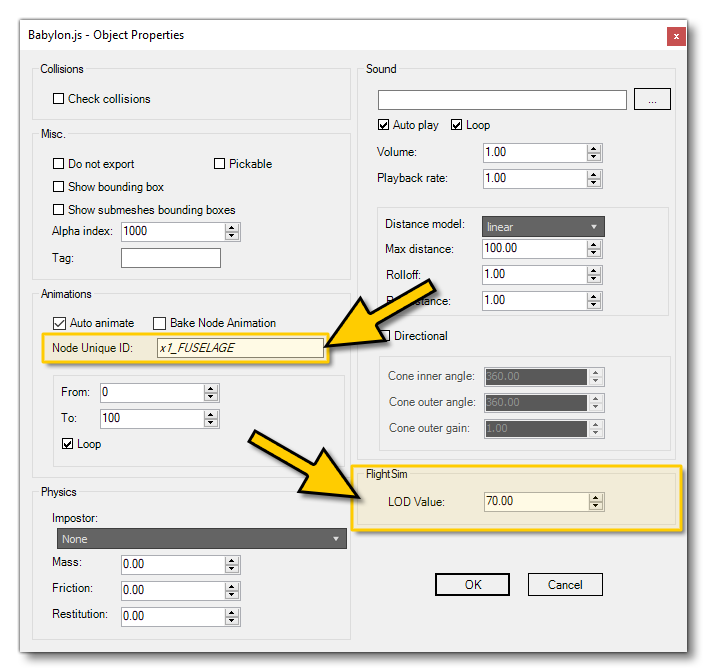
Most of the contents in this window are not required to be set when creating a model for Microsoft Flight Simulator, however you may find it useful to set the following two options:
- Node Unique ID: By default, this identifier will be set to the name of the object that the node belongs to, however if the scene contains multiple objects with the same name, you will get a conflicting unique ID warning when exporting using the Babylon Multi-Exporter tool with the Export selection as submodel option checked. Therefor, you can modify the unique ID parameter here to prevent or resolve these kinds of issues. See Submodel Merging for more details.
- LOD Value: The value shown here corresponds to the
minSizeLOD value set in the XML file that will be used to define the model in Microsoft Flight Simulator. This option permits you to set the LOD value "per object" instead of using the
Instances
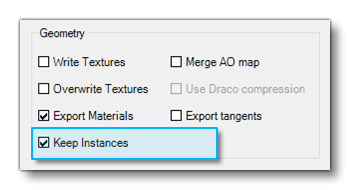
Using object instances means that multiple "clones" of the same object can be used in a model and they will be rendered as a single batch and also be stored as a single object in memory, reducing the GPU overhead required to render it in the game (the downside to this is that they will require more nodes - one for each instance - which has an effect on CPU performance). If your models have instances in them, then you must ensure that the Keep Instances option is enabled in the Babylon Exporter Geometry section:
Testing
There are several ways to validate a .gltf or .glb asset:
- Drag and drop the assets in the official glTF Validator
- This gives you detailed information about potential problems in text form. Note that the custom extensions written for Microsoft Flight Simulator are not supported by this tool.
- Drag and drop the assets in a glTF Viewer such as this one here. It is necessary to drop both the textures and the model at the same time in order for this to work. Custom extensions may cause problems here, too.
- When exporting, you can press Export and Run, this opens a viewer as well.
- For this to work, the textures are required to be in the output directory.
- Export to an appropriate game directory and run the game.
- eg:
<Game_Directory>\SimObjects\Your-Aircraft. - Note that this requires a working game object, see the relevant sections of the documentation.
- eg: