THE BLENDER PLUGIN
This section of the SDK documentation is for help with the support for Blender. This software is partially supported by the Microsoft Flight Simulator SDK and can be used when creating models, animations and materials for your add-ons. The plugin is supplied as a ZIP file with the SDK installation, available from the "Blender" folder in the Core SDK install location (which you can get from the Help menu), eg:

Alternatively, you can get the plugin from the following GitHub repository:
IMPORTANT!
- The Blender plugin cannot import glTF files that have been built for a Microsoft Flight Simulator package using the Package Builder within the simulation.
- The Blender plugin is not compatible with the legacy exporter developed for FSX and other simulations. You should remove this legacy plugin if you have it, or at least disable it (we recommend that you remove it, see here for more details: Uninstalling The Blender Add-on).
- As of version 1.3.x of this plugin, it is only compatible with Blender 3.3.x LTS. Other versions are not supported.
Installing
There are two ways to install the MSFS Blender exporter. Either using the Edit Preferences Menu and Install tab, or copy/paste the add-on files to your %APPDATA% folder. Both these installation steps are explained bellow.
NOTE: You may need to restart Blender again after activating the plugin (using either of the methods listed below) for all the options to be visible in the IDE.
Install The ASOBO Blender Add-on Using Blender
This guide assumes you are getting the plugin from the official GitHub repository. However, if you are using the version supplied with the SDK installer, you can skip to point (3) in the guide.
- Go to the Releases section of the Blender repository.
- Download the zip file
io_scene_gltf2_msfs.zip.

- After downloading, open Blender and go to: Edit > Preferences.

- Go to
Add-onsand click onInstall....

- This will bring up the Blender file dialog, where you should navigate to the folder where you have your
io_scene_gltf2_msfs.zipdownloaded file, select it, and then click theInstall add-onbutton.

- Back in the Preferences window, click on the checkbox beside the listed plugin to enable it.

Installing The ASOBO Blender Add-on Using AppData
This guide assumes you are getting the plugin from the official GitHub repository. However, if you are using the version supplied with the SDK installer, you can skip to point (3) in the guide. Regardless of where you got the plugin from, please ensure that you have closed Blender before proceeding.
- Go to the Releases section of the Blender repository.
- Download the zip file
io_scene_gltf2_msfs.zip.
- Unzip the contents of the file to a temporary location, then browse to that location.
- Select the
io_scene_gltf2_msfsfolder and then copy it to the clipboard (Ctrl+C).

- Now you need to browse to the Blender add-ons folder, which - by default - can be found in one of the following locations:
- Windows: This will usually be in
%AppData%\Blender Foundation\Blender\<blender-version>\scripts\add-ons\ - Mac OS X: This will be in your Library (Press the
Optionkey when in Finder's Go menu to open your Library folder) -\Users\<username>\Library\Application Support\Blender\<blender-version>\scripts\add-ons\
- Windows: This will usually be in
- Paste the
io_scene_gltf2_msfsfolder here (Ctrl+V). - After completing this process, you will need to start Blender and then activate the plugin. Activation is done from the Preferences (Edit > Preferences). In the Preferences window, click on the checkbox beside the listed plugin to enable it.
NOTE: You may need to restart Blender again after activating the plugin for all the options to be visible in the IDE.
Uninstalling The Blender Add-on
If you previously installed the Microsoft Flight Simulator add-on for Blender and wish to remove it before installing an updated version, you need to go ahead and do the following:
- Start by opening Blender and go to: Edit > Preferences.
- In the Preferences, you need to go to the add-ons tab, then use the Search function using "gltf". This will bring up a few plugins, and from them you can delete the Import-Export: Microsoft Flight Simulator gltf Extension using the
Removebutton. IMPORTANT! Do not delete the "Import-Export: gltf 2.0 format" add-on.
Migration of Legacy Blend File Material Types/Modes
Blend files that were made using any version/iteration of the Blender add-on previous to the 1.3.x version, are now considered legacy blend files. This is because legacy blend files had the extensions that are used to create glTF 2.0 files for use in the Microsoft Flight Simulator hard-coded into them. However, the Asobo version of the exporter uses the Khronos default code and adds hooks to this code for the extensions used in the glTF files.
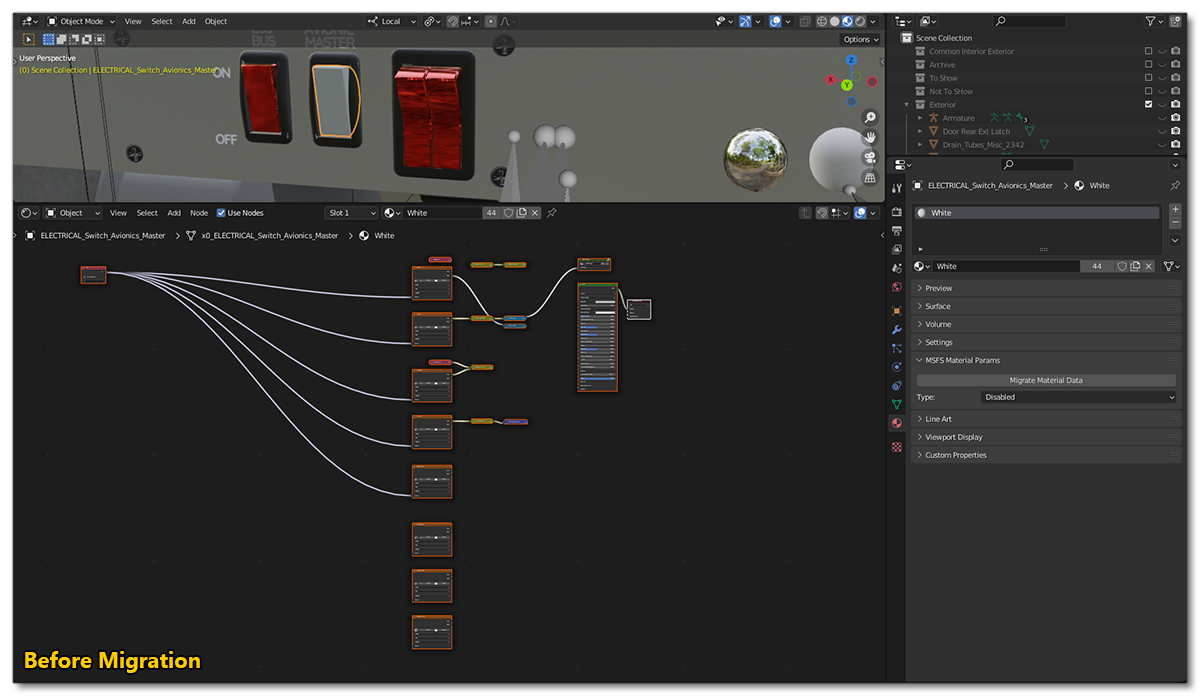
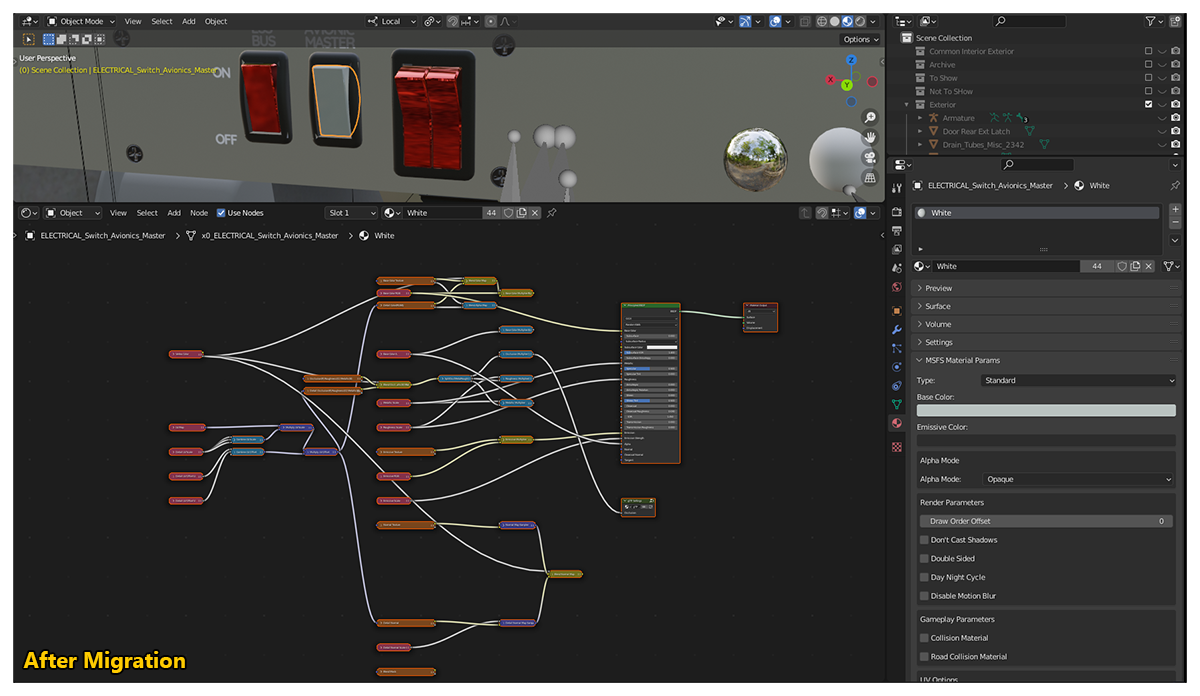
The Asobo exporter also has a much more complex and versatile material node structure that can be seen in the Shader Tab/Window in Blender. Your legacy Flight Simulator material mode/types should be migrated to the new Asobo Microsoft Flight Simulator material mode/types with the click of the "Migrate Material Data" button in the MSFS Material Parameters panel (under the Blender Material Properties).

Every effort possible has been made to ensure that legacy blend files can be easily and fully migrated to use this add-on and exporter, and we recommend you migrate to add-on version 1.3.x (or above) as soon as possible to ensure future compatibility as this add-on evolves and is updated.
Once you have performed a migration, you should look at the shader nodes in your original blend file and make sure the BSDF node parameters are the same as the panel values. This is an important check to make as these can get out of sync when you modify the parameters in the Surface section of the Material Properties panel instead of modifying them in the MSFS Material Parameters section. In particular, pay attention to the Metallic and Roughness Scale and Factor values.
The full steps to successfully migrate your blend files are as follows:
- Open your blend file.
- Select a node/mesh
- Open the MSFS Material Params panel in the Material Properties:
- You will see a
Migrate Material Databutton above the MSFS Material Params type drop down list. - DO NOT Select a MSFS Material from the drop down, as this will erase the existing legacy data and you will lose all your material settings.
- You will see a
- Click on the
Migrate Material Databutton - Your existing legacy material type/mode will be converted to the new Asobo MSFS material type shader node structure.
The image below shows before the migration, and if you mouse over it you can see after the migration:
IMPORTANT! After migration SAVE YOUR FILE AS A NEW FILE and keep your legacy blend file for future reference.
All the settings from the legacy node structure are copied to the Asobo exporter shader node structure. As you can see from the images above, the Asobo node structure is more complex and there are a lot more nodes. Sometimes some model developers have made changes to the legacy BSDF node that are not reflected in the MSFS Material Params panel data - the variables that are migrated come instead from the legacy panel data, so there may be situations where your material will not look correct. This means that you will need to compare your legacy blend file materials to the new blend file Materials after migration to see if there are any issues like this one. You can do this by opening another Blender instance and opening the legacy file in that, then comparing the MSFS Material Params panel values with the legacy parameter values and adjusting them accordingly.
Note that each Microsoft Flight Simulator material will need to be migrated, but any mesh/nodes associated to that material will also have its MSFS Material Parameters migrated.
Finally, you may also notice that some MSFS Material Parameters show data but cannot be adjusted. This is in keeping with the Asobo 3DS Max exporter material parameters.