RUNWAYS
At this point in the tutorial it's time to add the Runway objects to our airport. In general you'll always want to add these before almost anything else so that you can then later adapt taxiways and aprons to them correctly.
Adding The Runway
To add a runway, move the camera over the approximate position (still in top down mode) and then in the Objects window, select the Runway object type.
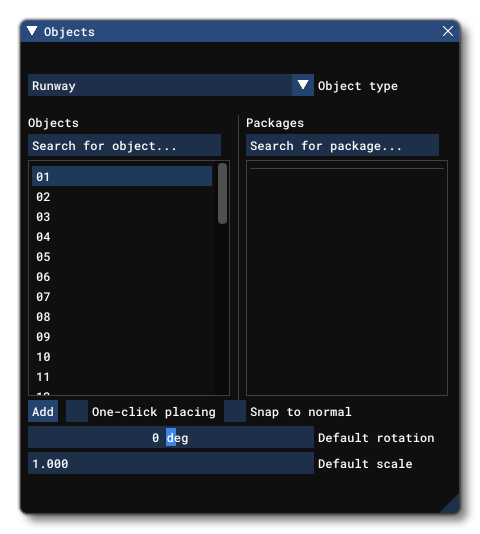
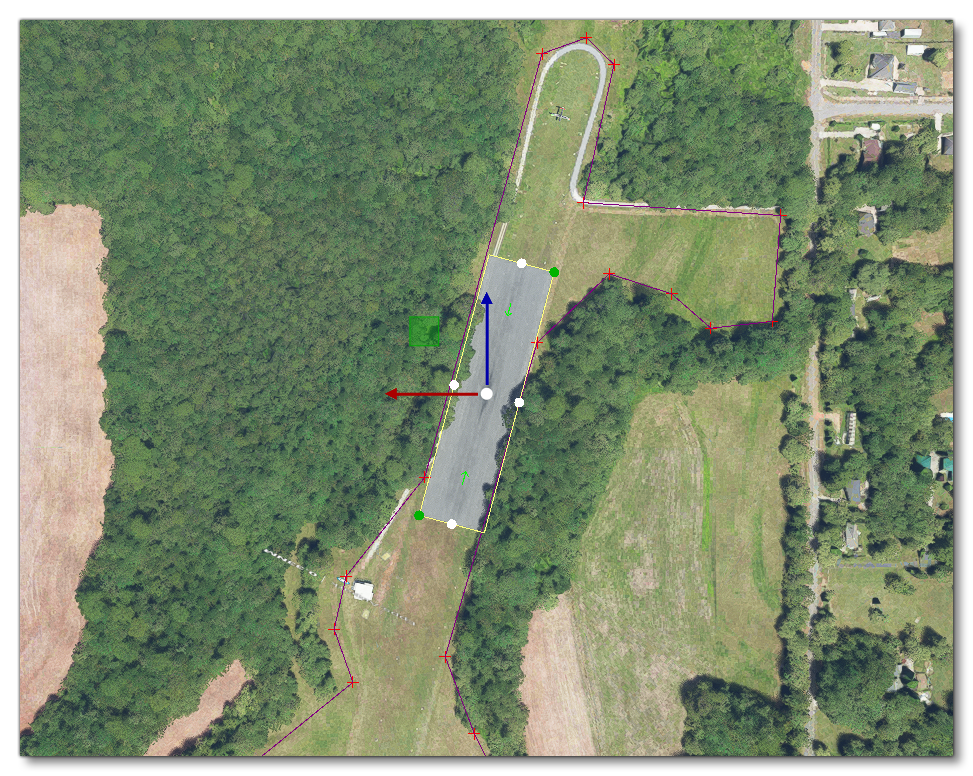
There are a number of different objects listed here, and each one simply corresponds to a runway designator. If you know it then you can select the value that is appropriate right now, but if not it doesn't matter just yet as we'll be editing the runway properties later. Once you are ready, click on the Add button to add the runway to the scene:
The Runway Properties
The editor will try and add the runway at the correct heading for the position and airport, however it will be the default length and width, and it will not have any of the required markings or other details. That means that it's up to you to provide this information. You can get the required details from a number of different sources, some of which are listed in the section on Airport Information. For this airport we've gone to the AirNav website to find information on the runway:

With these details, you can go into the object Properties window for the runway and set the initial values for length, width, surface material and number:
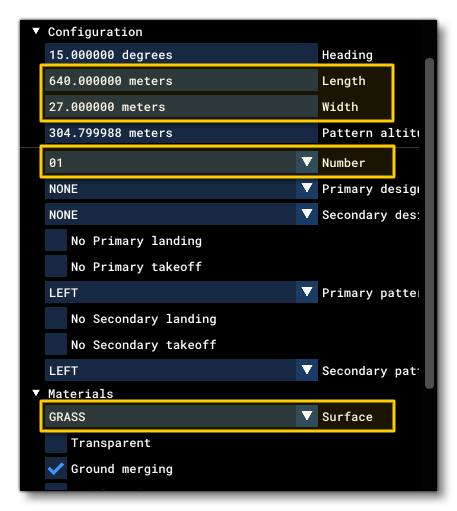
Once you have these details filled in, you can go back into the scenery editor and check and see how the runway looks. In general, you'll probably have tweak some of the supplied values, as the position may not be exactly correct, or the aerial view shows the runway slightly longer/wider, etc... A little bit of creative licence is permitted here to make what you add fit in with the existing scenery, but try not to take too many liberties!
Edition at this time in the process is usually best achieved using the Gizmo tool and changing the positions and sizes by hand:
Runway Start Points
By default the runway start points - which are the points on the runway where the aircraft will be positioned to start a flight - are incorrect and will need editing too. These are shown by two green arrows on the runway overlay:
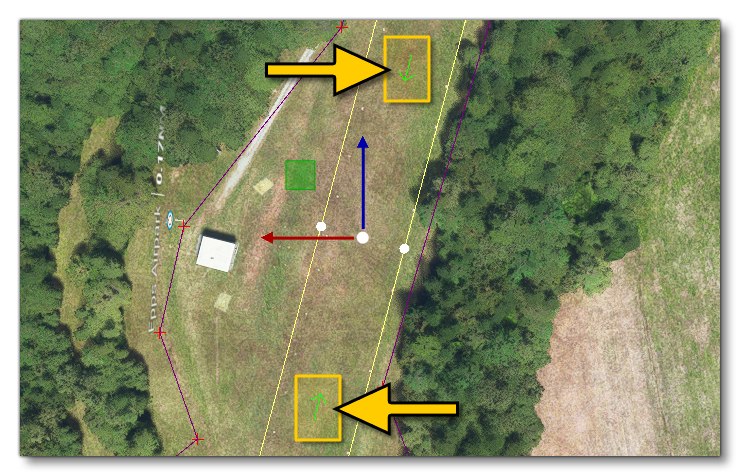
To edit these, you need to go to the last set of properties labelled Runway Start and expand the options. You would then check the box marked Edit Position. This will place a Gizmo in the scene at the position of the start point which can then be used manually position it where you require, nearer the ends of the runway. You should do this for both start points, assuming that both ends of the runway are usable.
That's really all you have to do for the runway in this tutorial airport, but it's worth checking all the options available to you for the Runway object and taking time to ensure that it's set up correctly.