COLLISION MESHES AND OCCLUDERS
This page explains the different collision meshes and occluder meshes that will be required to be added to the cockpit/cabin model.
NOTE: these meshes must be exported with the interior cockpit/cabin playable LOD (usually LOD0).
IMPORTANT! The materials listed here should not form part of any multi-materials.
PANEL_COLLISION
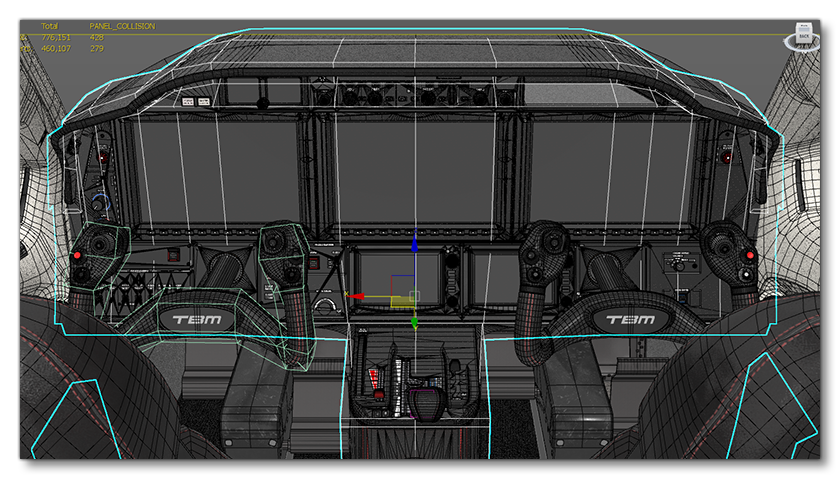
This refers to the collision mesh that only exists around the different instruments and that is roughly approximate to the shape and design of those instruments - essentially the geometry must simply stay at the average position of the instruments (overlaying the panels is fine). This prevents the simulation from having strange behaviors when moving the mouse around the instruments where the mouse can switch between colliding with an instrument and colliding with the cockpit panel. It is mandatory to have this mesh to have good collision behavior around the instruments. Also for now the depth when colliding with a virtual cockpit is retrieved thanks to the mesh it is on, so no collision mesh means bad interaction with virtual cockpits.
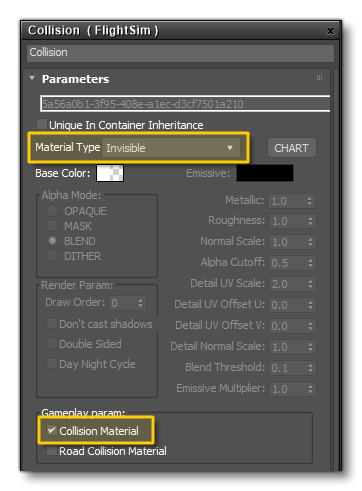
When creating this mesh, "PANEL_COLLISION" must be the name of the root node of your collision mesh in your glTF and must be exported with the interior playable LOD (usually LOD0) as we only need it for that LOD. The material used (in 3Ds Max using the SDK plugin) is the Invisible type and the Collision Material flag must be checked:
In the engine code, the mesh is activated by retrieving the node that contains the mesh, and this node is found thanks to its name, which is why it must be named exactly as explained here. Below you can see an example of the PANEL_COLLISION mesh:
WINDSHIELD_COLLISION
This collision mesh is used by the Smart Cam (typical use of the Smart Cam is when performing a traffic pattern around an airfield). When the user presses the Smart Cam button, it makes the head view rotate automatically toward the point on the runway where you are supposed to land. However, we need to constrain this camera somehow, which is where this collision mesh comes in.
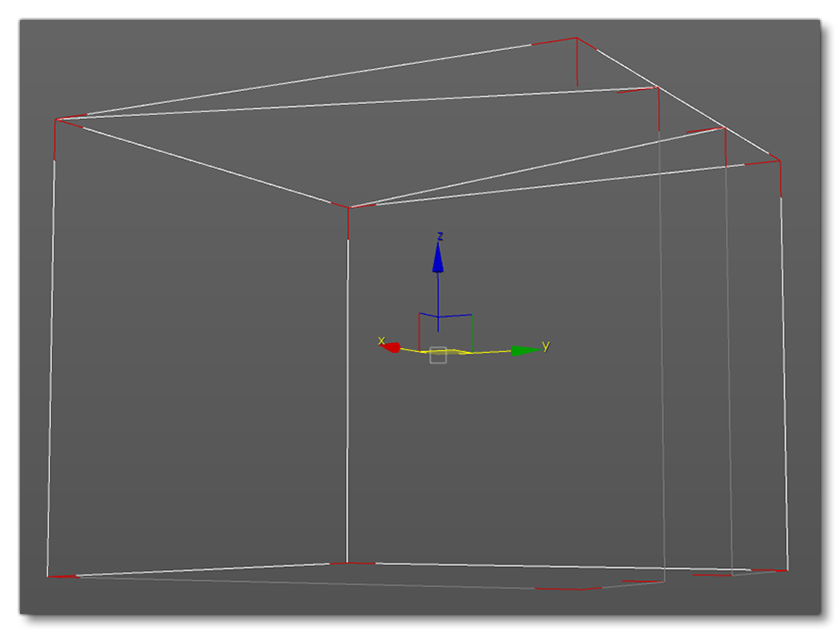
The Smart Cam will stop turning to look at the runway when it no longer collides with the WINDSHIELD_COLLISION mesh, which is why this collision mesh is essentially a simple "box" with no polygons on the bottom or at the back (because it would be odd to activate the Smart Cam when you fly - for example - exactly above the runway, as it would just show the floor of the cockpit and your feet). It should also have all its normals orientated towards the inside:
Note that like the PANEL_COLLISION mesh, the following rules apply to the WINDSHIELD_COLLISION mesh:
- "WINDSHIELD_COLLISION" must be the name of the root node of your collision mesh in your glTF.
- it must be exported with the interior playable LOD (usually LOD0).
- it must use the Invisible material type which also requires that the Collision Material flag is checked.
Occluder
Another mesh that you will need to create for the cabin/cockpit is the occluder mesh. The occluder is a simple mesh which will prevent environmental effects and objects from being visible inside the cockpit (things like rain, snow, trees, etc…). To make it, we just need a volume which will cover the entire cockpit (and cabin), where the normals face the outside of the cockpit:
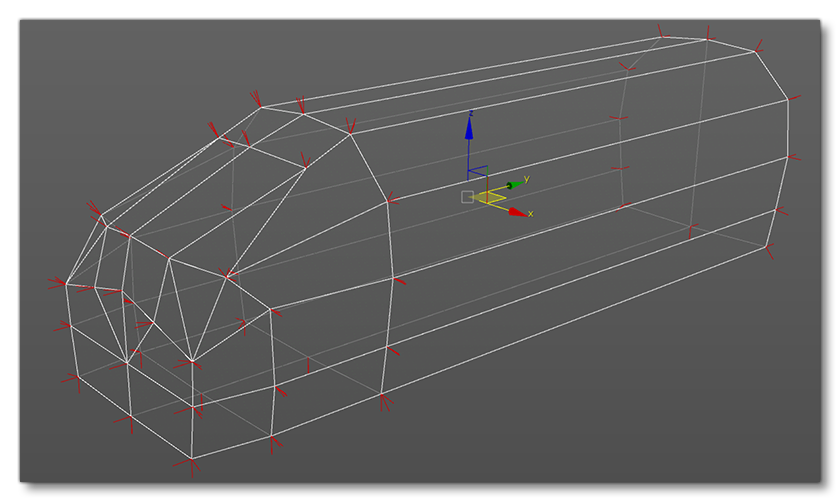
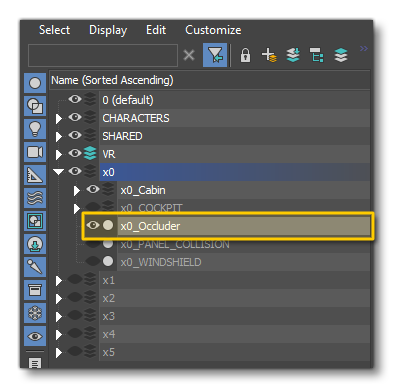
This mesh should be put on a separate layer (or in the x0 layer) so we can export it just for the LOD0 as we don't need it for the others.
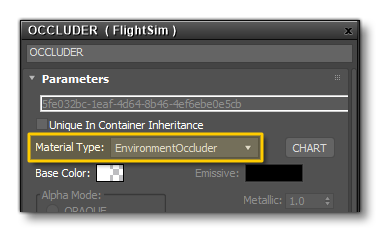
Finally, you need to ensure that this mesh uses the Environment Occluder material:
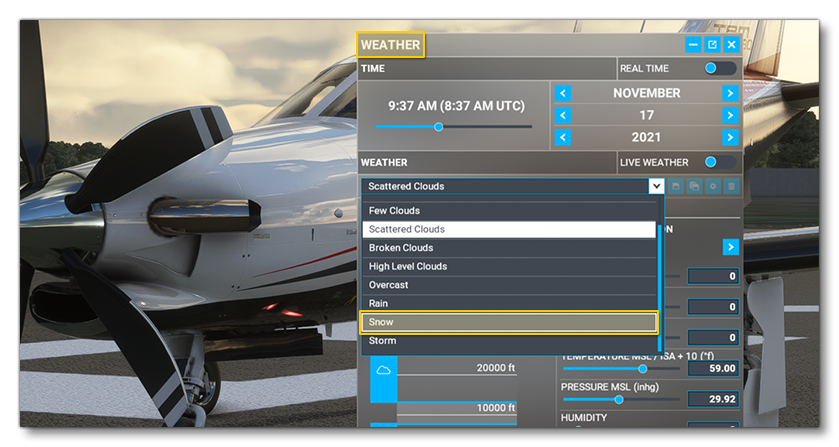
When you are at the stage of testing your aircraft within Microsoft Flight Simulator, you can test that this mesh is correct by activating Snow in the main game options and setting the precipitation to the maximum:
Or you can activate Slew Mode and then move the aircraft so that it's sitting among foliage:

In both tests, when the camera is in the cockpìt, you should see none of the environmental details passing through the fuselage.