LODs
So far the documentation on how to make an aircraft has concentrated on the LOD0 version of the aircraft, which is the one that users will see when flying the plane and using the different cameras. However in the simulation you may have a multiplayer server where other users have the same aircraft, or the aircraft itself could have been included as AI traffic, or it could simply be a part of the scenery of an airport as a parked aircraft. For these situations your aircraft will need different LODs so that Microsoft Flight Simulator can optimise the geometry and materials used by the aircraft based on how far away from the camera it is being viewed to keep an optimal framerate.
The following pages cover the creation of the different LODs that your aircraft will need (both exterior and interior):
Aircraft LOD Breakdown
Large planes will have a different triangle count to smaller planes, so they will have a different triangle count for the LODs also. Below you can find a high level overview of the triangle counts for different size aircraft. Note the reduction is approximately 50% per LOD, however as you approach the lowest LODs the tri count for all aircraft will start to align as they are viewed far away:
| Plane Size | Example | LOD Level | Exterior (approximate tris) | Interior (approximate tris) |
|---|---|---|---|---|
| Huge | Jumbo Jet | x0 | 500,000 | 400,000 |
| x1 | 250,000 | 200,000 | ||
| x2 | 100,000 | 50,000 | ||
| x3 | 20,000 | 1,000 | ||
| x4 | 5,000 | 200 | ||
| x5 | 100 | 6 | ||
| Big | Passenger Jet | x0 | 300,000 | 300,000 |
| x1 | 150,000 | 200,000 | ||
| x2 | 70,000 | 50,000 | ||
| x3 | 20,000 | 1,000 | ||
| x4 | 5,000 | 200 | ||
| x5 | 100 | 6 | ||
| Medium | Small Passenger Jet | x0 | 200,000 | 200,000 |
| x1 | 150,000 | 150,000 | ||
| x2 | 70,000 | 50,000 | ||
| x3 | 20,000 | 1,000 | ||
| x4 | 5,000 | 200 | ||
| x5 | 100 | 6 | ||
| Small | Single/Double Seater | x0 | 150,000 | 150,000 |
| x1 | 100,000 | 100,000 | ||
| x2 | 70,000 | 50,000 | ||
| x3 | 20,000 | 1,000 | ||
| x4 | 5,000 | 200 | ||
| x5 | 100 | 6 |
Interior detail is reduced significantly after x1 as they are viewed only from the exterior at this LOD level.
NOTE: The user aircraft will always be rendered using LOD0, regardless of how far from the camera gets. This behavior can be temporarily disabled using the Force User LOD 0 option.
Cabin LODs
The aircraft cabin will only be visible via cutscene cameras and - potentially - by viewing from the cockpit. Therefore, the top 2 LODs are the most important and the ones below those can be significantly reduced as they are barely visible from any of the exterior views. In general you should work within the x0 budget given in the table above for the interior, and then reduce the tri count based on the approximate percentages given below:
| Plane Size | Example | LOD Level | Tris (percent) |
|---|---|---|---|
| All | N/A | x0 | 100% |
| x1 |
-25% from x0
|
||
| x2 | -50% from x1 | ||
| x3 | -60% from x2 or 1000 tris, whichever is less | ||
| x4 | 500
(may not even be required) |
Animations
When creating the different LODs, keep in mind that some animations will need to be maintained down the LODs as appropriate. To ascertain whether an animation is required or not, use the camera distance reference (here) and think about the silhouette (see here) before deciding if animation will be visible – if it is, then it should be maintained. Animation also relates to componentization, for example: the landing gear doors need to open in order for the wheels to extend, therefore it is important not to weld the seams up or remove the back face of the doors as they will be visible when the wheels are deployed.
Some specific instances where animation should always be maintained are:
- WingFlex skinning - this will be noticeable from quite far away, although probably not on LODs x5 and x6 so LOD x4 is probably a good cut-off point.
- Landing Gear animations - these should also be maintained at least down to LOD x4.
Small components that make up larger animations, such as pistons on the flaps or wheels can be removed from LOD x3 or even LODx2, depending on their visibility.
Finally, always use dummies to animate meshes. This way all LOD elements can be parented to the same "master dummies" and work all down the LOD levels.
Textures
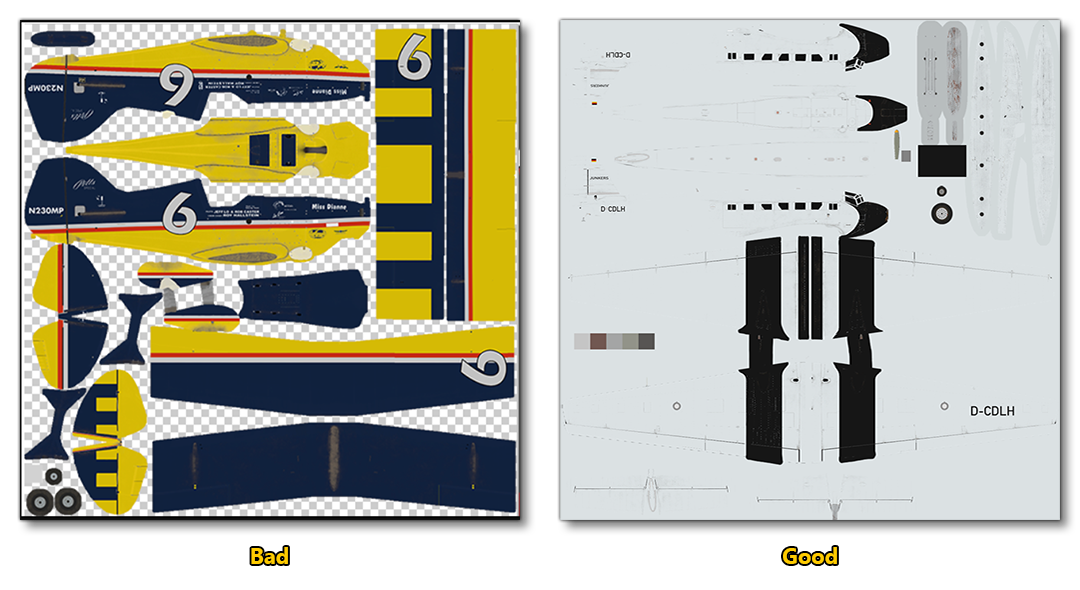
When creating your textures for the different LODs, in particular for the higher LODs (x4, x5 etc..), in many cases you'll be using a single texture for the whole aircraft, and as such it's important that when you create the map for those LODs you avoid empty spaces. Essentially, you should fill the "holes" with the colour of the nearest parts. As a result, there will be less artefacts on the mipmaps and the texture resizing during optimization will be better. Below you can see examples of a "good" and a "bad" texture map:
Examples - Airframe
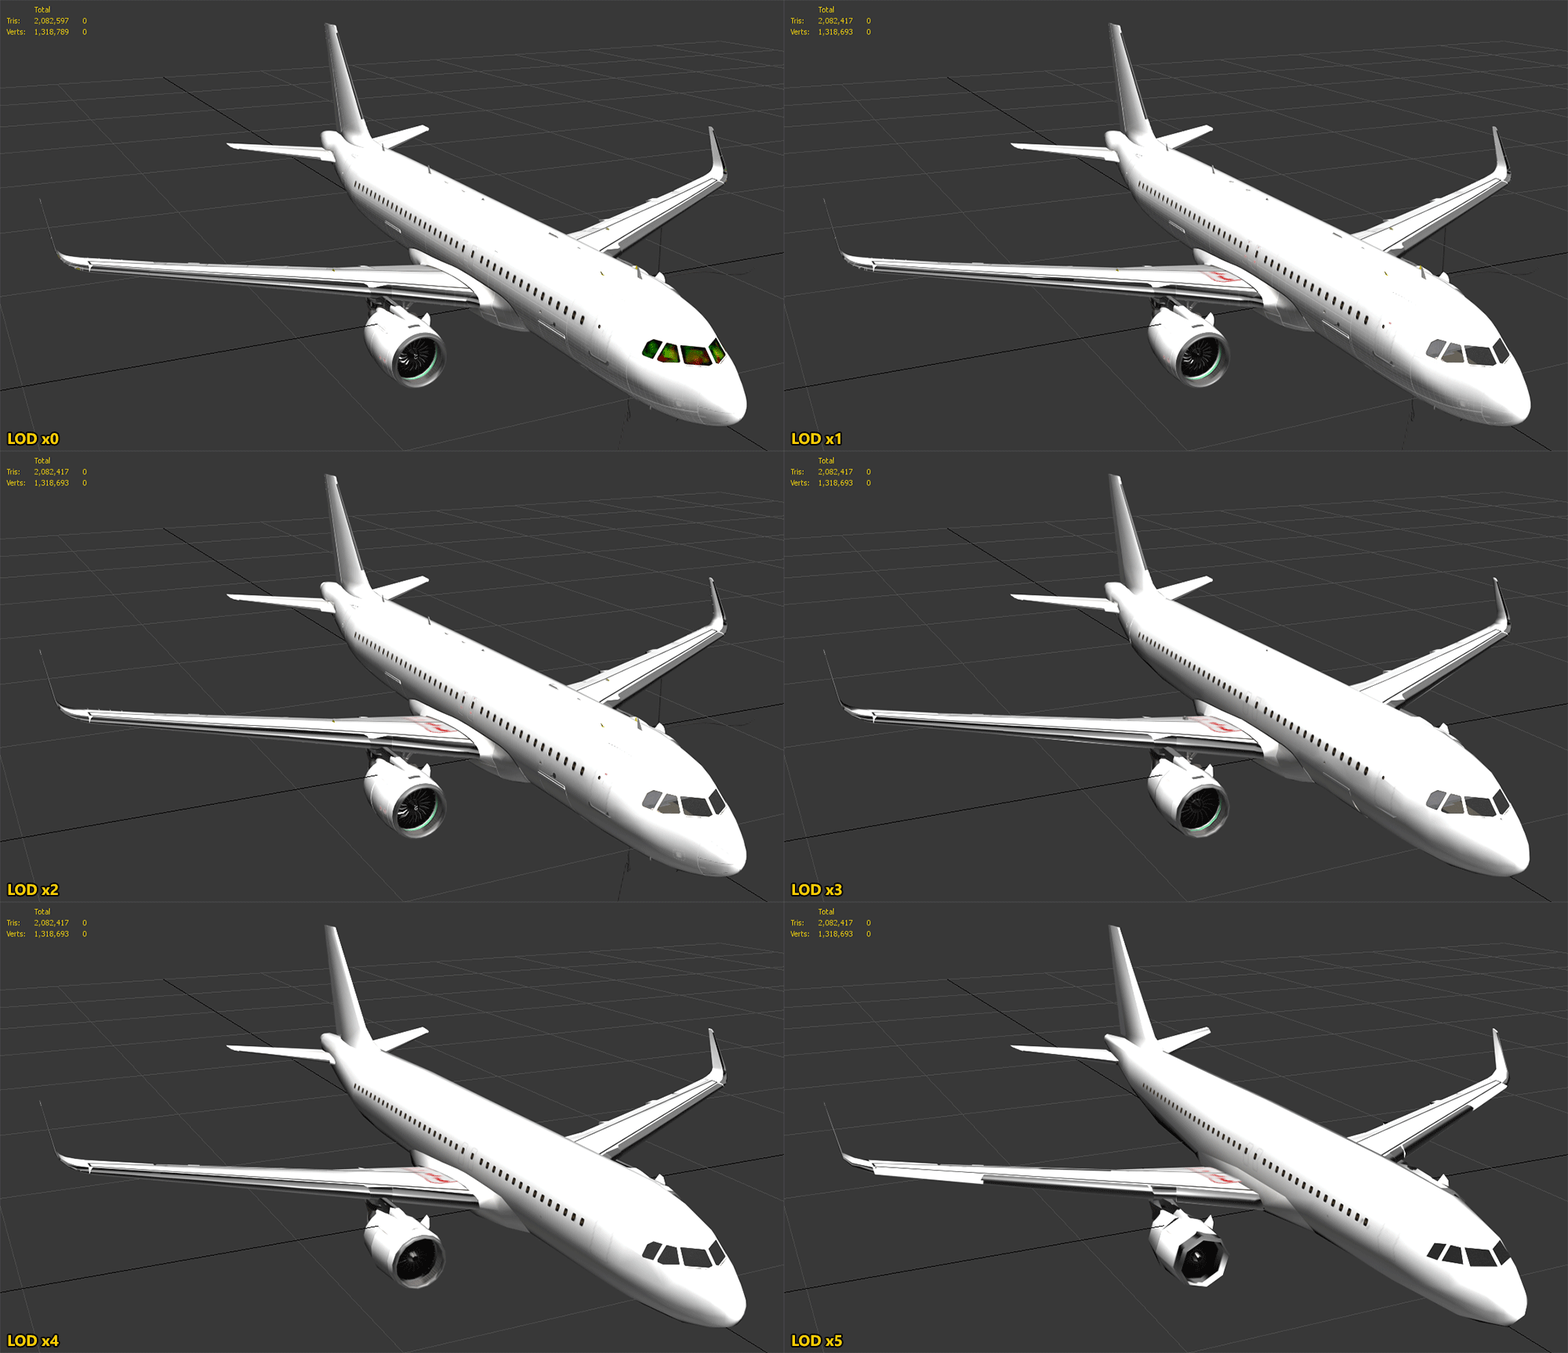
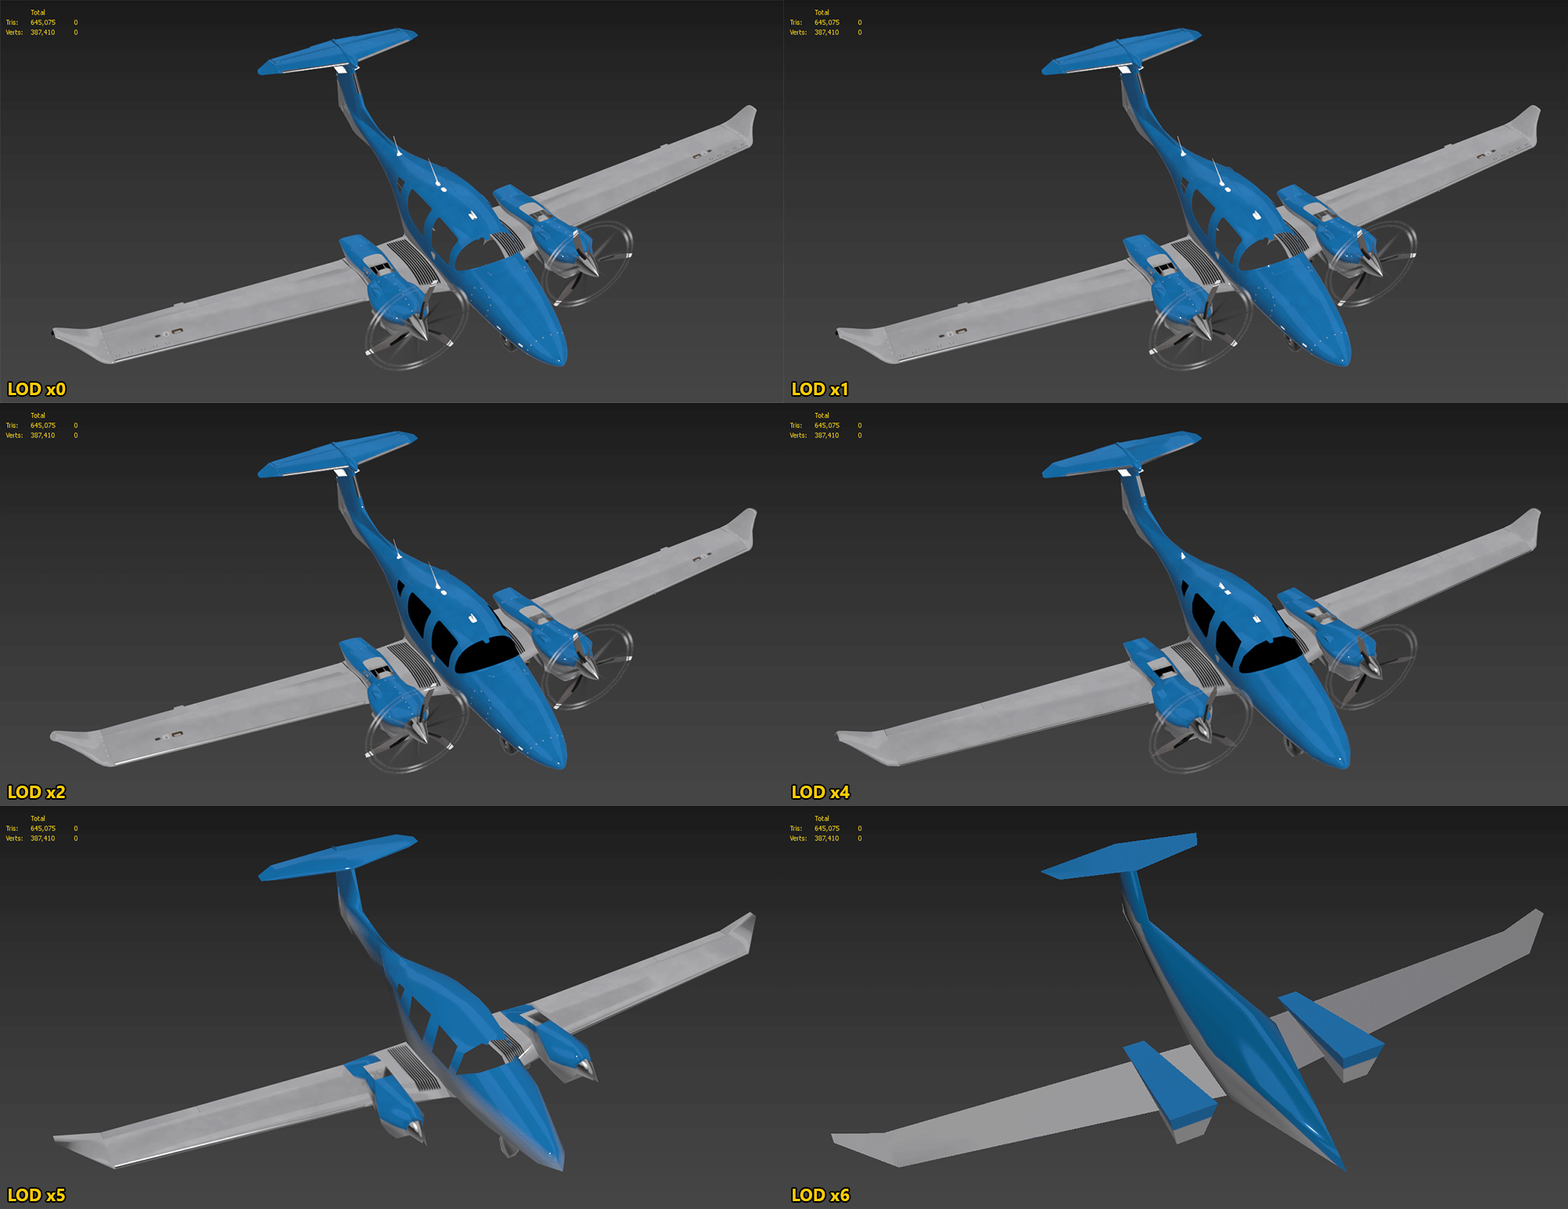
Below you can see a series of visual examples to help you see where and how you can create and optimise Airframe LODs at different levels. To start with, here's the A320 Neo:
And this is the DA62:
Examples - Cockpit
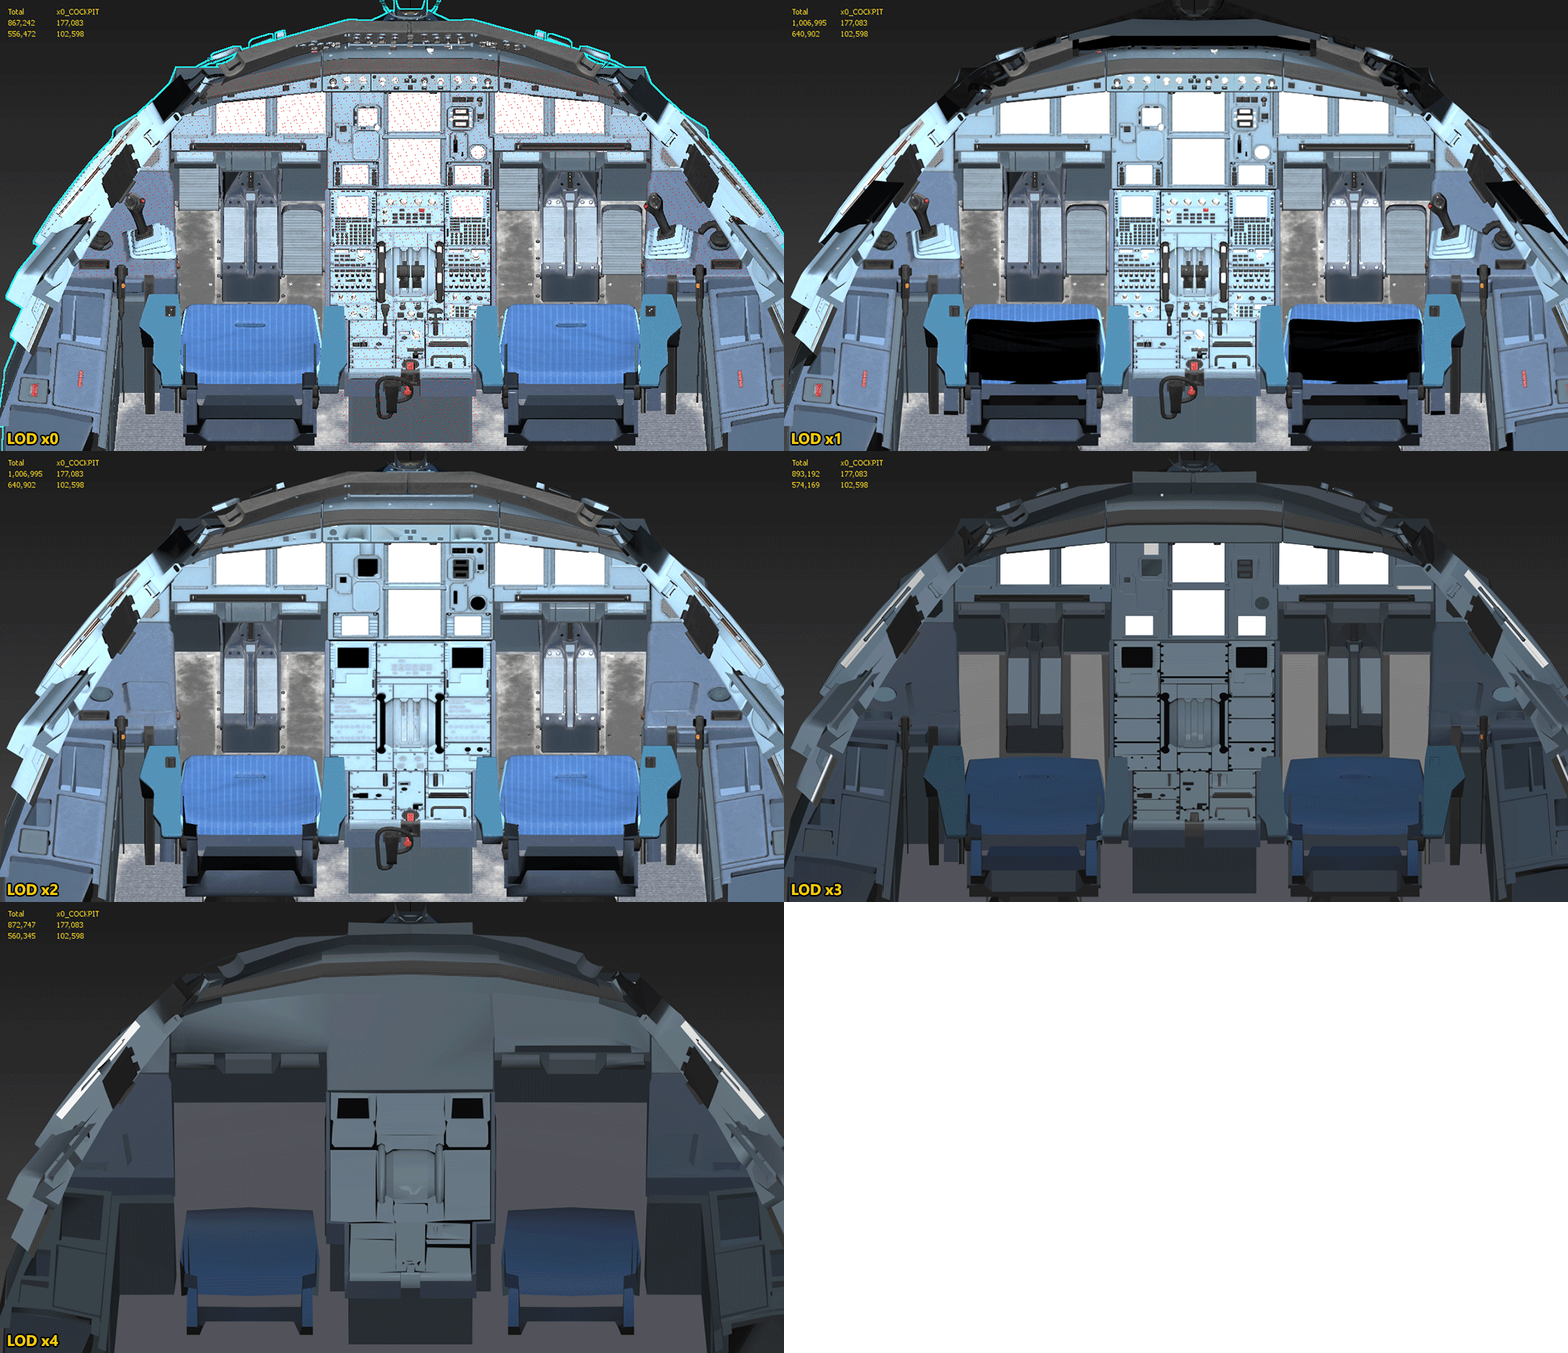
For the cockpit we have the following examples, starting with the interior of the A320 Neo:
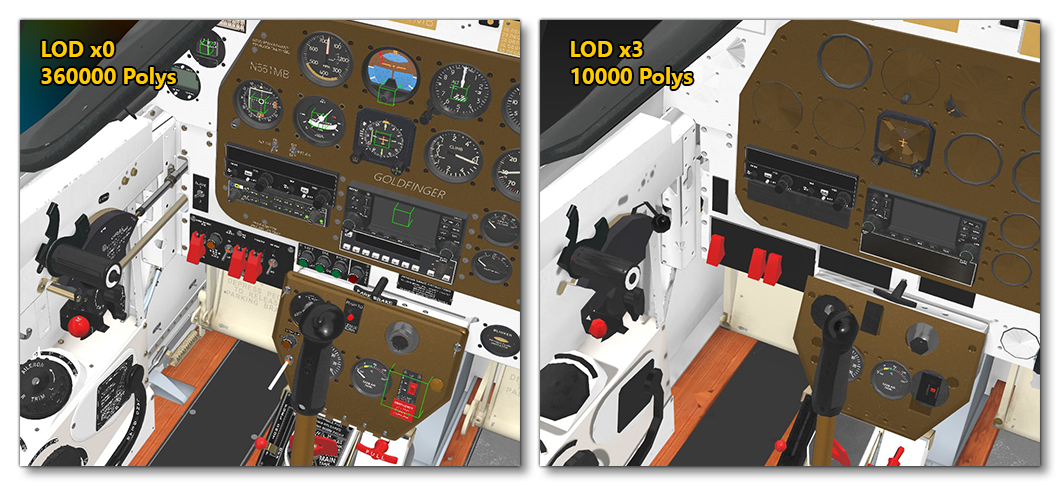
The following image illustrates just how much you can reduce the cockpit LOD detail when you reach LOD x3. First let's look at the Cap10:
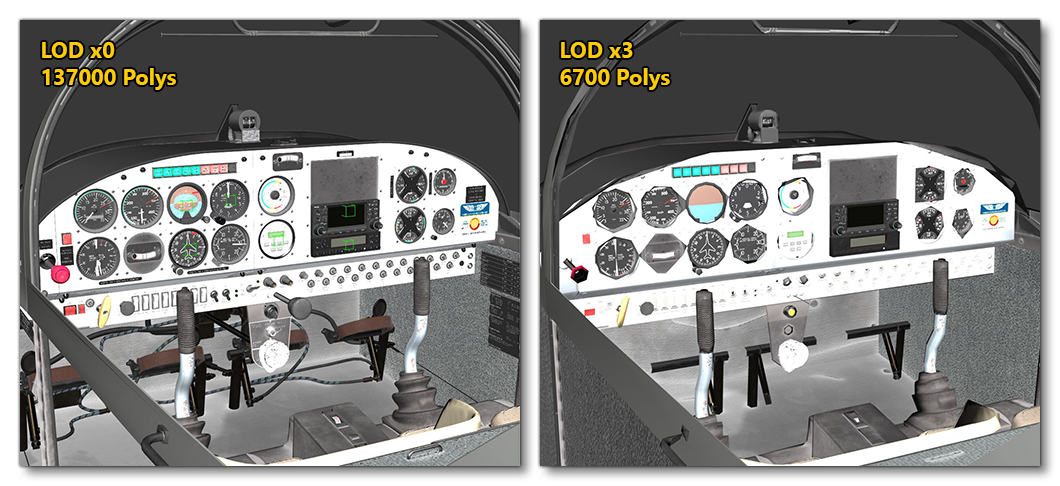
And here is the same LOD x3 reduction for the P51 Goldfinger:
