MODEL EXPORTING
Once you've created your exterior (airframe) and interior (cockpit) models, they need to be exported as glTF files and this will be done using the Multi-Exporter Tool. This tool is part of the 3DS Max plugin that comes with the SDK and is used to generate the required files in the correct format for Microsoft Flight Simulator. This page outlines what we need to do to export the files for the airrcaft package we are making, but you can find full information on this tool from the following page within the main documentation:
It's worth noting that the export process wil be much easier the cleaner and more optimised that you have your model hierarchy. So, before continuing, it's worth taking a few moments to ensure that your LOD hierarchy is setup clearly along with the animations, etc... See the section on Layer Construction and Object Naming Conventions for more information on best-practices.
Setup The Export
NOTE: This process will need be completed twice: once for the airframe model and once for the cockpit model.
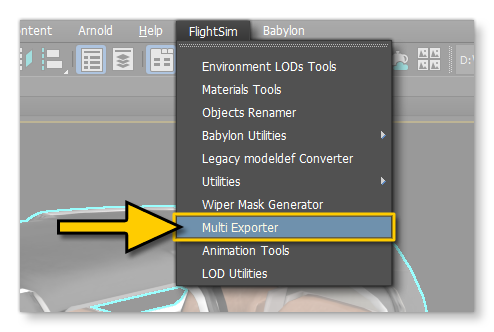
Once you have your model - with all its LODs - prepared in your modelling program, you need to export them using the Multi-Exporter tool. This is found from the FlightSim Plugin menu, as shown in the image below:
This will open the following window, where you should click on the Presets tab:
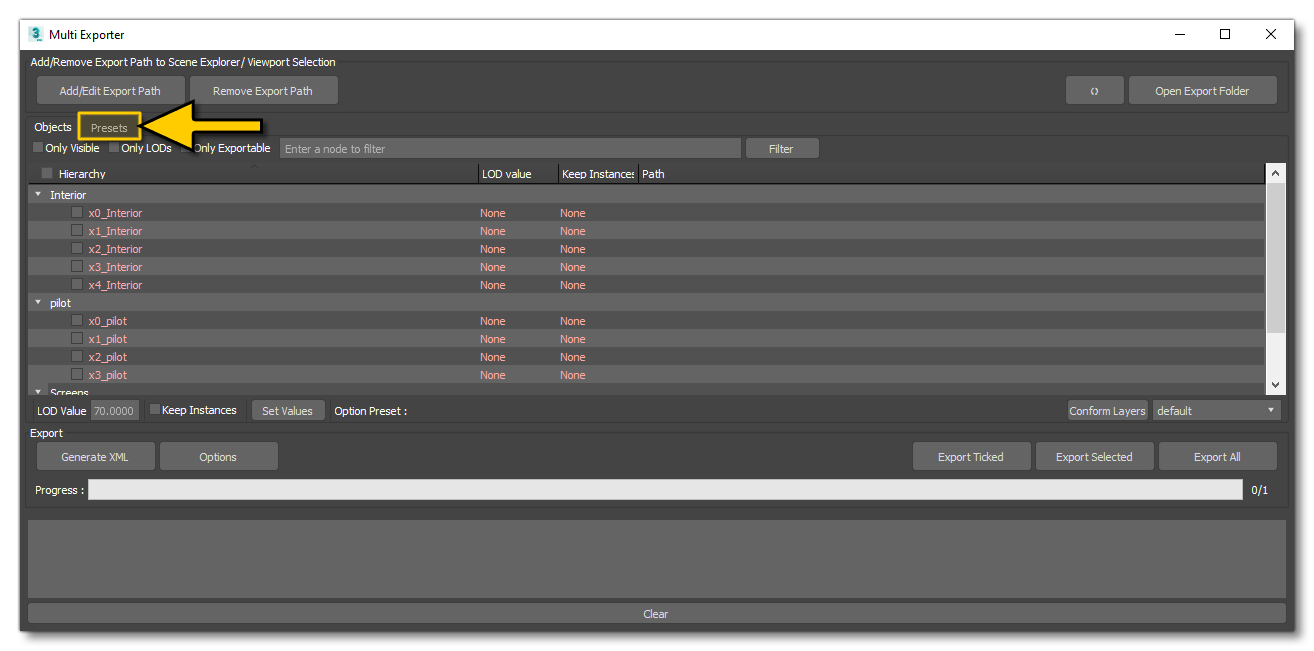
The Presets tab is where we'll set up the paths to export the glTF files to and also set what exactly will be exported. To start with, you need to set up the options to output the textures to the required folder in the aircraft package, so click the Options button to open the following window:
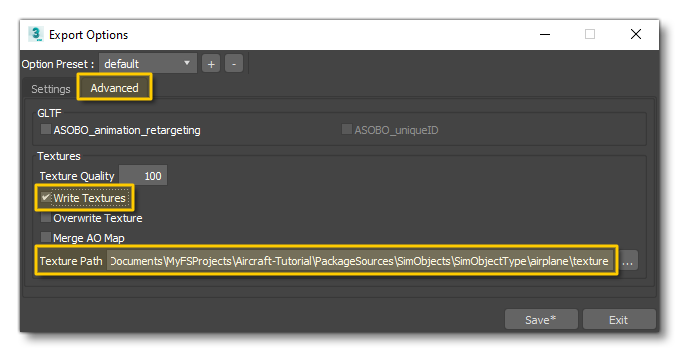
Here you go to the Advanced tab, then check the Write Textures option and set the Texture Path to the location of the "texture" folder within the project that you made earlier (see here). The path should be something like this:
ROOT\<PackageName>\PackageSources\SimObjects\Airplanes\<AircraftName>\texture\
Once you have done that, you need to go through each of the LODs and set up the export name and path for each of them. For this (still on the Presets tab of the multi-exporter) you need to click the Add Preset button:
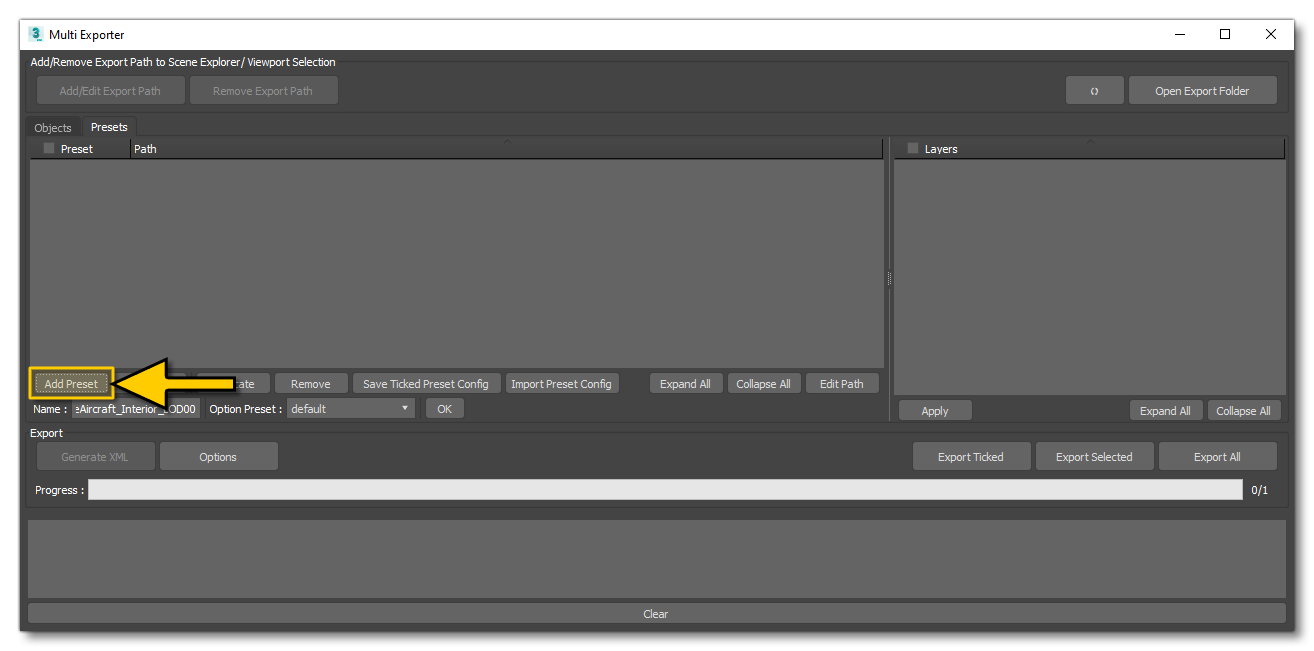
This will open a file explorer window where you need to give a path and a name for the glTF file that will be exported. This path should be similar to the one you gave for the textures, only it should point to the "model" folder of the package:
ROOT\<PackageName>\PackageSources\SimObjects\Airplanes\<AircraftName>\model\
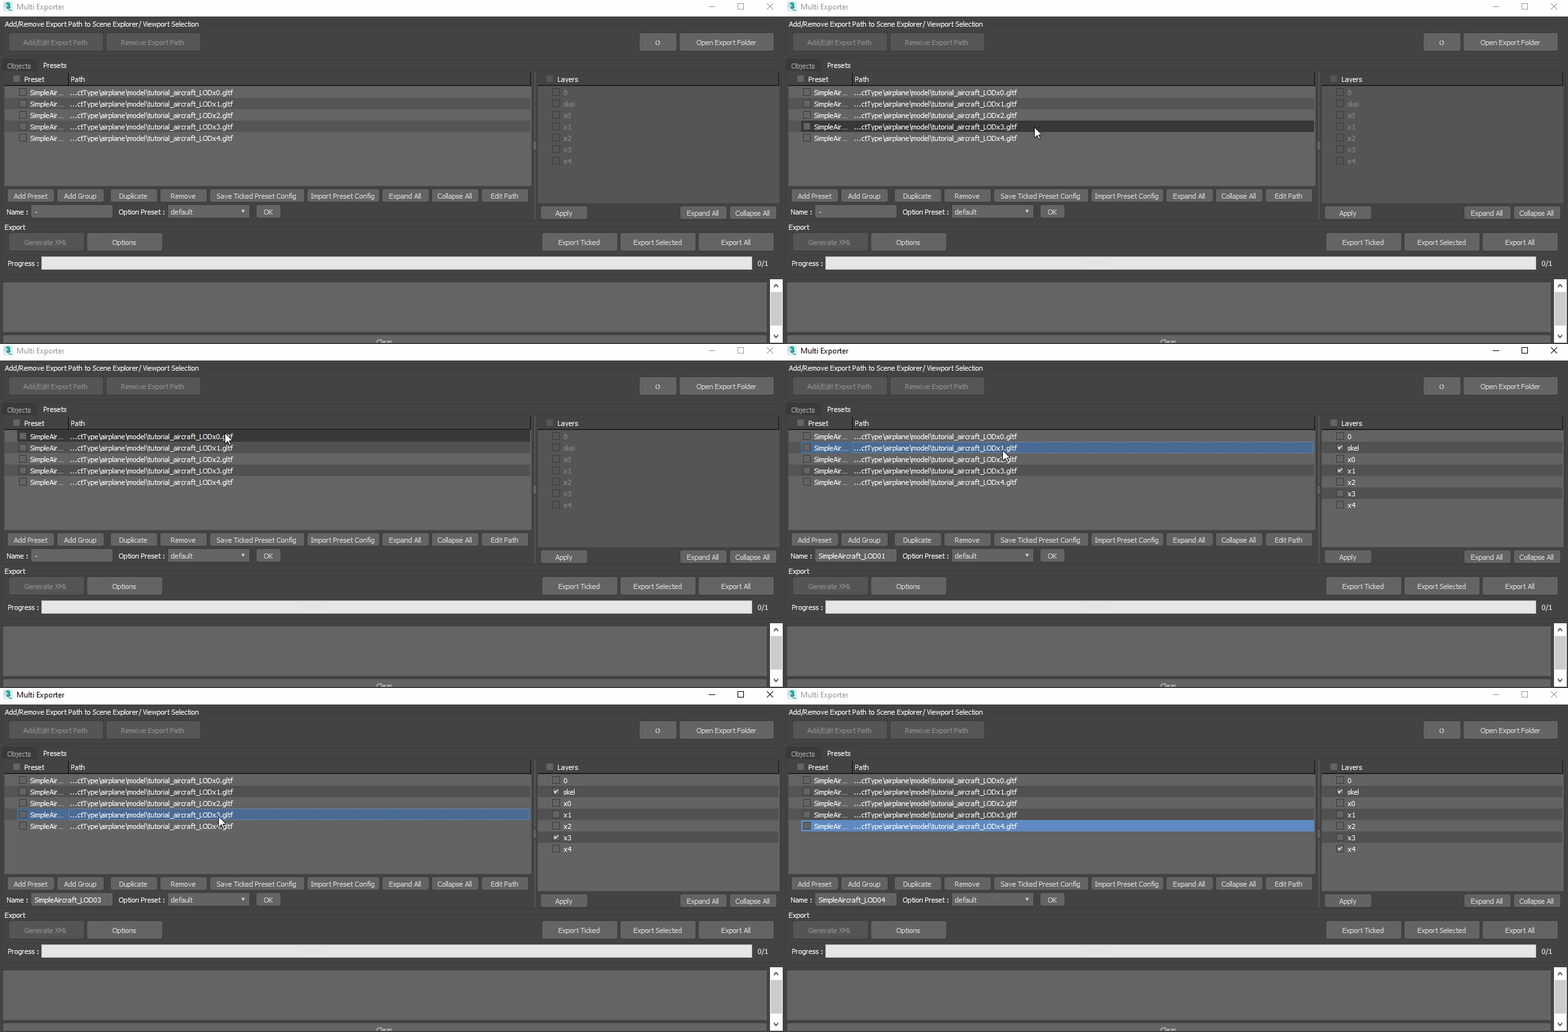
For each LOD preset, you will then select the appropriate layers from the list on the right of the window.
You will need to create one preset for each LOD that is being exported, and when finished you should have something that looks similar to this:
When you have completed this, tick each of the LOD presets that you have created and then click on the Export Ticked button to save out your LODs and textures. When finished revise the models and textures folders to ensure that everything is correct.