USER LIGHTS
The User Lights window is used to show information and debug the different lights on an aircraft. It can be opened from the Tools menu and will look something like this by default:
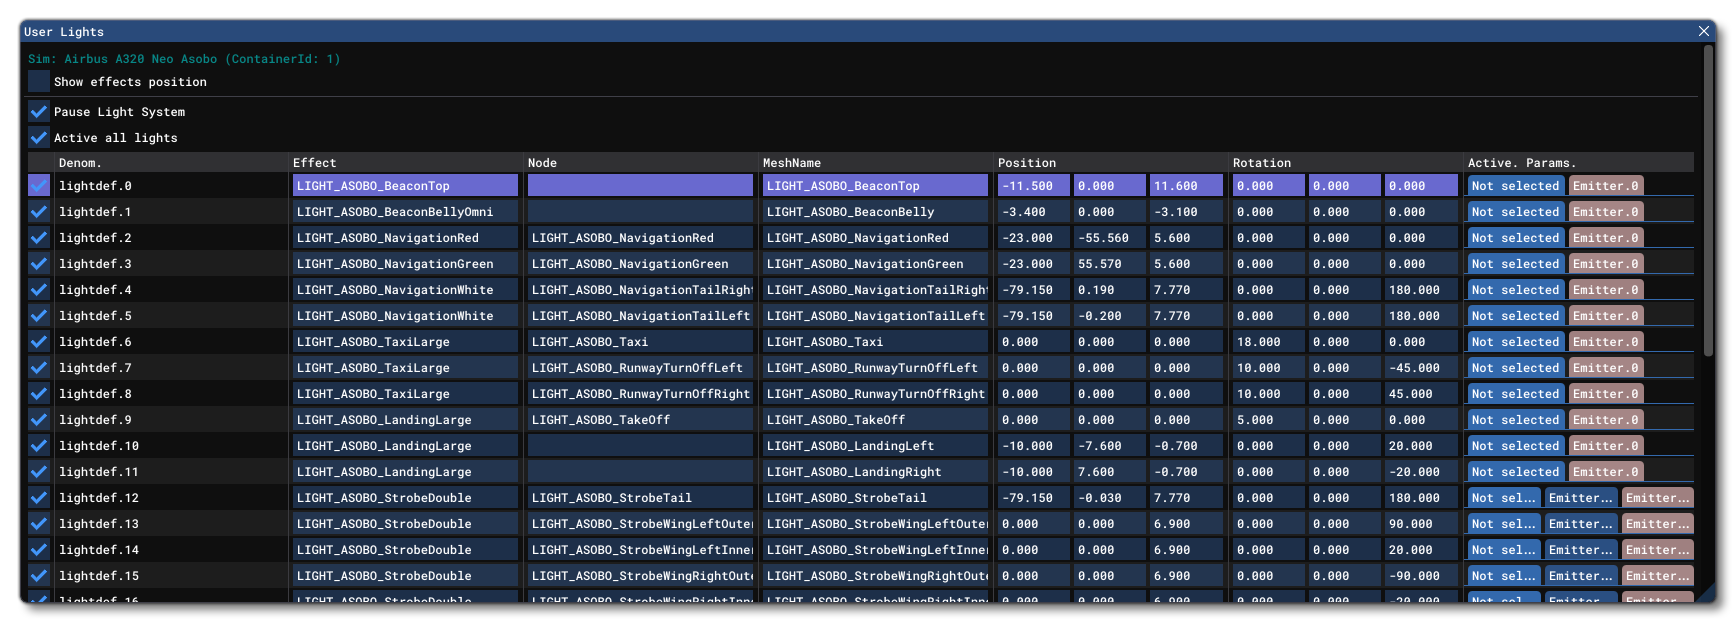
This window is split into two main section. At the top you have the tools for in-sim visualisation, and below that you have the information about each individual light.
For in-sim visualisation, if you click the Show Effects Position box, it will enable debug information to be drawn directly over the simulation, something like this:
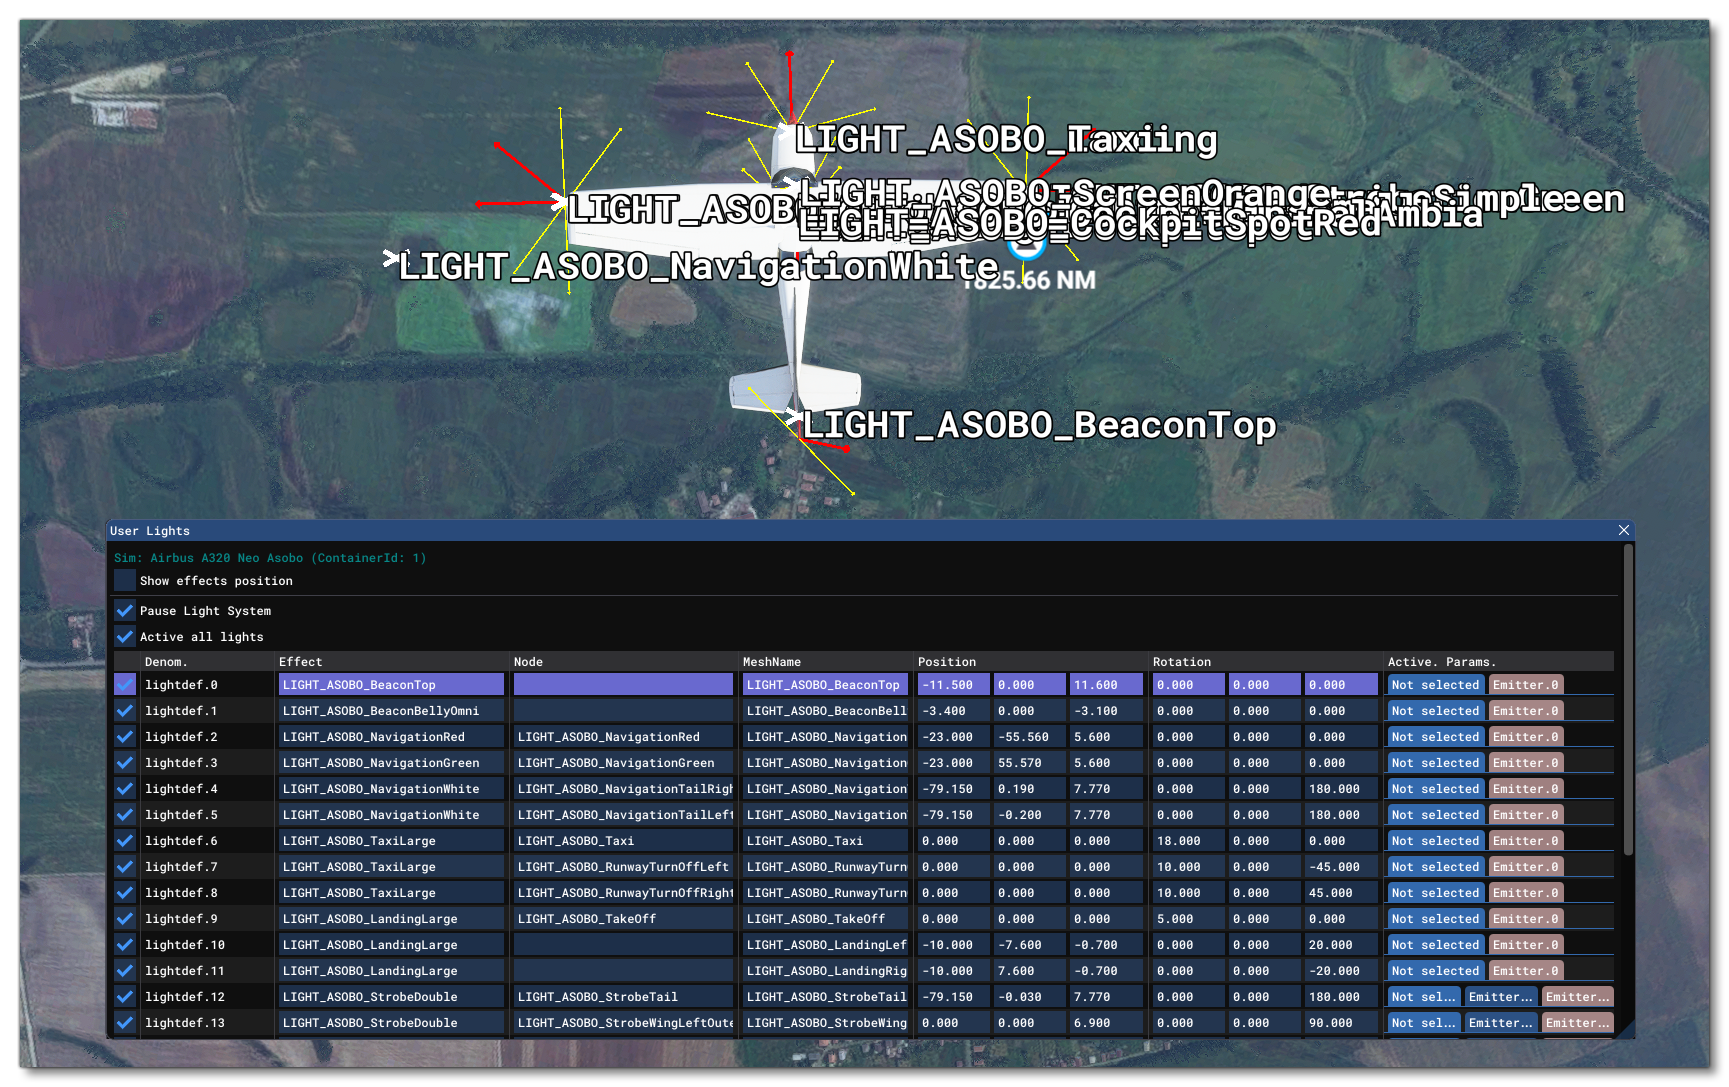
This is quite confusing so you can edit the information shown in the following ways:
- Click the Show Flashlight option to toggle on/off flashing lights.
- Click the Show Name option to toggle on/off the name text in the overlay
- Click the Show Direction And Cone option to toggle on/off the direction and cone information in the overlay
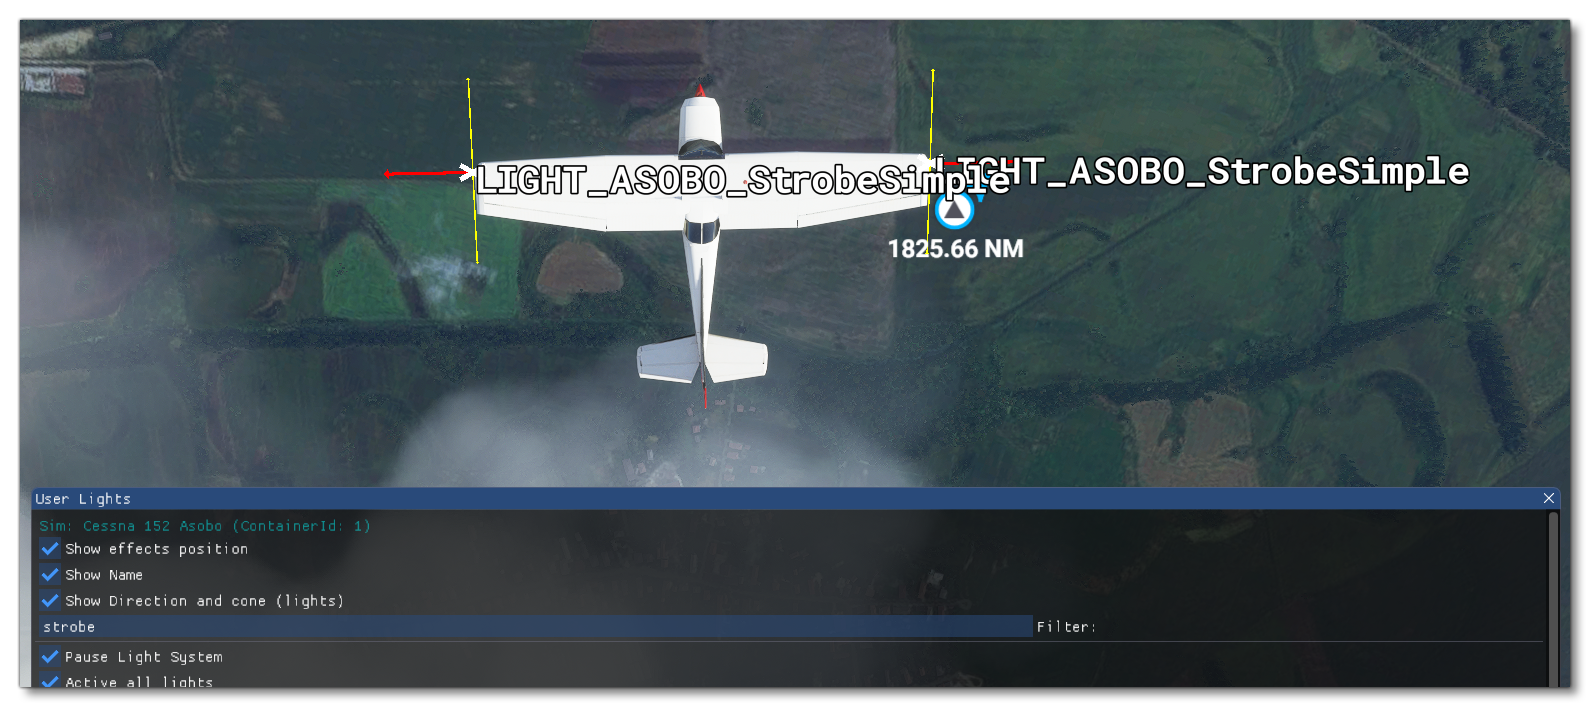
- Add text to the Filter input box to filter the lights shown in the overlay
The image below shows the same aircraft as that shown in the above image, only this time using "strobe" as a filter option:
The section beneath the visualisation options lists each individual light and also gives a couple of global options:
- Override Light System: When this checkbox is unchecked, light states are dictated by the simulation itself. When it is checked, you can activate/deactivate lights as required by checking the corresponding checkboxes in the first column of the light list. Checking this will also permit you to activate or deactivate lights on an individual bases using the checkboxes beside each of the definitions shown in the list.
Activate All Lights/Deactivate All Lights: These buttons can be used to activate/deactivate all of the lights at once.
Below the global options you have the list of individual lights, split into the following sections:
- Denominator: The light denominator, as defined by the
[LIGHTS]section of thesystem.cfgfile for the aircraft. - Effect: The name of the effect file that the light is using.
- Node: The name of the node where the light should be spawned.
- Mesh Name: The name of the mesh used by the light for close inspection.
- Position: The X/Y/Z position of the light, relative to the Datum Reference Point.
- Rotation: The rotation of the light around the X/Y/Z axis.
- Active Parameters: Show or hide the active emitter parameters for the light.
All of the fields mentioned above are editable and so you can use them to change any of the available parameters for the light, and these changes will also be reflected in the in-sim visualisation. However, these changes will not be saved with the aircraft, and are designed so you can tweak values and see what the outcome is before doing any edition of the system.cfg file.
Note that the Active Parameters section has two buttons: Not Selected and Emitter.N. Clicking on the emitter button will expand the light list of the current light and show the emitter information:
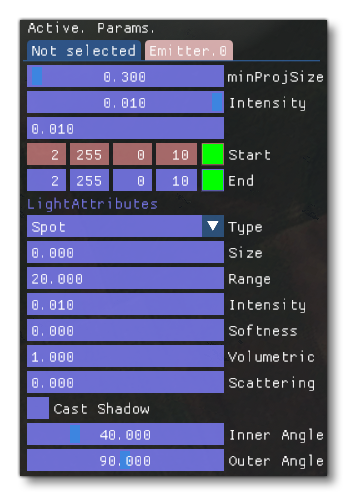
As with the general light data, all these fields are editable, although they won't be saved. Each field represents the following information about the light emitter:
- minProjSize: The minimum projection size on-screen. Use
Ctrl+ left click to edit, or click and drag the slider. - Start: The starting color RGBA components.
- End: The ending color RGBA components.
- Type: The type of light being emitted (None, Spot or Omni).
- Size: The size of the light emitter.
- Range: The range of the light emitter.
- Intensity: The intensity of the light, between 0 and the Maximum Intensity (set below). Use
Ctrl+ left click to edit, or click and drag the slider. - Max Intensity: The emitter intensity (this is the same value as the one set in the Intensity setting listed above).
- Maximum Intensity: The maximum possible intensity for the light.
- Softness: The softness of the light.
- Volumetric: Whether the light is volumetric (1.0) or not (0.0).
- Scattering Direction: The scattering direction for the light.
- Cast Shadow: Whether the light casts a shadow or not.
- Inner Angle: The inner angle of the emitter.
- Outer Angle: The outer angle of the emitter.
Once you are finished reviewing and/or editing the details listed here, you can then click the Not Selected button to close the emitter information.