Jetway
This sample project has a single Jetway object that can be added to an airport. Jetways are what are used at some airports to connect a parked aircraft to a gate. You can find information about creating Jetway visual assets (models) from the following page:
You can also find more information about the configuration of a jetway by seeing the <IKChain> and <IKConstraint> sections of the [model].xml file.
You can expand the link below to see the Jetway file and folder structure:
|---+ Jetway
    |---+ PackageDefinitions
    |   |---- mycompany-jetways.xml
    |---+ PackageSources
    |   |---+ Data
    |   |   |---+ Jetway_Link
    |   |       |---+ model
    |   |           |---- Jetway_Link.bin
    |   |           |---- Jetway_Link.gltf
    |   |           |---- Jetway_Link.xml
    |   |           |---- Jetway_Link_LOD01.bin
    |   |           |---- Jetway_Link_LOD01.gltf
    |   |           |---- Jetway_Link_LOD02.bin
    |   |           |---- Jetway_Link_LOD02.gltf
    |   |---+ SimObjects
    |       |---+ Landmarks
    |           |---+ MyCompany_Jetway
    |               |---+ model
    |               |   |---- Jetway.bin
    |               |   |---- Jetway.gltf
    |               |   |---- Jetway.xml
    |               |   |---- Jetway_LOD01.bin
    |               |   |---- Jetway_LOD01.gltf
    |               |   |---- Jetway_LOD02.bin
    |               |   |---- Jetway_LOD02.gltf
    |               |   |---- model.cfg
    |               |---+ soundai
    |               |   |---- soundai.xml
    |               |---+ texture
    |                   |---- Glass_Boarding_Ramp_Albedo.png
    |                   |---- Glass_Boarding_Ramp_COMP.png
    |                   |---- Glass_Boarding_Ramp_Normal.png
    |                   |---- Metal_Boarding_Ramp_Albedo.png
    |                   |---- Metal_Boarding_Ramp_COMP.png
    |                   |---- Metal_Boarding_Ramp_Normal.png
    |                   |---- Metal_Boarding_Ramp2_Albedo.png
    |                   |---- Metal_Boarding_Ramp2_COMP.png
    |                   |---- Metal_Boarding_Ramp2_Normal.png
    |---+ Sources
    |   |---+ Art
    |       |---+ Max
    |           |---- Jetway.max
    |---- JetwayProject.xml
Loading And Building The Project
In order to load and build the project in Microsoft Flight Simulator 2020, you must have previously enabled Developer Mode (see here for more information). A jetway cannot exist on it's own and is linked to other simulation objects, specifically an Airport and a Parking Spot, so you'll need to do a few extra steps before you can see it in the simulation.
So, once dev mode is enabled, you should start a flight so that you are taken into the simulation, then follow these steps:
- Use the Open project... command from the File menu.

- Select the file
JetwayProject.xmlfrom theJetwaysample project.

- The Project Editor should open automatically and show you the project
mycompany-jetway(if the Project Editor doesn't open, then you can open it from the Developer Mode Tools menu).
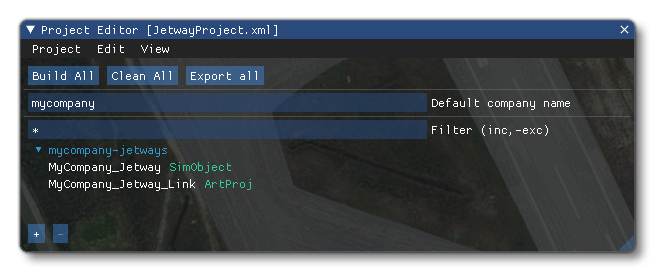
- At this point you want to click the Build All button to build the package so it can be used in the next steps.
- Once you've built the package, you need to open the Simple Airport project. The steps to do that are outlined here.
- With the Simple Airport loaded and opened in the Scenery Editor, you need to open the Objects window (from the Scenery Editor View menu).
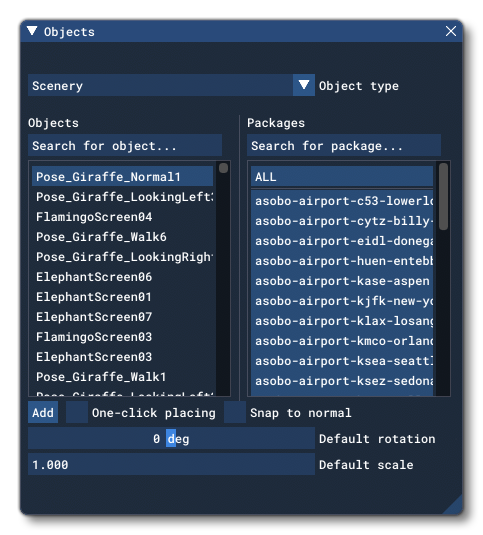
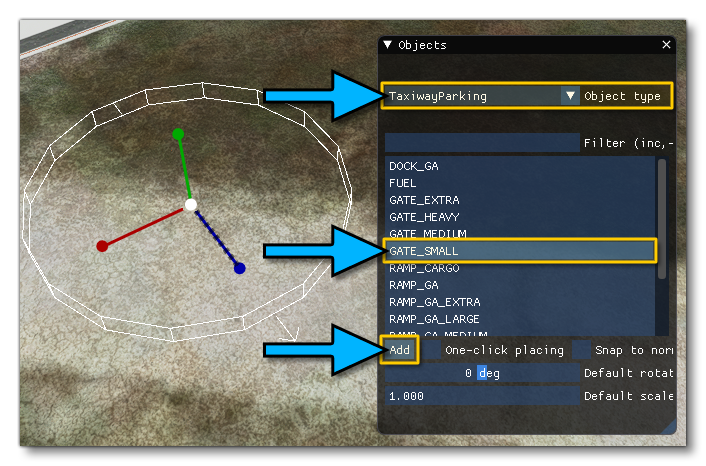
- Now, if you try to add the jetway at this point you'll get an error, as it requires a parking spot before it is permitted. So, in the Objects window, from the Object Type drop down list, select the option TaxiwayParking , then select one of the gate types, then click the Add button (jetways can only be associated with Gate parking). This will add a taxiway parking spot to the airport (the actual location isn't important for this example).
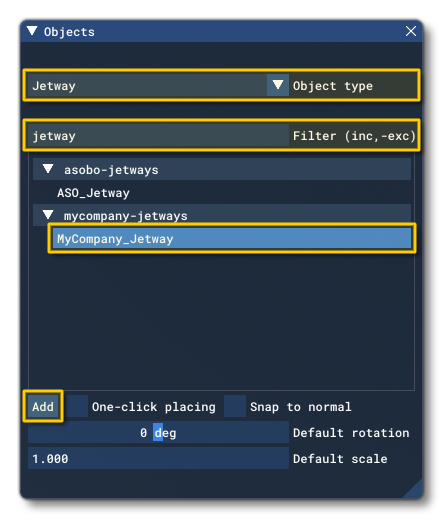
- Now, you can change the Object Type to Jetway in the Objects window, and if you scroll down the list you should see "MyCompany-Jetway", which is the jetway sample package you built at the start. As before, click the Add button to add it to the airport.
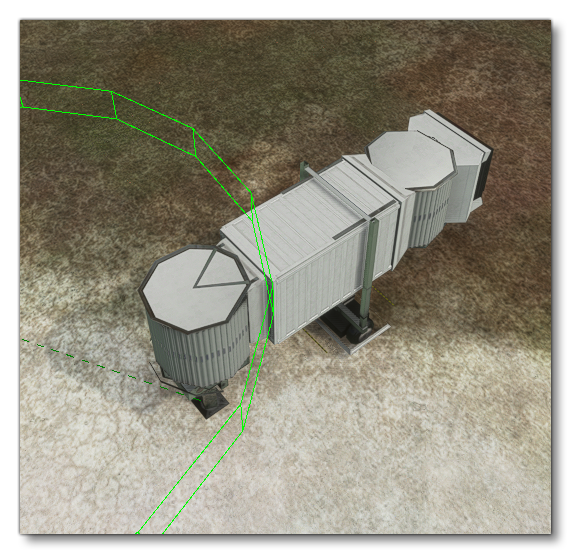
- You should now see the Jetway has been added to the scene: