ANIMATING AILERONS, FLAPS AND SPOILERS
This page goes through the steps needed to animate the ailerons, flaps and spoilers on an aircraft. Note that the bulk of the page explains in detail the steps for ailerons, since the steps for setting up flaps and spoilers are almost identical. However, extra details for them are supplied at the bottom of the page.
Step 1
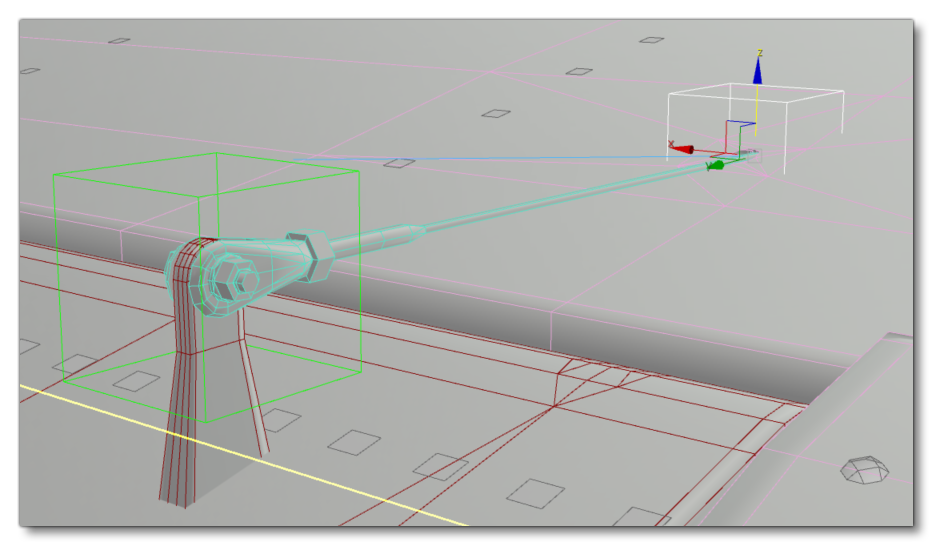
To animate an aileron, you need to first create a point, then rename it to something appropriate, generally using the format [side]Aileron, for example LeftAileron. Place the point on the rotation axis of the aileron. The pivot must be align with the rotation axis.
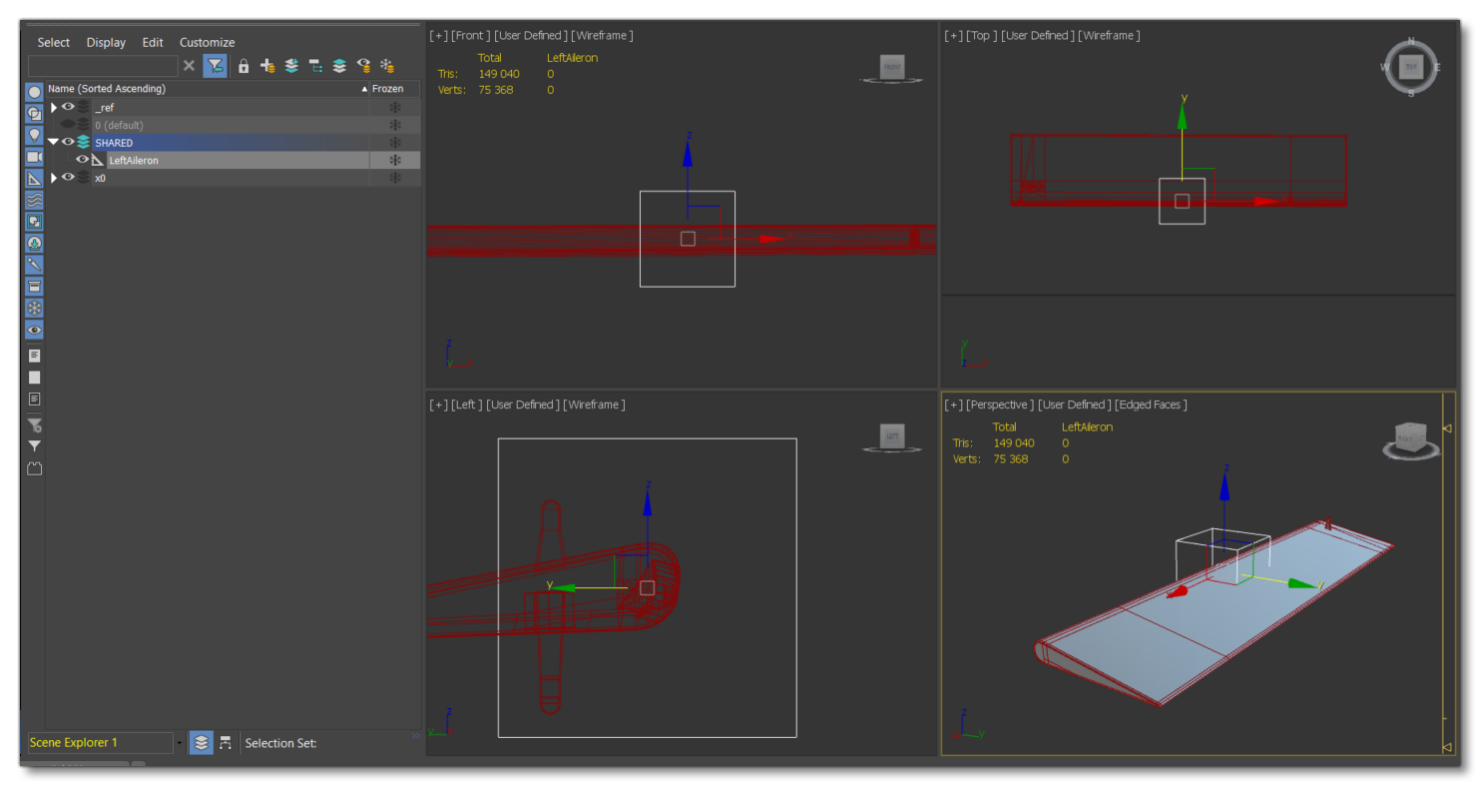
Now you can link the aileron mesh to the bone you've just added with the link tool![]() .
.
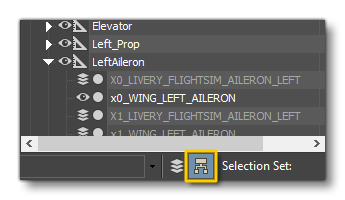
NOTE: You can check in the hierarchy explorer if the object is correctly linked to the helper:
Step 2
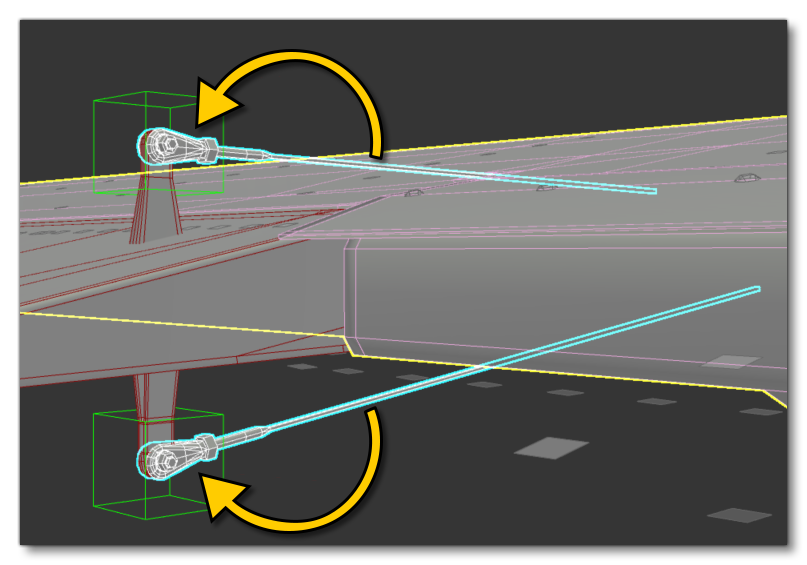
The actual animation of an aileron is done with just 4 frames (0 to 3), and it's important to ensure that the left and right ailerons have complimentary animations: when left aileron is up, the right aileron is down. In all cases, the left aileron will be the first one to go down on frame 1, and the right aileron will go up. You should also ensure that you have enabled auto-key.
This table shows the frames and positions relative to each other:
| Frame | Left Aileron | Right Aileron |
|---|---|---|
| 0 | Neutral position | |
| 1 | UP (20°-25° angle) |
DOWN (20°-25° angle) |
| 2 | Neutral position | |
| 3 | DOWN (20°-25° angle) |
UP (20°-25° angle) |
Step 3
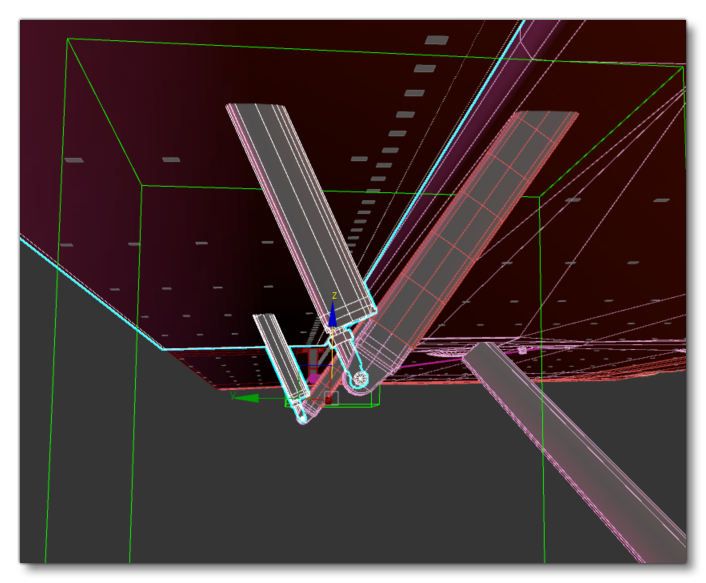
Often an aileron has a visible mechanism that can make animation a bit more complicated. For example, in this image you can see an additional mechanism that isn't being animated using the current helper:
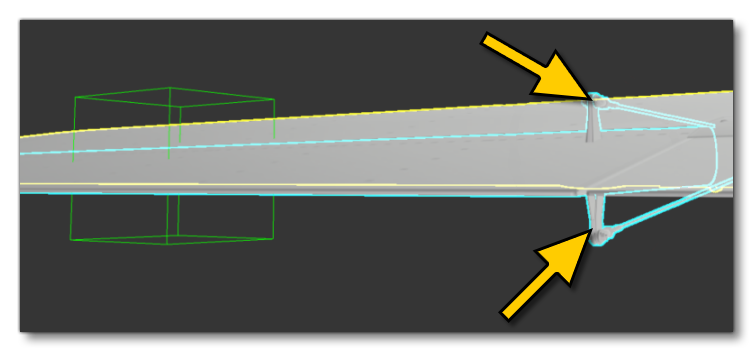
To animate these additional mechanisms, you will need to create more helpers, which we'll add into the PLOT group. In the case of our example we'll need two helpers which we'll name LeftAileron_Aux1 and LeftAileron_Aux2. These would then be linked with the LeftAileron helper (where LeftAileron is the parent).
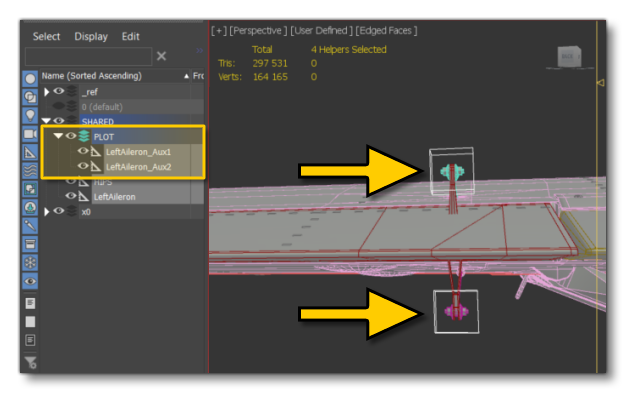
Now, if you play the animation, the PLOTS helpers should follow the LeftAileron movement.
Step 4
The last step for our example aileron is to constrain the additional mechanism so that it stays on the wing. For that we'll be creating two more PLOTS helpers and then placing them between the "cable" and the wing. We'll keep following the conventions and call these LeftAileron_Aux3 and LeftAileron_Aux4. These need to be linked to the HIPS helper, as we don't want them to move with the aileron, we want a constraint to do that job.
To constraint the cable to stay aligned with the hole in the wing, you'd use a LookAt Constraint between the previously created PLOTS: the upper plots together, and the lower plots together.
Select the PLOTS which need to stay aligned (LeftAileron_Aux1 and LeftAileron_Aux2) and then go to the Animation window, and in the Constraints section select the LookAt Constraint so you get something like this:
You can now link additional objects for the mechanism to the PLOTS controlled by the helper, if required. At the end you need to have this hierarchy:

Flaps and Spoilers
Like the aileron, animating a flap or spoiler requires you to create a point (generally using the format [side]Flaps, for example LeftFlaps), and then place it on the rotation axis of the flap. Note that the pivot must be aligned with the rotational axis:
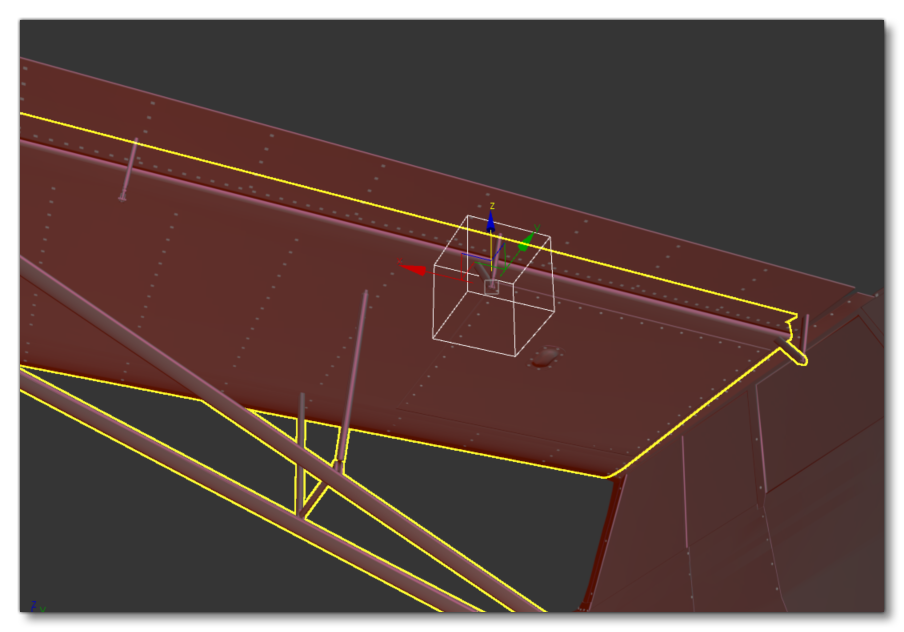
It's really important to define a good rotational axis for the elements, and to place the helper correctly on it. Now link the mesh to the bone LeftFlap with the link tool![]() .
.
If there are additional mechanisms, these should be animated the same as you did for the mechanisms on the aileron.
Flaps / Spoilers Frames
The animation of flaps and spoilers is initially done using 3 frames, although this will finally depend on the number of flaps states for the aircraft.
| Frame | Position |
|---|---|
| 0 | Neutral Position |
| 1 | UP position (retracted) |
| 2 | Intermediate position (half extended) |
| 3 | DOWN position (full extended) |
As long as the first frame (frame 1) corresponds with the UP position and the last frame corresponds with the DOWN position, then your flaps/spoilers will animate correctly. Just ensure that the intermediate positions correctly match the middle states.
NOTE: If you set a key frame at both extremes (UP and DOWN), then the intermediate positions will be done automatically.