ICE
This page outlines the procedure for creating an ice mesh for the aircraft airframe.
NOTE: for window icing, please see the Ice section of the Windshield And Windows page.
When creating this effect, try to think about it logically: the more a part of the airframe is exposed to the wind when the plane is flying, then the more it will be affected by frost and ice. There will also be some parts which react differently based aspect of the aircraft itself, for example around the exhaust it can be hotter so there would be less frost.
IMPORTANT: Please make sure that the ICING EFFECT option in the ASSISTANCE OPTIONS > FAILURE AND DAMAGE panel is set to ON or VISUAL ONLY when testing your ice effect. Setting this to OFF will prevent the effect from being displayed and the Icing slider in DevMode > Options from working correctly.
Creating The Mesh
All ice and frost effects will be applied using a custom mesh that should be created by duplicating the geometry meshes of the aircraft and then removing the parts that won't be getting any ice cover, and simplifying the parts that will.
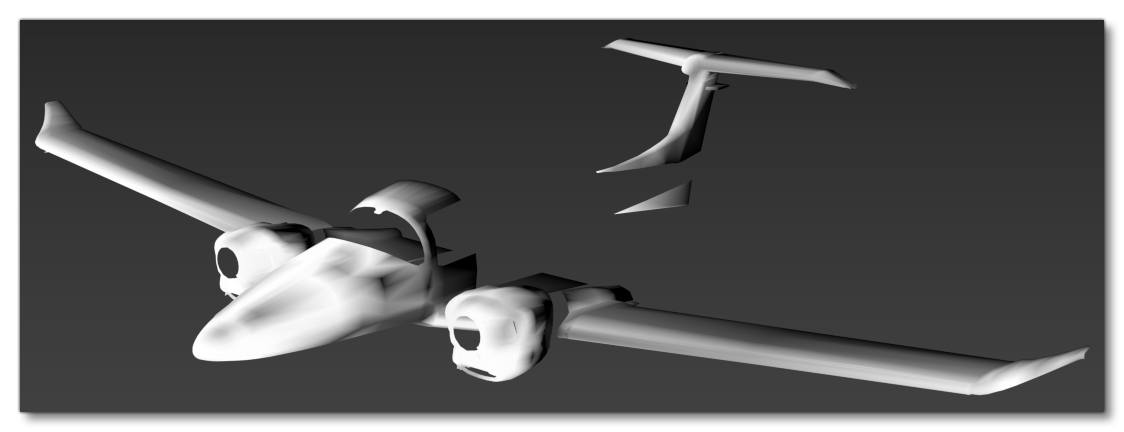
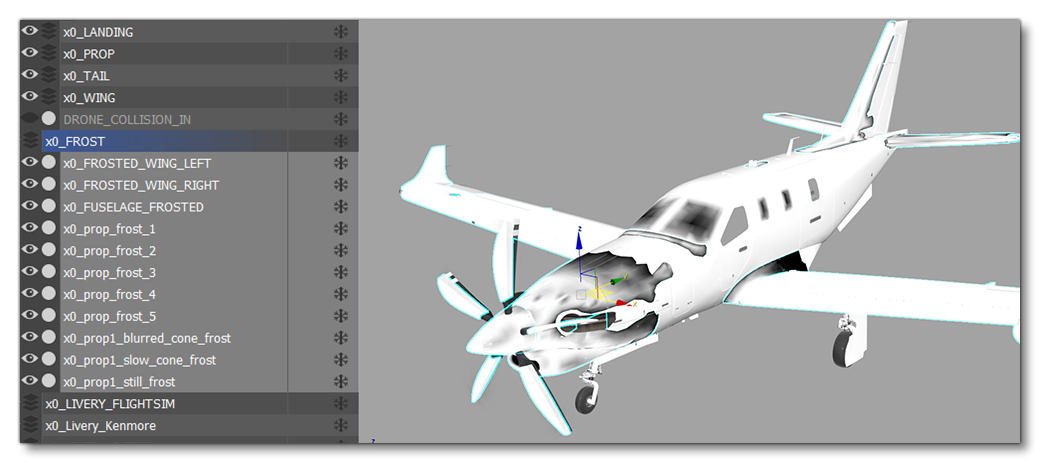
You can use a push modifier (eg: with a value of 0.2) on the ice meshes to avoid overlap issues. This can be put in a separated layer which should be called x0_FROST. In fact, you can probably use the same mesh for the for the first 3 LODs since it's so simple, and then further simplify it for the remaining LODs (in which case you should name it to reflect the LODs it'll be used on, for example: x0_x1_x2_FROST).
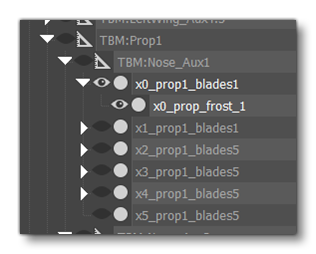
Note too that any moving parts will need to remain with the same hierarchy as the main meshes:
The Ice Material
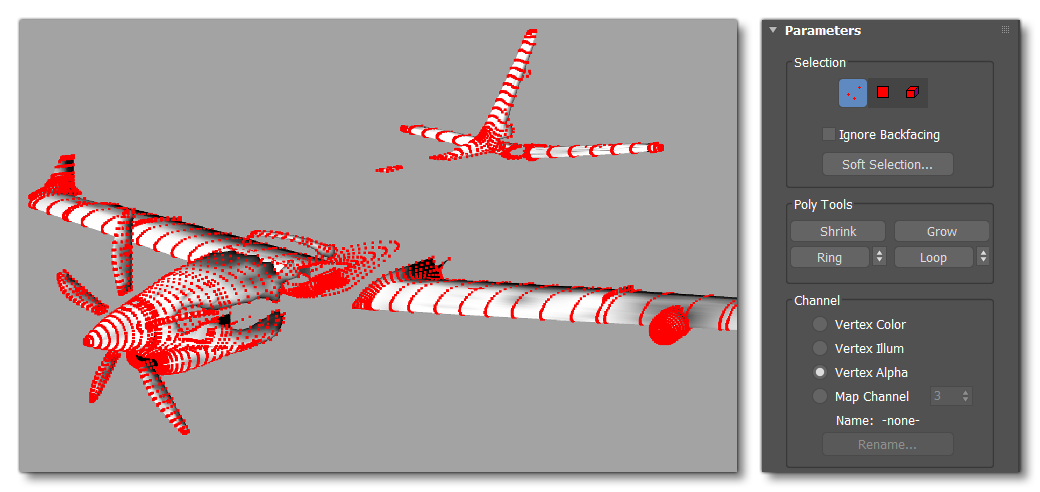
For the actual ice texture and material, you'd use the vertex paint modifier to paint on the vertex alpha, where more icing will appear on the "white" areas and less will appear on the "black" areas:
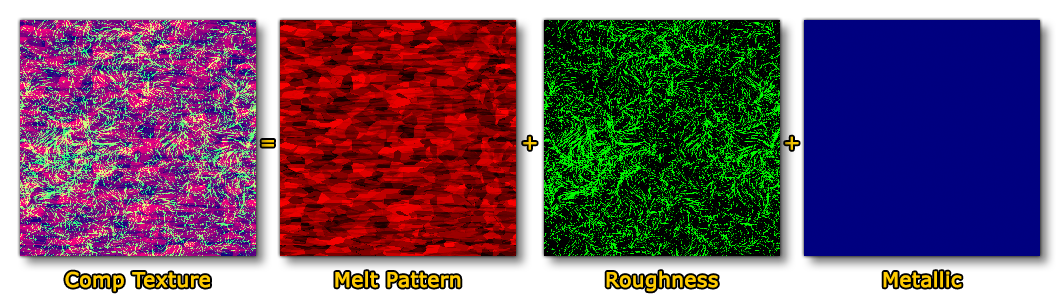
Once you've painted the vertex alpha, we can setup the material. For ice it needs to be the GeoDecalFrosted material and uses the Melt pattern(R) Roughness(G) Metallic(B) and Detail Normal textures.
To create the material itself you pay attention to the following parameters:
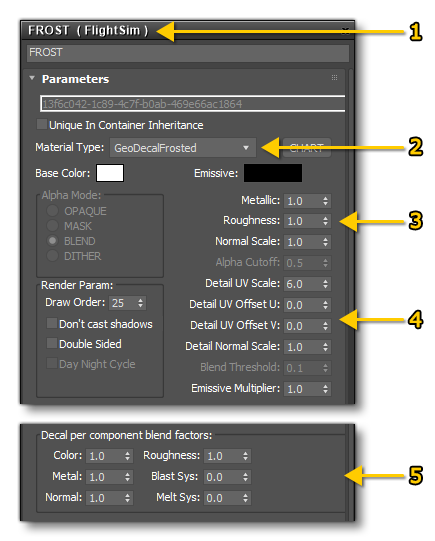
- Create a new FlightSim material
- Call it "FROST" and set the Material Type to GeoDecalFrosted as well
- Set the Metallic / Roughness / Normal values as required.
- Tweak the UV scale and offset values to suit the model UVs.
- Set the Blast Sys and/or Melt Sys values. Note that these ones will work only if you have some anti ice system in the aircraft. Using these also means that if you want ice to melt on some parts but not on the other ones you should have 2 distinct materials, one with blast/melt set between 0 and 1 and the second material with the blast/melt set to 0.
This can be tested in the simulation by using the Visual Icing Option in DevMode:
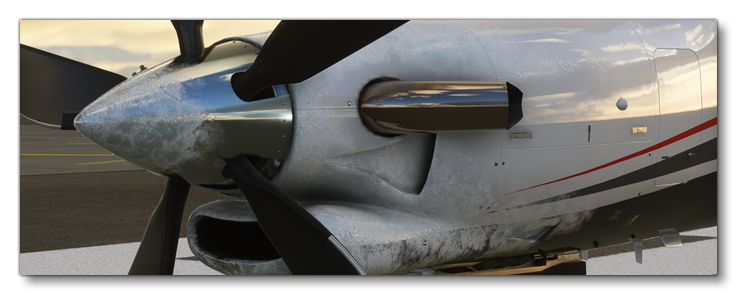
NOTE: The DevMode icing option is there to debug the visual effects but can't be used to debug aircraft de-icing systems as the icing conditions are not forced by this setting. The easiest way to test de-icing systems is to switch to the "Snow" weather-preset and use Slew Mode to place the aircraft in a cloud.
Notes On Vertex Alpha
When working in 3Ds max to generate ice meshes (or anything else that requires the setting of the vertex alpha), please be aware that there is currently a bug in the workflow. When you set the alpha value here:
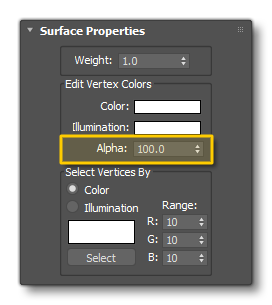 It will not be applied on export without first having edited some other property for the vertices. So, to avoid this issue, the recommended procedure would be to
- set the vertex alpha for all vertices that require it to be changed
- open the color picker and change the color of one vertex
- close the color picker to apply the color
- open the color picker again and reset the color back to what it was originally
- close the color picker to re-apply the color
Just doing this once will force 3Ds Max to correctly store the alpha for all vertices.