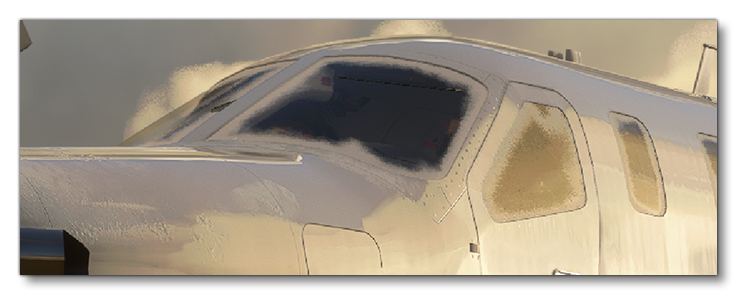
WINDSHIELD AND WINDOWS
This page talks about how to texture all the glass elements (windshields and windows) of the aircraft being modelled. For these textures you will need to use the Windshield material. To set up this material you need to do the following:
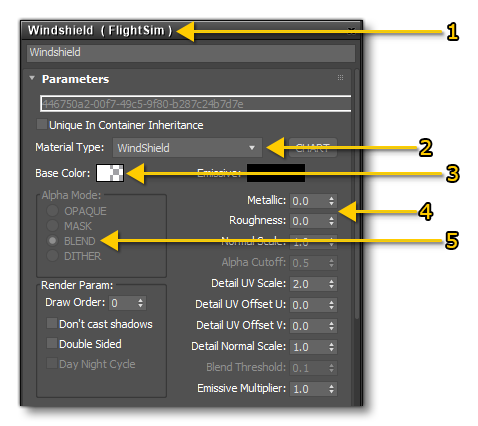
- Create a new FlightSim material
- Call it "WINDSHIELD" and set the Material Type to Windshield as well
- Set the alpha of the Base Colour to 0.01
- Set the Roughness to 0.0 and the Metalness to 0.0
- Set the Alpha Mode to BLEND
The different textures that you will need are explained in each of the sections below.
Rain Effects
To ensure that rain and moisture effects are correctly rendered on any windshield, a UV2 channel will needs to be created for it. This channel will be dedicated to the rain effect, and controls the direction of the rain drops and how they will move as the aircraft flies. The image below shows an example of this UV2 channel mapping, with arrows showing the direction of the rain, and how this will be interpreted when applied in the simulation:
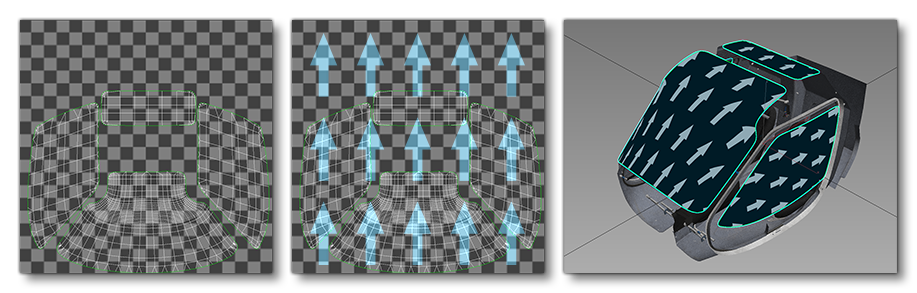
When setting up the Windshield material, you can adjust the UV scales to ensure that everything matches:

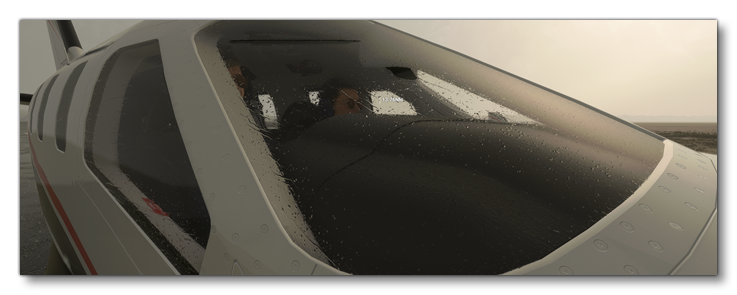
You can actually test this in the simulation by using the Windshield Rain Option in DevMode:
Dirt, Scratches and Fingerprints
To make things more realistic you can have dirt, scratches and even fingerprints on the windows of your aircraft.
NOTE: this section is specific to glass elements, but if you want information on adding dirt to the airframe, please see the Dirt And Grime section on the Surface Detail page.
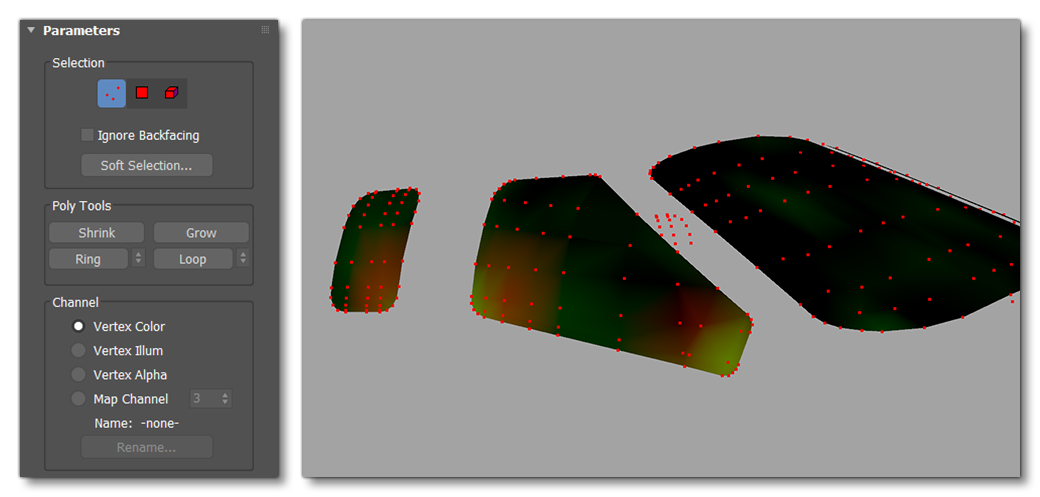
This is done using the combination of a comp material texture and painted vertex colours (colours only, alpha will be used for Ice). To start with you'd use the vertex paint modifier to paint on the vertex colours, where:
- Red = Scratches
- Green = Dirt
- Blue = Fingerprints
Then we would setup the Windshield material to use the Details Scratch(R), Icing Mask(G), Fingerprints(B) texture where each channel corresponds to the same things as the vertex colours listed above:
NOTE: The green channel is misnamed as "Icing" in the material, but it is actually "Dirt".
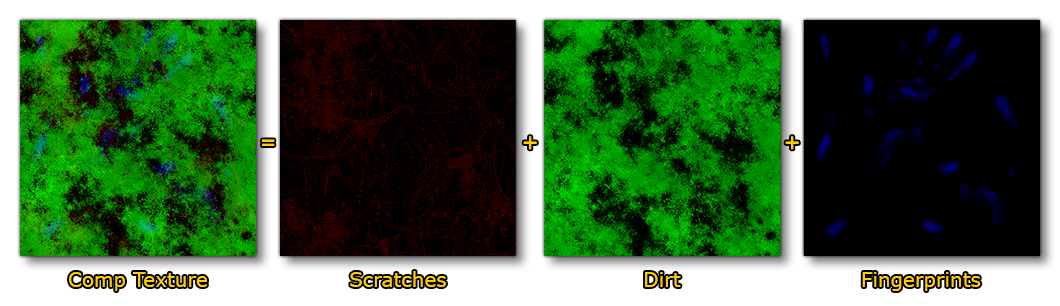
Note that you can adjust the UV scales to ensure that everything looks just right.
Ice
Aircraft also have the possibility of icing up and this is something that you need to consider when creating your aircraft model.
NOTE: this section is specific to glass elements, but if you want information on adding ice to the airframe, please see the page on Ice.
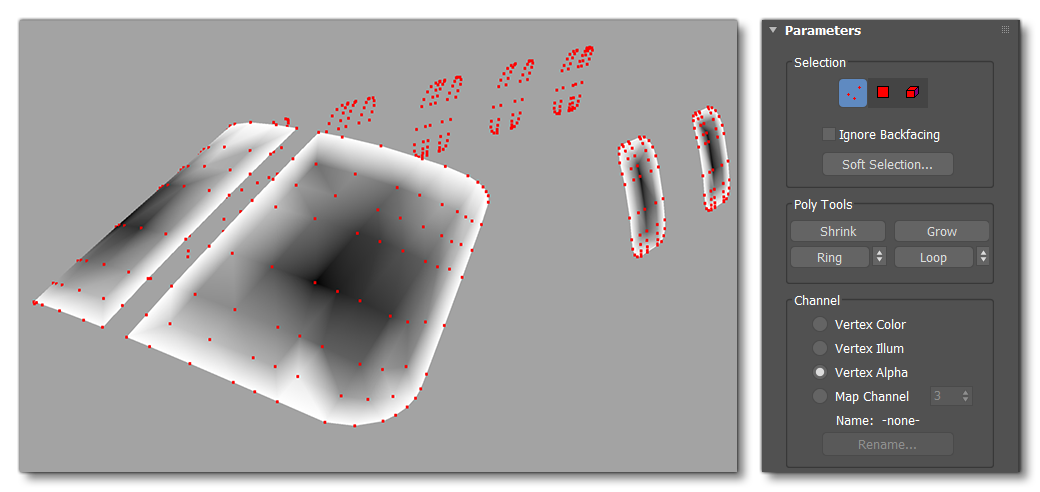
To show ice creeping over the window, we will use a couple of textures and some vertex painting (alpha only, colour will be used for Dirt, Scratches and Fingerprints). To start with you'd use the vertex paint modifier to paint on the vertex alpha, where more icing will appear on the "white" areas and less will appear on the "black" areas:
Then we would setup the Windshield material to use the Secondary Details (A) and Icing Normal (use DetailMap UV) textures:
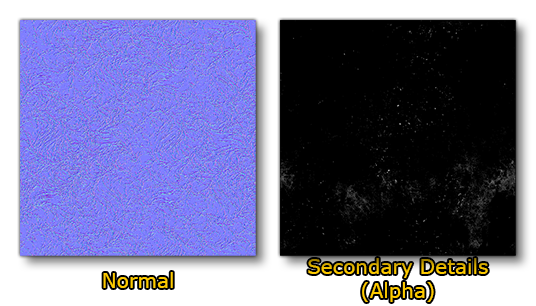
Note that you can adjust the UV scales to ensure that everything looks just right, and you can test the results in the game by using the Visual Icing Option in DevMode.