DECALS AND DETAIL MAPS
The interior decals for the cockpit are comprised of textures mapped to meshes, and so before actually applying anything to the cockpit you should start by creating the texture. Since a LOT of the decals for the cockpit will be text and numbers, it's often a good idea to plan out the text first in an application like Notepad++, as it'll make searching through and editing the text easier later. For example:
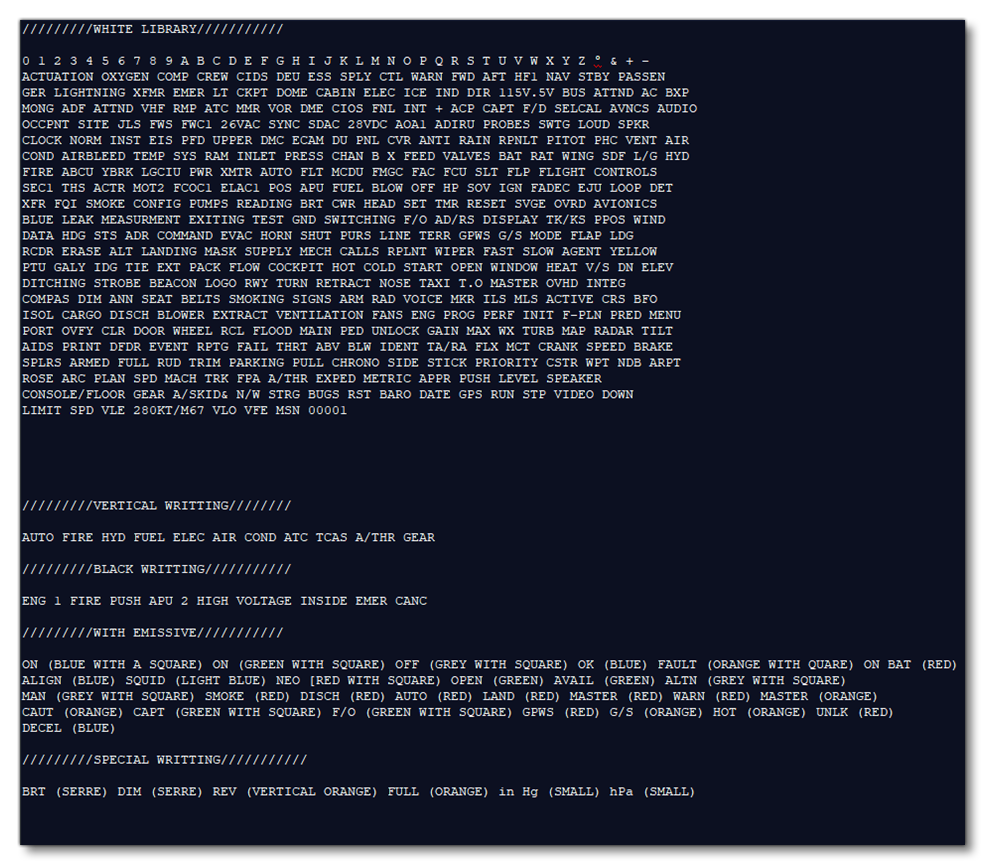
When you have finished sourcing the various text decals into this file, you can create a file in Photoshop - or whatever art application you use - and then simply copy/paste the text into an image. This can then be styled and coloured as required. In general, you want to have all the decals fit on a 1024*1024px texture sheet (which should even be enough for the biggest planes).
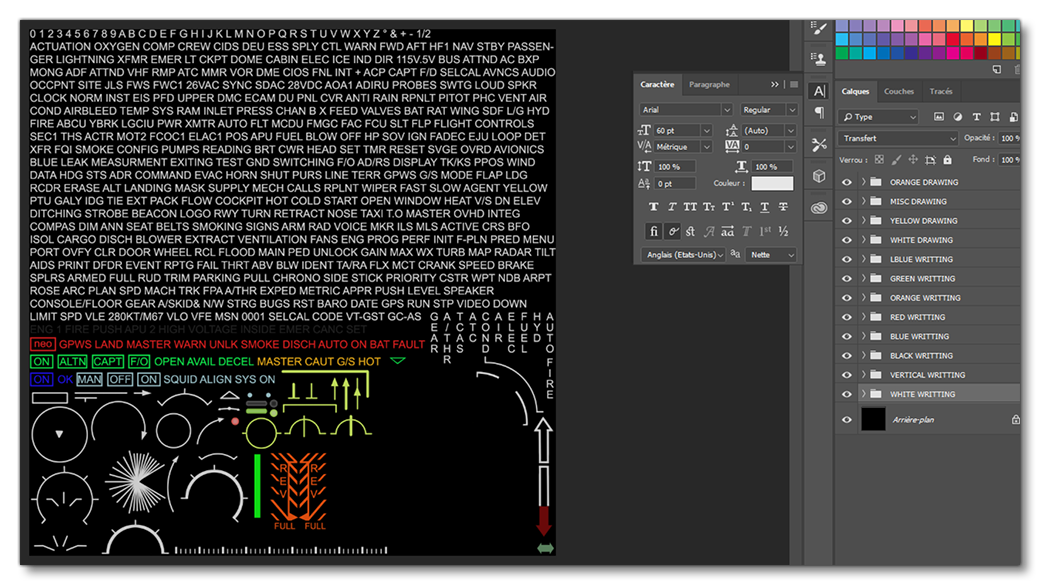
To get the best readability and ensure they are correct in the scene, the decals must follow these requirements:
- All the text decal tectures have to be saved as
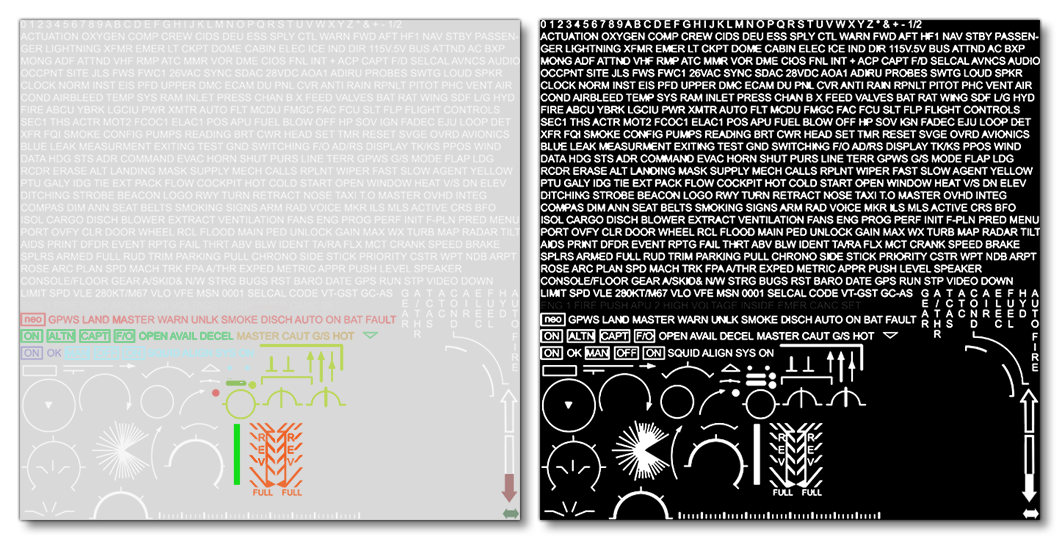
.tifformat files - The decal opacity is controled by the alpha channel
- The RGB channel is totally opaque
In 3DS Max you can then easily cut out all your decals and then apply them:
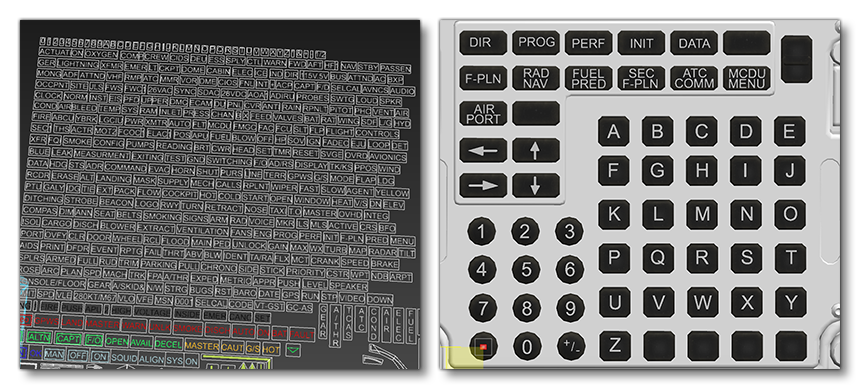
Note that if you have multiple instances of the same word or number on some switches or buttons, then you should share their UV space. However, you have to be sure that the lighting is the same for all of them - for example the same word can have different lighting colors and in that case they would have different UVs.
The Decal Material
These decals will need to use the FlightSim Decal material. To set up this material you need to do the following:
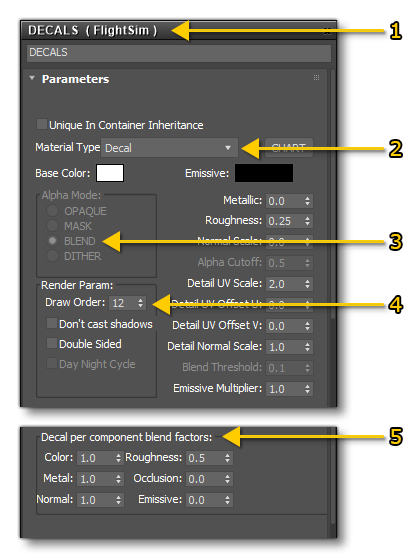
- Create a new FlightSim material
- Call it "DECAL" and set the Material Type to decal as well
- Set the Alpha Mode to BLEND.
- Set the Draw Order appropriately (see below for more details).
- Set the blend factors to achieve the look you require (see below for more details)
The only texture that is needed for this material is the albedo (Base Color) texture, however you can also supply Occlusion(R) Roughness(G) Metallic(B) (to provide texture) and Normal textures if required.
It is important to note that the Draw Order material parameter can be used to sort the rendering order, which is useful for cases where the mesh center doesn't provide the correct order. The value strictly specifies the order in which the decals are rendered, where a higher value will be drawn above and a lower value will be drawn below. This can be used to avoid rendering artifacts such as flickering when multiple transparent or decal material types are on top of each other in the rendered output.
Finally, you can also add an emissive texture to your decal materials if required. This is discussed in more detail on the following page:
Detail Maps
Apart from decals, you can also use detail maps to add additional texture and detail to the elements within the cockpit scene. These would be applied to the standard material using the Detail Colour (RGB) Alpha (A), the Detail Occlusion(R) Roughness(G) Metallic(B) and the Detail Normal textures.
If you supply any (or all) of these textures, then you need to make changes to the vertex alpha colour to activate them, where:
- 0 alpha = no detail map
- 100 alpha = fully active detail map
Values in-between will mix the detail map more or less.
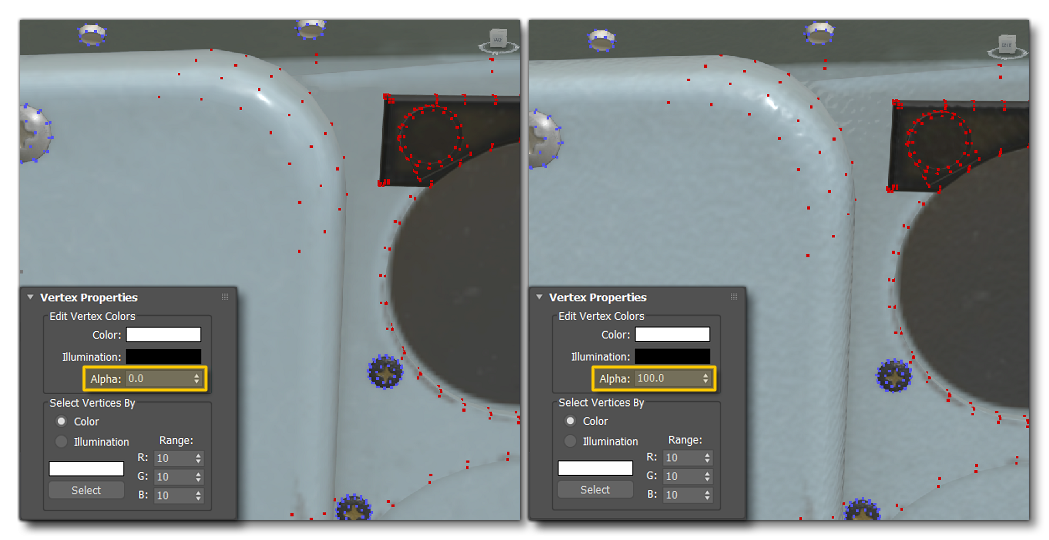
Note that you can also adjust all the UV parameters for the detail maps - like the scale or the offset - if required and 3DS Max supplies a rough visualisation to help during this setup.