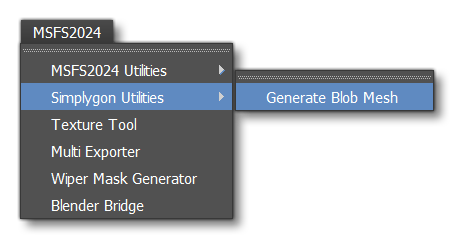
SIMPLYGON UTILITIES

The Simplygon Utilities menu contains tools useful for those developers using the Simplygon SDK to create their scenery assets. The contents of this menu are explained below, and you can find more information on Simplygon on the following page:
Generate Blob Mesh

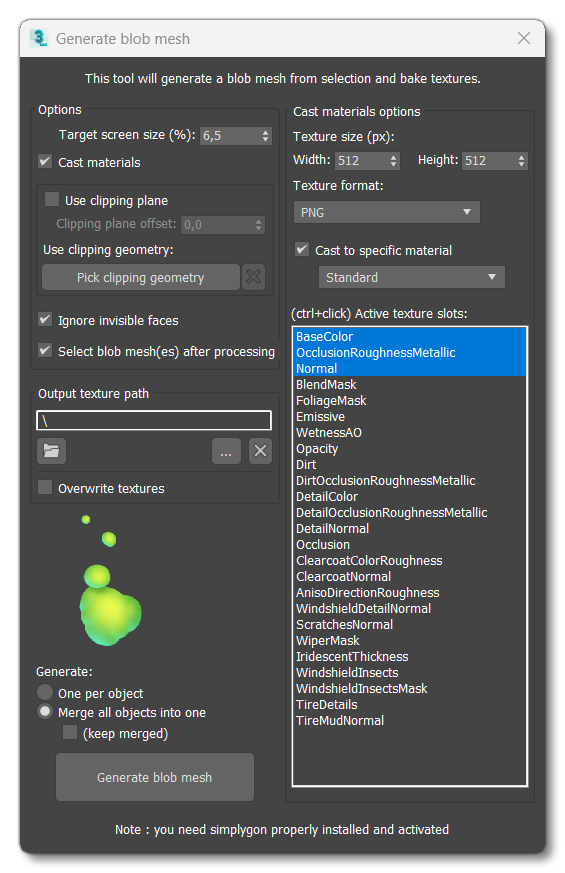
This tool is for creating a blob mesh based on selected geometry as well as properly handle MSFS 2024 materials to generate new textures baked onto the new blob mesh. Before using this tool, please ensure that you have the Simplgon SDK installed and correctly setup.
NOTE: Parameters in this window are saved per scene, except for the Output texture path. If a new scene is loaded while the tool is open, however, the UI will not be updated with the parameters saved in loaded scene (if any). To reload scene embedded parameters, close the tool before loading a scene. When the tool is opened again, it will get the parameters saved in the currently loaded scene (if any).
Before opening this tool, you should first select all the geometry that you want to process in 3DS Max. Once selected, you can then open this tool and use the following to setup how the geometry and textures will be processed.
IMPORTANT! Texture paths are modified during processing by this tool. If there are any errors, bugs, etc... during processing, you should prefer reloading the scene again over saving.
Options
-
Target screen size
This sets the desired screen size for the blob mesh, i.e: how big will this blob mesh appear on screen. The default setting is set to 6.5% which is about 70pixels tall on a 1080p screen.
-
Cast materials
Material casting will generate new textures, and is enabled by default. You can disable this option to generate only geometry.
-
Use clipping plane
When checked, geometry will be cut along an imaginary plane placed at the object pivot position.- Clipping plane offset - This can be used to adjust the clipping plane offset on the Z axis.
- Use clipping geometry - This will use a custom mesh to cut the blob geometry. The geometry used must be "watertight" (i.e: have no no holes) within the bounds of the geometry being processed.
-
Ignore invisible faces
Checking this option will simply ignore any invisible face for casting. This can be useful to exclude collision polygons from the casting process.
-
Select blob mesh(es) after processing
When this is checked, the processed blob mesh will become the current selection after the tool is finished.
Output Texture Path
This section is used to set the path to the folder where textures should be output. The buttons available are as follows:
-

Reload the last path used.
-

Open explorer and select output path.
-

Open output path in explorer.
-

Clear output path.
Additionally there is the following checkbox:
-
Overwrite Textures
Checking this means that any textures that already exist in the output folder will be overwritten on export.
Cast Materials Options
-
Texture size
Here you can specify the output texture size for the texture baking, in pixels.
-
Texture format
This section lets you choose between supported output formats. If you aren't sure then just select PNG.
-
Cast to specific material
Use this is you want to cast original material(s) to a specific one. If not set, material casting will use the original material type applied to the object if possible. Note that Standard is usually enough for any LOD seen from a great distance.
-
Active texture slots
Select which textures you wish to bake during processing. Normally, this would be BaseColor, Occlusion/Roughness/Metallic, and Normal, since these are usually enough for any LOD seen from a great distance, however you may even reduce to less if you think that's appropriate.
Generate
In this section you can generate the blob mesh. It has the following two methods available:
-
One per object
This will create one blob mesh per object selected.
-
Merge all objects into one
This will create a new blob mesh combining all selected objects together.- Keep merged - Combined geometry used for casting can be kept in the scene. If you want to experiment with different screen sizes for example, you can then reuse the merged object instead of having to wait for the merge to be performed each time.
Once you have made your choice you can click the Generate Blob Mesh button.