THE INPUT DEVICE EDITOR
The Input Device Editor is used to setup a new device for use with Microsoft Flight Simulator 2024. This editor is primarily designed for use by device manufacturers so they can add support for their devices without having to request that they are integrated into the simulation in an update. However it can also be used by 3rd parties to add support for lesser-known devices, or any device that the manufacturer has not officially created support for. You can find out how to use this editor on the following page:
Overview
The Input Device Editor can be opened directly from the Editors menu, or - and this is the more common method for opening it - it'll be opened from The Project Editor when you create or edit a device package. The editor itself looks like this:

At the top of the window you have the various menu items (explained below), and then underneath that you have the Package information, and the Asset Group being edited (which can be changed using the Select... button if you have multiple devices defined in the same package). The rest of the options shown are as follows:
- File: The path the device XML file. You can change this from the drop down menu
▼, or you can use the✎button to rename it, the🗑button do delete it, or the+button to add a new file.
- Device: This is the device that is being edited, based on the list of devices that are natively supported, and any devices previously defined in the package or other add-ons.
- Product ID: The unique USB ID for the device.
- Composite ID: This is used to identify a device when it is a part of a multi-part device where each part has the same Product ID.
- Device Type: Identifies the type of device based on the input protocols it uses, which can be one of the following:
- Direct Input - A generic stick / device.
- DualSense - A PS5 controller.
- Keyboard - A keyboard.
- Mouse - A mouse.
- XBox Gamepad - An XBox One controller.
- XBox Series Stick - An XBox One compatible joystick.
- XInput - An XInput device.
- XR Controller - Left and right VR/AR controllers.
- Tobii - A Tobii controller.
- Display Name: The name of the controller, as shown to the user in the UI.
- Priority: This sets the priority in the UI for the device profile, expressed as an integer, where a lower value will represent a higher priority in the UI list (ie: lower values push the controller further towards the top of the list).
Merge Icons
Merge icons are those icons that show inputs as icons merged with text in the simulation. Much of this is handled automatically and all you have to do here is link specific inputs form the device being defined with icons which you add. In general, it is expected that you "merge" multiple inputs with a single icon, for example, joystick up / down / left / right can all be linked to single "joystick" icon.
To use this section, icons should first be added into the Icons group, which is done simply by clicking the Import... button. Once clicked you can select one or more icons (authored as *.svg) to add into the editor, and they will all be shown in the Icons group:
![]()
Having added the icons you can then create the merge icons entries by clicking on the Add Merge Icons... button. The interface will change to show you the following options:

- Inputs: This section is where you define one or more device inputs to associate with an icon. Clicking the
+button will add a new input:
 Here you can click on the
  button then move the device or press a button to have the editor automatically pick up the input and add it to the input field. Alternatively, you can click the
 ▼button to open a list of available inputs and then select one. If you wish to remove an input, simply click theXbutton. If you wish to associate an icon with multiple inputs, or combined inputs, then you can use the+button to add more inputs to the MergeIcon setup.
- Icon: Clicking the
...button will open the list of added icons and you can select the one you wish to use for the MergeIcon from the sub-window that opens. This window also has anImport...button, and you can import an Icon for use from here.
- Translation: Here you can give the text to be used for the MergeIcon. This is a short string - eg: "Left Shoulder Button" - that will be used as a fallback should there be a problem with the icon, or when very specific UI elements require it, or as part of the simulation narration processes. You can supply a
TT:string to link the text to a translation file (see LOC Files (Localization) for more information), or, if you have no localisation, the text should be supplied be in English.
You can repeat this process until you have applied MergeIcon settings for all possible inputs. It is recommended that you have a merge icon for every input on the controller, although it is assumed that you will assign the same icon to multiple inputs (for example, a single "Left Stick" icon can be assigned to the left stick +X, -X, +Y and -Y inputs).
Button Translations
This section initially only has a button: Add Button Translation. Clicking this will add two input fields:
- Button - This will give you a list of all buttons that do not yet have a translation for selection.
- Translation - Here you can supply a
TT:string to describe the button using localised text (see LOC Files (Localization) for more information), or, if you have no localisation, the description should be supplied be in English.

Note that this section is meant for you to add in a description of every input on the device. For example, if the device has a joystick, you should have 4 button descriptions for up / down / left / right, or if there is a slider, there should be two button translations for "slider up" and "slider down", etc... This string will be used when specific UI elements require it, or as part of the simulation narration processes.
Menus
The top of the Input Device Editor has a number of menu options, explained below.
File

The following File options exist for the Device Editor:
-
Save
This option is used to save the device configuration XML file to the package sources.
View

The following view options exist for the Device Editor:
-
Device Keys
Selecting this option will open the Device Keys window:
 This window shows each of the different "base" controller categories as tabs, and each tab shows the input strings (Key Names) that these devices transmit, along with the numeric value associated with the string. All controllers that can be used by the simulation will fall into one of these categories and use the strings associated with that category. As such, this window is for reference only, primarily for when you need to set up a device without actually having it available or plugged into the machine.
-
Undo History
This option will bring up the Undo History window:
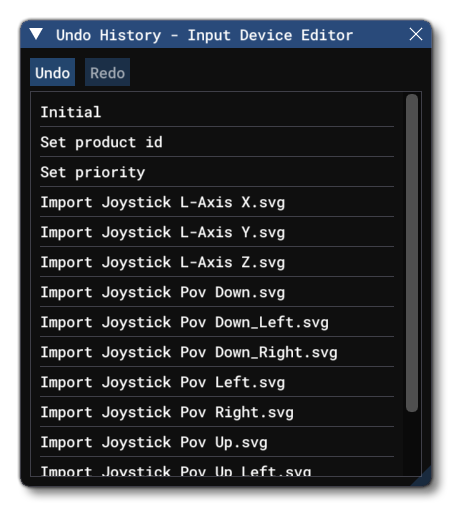 This window shows the full list of actions that have been performed since the main Device window has been opened. You can click on any one of them to go back or forward between the different undo/redo states.
Options

The following additional options exist for the controller setup:
-
Split Axis
This option will tell the simulation to differentiate between the +/- inputs on the X / Y / or Z axis. For example, when not checked, the simulation will interpret a joystick stick left and right as simply "Joystick LAXIS X" input. However, when checked, this will now be interpreted as "Joystick LAXIS X-" for moving the jotsick left, and "Joystick LAXIS X+" for moving the joystick right.
-
Split POV / Hatswitch
This option will tell the simulation to differentiate the movement of POV hat-switches. For example, when not checked, the simulation will interpret all POV movement (left, up, etc...) as simply "Joystick POV" input. However, when checked, this will now be split based on direction such that left is now "Joystick POV Left", up is "Joystick POV Up", etc...