TEXTURE TOOL
IMPORTANT! This part of the documentation has not been fully updated for Microsoft Flight Simulator 2024 and is currently a work in progress.
The Texture Tool is used to generate the TextureLib XML that is required for each of the textures used by your models. This XML file is used to set the FLAGS and ansiotropic settings that will be used by the simulation to optimise the textures used and replaces the old CFG file used by previous iterations of Microsoft Flight Simulator 2024.
NOTE: You can find reference information on the old CFG file format here: Output Formats And FLAGS File
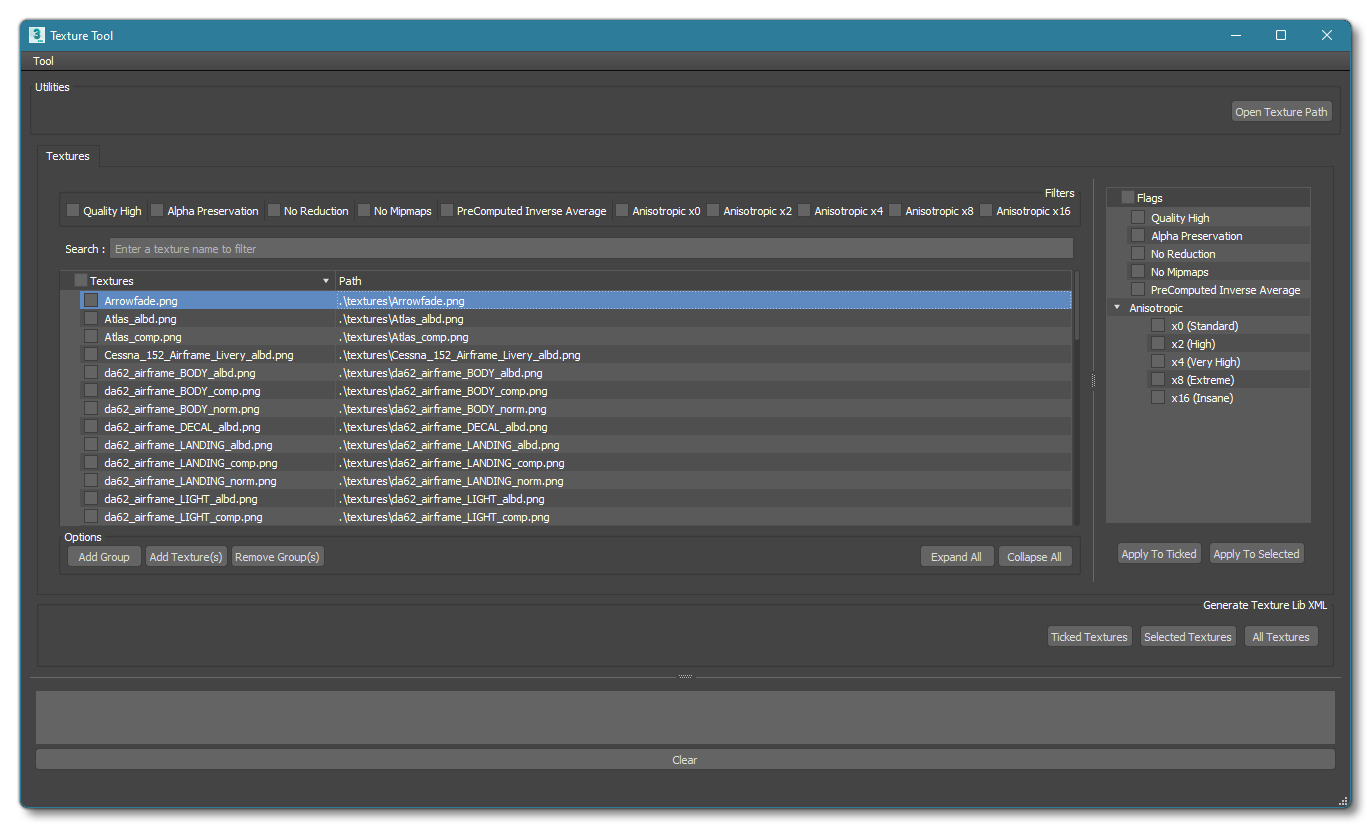
The Texture Tool can be opened from the main The 3DS Max Plugin menu, or it can be opened from the Multi-Exporter. On opening the tool you will be presented with the following window:

To use this tool simply select one or more textures using the checkboxes on the left of them or by clicking on them to highlight them (you can select multiple using click plus CTRL and/or Shift), and then select one or more of the FLAGS and an Ansiotropic value. The table below shows the way the different FLAGS will affect the texture and the simulation:
| Flag | Compiler behavior | Sim behavior | Rendering side-effects |
|---|---|---|---|
| Quality High | Uses a higher compression quality, if applicable. Some texture usages already compile to the highest available quality (such as normal map textures). | N/A | Increased memory usage, slower rendering, less compression artifacts. |
| Alpha Preservation | Computes mipmaps in a way such that the ratio of transparent/opaque pixels is maintained. This is important for textures that act as alpha masks, to prevent averaging the opacity between neighbouring pixels. | N/A | Sharper alpha masks. |
| No Reduction | N/A | Disables unloading MIP levels based on quality settings. | Increased memory usage and higher quality on lower graphics settings. |
| No MipMaps | N/A | Disables the use of mip-maps. | Increased memory usage and higher quality on lower graphics settings, but requires extra processing. |
| Precompute Inverse Average | Computes the inverse average of the texture, per mipmap, and stores it with the texture. | Allows the simulation to read the inverse average color per MIP. Used for setting the ground texture colour of certain elements (for example, the aprons in an airport). | N/A |
Having set the FLAGS and Ansiotropic values, you can then click on the Apply To Ticked or Apply To Selected buttons to apply them to the textures.
NOTE: If you have selected multiple textures and the FGLAS/Ansiotropic section is greyed out, it's because within the selected files, some of them have FLAGS/Ansiotropic settings already set which conflict with each other.
Having applied the FLAGS/Ansiotropic settings to all your textures, you can then choose to export the XML files. This is done by using one of the buttons shown in the Generate TextureLib XML section:

Here you can export either the ticked textures, selected textures, or all textures by clicking the appropriate button. The tool will then create the required XML files and output the progress - along with any issues - in the Log Window at the bottom. If you need to clear the Log Window, you can click the Clear button underneath.
IMPORTANT! The Multi-Exporter has an option to "Generate TextureLib XML". This is provided only for cases where you have an issue using the Texture Tool, and should not be used unless absolutely necessary. You should always use the Texture Tool to generate the required XML files.
The XML files that this tool creates are not meant to be edited by hand after creation, and should always be updated using this tool. However, for reference, you can find an outline of its contents on the following page:
Texture Groups
To help you organise your textures easier, it is possible to create groups and then apply the FLAGS/Ansiotropic settings to the group as a whole. Groups and textures are managed from the Options section:

These buttons permit you to add and remove groups, as well as add specific textures using the file explorer, if required. You can only add a texture if it does not exist in the scene but it is referenced in the scene using the same name as the one being added.
Note that if you wish to use groups you have two options for adding textures to them. Either:
- Select/check all the textures you want to add to the group then click the Add Group button. The group will be created and the selected textures moved into it.
Or:
- Create the group, then select each of the textures you want to add to it. Once you have them selected you can simply click on one of the selected textures, then drag and the drop them onto the group. The selected textures will then be moved to the group.
Filters
At the top of the editor there is a series of filter options available to you:

This can be used to filter the contents of this list based on the FLAGS and Ansiotropic settings. You can select multiple options to find those items that have multiple FLAGS. You can also add text into the Search field and filter the list based on that. Text does not have to be an exact match, for example, typing "_comp" will show all textures that have that in their name.
Tool Menu

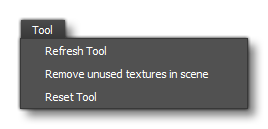
This menu has the following options:
-
Refresh Tool
This option will simply force the tool - and everything it shows - to be refreshed.
-
Remove Unused Textures In Scene
If you have deleted textures from the scene, or you still have a reference to a texture that does not exist, you can use this option to delete it from the texture view in the tool.
-
Reset Tool
This option will delete every setting you have set (FLAGS, groups, added textures, etc...) from the scene. Be careful when you use this option, as it cannot be undone and may cause you to lose valuable work if selected by mistake.