SETTING UP FOR HTML/JS/CSS INSTRUMENTS
In this short tutorial we'll quickly go over the basics required from you to create a new glasscockpit package that can be used in a game. We'll be showing how to do this in two distinct ways:
- By replacing an already existing glasscockpit used by default in some aircraft
- By creating a custom glasscockpit gauge for your own aircraft package
Both will require many of the same steps and procedures and we'll outline them all in the guide below, which covers:
- Creating a glasscockpit package.
- Creating the required HTML, JS and CSS files.
- Setting up the architecture for your own aircraft
- Setting up the architecture for replacing an existing glasscockpit
- Revising some important JavaScript from the SDK (BaseInstrument and other useful functions)
- Using the Coherent Debugger for debugging
Before continuing it is worth understanding the basics behind what we will be doing: essentially, glasscockpits are rendered by an HTML file which is the entry-point for the simulation. This HTML file itself is referenced inside the panel.cfg of the target aircraft so Microsoft Flight Simulator knows where to look for it. The contents of the HTML will depend on the glasscockpit being created, but it will reference some JavaScript - which is required to control the behaviour and functionality of the display - and it will reference some CSS - which is used to style the display.
The JavaScript, HTML, and CSS, are usually supplied as files that are part of an independent glasscockpit package, and within the aircraft package that is going to use the instrument, you would reference it in the panel.cfg. You may also include an optional panel.xml file which is used to trigger certain things automatically (like vocal alerts, text warnings, etc...), as well as customise certain features of the instrument - on an aircraft-by-aircraft basis - permitting you to modify a single gauge shared by multiple different aicraft.
However, before we get to any of the above, we need to quickly setup and create a project. The process outlined below will be used for both the examples we are going to create.
Project Setup
The first thing you'll need to do is create a new project which we'll use to contain the glasscockpit package. This is done by going to the [DevMode] menu and selecting New Project. This will open the project wizard where you should give the basic details:
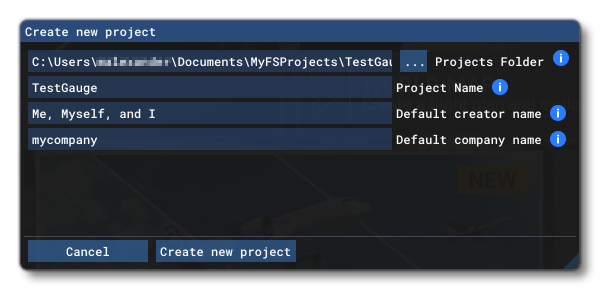
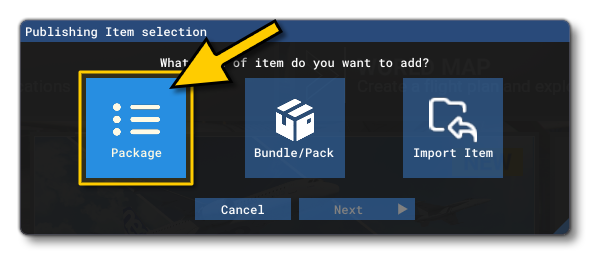
After clicking Create New Project, you will be asked what kind of publishing item you want to create first, and in this case you should select Package:
Now you will need to select what kind of package you wish to create. For our purposes, it should be Custom and when you give the package details, you should ensure that the Content-Type is set to INSTRUMENTS:
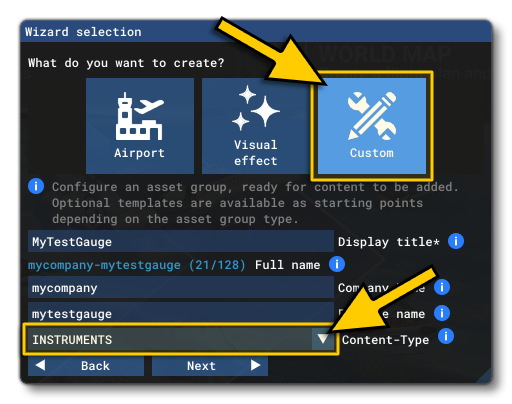
Once you have completed these details, you need to click the Next button. This will take you to the final window of the setup wizard where you need to define the first Asset Group to be used in the package. The name of this package will depend on what you want to do with it:
- if you want to create a new instrument, then you should name the asset group after the instrument that you will be creating. For example, for the tutorial Creating An HTML/JS/CSS Instrument you should call it "HelloWorldDisplay".
- if you want to replace an existing instrument then the asset group should be named after the instrument it is replacing. For example, for the tutorial Replacing An HTML/JS/CSS Instrument you should call it "BackupSpeedDisplay"
Once you have given the name of the asset group you need to set the Type to Copy:
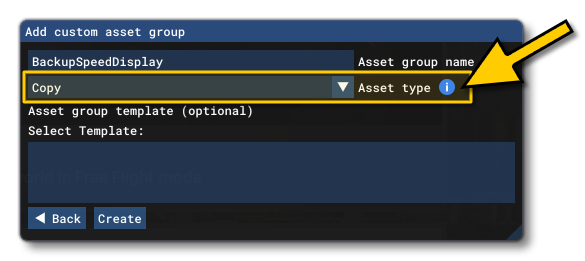
When you click Create, the project will be created and if you navigate to the location you saved the project to, you should see something like this:
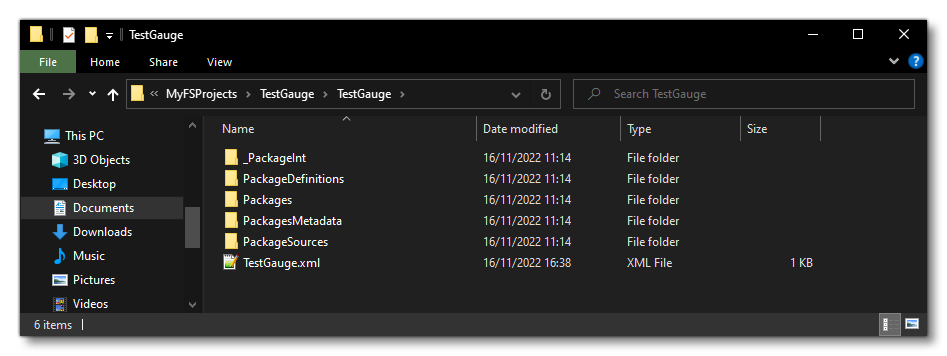
There are really only two folders we're interested here:
- PackageSources: This folder will contain the source information for the package, and will be where you add your code for the gauges you create.
- Packages: This folder will contain your package after it is build.
You can now open this folder in your programming IDE of choice. We recommend Visual Studio:
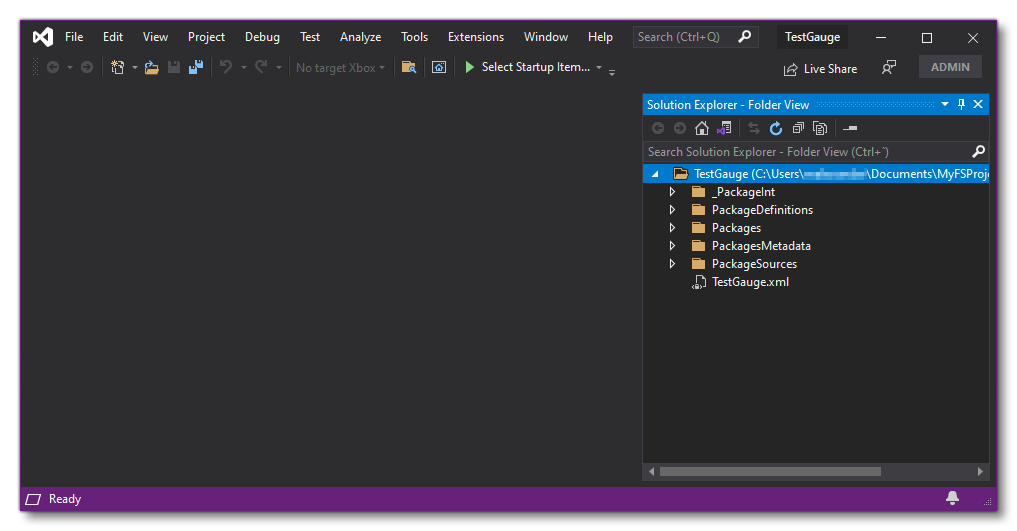
With the project created and ready to edit, you can now continue on to the appropriate tutorial that you wish to do: