THE AIRCRAFT CAPTURE TOOL
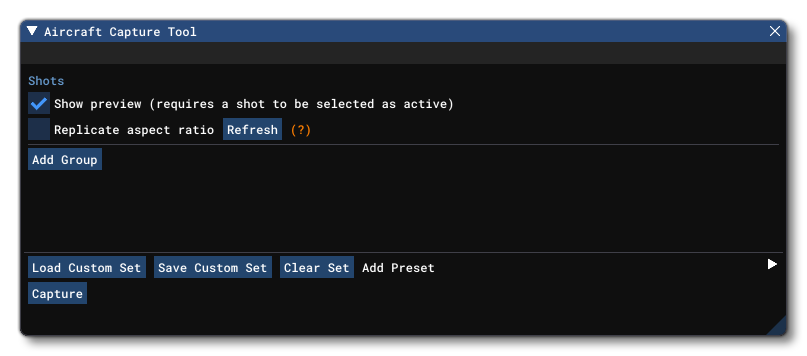
This tool is designed to make it as easy as possible to create a comprehensive set of screenshots and thumbnails that can be used for promotional purposes and as part of the meta-data when uploading to the Microsoft Flight Simulator 2020 Marketplace. When this window is first opened you will be presented with the following options:
-
Show Preview
When checked, the currently Active image shot will be shown in the simulation window as a preview image of how it will look when it is saved as a file. When enabled you will be presented with the following extra options:
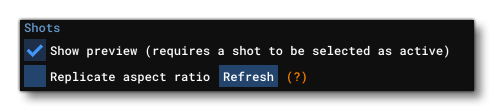
- Replicate Aspect Ratio This checkbox can be used to have the simulation window change size to match the aspect ratio of the currently active shot width and height. This may require that you use the
Refreshbutton to update the window.
-
This button will create a new Capture Group. This is simply a way of grouping together different thumbnail/screenshots in one place, and you can create multiple different groups for each "set" that you create. For more information please see the Capture Groups section, below.Add Group
-
Clicking this will open a file explorer window where you can browse to a previously saved Capture Set for loading. For more information please see the Capture Sets section, below.Load Custom Set
-
This button can be used to save the currently set up Capture Groups as a "Set". This can then be re-used at any time for any aircraft using theSave Custom SetLoad Custom Setbutton. For more information please see the Capture Sets section, below.
-
With this button you can clear all the information in the currently loaded (or created) set. This will delete all the defined Capture Groups and their contents, but will not delete any screenshots/thumbnails that have been created using them.Clear Set
-
Add Preset
Selecting this option will open a sub menu where you can select from one of three Presets: General, Technical or Reno. Clicking on any of these options will add a new Capture Group with screenshots/thumbnails already setup and ready to use.
-
This button will generate all the images that you have predefined in the different Capture Groups. Note that the screen may flash and change during this process, and after the initial captures are taken, there will be some post-processing done in the background. This means that there will be some time after pressing capture and finishing the screenshots where which the files are being processed and have not been to disk yet. During this time, you will see a progress bar and the "Capture" button will be disabled:Capture

Validation
While setting up the captures, the tool will automatically perform a certain amount of validation checks, and will display a warning icon if there is something wrong with a shot definition meaning it cannot be properly validated. Hovering the icon will display the list of issues the tool detected, for example:
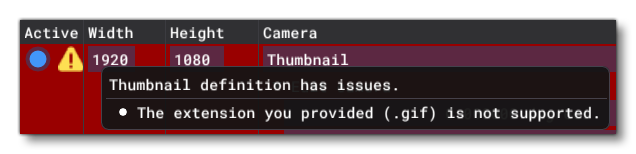
Trying to create a capture with an active warning will not crash the game, but the final image may not be generated, or may be generated incorrectly. Note that one such warning that will typically be seen is when you try to create a *.jpg file, while having "Transparent background" ticked:

This warning will not pervent a capture being taken, however the capture will not be generated with transparency, but will instead be rendered with a background.
Capture Groups
A Capture Group is comprised of one or more image capture sets, where a single set is used to define how an image will be created for use in promotional and marketing material. Capture Groups can be added using one of the pre-defined Presets or as custom capture groups by clicking the Add Group button. Presets will add group sets with multiple image thumbnails/screenshots already defined, while the Add Group button will simply create a new group with a single preset in it, ready to be set up as required (and more image sets can be added to the group using the Add Thumbnail button).
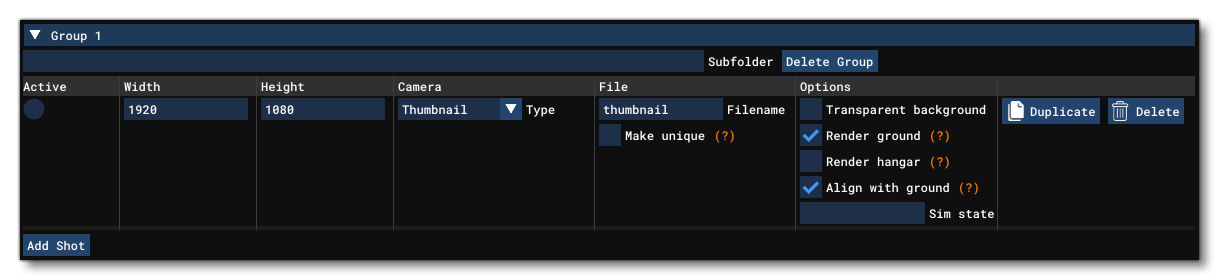
Each group can output the image files to a specific location by editing the Subfolder field. Leaving it empty will result in the images being generated directly in the root of the user-selected directory, as chosen when you click the Capture button. However, setting a subfolder will instead save the group of images to that subfolder within the user-selected root directory.
The sections for each thumbnail/screenshot are as follows:
-
Active
When this is selected, it sets the currently "Active" screenshot/thumbnail. When selected, you will have an extra Camera option to edit the camera, and this also sets a preview of image to be viewed in the Microsoft Flight Simulator 2020 window (this is only effective when the Show Preview option is also selected).
-
Width / Height
Sets the width and height (in pixels) of the screenshot being taken. This is particularly useful when creating images to be used for the Marketplace Data section of a project.
-
Camera
From here you can select from a number of default camera positions:
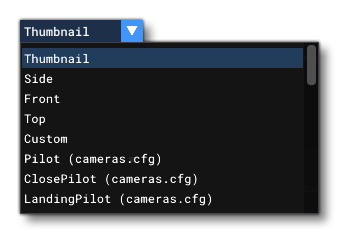 If you wish to set your own camera positions then you should use the Custom option, which is explained in more detail in the Editing Cameras section, below. The list of default camera positions will also include those that have been set in the
 cameras.cfgfile for the aircraft, which you can use to get shots of the interior or from different angles. When you select any of the presented options, you will also have an additional set of options available to you to Edit Cameras. These options are explained in the section on Editing Cameras. Note that you can only edit the camera for the currently Active shot setting.
-
File
This section has an input field where you can give the setting a file name. By default all shots will be saved as*.pngfiles, however if you append an extension onto the filename (for example:my_image.jpg) then the image will be saved in that format. Note that currently only*.png,*.jpgand*.jpegare supported. If you check the Make Unique box, then a randomly generated number will be appended onto the given filename. By default, when this option is unchecked, each capture done with this setting will overwrite any previously saved captures. However by checking this box, each time the capture tool is used the images will be saved with a unique number appended to them so you will have multiple "versions" of the image.
-
Options
Here you are presented with a number of options that will affect how the final thumbnail/screenshot is rendered. These options are:- Transparent Background: The image will be rendered on a transparent background. Note that for this option the File should be
*.png, and using any other file type will give unexpected and/or incorrect results. - Render Ground: The image will be rendered on a grey background with a white ground. Note that you can only have this option if Render Hangar is unchecked.
- Render Hangar: The image will be rendered in the aircraft hangar. Note that you can only have this option if Render Ground is unchecked.
- Close Hangar Doors: This option will close the hangar doors, and is only available when the Render Hangar option is selected.
- Align With Ground: This option, when checked, will ensure that the camera is always aligned with the ground. This option is checked by default, and unchecking it will mean that the camera can be rotated to any angle relative to the ground.
- SimState: Here you can choose a
*.fltfile to load, and the simulation will use the flight characteristics from that to setup the simulation to take the screenshots. When supplying the file, you give the name only without the .flt extension. Note that when you supply a file here, the tool will wait 4 additional seconds between capturing screenshots to ensure the aircraft has time to stabilize. Leave this blank to use the default hangar view.
- Transparent Background: The image will be rendered on a transparent background. Note that for this option the File should be
Additionally you have buttons to Duplicate or Delete the thumbnail/screenshot settings. Once you have created a setting for a capture within the group, you can continue to add more settings by clicking the Add Thumbnail button.
Once you have created as many thumbnail/screenshot settings as you require for the group, you can create further groups, or you can save the group to be used again later for other aircraft. For more information on this, please see the section on Capture Sets, below. If you wish to clear all the groups and settings that you have created to start again (or after saving them) then you can click the Clear Sets button.
Editing Cameras
When a setting has the Active flag checked, there will be an additional option available under the Camera selection: Edit Camera. Selecting this option will expand to show the following inputs:
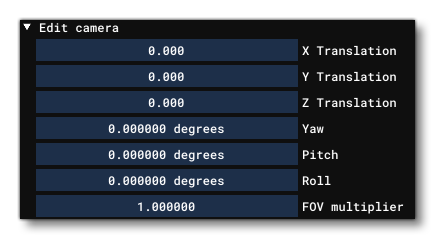
- X / Y / Z Translation - adjust the camera on the X / Y / Z axis
- Yaw / Pitch / Roll - Change the angle of the camera along the X / Y / Z axis
- FOV / FOV Multiplier - This setting can edit the camera field of view. It will work in two "modes" depending on the camera type where:
- The "Custom" camera permits the FOV to be modified directly.
- All other cameras permits the FOV to be modified via a multiplier.
For the Thumbnail, Side, Front and Top cameras - as well as those form the cameras.cfg file - these options are meant to permit you to "tweak" the camera position to get it to suit your needs. However, you may want to create more interesting and artistic cameras for different purposes, and so you can select the Custom camera. This will give you an additional button, Locked. Clicking this button will permit you to use the Drone camera controls to position the camera anywhere you want. Clicking the Unlocked button will then switch off the drone camera and let you fine tune the camera position (if required) by editing the values directly.
| Camera Movement | Keyboard/Mouse Input | GamePad Input |
|---|---|---|
|
Translate Up |
"R" |
|
| Translate Down | "F" |
|
| Translate Left | "A" |
|
| Translate Right | "D" |
|
| Translate Forward | "W" |
|
| Translate Backwards | "S" |
|
|
Pitch Up |
Numpad 8 |
|
| Pitch Down | Numpad 2 |
|
| Roll Left | Numpad 7 |
|
| Roll Right | Numpad 9 |
|
| Yaw Left | Numpad 4 |
|
| Yaw Right | Numpad 6 |
|
| Increase Zoom | Numpad + |
|
| Decrease Zoom | Numpad - |
Capture Sets
A Capture Set is comprised of one or more Capture Groups and their associated thumbnail/screenshot settings. These sets can be saved as XML files and then reloaded later and used for various different aircraft without having to recreate them each time. To do this, you can create your capture set and then click the Save Custom Set button, which will open a file explorer and ask you to name the file and select a location to save it to. Once it has been saved you can then load it back into the Capture Tool by clicking the Load Custom Set button, and in this way re-use any number of predefined thumbnail/screenshot cameras with different aircraft.
IMPORTANT! Saving custom sets with cameras taken from the cameras.cfg file of an aircraft and then loading the sets for use use on an aircraft which does not have a camera with the same name(s), will instead use the default "Custom" camera configuration.