MARKETPLACE DATA
IMPORTANT! To upload to the Marketplace you must be part of the Microsoft Partner Program and have a valid Seller ID. You can find more information from the following link: Marketplace Partner Program FAQ Once you have that you can upload through the Marketplace Content Portal.
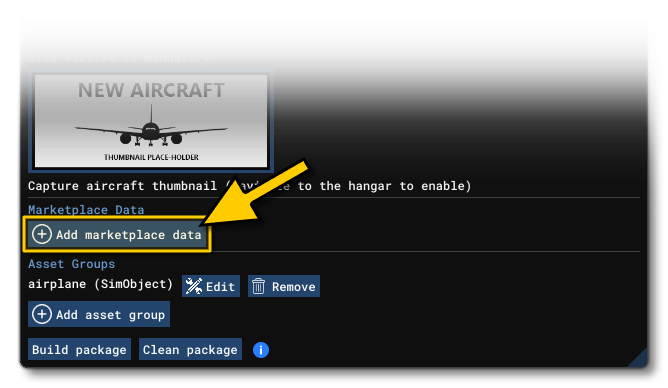
When creating a package that is destined for uploading to the Microsoft Marketplace, you will need to have added some marketplace meta-data to the package. This is done from The Package Inspector, specifically by clicking the (+)Add Marketplace Data button beside the Marketplace Data section of the Summary Content Manager tab:
 This will create a new MarketplaceData asset group in the project, and the Inspector window will then change to display the contents of this group:
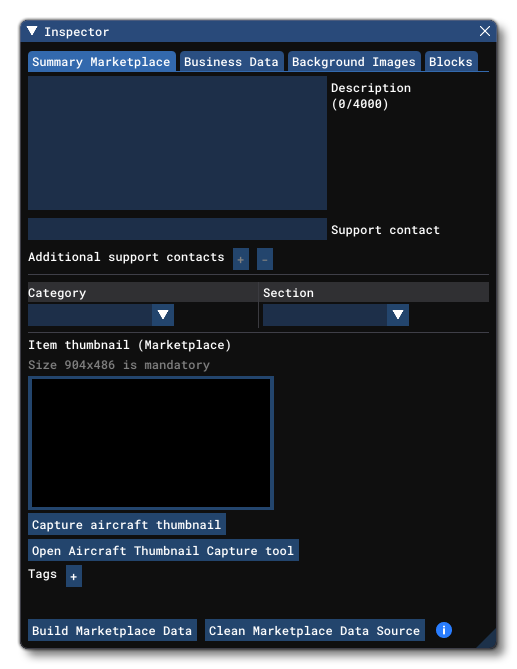 Each of the tabs of this window are explained in the sections below.
Guidelines
Before creating your visual assets and writing your descriptions for the different Marketplace elements, please keep in mind the following guidlines (be aware that your packages may be rejected if these are not followed):
- Visual assets should NOT have any text on them, as they may be cropped to fit different areas of the Marketplace and look bad.
- Visual assets should NOT include any company or creator logos (for the same reason given above)
- Text descriptions MUST clearly mention any dependency on any other package
- You MUST give at least one support contact.
- For Packs and Bundles - all items MUST be from the same seller ID
Other restrictions may apply - like image format or size for images, or number of characters for text - but these are explained below for each specific section of the Marketplace Data.
Summary Marketplace
This tab is for setting up the general Marketplace information that will be displayed for your package after addition to the store. This tab has the following fields to fill out (note that most of these are mandatory and any that are optional will be mentioned in the description):
-
Description
This is the main description of the package and will be used for marketing. The text can use MarkDown, which enables you to easily add some basic formatting to it (like bullet points, bold text, etc...), and the field has a character limit of 4000 characters.
-
Support Contact
Here you should add in either an email address or a full web page URL as a point of contact for any support issues with the add-on. Once you add this information, you may also supply additional support contacts (see below for details).
-
Additional Support Contact
The summary tab permits you add in up to two optional additional support contacts for every add-on package. For example, the main contact could be for bug reporting, but you may want to have an additional contact for "marketing" or simply "feedback", etc... This section permits you to add a custom Label for the contact type and then supply a Link, which can be an email or a full URL. To add an additional contact, simply click on the+button, and to remove a contact click the-button. Note that these buttons will not be available unless you have first supplied an initial Support Contact (see above).
-
Category
Selecting this will present you with the following drop down menu:
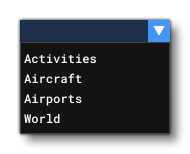 These are "broad stroke" categories for packages that are used to filter the different add-ons when viewing the marketplace. You should select the one that is most appropriate for what you are submitting. Note that for Bundles And Packs you can add up to three different categories.
-
Sub-Category
The contents of the sub-category menu will depend on what you have chosen as your main category. For example, the image below shows the sub-categories for an Aircraft add-on:
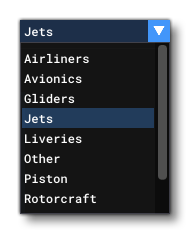 This sub-category is used to further filter add-ons on the marketplace and is also used when performing a marketplace search.
-
Item Thumbnail(s)
Here you have to add in a "thumbnail" image that will be used by the marketplace for different purposes. The image should be authored as aJPGfile, and at a resolution of 904px * 486px. If you are creating an aircraft add-on then you must use the buttonCapture Aircraft Thumbnailto generate a base image from which the above listed thumbnail should be created.
NOTE: This option will only be shown when you are in the main menu, in the aircraft hangar.The base image taken by clicking theCapture Aircraft Thumbnailbutton will be authored as a high-resolution, 3840px * 2160px,PNGformat file, and you will be asked to give a folder to save it to. The image created should then be resized and cropped to suit the specified marketplace thumbnail requirements. Note that you can also click on theOpen Aircraft Thumbnail Capture Toolbutton to open the tool and setup how you want the thumbnail and other images to be generated. See the page on The Aircraft Thumbnail Capture Tool for more information.
-
Tags
In this section you can click the+button to add one or more tags to the marketplace data. Each tag can be a maximum of 32 characters, all capital letters, and you can have a maximum of 5 tags. These can be used on the marketplace to filter results and will be shown on the page for the add-on.
Business Data
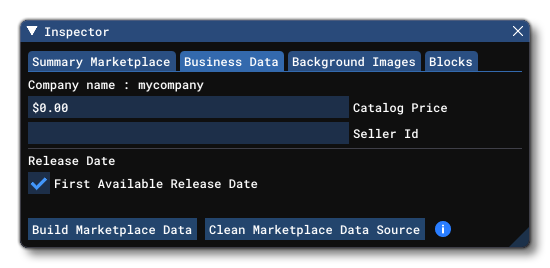 This tab is used for adding in the data required for selling the add-on on the Marketplace. It has the following mandatory fields:
- Catalog Price: This is the price (in US dollars) of the add-on on the Marketplace. This can be free ($0.00) or can be between $4.99 and $149.99. Price is input without the "$" sign, and must be in increments of $0.50 between the values of $4.99 and $99.99 (EG: you can't have $10.25, it has to be either $9.99 or $10.49), and in increments of $1.00 if above $99.99 (EG: you can't have $125.49, it would have to be either $124.99 or $125.99). Any input price that does not meet these requirements will be rounded down to the nearest value that does meet the requirements.
- Seller ID: Here you should input the seller ID that you have been assigned by Microsoft when you completed the Partner process.
- First Available Release Date: This box, when checked, will publish the asset on the first available release date after it has been validated. If you un-check this option, then you can supply a planned release date for the asset (Year / Month / Day). The asset will not be published until the date given, assuming that it passes validation. If the date specified has passed when the validation process is finished, then the add-on will be published on the next available release date.
Background Images
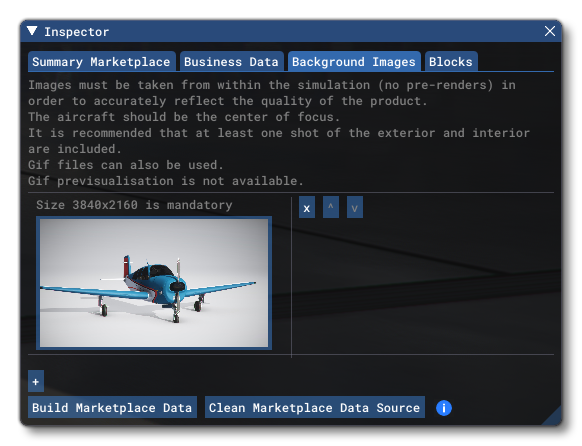 On this tab you can add one or more images that will be used as background images (that the user can change) for the Marketplace section relating to your add-on. To add an image, click the
 + button, and once added you can remove it again by clicking the X button, or you can change the order of the images using the ↑ or ↓ buttons. You can add up to 5 images in this section, and it is recommended to have at least 3 for most add-ons.
All images added to this tab should be authored at 3840px * 2160px, and can be either JPG or GIF format files. Note that GIF files will not be shown correctly in the preview window, but will be fine on the actual Marketplace page for the add-on. If the add-on is for an aircraft, then there should be at least one interior and one exterior image of the aircraft, and all exterior images should clearly show the aircraft in the center of the frame, as the main focal point of the image. Note that you can setup these images quickly and easily using the The Aircraft Thumbnail Capture Tool.
IMPORTANT! All images added here must have been taken from within the simulation. You cannot use pre-rendered images or images from alternative sources in this section.
Blocks
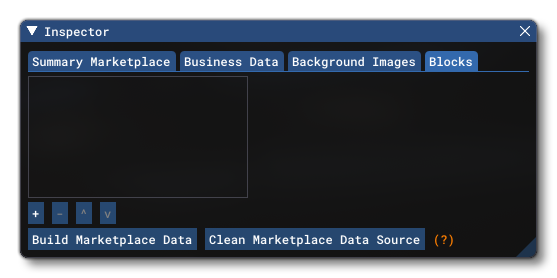 This tab is where you can add different "blocks" to your MarketPlace listing. Each block can contain additional data that will be shown underneath the main Marketplace descriptive text/price block. Initially this window is empty and you can add a block by clicking the
 + sign at the bottom. This will show the following menu:
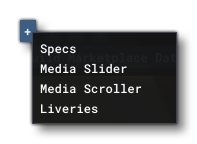
Each of these different block types has it's own inputs and you can add one or more of each of them (although generally you would only ever want to have one of each type at most).
NOTE: You may find using The Aircraft Thumbnail Capture Tool a quick and easy method for creating the images required by some of these sections.The details of each type are given below:
- Specs: This block is only for use with aircraft packages, and is used to add in the specifications of the aircraft. When you add this type of block, the window will change to show you some input fields as well as a
+button which you can use to add further specifications:
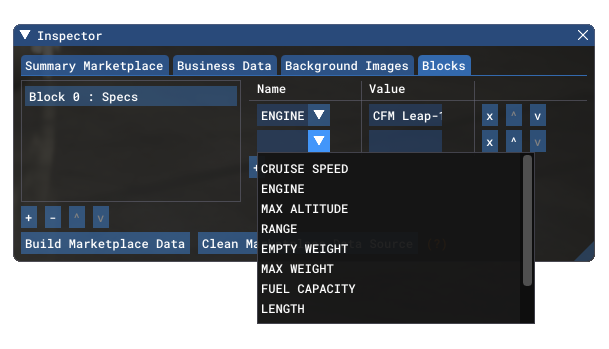 Each specification has a drop down menu where you can select the Name of the specification, and then you can set the Value. This doesn't have to be a numeric value and can be text, or a combination of numbers and text. You can also re-arrange the specification order using the
 ↑or↓buttons, and you can also remove a specification using theXbutton. Below is an example of a specs block on the Marketplace:

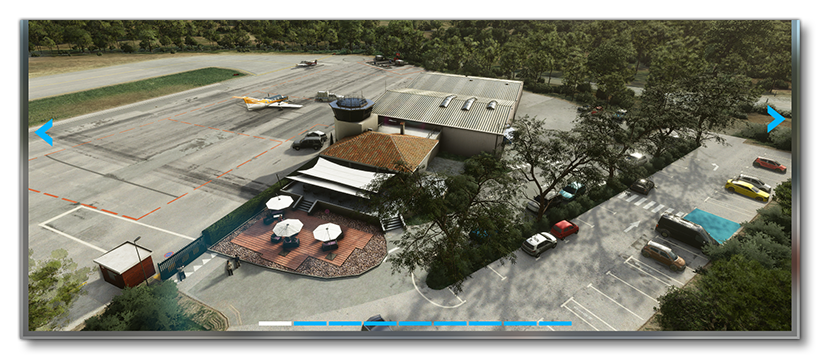
- Media Slider: This adds a slider block to the Marketplace that permits you to add various large images that the user can slide between:
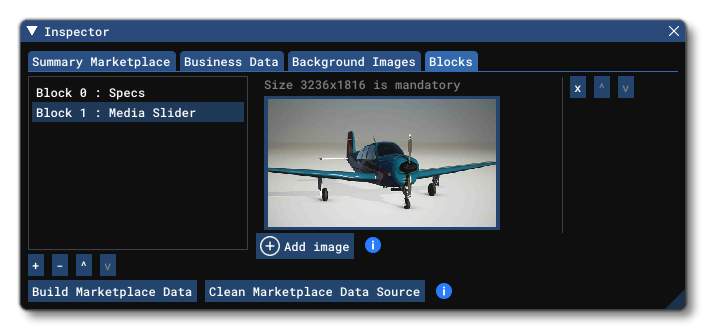 You can click on the
 (+)Add Imagebutton to add media to the block, and then use theXbutton to remove it, or the↑or↓buttons top reorder those that are there. Media images should be authored as 3236px * 1816pxJPGorGIF. These will be displayed like this on the Marketplace:
- Media Scroller: This adds a scroller block to the Marketplace that permits you to add various small images that the user can scroll:
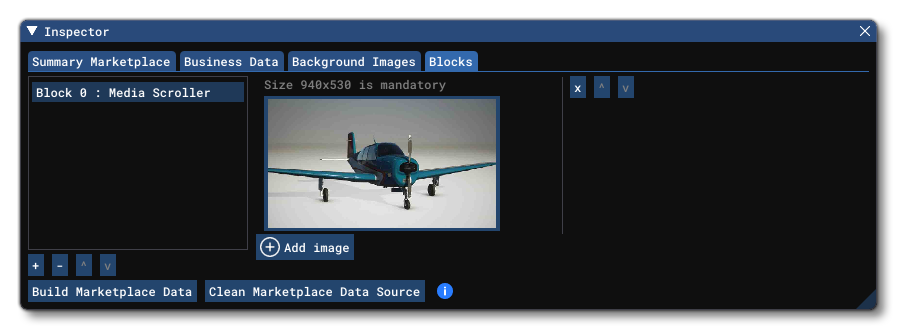 You can click on the
 (+)Add Imagebutton to add media to the block, and then use theXbutton to remove it, or the↑or↓buttons top reorder those that are there. Media images should be authored as 940px * 530pxJPGorGIF. These will be displayed like this on the Marketplace:

- Liveries: This block is only for use with aircraft packages, and is used to add in images of the different aircraft livery. This adds a scroller block to the Marketplace that permits you to add various small images that the user can scroll:
 You can click on the
 (+)Add Imagebutton to add a livery image to the block, and then use theXbutton to remove it, or the↑or↓buttons top reorder those that are there. Livery images should be authored as 515px * 290pxJPGorGIF. You can also click on the Primary and Secondary color swatches to set the main colours that the livery uses. This block will look like this on the Marketplace:

Preview The Marketplace Data
Once you have added the Marketplace data to the package you'll want to preview it in the simulation. The first time you want to do this, you'll need to use The Project Editor option for Building A Package. Once this initial build is done you can preview how it'll look on the Marketplace by going to the Marketplace section of the Microsoft Flight Simulator 2020 UI, and it should be shown just like any other item:
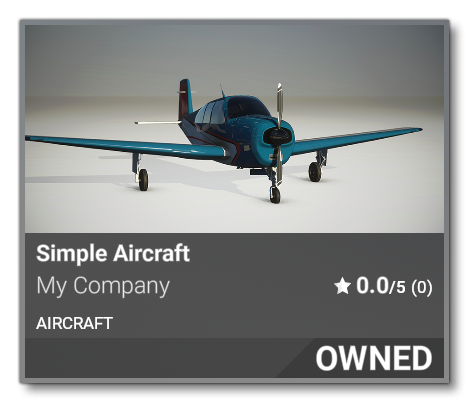
After this initial build, you can then continue to make edits to the Marketplace data and preview them by simply using the Build Marketplace Source data button. This will build just the marketplace data so you can see any edits or changes without having to re-build the entire package, permitting you to tweak how the item will look on the marketplace before actually publishing it.
If you have any issues with corrupt data, or wish to remove the data from the Marketplace within the simulation UI, you can use the Clean Marketplace Data Source.
Publishing
Once you're happy that the Marketplace Data is correct and wish to publish it to the Marketplace, you should use the Build & Export option from the Project menu to generate a "clean" build that - when finished - will be marketplace ready:
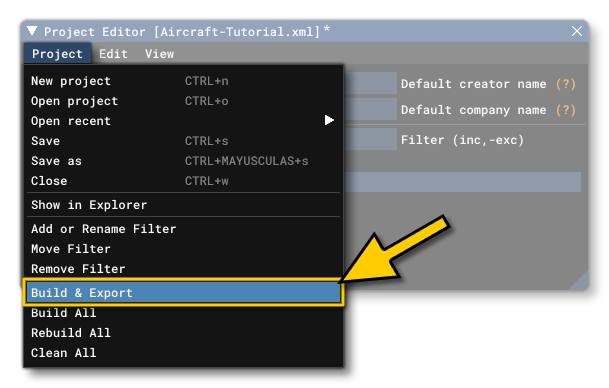
Using this button will validate not just build the asset groups in the packages, but also build the Marketplace Data. If any issues exist, these will be flagged here and you can go back and fix them, then try building again. Once the build has been completed and validated, it will be available as a ZIP file that can then be uploaded to Microsoft. For full instructions of how to export packages, please see the following page: