THE PROJECT MENU
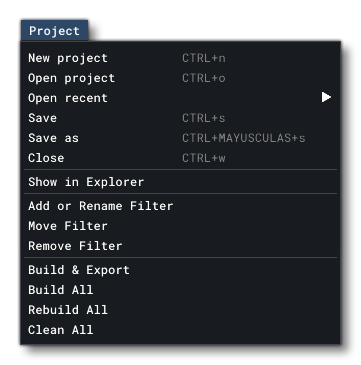
The Project menu is used by The Project Editor to create, open, or build projects and has the following options:
-
New Project
Selecting this option will open the Create New Project window:
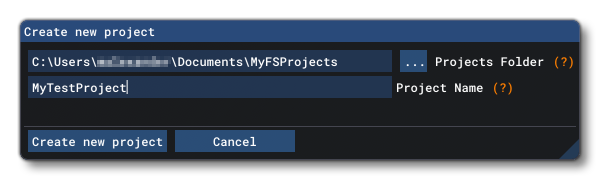 Here you can select the Project Folder where you wish to save all the project data to (clicking the
 ...button will open an explorer window and you can browse to the location), and also set the name for the project. Note that the name can only use alpha-numeric characters (no symbols, but upper and lower case characters are permitted), and all spaces will be replaced with "-". ClickingOkaywill create the new project (you may be prompted to save if the current project has unsaved data), and the Project XML file will be created in the chosen destination, at which point you will be prompted to add an initial package to the project (see Creating A New Project for more information). You can also clickCancelto cancel the new project creation.
-
Open Project
This option will open an explorer window for you to browse to an already existing Project XML file. After selecting the file, it will be loaded into the Project Editor (you may be prompted to save first if the currently open project has unsaved data).
-
Open Recent
When you mouse over this option, a list of previous projects will be shown and you can select any of them to quickly open the project without having to open an explorer and browse to the project directory.
-
Save
This option simply saves the current project.
-
Save As
This option permits you to save the project using a different name and folder, essentially creating a duplicate project.
-
Close
This option will close the current project (but not the Project Editor). You may be prompted to save first if the currently open project has unsaved data.
-
Show In Explorer
This option can be used to open an Explorer window on the path to the Project XML file for the currently loaded project.
-
Add Or Rename Filter
This option permits you to add or rename a filter group to The Project Editor. Filter groups permit you to create hierarchies of assets that are grouped together under the same filter group name. These filter groups can even be nested. Selecting this option will show the following window: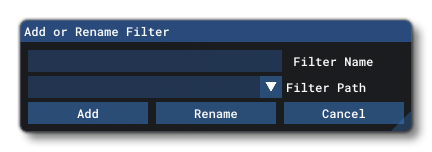 Here you can give a name and then select the path that it should be applied to (default is the "root"). If you click
 Addthen a new filter group will be added to the Package List, and if you selectRenamethen the filter selected in the Filter Path will be renamed to the given name. Filter groups will be coloured green in the Package List, as shown in the image below: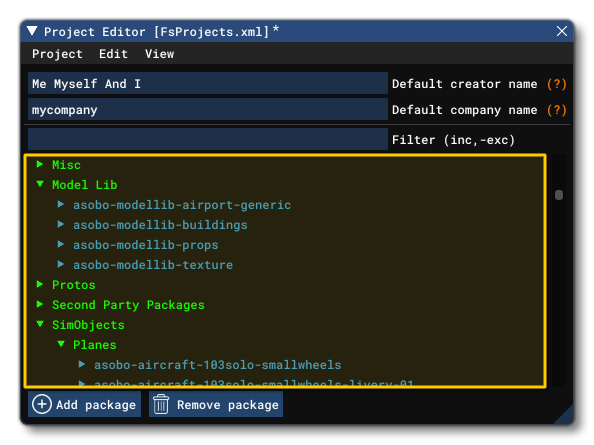
-
Move Filter
This option permits you to move an already defined group filter within the hierarchy. Selecting it will open the following window:
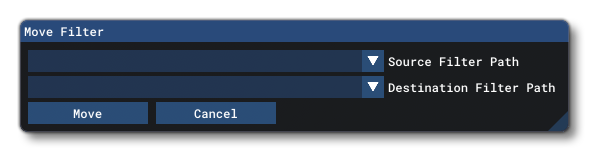 Here you can select the Source path and then the Destination path. When ready, clicking on the
 Movebutton will move the filter group.
-
Remove Filter
This option permits you to remove an already defined group filter from the hierarchy. Selecting it will open the following window:
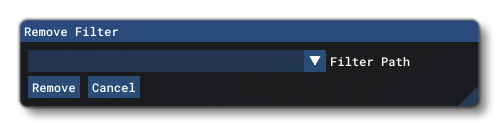 Here you can select the path to the Filter Group that you want to remove then you can press
 Removeto remove it from the list. Note that any items found within the filter group will be placed in the next filter group up in the hierarchy, or the root node if no other filter groups exist.
-
Build & Export
This option will build all the packages in the currently open project, as if using the Build All option. It will then export the packages as a completed add-on, including any marketplace data. For more information on exporting, please see the Export Window page.
-
Build All
This option will build all the packages in the currently open project. Built packages will then be available in the simulation. For example, if you build a livery package, the liveries will be available from the Aircraft select screen in the main menu. This option will not perform a "clean" of the package locations first, so if you have any issues with - for example - file corruption or anything similar you should use the Rebuild Package option, or the Clean All option then build again.
-
Rebuild All
This option is similar to the Build All option, only it will first clean the simulation of previously built packages - the same as calling Clean All - before doing the build.
-
Clean All
This will remove all packages and package information from the simulation.