WINGFLEX - FLAPS
For larger aircraft with wingflex, we'll also need to ensure that the flaps flex along with the wing. This will be done in a similar manner as we did for the Slats, ie: e will need to add helpers, then skin the flaps to those helpers and animate them that way.
Inner Flaps
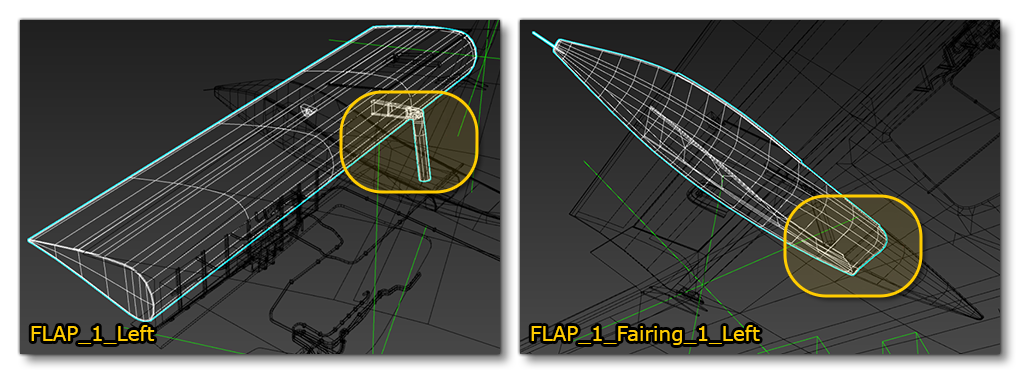
For the flaps nearest the airframe, we don't need to do anything too special as they - like the slats - won't be affected by the wingflex, so they can be animated as normal. So, like you would do for smaller aircraft (see Flaps and Spoilers), we'll need to create a helper and call it something like FLAP_1_Left. This helper will drag the animation of the main part of the Flap. We'll then create a second helper and name it FLAP_1_Fairing_1_Left. This one will drag the animation of the fairing below the flap. They will both need placed at the correct position to animate both nodes:
FLAP_1_Leftmust be placed inside the flap, where the mechanism is supposed to be activated and moved, .FLAP_1_Fairing_1_Leftneeds to be placed on the rotational axis of the fairing.
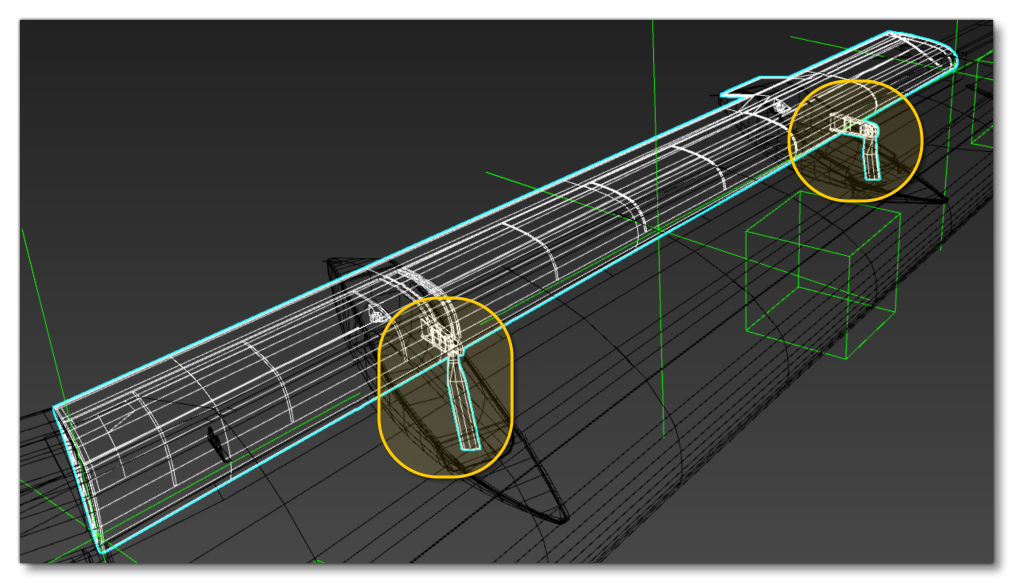
You can see that for the flap there is a small mechanism - like an arm that should move to extend the flap - which will need to be animated. For that we'll place FLAP_1_Left on the rotational axis of the arm, and then create a second helper named FLAP_1_Aux_1_Left. This will be placed on the rotational axis of the joint, and then we'll create a second one called FLAP_1_Aux_2_Left that will be placed on the rotational axis of the flap. These will then be parented with their corresponding helper.
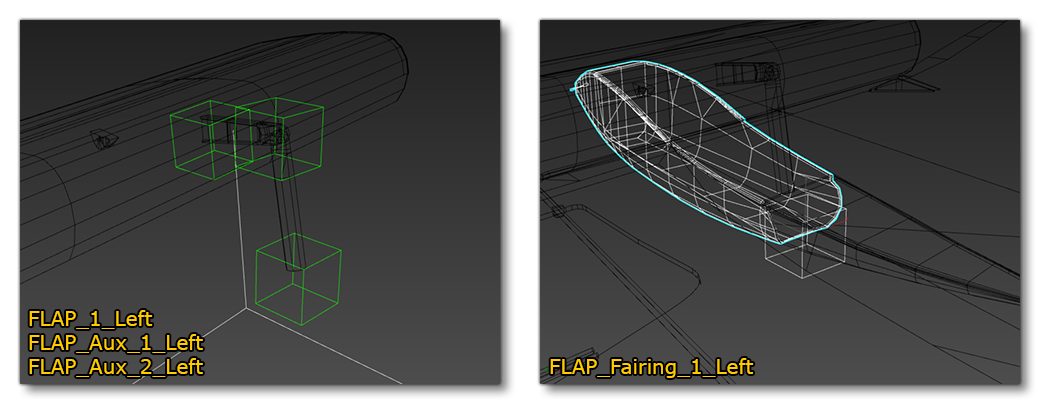
Now we would animate these helpers and try to get as realistic movement as possible:
Main Flaps
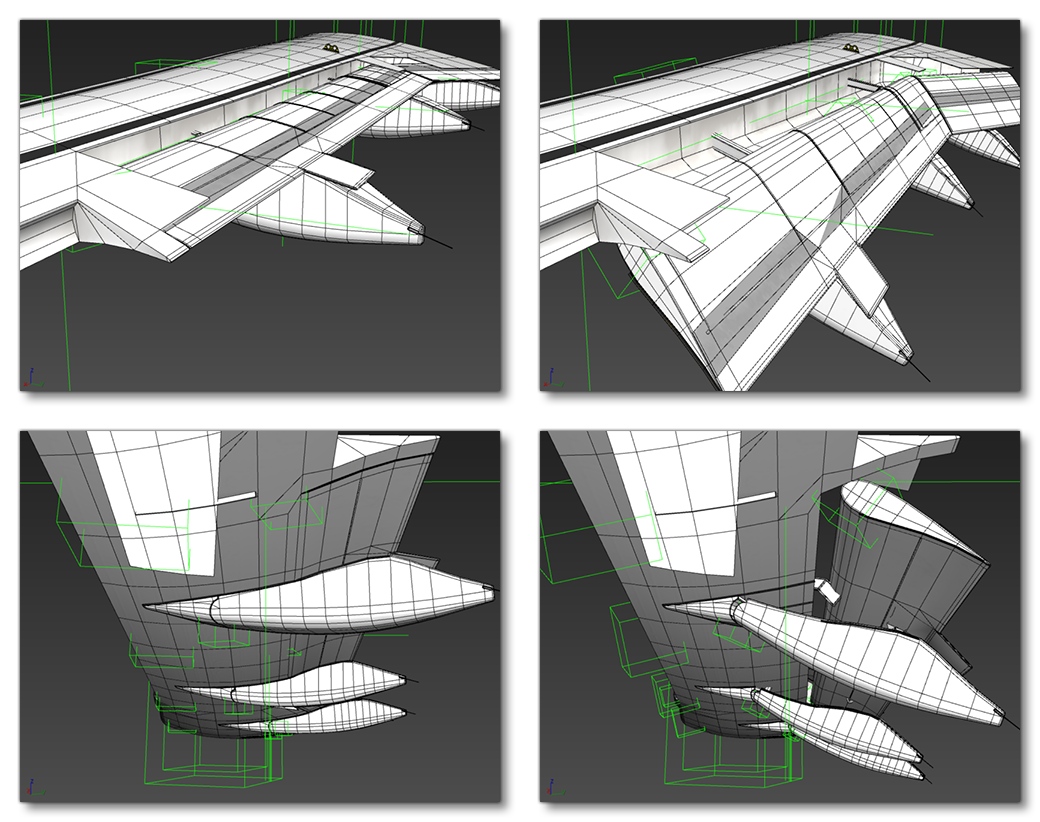
Due to the wingflex, we can't just animate the main flap without also performing deformations. For that, as you'd expect, we will need to add helpers, skin the flap to those helpers, and then animate them. Again, like for the slats, to skin this flap we will need several helpers specific to the skin of this flap, and for better deformation, we will place a helper in front of each deformation bone of the wing on the axis of rotation of the flap. Each helper placed will be linked to the corresponding wing flex bone.
In the image shown above, you can see that the main flaps have the same mechanism as the inner flap. Now, we can animate these - as we did for the inner flap - without using skinning, but because of the wingflex we'll use skinning. This will give a slightly different result, but it will be easier to animate the flap.
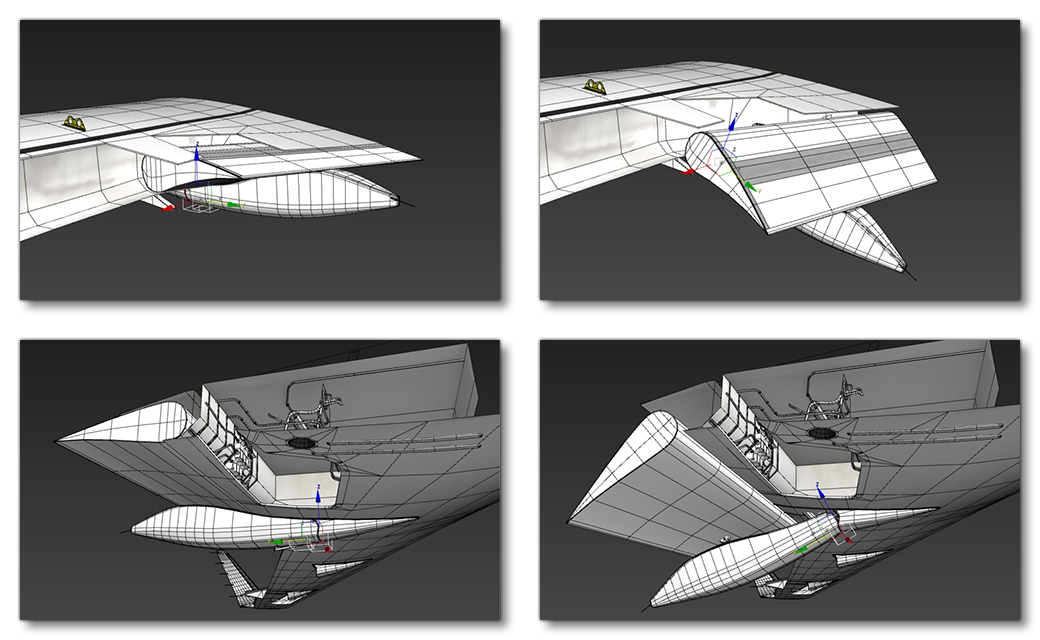
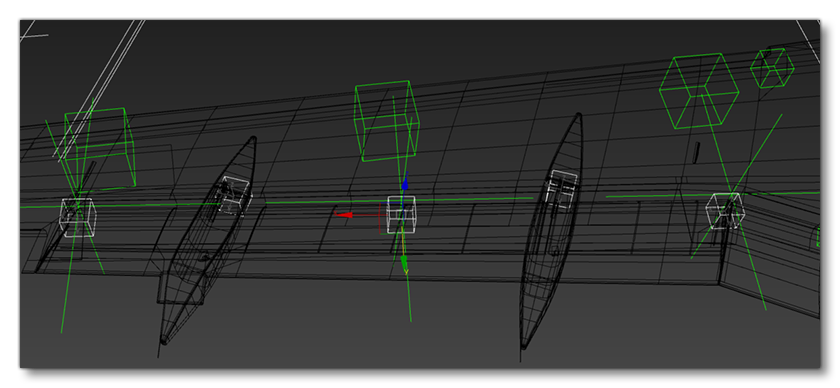
To start with we'll create 3 new helpers that correspond to the appropriate wingflex bone and then parent them, naming them FLAP_2_Bone_1_Left, FLAP_2_Bone_2_Left and FLAP_2_Bone_3_Left. We'll also need to create also helpers for the two flaps fairings of the second flap, so we'd create those too and name them FLAP_2_Fairing_1_Left and FLAP_2_Fairing_2_Left. After creating and positioning them, we'd have something like this:
Skin And Animate
With the helpers in position we can proceed to the Skinning:
After skinning, we can then animate the flap: