FILE SETUP
When you go to start modelling your aircraft, there are a series of important conventions that should be followed to ensure maximum compatibility and ease of setup within Microsoft Flight Simulator later. This page outlines these conventions and we strongly recommend that you follow them.
Setting Up
When you first create your file in your modelling program (3DS Max in this tutorial), you should follow these guidelines:
-
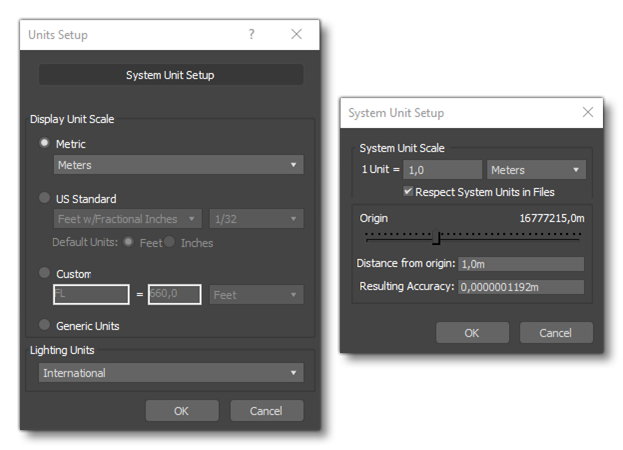
The file units setup should be Metric Meters:
1Unit =1Meter.
-
The plane must be positioned so that top view displays the nose pointing downward.
-
The plane should be positioned in the file so that the center is approximately 1/3 of the way down the wing from the front as in the image. In the Z axis the center should be approximately where the water level would be.

-
All objects must have their xforms and transforms reset (100, 100, 100 scale - 0, 0, 0 rotation).
Layer Construction and Object Naming Conventions
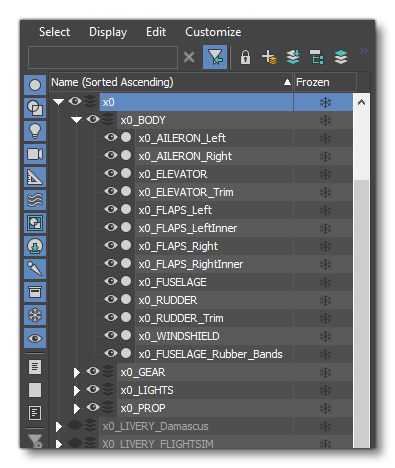
When setting up the file for your aircraft within your modelling tool, you should create a series of layers based on LOD level following the conventions in this table:
| Layer Name | Description |
|---|---|
| Default | Empty |
| X0 | All objects prefixed "x0_" |
| X1 | All objects prefixed "x1_" |
| X2 | All objects prefixed "x2_" |
| X3 | All objects prefixed "x3_" |
| X4 | All objects prefixed "x4_" |
| X5 | All objects prefixed "x5_" |
| X6 | All objects prefixed "x6_" |
Each layer set may have nested layers within without any issues as long as the object names are prefixed correctly with the suggested LOD identifier and follow the correct naming convention. This naming is important as it ensures that the 3DS Max plugin tools work correctly and is also required for certain things to work correctly when the aircraft is imported into the simulation. As a general rule, however, the format is as follows:
[lod prefix]_[object name]_[position]
For example:
x0_WING_left
x2_WHEEL_Right
x1_FUSELAGE
The table below shows the typical naming scheme for aircraft objects and sub-elements:
| Bodypart Object Name | Mesh Type | Description |
|---|---|---|
| FUSELAGE | Static | The airframe fuselage. |
| FUSELAGE_XX | Static | Used for additional fuselage geometry that adds details, where XX is an extra identifier, eg: x0_FUSELAGE_Details. |
| WINDSHIELD | Static | The airframe windshield and window glass. |
| PROPELLER_Blade_i | Animated | An aircraft propeller blade. This can be can be broken down into 1, 2 or 4 propellers depending on the plane. Please see the section Notes On Blur Meshes for additional information. |
| PROPELLER_Side_i | Animated | The propeller nose cone. Please see the section Notes On Blur Meshes for additional information. |
| PROPELLER_Nose_i | Animated | The propeller nose cone. Please see the section Notes On Blur Meshes for additional information. |
| TAIL | Static | The airframe tail section. |
| TAIL_Details | Static | Used for additional tail geometry that is used to add details. |
| RUDDER | Animated | The rudder section. |
| RUDDER_Trim | Animated | The rudder trim. |
| STABILIZER_Vertical / STABILIZER_Horizontal | Animated | The vertical / horizontal stabilizers. |
| ELEVATOR / ELEVATOR_Left / ELEVATOR_Right | Animated | The (left / right) elevator. |
| ELEVATOR_Trim / ELEVATOR_TrimLeft / ELEVATOR_TrimRight | Animated | The (left / right) elevator trim. |
| WING_Left / WING_Right | Static | The main left / right wing sections. |
| WING_LeftBody / WING_RightBody | Static | The body left / right wing sections. |
| WING_LeftTip / WING_RightTip | Static | The left / right wing tips. |
| WING_LeftDetails / WING_RightDetails | Static | Used for additional wing geometry that is used to add details. |
| AILERON_Left /AILERON_Right | Animated | The left / right ailerons. |
| FLAPS_Left / FLAPS_Right / FLAPS_LeftN / FLAPS_RightN | Animated | The left / right flaps. If multiple flaps are present they can be numbered (or suffixed with an addition name) to identify them individually, for example: x0_FLAPS_LeftInner. |
| SPOILER_Left / SPOILER_Right / SPOILER_LeftN / SPOILER_RightN | Animated | The left / right spoilers. If multiple spoilers are present they can be numbered to identify them individually. |
| ENGINE_Left / ENGINE_Right / ENGINE_Center / etc... | Static / Animated (depending on requirements for the objects) |
The engine object or objects. Depending on complexity you may need to expand the naming, for example: x0_ENGINE_LeftInner, x0_ENGINE_RightFan, etc... |
| UNDERCARRIAGE_Center / UNDERCARRIAGE_Left / UNDERCARRIAGE_Right | Animated | The sections of the wing and/or fuselage that animate when the landing gear is deployed. |
| GEAR_Central / GEAR_Left / GEAR_Right / etc... | Animated | The landing gear. Depending on complexity you may need to expand the naming, for example: x0_GEAR_CentralSupport, x0_GEAR_RightSuspension, etc... |
| WHEEL_Center / WHEEL_Left / WHEEL_Right / etc... | Animated | The landing gear wheels. Depending on complexity you may need to expand the naming, for example: x0_WHEEL_LeftFront_BLURRED_Fast, x0_WHEEL_BLURRED_Still, etc... Please see the section Notes On Blur Meshes for additional information. |
| LIGHT_XX | Static | The aircraft lights. Lights are created using a mesh that then has an emissive material applied to it. They should ne named such that XX references the light type, for example: LIGHT_StrobeLeft, LIGHT_NavigationRed, etc... Please see the section Notes On Lights for additional information. |
Notes On Blur Meshes
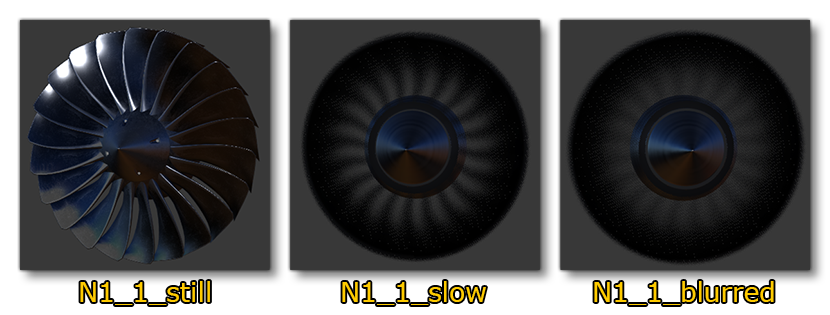
For any object that rotates, such as wheels, turbines or turbo props, a blur mesh is required. The static mesh is swapped out for the blur mesh once the moving part reaches a certain speed in order to look more realistic in game. As such each LOD will require multiple versions of these objects to be set up using a very specific naming system so that they work correctly in the simulation.
Propellers And Jet Turbines
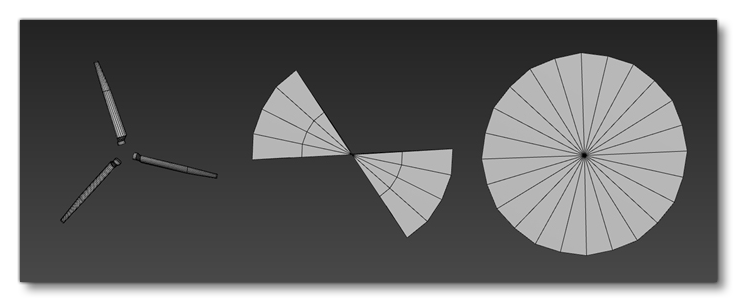 These require three "states" that go from fully static to fully blurred and each state should follow the naming shown in the table below for propellers:
| Object Name Structure | Mesh Type | Description |
|---|---|---|
|
[LOD]_[Name]_BLURRED_[engine_index]_[detail] |
Animated | The high speed blur mesh, eg: x0_PROPELLER_BLURRED_1_Nose. |
| [LOD]_[Name]_SLOW_[engine_index]_[detail] | Animated | The low speed blur mesh, eg: x0_PROPELLER_SLOW_2. |
| [LOD]_[Name]_STILL_[engine_index]_[detail] | Static | The static mesh, eg: x0_PROPELLER_STILL_1 |
And for jet turbines:
| Object Name Structure | Mesh Type | Description |
|---|---|---|
|
[LOD]_[Name]_BLURRED_[engine_index]_[detail] |
Animated | The high speed blur mesh, eg: x0_Turbine_BLURRED_1_left. |
| [LOD]_[Name]_SLOW_[engine_index]_[detail] | Animated | The low speed blur mesh, eg: x0_Turbine_SLOW_2_Right. |
| [LOD]_[Name]_STILL_[engine_index]_[detail] | Static | The static mesh, eg: x0_urbine_STILL_2 |
Wheels
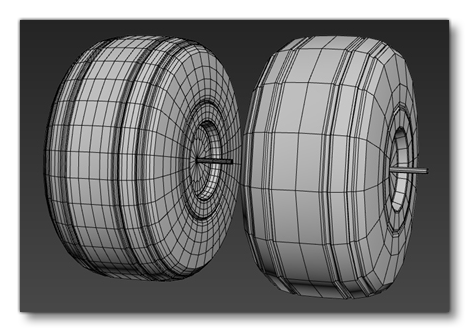
These require two "states" and each state should follow the naming shown in the table below:
| Object Name Structure | Mesh Type | Description |
|---|---|---|
| [WHEEL]_[position]_Blurred | Animated | The high speed blur mesh, eg: x0_WHEEL_Center_Blurred. |
| [WHEEL]_[position]_Still | Static | The static mesh, eg: x0_WHEEL_Right_Still. |