MODEL EXPORTING
Once you've created your exterior (airframe) and interior (cockpit) models, they need to be exported as glTF files and this will be done using the Multi-Exporter Tool. This tool is part of the 3DS Max plugin that comes with the SDK and is used to generate the required files in the correct format for Microsoft Flight Simulator 2024. This page outlines what we need to do to export the files for the aircraft package we are making, but you can find full information on this tool from the following page:
It's worth noting that the export process will be much easier the cleaner and more optimised that you have your model hierarchy. So, before continuing, it's worth taking a few moments to ensure that your LOD hierarchy is setup clearly along with the animations, etc... See the section on for more information on best-practices.
NOTE: Models for Microsoft Flight Simulator 2024 should be in the .gltf format as currently the SDK/simulation does not support .glb files with embedded textures.
Setup The Export
NOTE: This process will need be completed twice: once for the airframe model and once for the cockpit model.
Once you have your model - with all its LODs - prepared in your modelling program, you need to export them using the Multi-Exporter tool supplied as part of the SDK plugin:
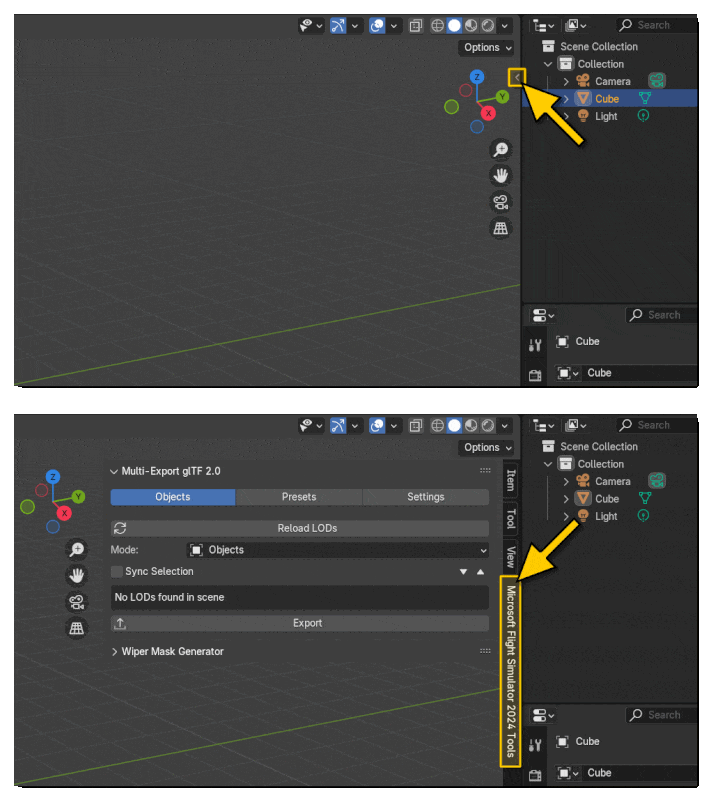
The Blender Multi-Exporter can be found here:
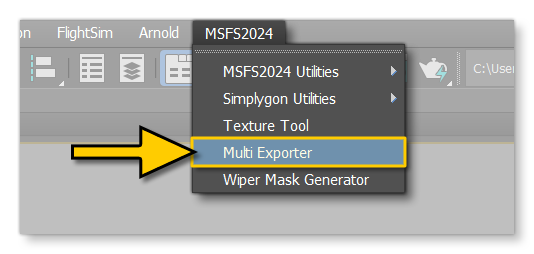
The 3DS Max Multi-Exporter can be found here:
Next you'll need to ensure that the export settings are correct:
The Settings panel allows you to setup the glTF export settings for Blender. On this panel the following sections should be edited:
- Textures: Here you can choose to keep the original textures - for those cases where you have a texture library in the package and re-use the textures - or you can supply an output path for the textures if they are to be included with the aircraft model glTF. As an example of placement for textures in the project, it would be like this (although a lot will depend on how you have set up the aircraft package):
PROJECT ROOT\<PackageName>\PackageSources\SimObjects\Airplanes\<AircraftName>\common\<CompanyName>\Exterior\texture
- Microsoft Flight Simulator 2024:
- Use Asobo Unique ID Extension - This must be checked for models used in SimObjects to ensure that everything has a unique ID (it is optional for models used in Scenery).
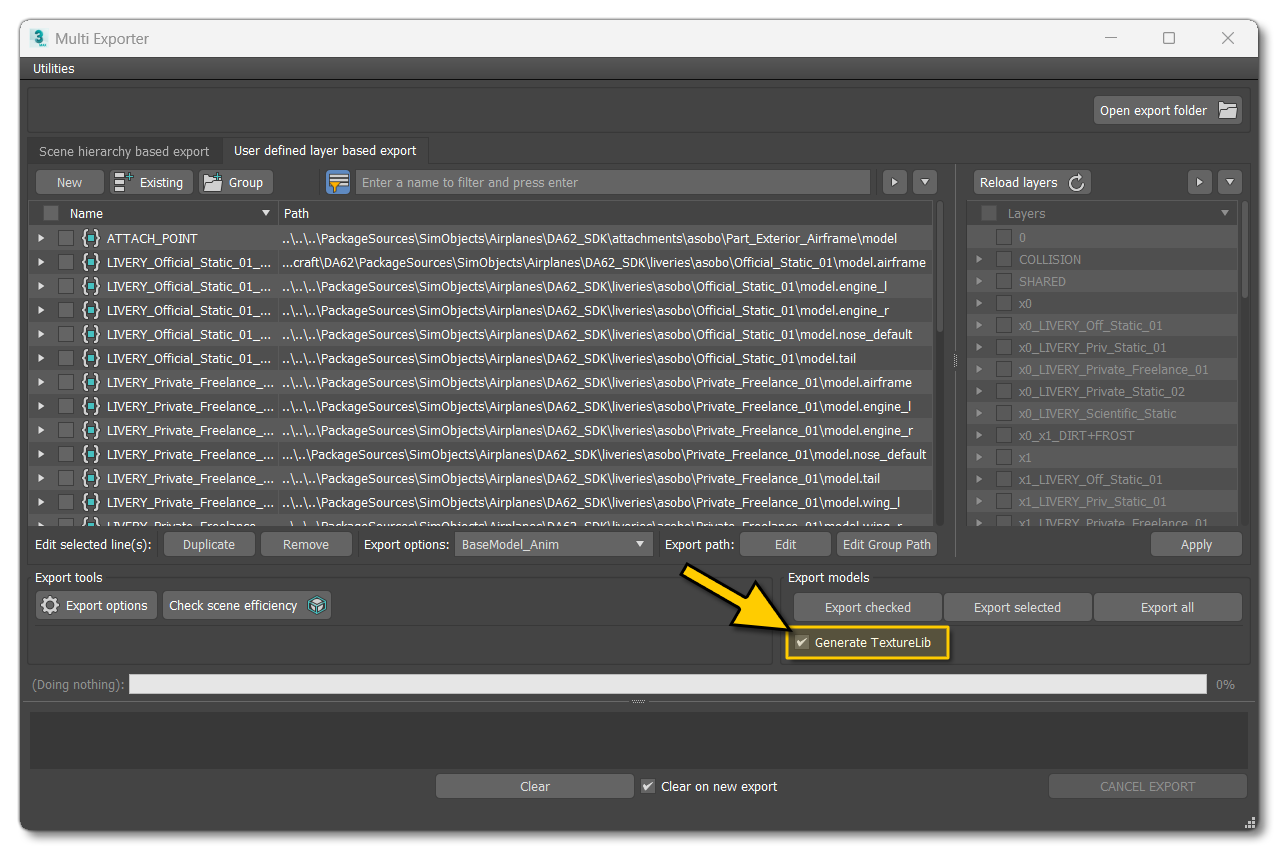
- Generate TextureLib - This should be checked to generate the texturelib XML file.
- Reset Origins - These options are almost always required to be checked if exporting parts for modular aircraft as they reset the root node transforms, which means that the parts can then be attached correctly when the aircraft is created in the simulation.
- Remove LOD Prefix - This should be checked and will remove the LOD prefixes from all the objects, which is necessary to be able to reference them correctly using the different model behavior templates.
- Animation: The animation mode should be set to NLA Tracks.
- Optimise Animations: Here you want to check the Optimise Animation Size option and the Disable Viewport For Other Objects option.
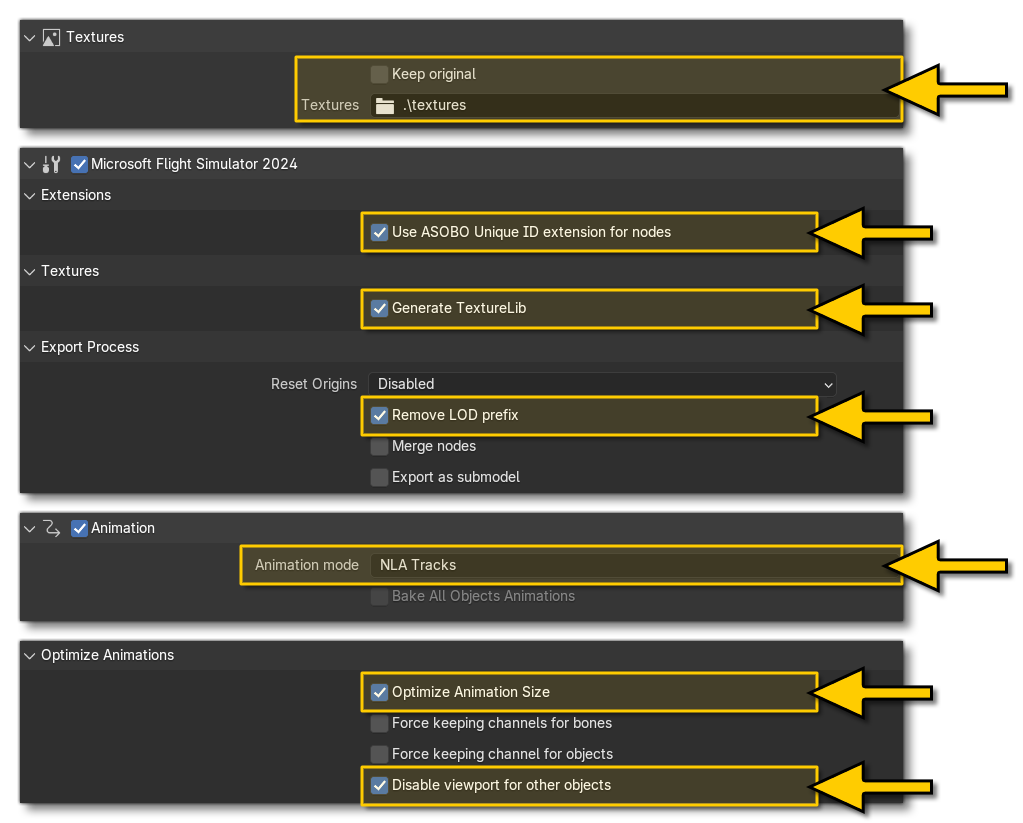
Note that you can save these values as an export preset by clicking the + button at the top of the Settings window, which lets you set up different presets to be used depending on the group of objects being exported. These are then applied to the export groups, as explained in the Creating Preset Groups section, below.
Reset Root Node Transforms
An important thing to be aware when setting up your exports, is the possible need to reset the root node transforms of each aircraft part. For modular aircraft, it is normal to have each part attached to each other part in a hierarchy of attachments, for example: root helper node > airframe > wings > engines. However, the root nodes of these parts will normally be offset from the (0, 0, 0), and after exporting and generating the aircraft in the sim, the offset from the (0, 0, 0) position will become the offset from the attach point position of the previous object in the attachment hierarchy. Therefor it is important to reset the root node transforms for each attachment, and this should be done before export, using the Transform Properties, which are explained here: Transform Properties.
On the User Defined Layer Based Export tab, you can click on the Export Options button to setup the 3DS Max export preset for the aircraft. From the following window you will need to check these options:
- Export Materials: This should be checked to ensure the aircraft exports the materials with the objects.
- Remove LOD Prefix: This should be checked and will remove the LOD prefixes from all the objects, which is necessary to be able to reference them correctly using the different model behavior templates.
- Use Asobo UniqueID: This must be checked for models used in SimObjects to ensure that everything has a unique ID (it is optional for models used in Scenery)..
- Animations: Here you want to select Export Meshes And Animations.
- Textures: Here you will want to set the Texture Path to the location of the "texture" folder within the project that you made earlier (see here). The path should be something like this (although a lot will depend on how you have set up the aircraft package):
PROJECT ROOT\<PackageName>\PackageSources\SimObjects\Airplanes\<AircraftName>\common\<CompanyName>\Exterior\texture
- Use Pre-Export Process: In this section make sure that the Bake Animation Options are set to Bake All Animations
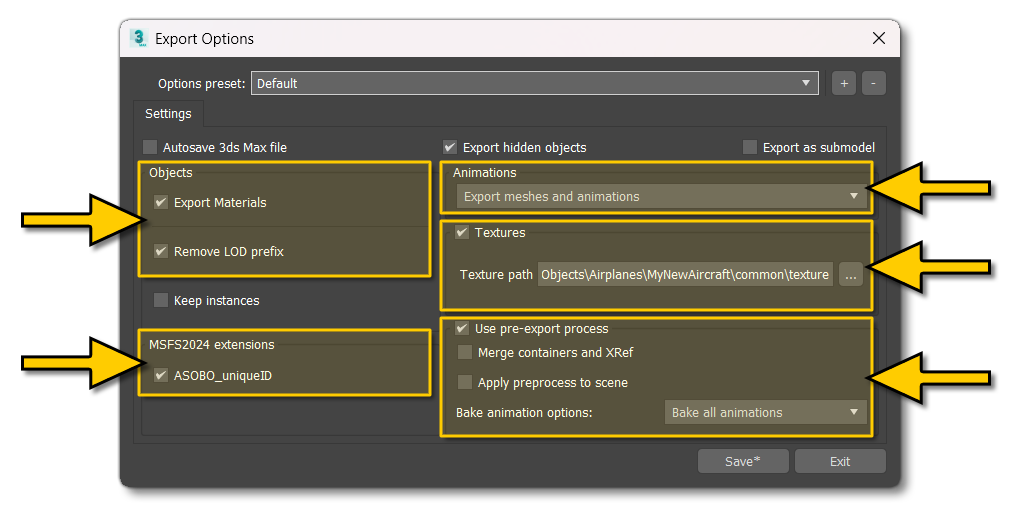
Note that you can save these settings as an export preset by clicking the + button at the top of the Settings window, which lets you set up different presets to be used depending on the group of objects being exported (after creating a new export preset you can change its name by simp,y clicking on the name field). These settings will then be applied to the export groups, as explained in the Creating Preset Groups section, below.
Reset Root Node Transforms
The other important thing to be aware of is the possible need to reset the root node transforms of each aircraft part. For modular aircraft, it is normal to have each part attached to each other part in a hierarchy of attachments, for example: root helper node > airframe > wings > engines. However, the root nodes of these parts will normally be offset from the (0, 0, 0), and after exporting and generating the aircraft in the sim, the offset from the (0, 0, 0) position will become the offset from the attach point position of the previous object in the attachment hierarchy. Therefor it is important to reset the root node transforms for each attachment, and this should be done before export, using the Object Properties, which are explained here: Object Properties.
Next you'll want to ensure that you have set up your animations and textures correctly for exporting:
In Blender you need to ensure you have pushed the actions of the animated empties down into the NonLinear Animation Panel, and that the tracks have been named the same for the grouped animations, for example:
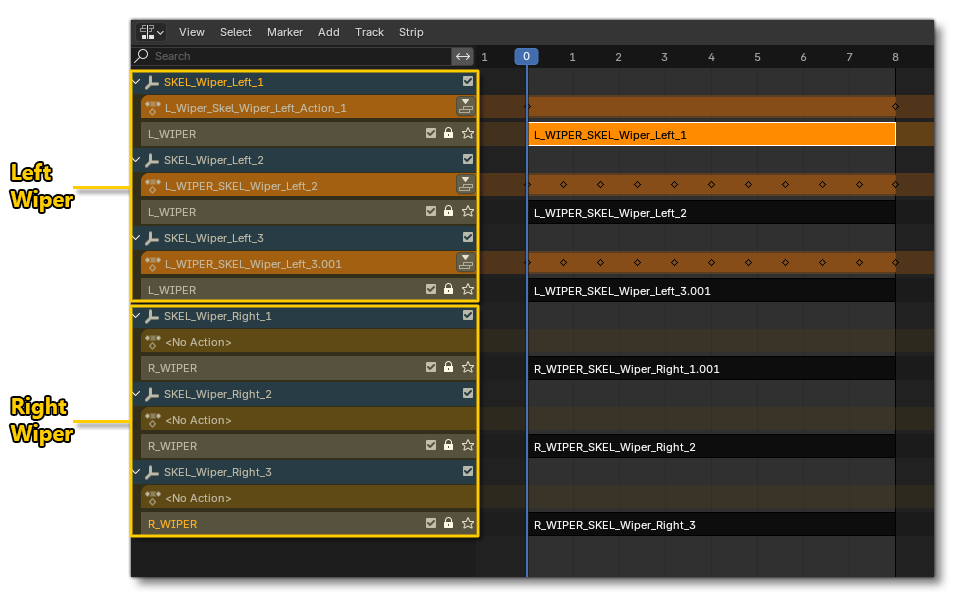
You should also note that you have additional options for your textures available from the Simple Shape Collisions Properties, and - if required - you should ensure that the appropriate flags have been set (although in most cases this isn't necessary, but it's important to be aware that the options exist).
IMPORTANT! While Blender permits negative keyframes for animations, the simulation does not, and as such the plugins will show an error when exporting animations with negative keyframe values.
In 3DS Max, you will need to ensure that you have set up your Animation Groups correctly, where all objects that animate together are in one group and the frames are correctly defined:
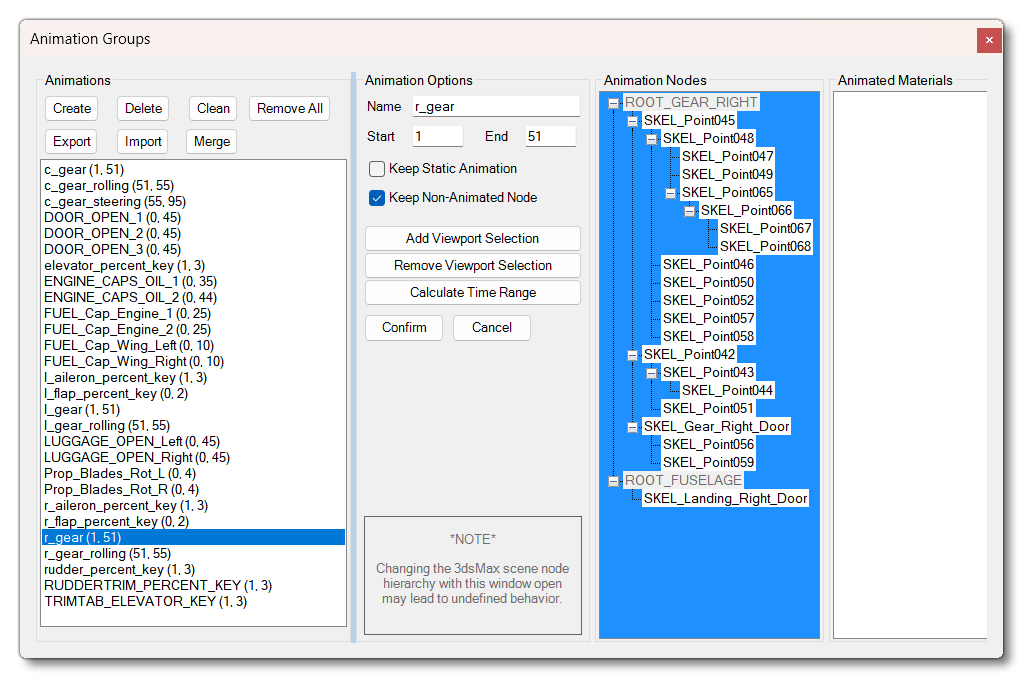
Additionally, in the multi-exporter window, if this is the first time you are exporting and you have made no changes to the textures, you should ensure that the Generate_TextureLib option is checked so that the tool generates the required texture XML files on export.
Creating Preset Groups
Once all the appropriate settings have been made, it's time to set up the preset groups for export, The concept here is to export all the parts that make up the aircraft in groups that include all the LODs, animations and attach points for the part (this includes any extra details like the ice or dirt and grime meshes). How this is done depends on the modelling program being used:
The Presets panel allows you to create Export Presets that will make it easier to export a large numbers of different objects, animations and more, without having to constantly repeat the same steps over and over. This exporter relies on Collections to be selected and added to a Preset, so you will need your scene to be split into relevant collections.
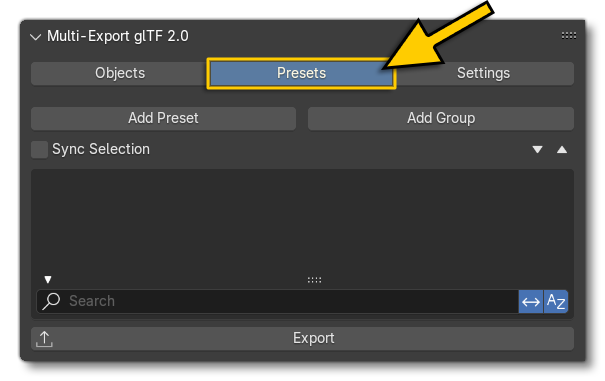
On the presets tab, the first thing you will want to do is add a Group, and set the export path - which will always be to a model folder within the modular aircraft package - and export preset (as explained in the Setup Export section above), and also rename it for clarity:
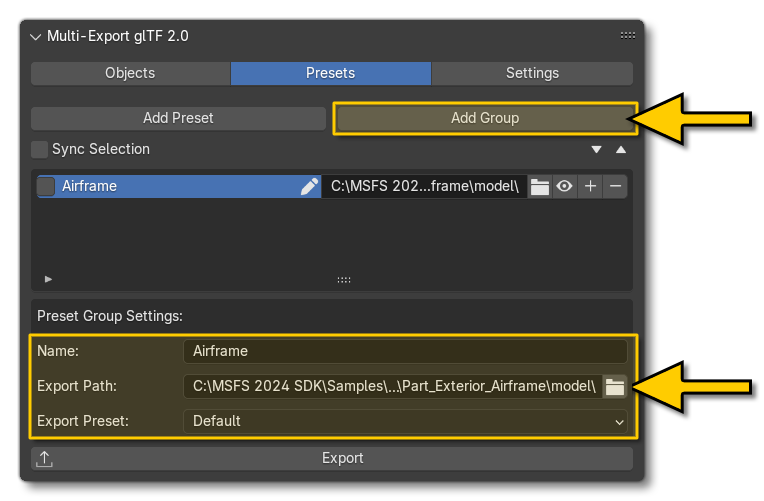
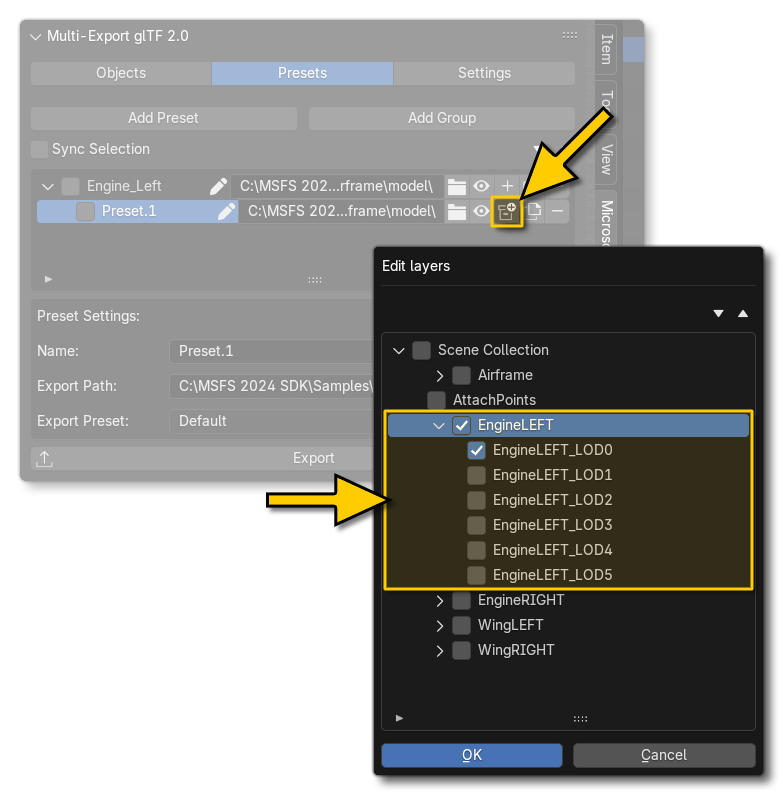
For each group you can then add one or more presets to it, by clicking on the + button beside the group (using the Add Preset button at the top will add a unique preset to the top-level, not to the selected group). As with the group, you can name the preset, set it's path if needed (it will have inherited the group output path automatically), and also apply a different set of preset options if required.
When ready, you can then click on the collections ☐⊕ button and add the required items from the scene into it:
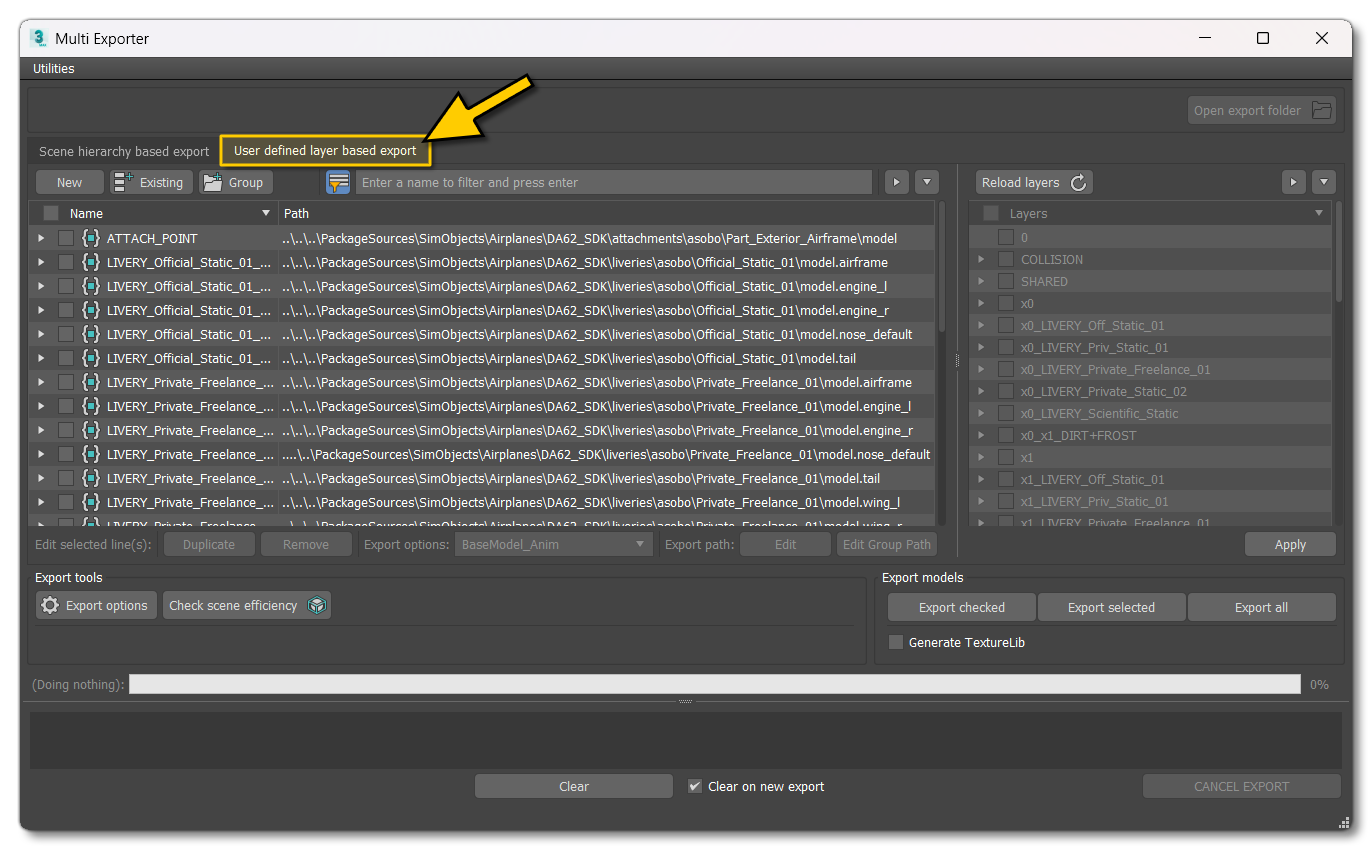
The User Defined Layer Based Export view allows you to create export presets - and groups of presets - that will make it easier to export a large numbers of objects, animations, etc... and assign them all specific characteristics without having to edit them individually.
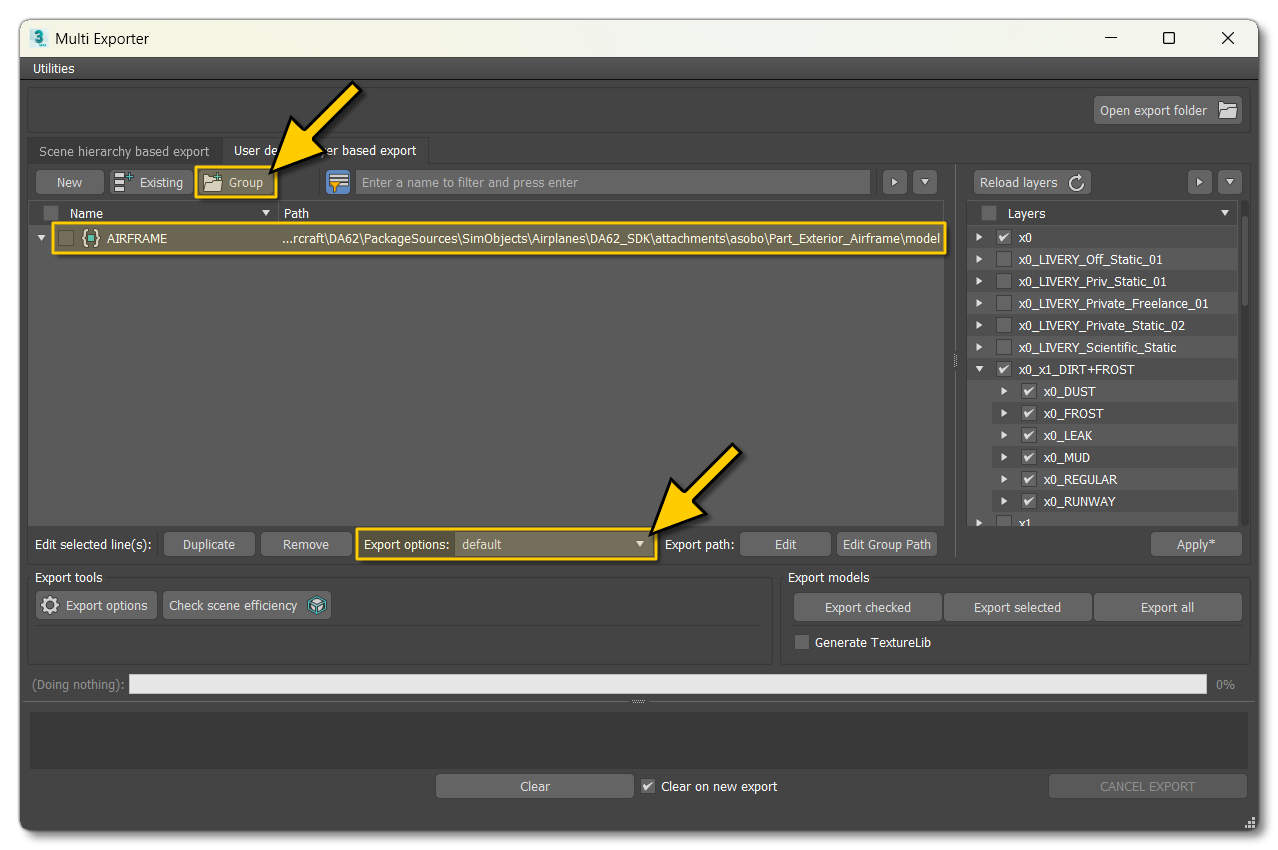
In this window the first thing you'll need to do is click the Group button at the top, then browse to the folder where you want the exporter to save the glTF files for the part(s) in the group. After that you should rename the group to something appropriate for the part(s) being exported, and select the Export Options you want to use (as explained in The Export Setup section, above):
The next thing to do is - with the group selected - click on the New button to add a new preset to it. This will open a browser window and here you can give the name of the glTF file that is going to be exported by this preset, and then you can select the contents of the glTF from the Layers section to the right of the window:

You can now repeat this process until you have setup all the preset groups required for the parts of your aircraft. The general concept here is to have one group per part and then in each group, have one preset per LOD.
Note that the DA62 is an excellent reference when it comes to the export paths within a modular aircraft project, where:
- a single "attach point" node glTF is in the common folder.
- the aircraft part glTFs and base textures - airframe, wings, cockpit, etc... - are all in the attachments folder.
- the additional livery meshes and textures are in the liveries folder.
- all the parts will be attached in presets using the attached_objects.cfg.
Exporting
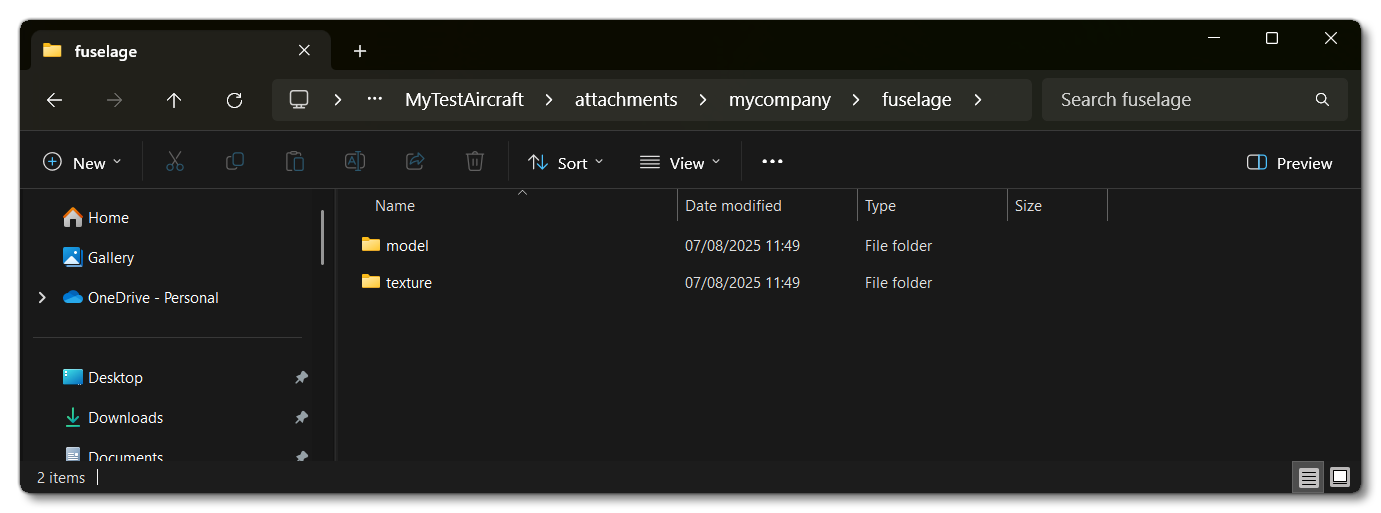
When you have completed the setup of the various export presets, tick each of the groups that you have created and then click on the Export Ticked button to save out your LODs and textures. When finished revise the models and textures folders to ensure that everything is correct and they are in the correct location within the project. The helper-node glTF should be in the common folder, and all the other parts should be in the attachments folder, for example:
Related Topics