INPUT APPLICATION
The Input App is an application that allows you to create your own input profile for different devices so that they are shown correctly in the Simulation UI and also have their buttons/axis mapped to the correct default actions. When you run the app the following window will be shown:
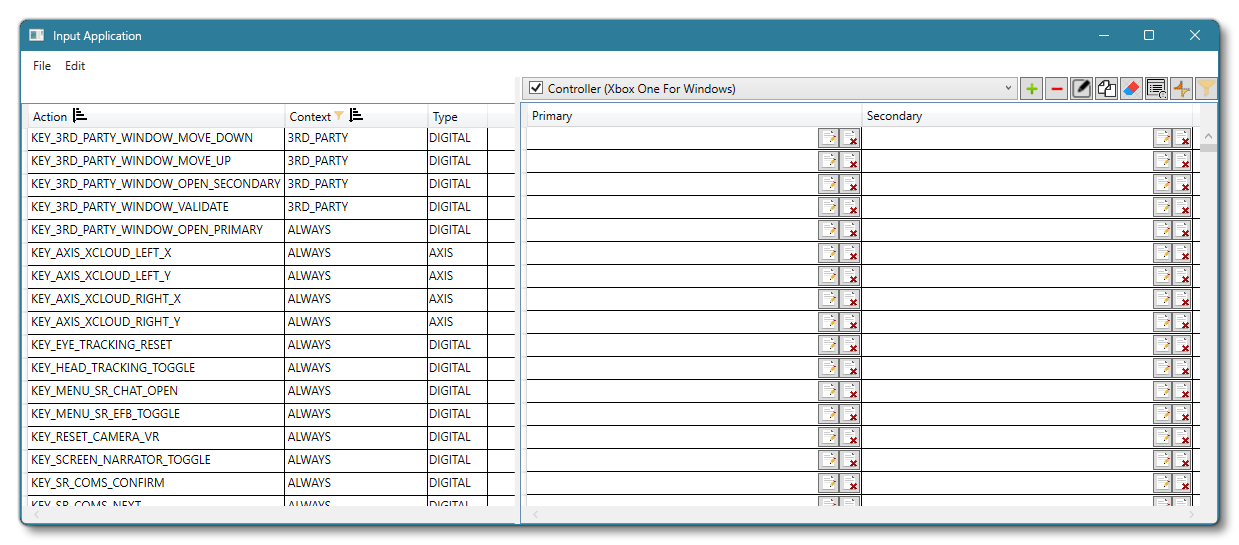
This application will create a DeviceConfig.xml file which is then placed into a package to create add-ons with a unique input profile for the device in the simulation UI. You can find a tutorial on how to use this application on the following page:
The File Menu
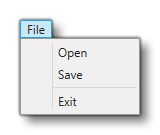
The File Menu has the following options:
-
Save
This will open the following window where you can specify details about the project you want to save:
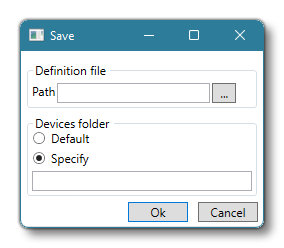 Here you give the path where you want to save the project to as well as the name to use, and the project will be saved as an
 *.inputdbfile. Along with this file, each device configuration will need to be saved. By default these will be saved to a "Devices" folder beside the*.inputdbfile, however if you select the Specify option, you can then input an alternative name for this folder (which will still be saved to the same location as the*.inputdbfile). When finished you can click onOKto save the device configurations as*.devicedbfiles to the chosen folder.
The Edit Menu
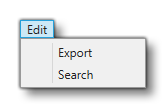
The Edit Menu has the following options:
-
Export
Here you can export the different input profiles for each device you have defined as XML files. Selecting this option will show the following window:
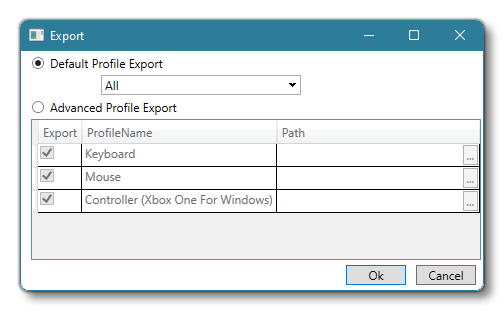 From this window you have two options for exporting:
- Default Profile Export: This option will export the selected profiles to the same location that the project file was saved to. You can use the drop-down menu to select which profiles you want to export.
- Advanced Profile Export: This option permits you to select not only the profiles to export, but the location to export them to. If you click the path button
...then you can choose the export location using the folder browser window.
-
Search
This will open the following window where you can search the Action List for specific terms:
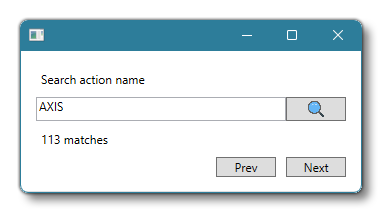 Simply supply the term to search for then click the
 PrevorNextbutton to skip forward and backwards through the Action List to find the exact Input Action that you need.
The Action List
The main section on the left of the Input App window is dedicated to the Action List. This list is split into three different columns:
- Actions: This is a list of every available input event action in the simulation. Under most circumstances, you will not be creating a definition for all of these and the default mappings will do, but they are all made available to you just in case you need them. For a description of the various input events, please see this section: Event IDs
- Context: This section gives the "context" for the input event, ie: over which part of the simulation it has influence. For more information on context, please see the
<Context>section of the Input Configuration XML Properties.
- Type: This sets the type of action that the input requires (digital, analog, etc...). For more information on context, please see the
The Binding List
The right side of the Input App window is used to create the bindings for the selected input event action. It has two columns where you can define the primary input and the secondary input, and a series of options at the top. These options are as follows:
- Input Device: Here you can select both the input device that you wish to edit, and the default input device when exporting. For example, in the image below, the drop-down menu shows 3 controller device configurations, and the "Default" one is flagged as the default:
 Default devices are the ones that will be loaded first by the simulation when run. Note that the device you are mapping should be connected to the PC and should be added automatically to this list.
 Add Device: Clicking this button will open the Add Device window where you can select any one of the following base devices to add and then edit:
- Keyboard - Set up input for keyboard controls
- Mouse - Set up input using a mouse
- Controller (XBox One For Windows) - Set up input using an XBox One controller
- XInput Gamepad - Set up input using a generic controller
- XBox Series Gamepad - Set up input using an XBox gamepad (other than XBox One)
- XBox Series Stick - Set up input using an XBox compatible joystick
- XR Controller Left - Set up input for the Left VR/AR controller
- XR Controller Right - Set up input for the right VR/AR controller
- Tobii - Set up input for a Tobii controller
 Remove Device: Clicking this will remove the currently selected device. Note that you can undo this if required using
 Ctrl+Z.
 Rename Device: Clicking this will open up the Rename Device window where you can change the name of currently selected device.
 Duplicate Device: Clicking this will immediately create a duplicate listing of the currently selected device.
 Clear All Bindings: This will clear all the bindings for the currently selected device. Note that you can undo this if required using
 Ctrl+Z.
 Device: This button will open the Device Properties window:
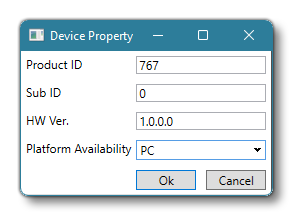 Here you can see details about the device and also set on which platform it should be available (PC and/or Xbox). The options here are as follows:
- Product ID: Device identifier.
- Sub ID: This is the composite identifier for when you have more than one device with the same Product ID, or a single Device with several distinct parts (only used on PC).
- HW Ver.: Hardware version of the device, which can be changed if the device has other devices connected to it (only used on Xbox).
- Platform Availablility: Sets which plaform can use this input profile.
 Axis Setup: This button will open the Axis Setup window. From this window you can set various properties for the "axis" controls on the selected device:
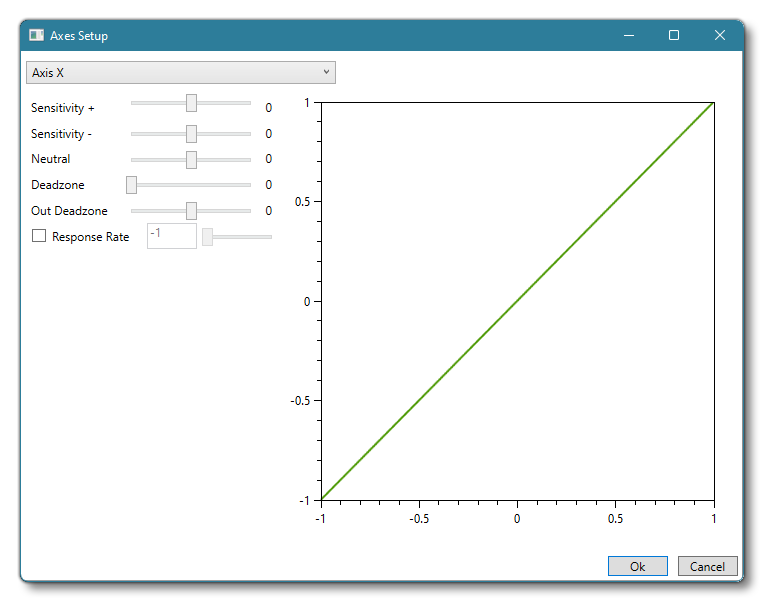 This window sets the controls on a global level, so any input mapped to an axis will use these properties by default, however it is possible to edit the axis properties on a per-binding basis. Please see the section on Editing Bindings, below.
 View Only Bound Actions: This button toggles the view bound actions filter. When enabled, only those actions that have a custom input binding will be shown, and when disabled, all actions will be shown.
Editing Bindings
The main part of the Binding List section is taken up with the different input bindings, separated into two columns: Primary and Secondary. To add a binding for a given input event action, simply click on the ![]() Edit button, which will open the following window:
Edit button, which will open the following window:
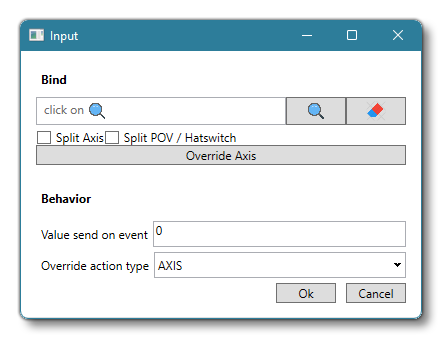
In this window you have the following options:
 Bind Select: Clicking this button toggles the window to detect input on the chosen device or not. Once clicked you would then either move an axis, press a button, or press a key to register it as the input to be bound. Note that the window will continue to detect input until you click this button again, so you may add multiple inputs as a combined input binding (eg: gamepad buttons 4 + 5 or the keys
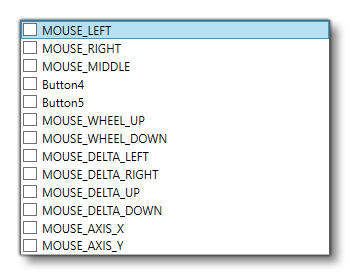
 SHIFT+A(up to a maximum of four concurrent inputs). Clicking this button again disables the input detection once more. It should be noted that this option may not exist for certain inputs (eg: mouse). Instead you will be presented with a drop-down list of the different inputs where you can select the one(s) you require. The image below shows the input options for the mouse:
 Remove Binding: Clicking this will remove the current input binding.
- Split Axis: By default, axis are detected regardless of direction of movement. For example, a stick movement up or down will be detected as simply "Axis Y". However, when you select this option, the axis input will be detected as either "Axis Y+" or "Axis Y-" depending on the direction that it has been moved. This option is not available for all inputs.
- Split POV/Hatswitch: By default, controller POV/hats are detected regardless of direction of movement. For example, a POV/hat movement up or down will be detected as simply "POV". However, when you select this option, the POV/hat input will be detected as either "POV UP" or "POV DOWN" depending on the direction that it has been moved. This option is not available for all inputs.
- Override Axis: If the input being bound is an Axis, Rotation, or Slider, then you can choose to override the global controller setting for this input type (as set using the Axis Setup) by selecting this option. The Axis Setup window will be opened on the specific input type and you can then change the properties. The new properties will ONLY be applied for the currently bound input. Note that editing this property will automatically add MOD AXIS OVERRIDE to the Override Action Type section. This option is not available for all inputs.
- Value Send On Event: By default, a bound input event will send either a 1 or a 0 when pressed/moved/detected. However, it may be that you wish to send a specific value along with the input event, in which case you would set that value here. Note that you must also select MOD VALUE from the Override Action Type section for the value to be sent successfully.
- Override Action Type: This section has a drop down menu where you can check one or more override options, which will be used to override the default input parameters for the input being bound. These override options are as follows:
- DIGITAL - The input will regarded as being a digital "on/off" input
- ANALOGICAL - The input will be considered as an analog input. Note that this is supplied for compatibility with certain joystick devices, but usually any analog input would use the Axis type.
- AXIS - The input will be considered as some kind of analog input.
- MOD_INV - The input will be inverted.
- MOD_UP - Normally input is sent on the press of a button, however when this modifier is added, input will be sent when on the release. This is normally only valid for digital input.
- MOD_VALUE - The input will send a value other than 0 - 1, as set in the Value Send On Event section.
- MOD_AXIS_OVERRIDE - This will be added automatically when you choose the Override Axis option, and signifies that the global axis settings should be overridden by a custom setting for this input event binding.
Related Topics