AIRCRAFT LODs
So far the documentation on how to make an aircraft has concentrated on the LOD0 version of the aircraft, which is the one that users will see when flying the plane and using the different cameras. However in the simulation you may have a multiplayer server where other users have the same aircraft, or the aircraft itself could have been included as AI traffic, or it could simply be a part of the scenery of an airport as a parked aircraft. For these situations your aircraft will need different LODs so that Microsoft Flight Simulator 2024 can optimise the geometry and materials used by the aircraft based on how far away from the camera it is being viewed to keep an optimal framerate.
The following pages cover important information for creating LODs not mentioned here:
Animations
When creating the different LODs, keep in mind that some animations will need to be maintained down the LODs as appropriate. To ascertain whether an animation is required or not, use the camera distance reference and think about the silhouette (see here) before deciding if animation will be visible – if it is, then it should be maintained. Animation also relates to componentization, for example: the landing gear doors need to open in order for the wheels to extend, therefore it is important not to weld the seams up or remove the back face of the doors as they will be visible when the wheels are deployed.
Some specific instances where animation should always be maintained are:
- WingFlex skinning - this will be noticeable from quite far away, although probably not on LODs x5 and x6 so LOD x4 is probably a good cut-off point.
- Landing Gear animations - these should also be maintained at least down to LOD x4.
Small components that make up larger animations, such as pistons on the flaps or wheels can be removed from LOD x3 or even LODx2, depending on their visibility.
Finally, always use dummies to animate meshes. This way all LOD elements can be parented to the same "master dummies" and work all down the LOD levels.
Textures
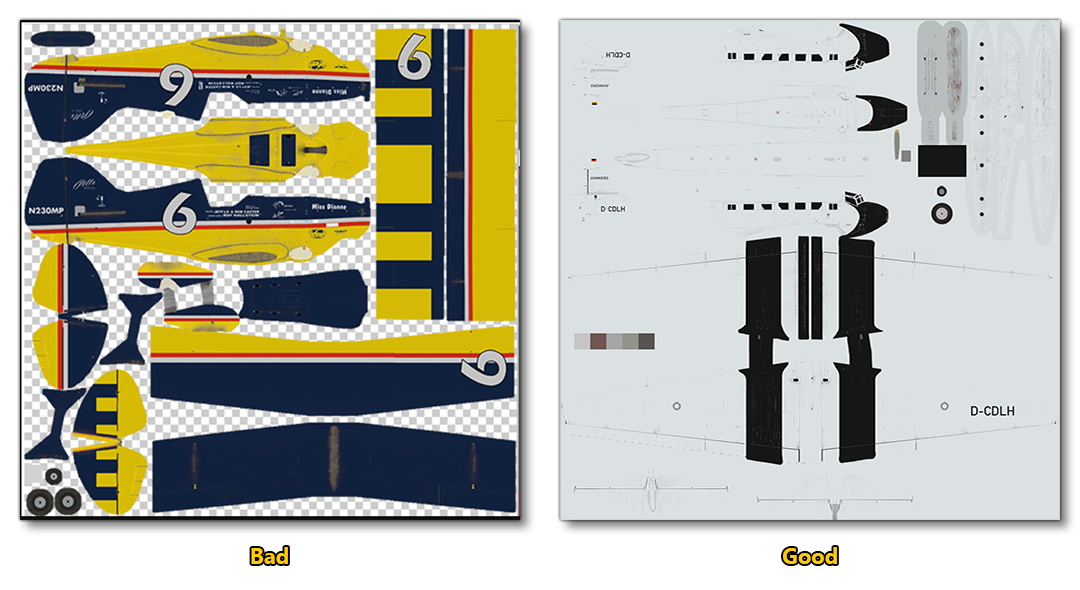
When creating your textures for the different LODs, in particular for the higher LODs (x4, x5 etc..), in many cases you'll be using a single texture for the whole aircraft, and as such it's important that when you create the map for those LODs you avoid empty spaces. Essentially, you should fill the "holes" with the colour of the nearest parts. As a result, there will be less artefacts on the mipmaps and the texture resizing during optimization will be better. Below you can see examples of a "good" and a "bad" texture map:
Examples - Airframe
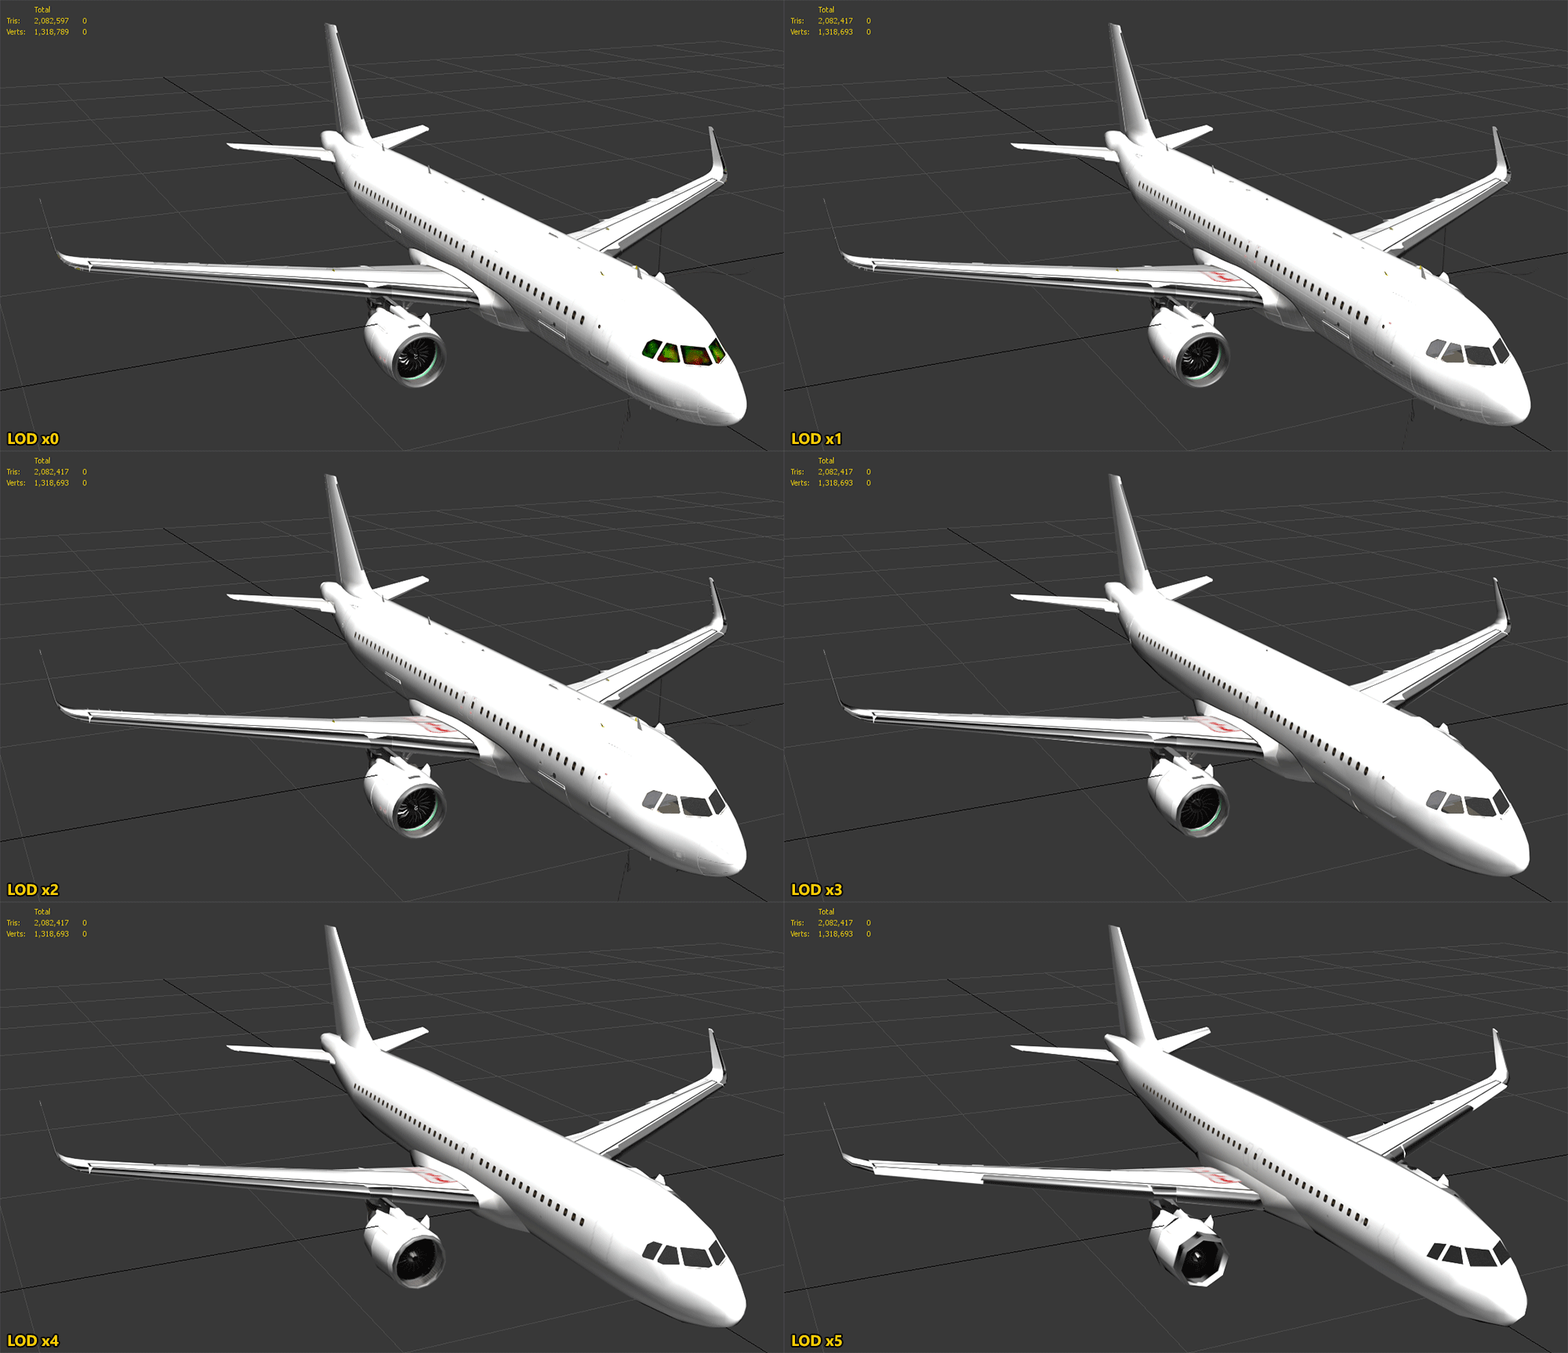
Below you can see a series of visual examples to help you see where and how you can create and optimise Airframe LODs at different levels. To start with, here's the A320 Neo:
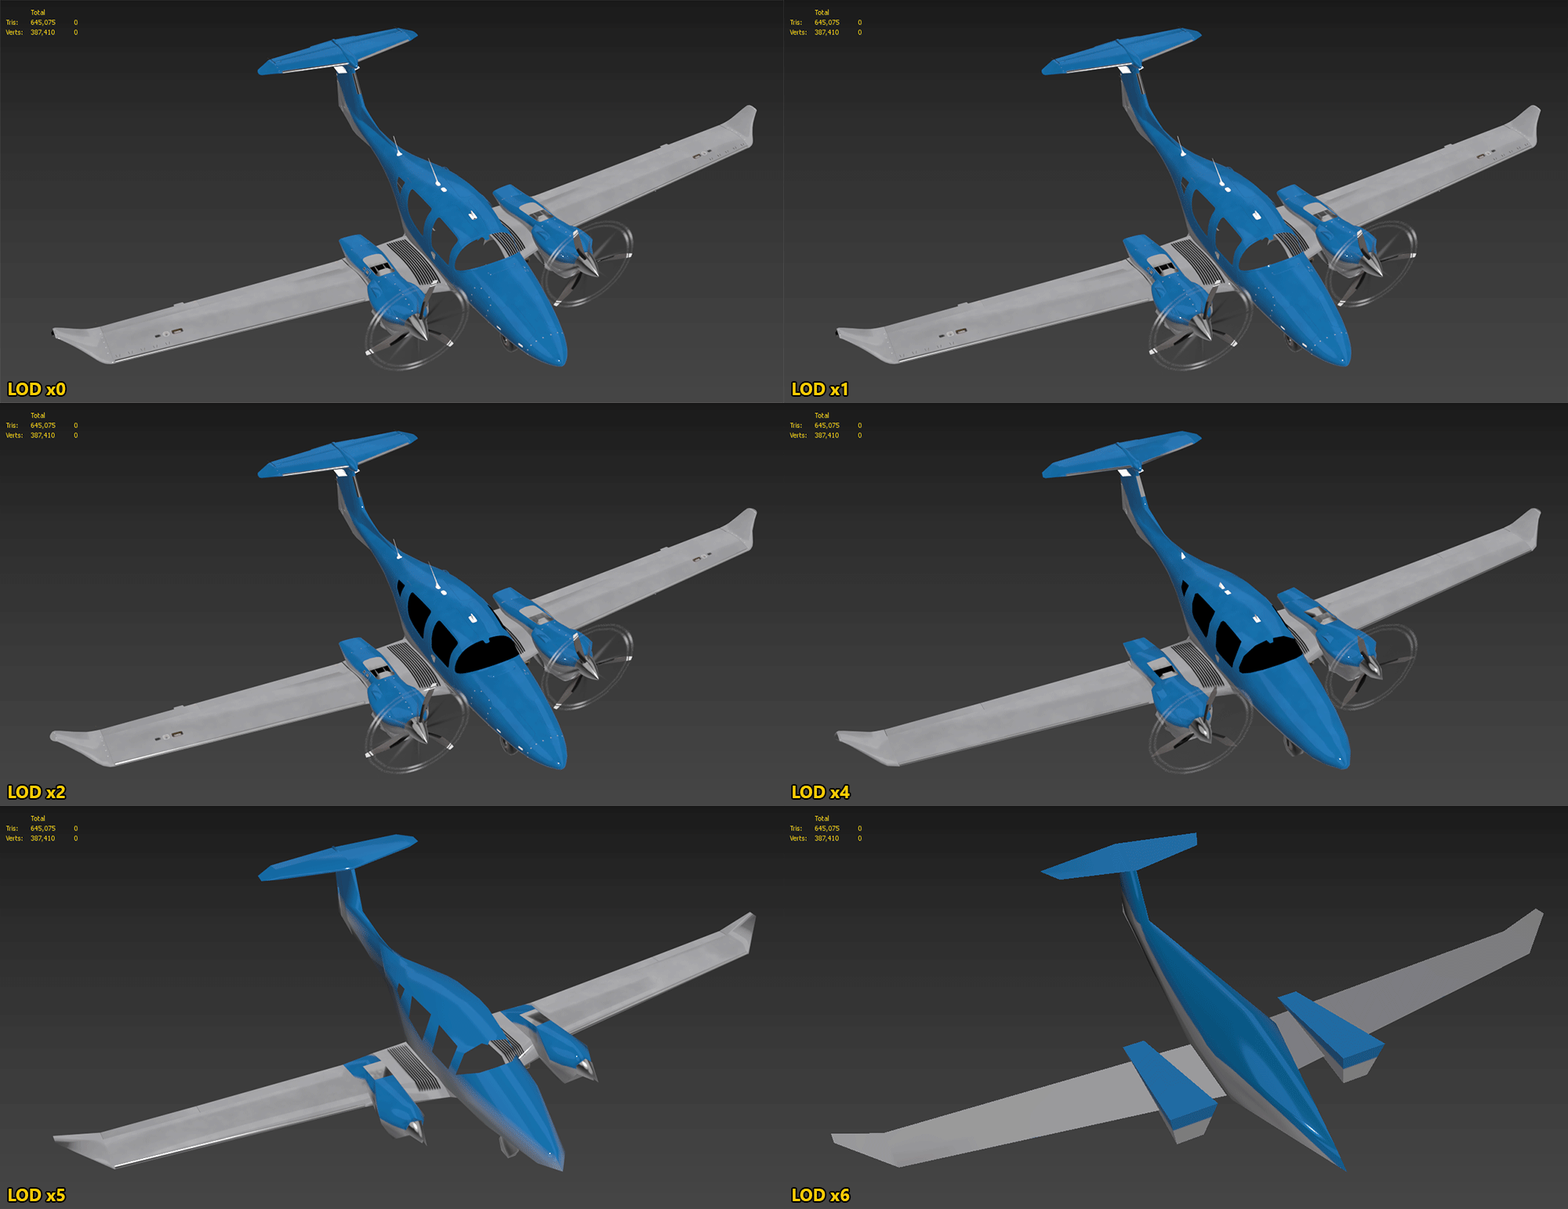
And this is the DA62:
Examples - Cockpit
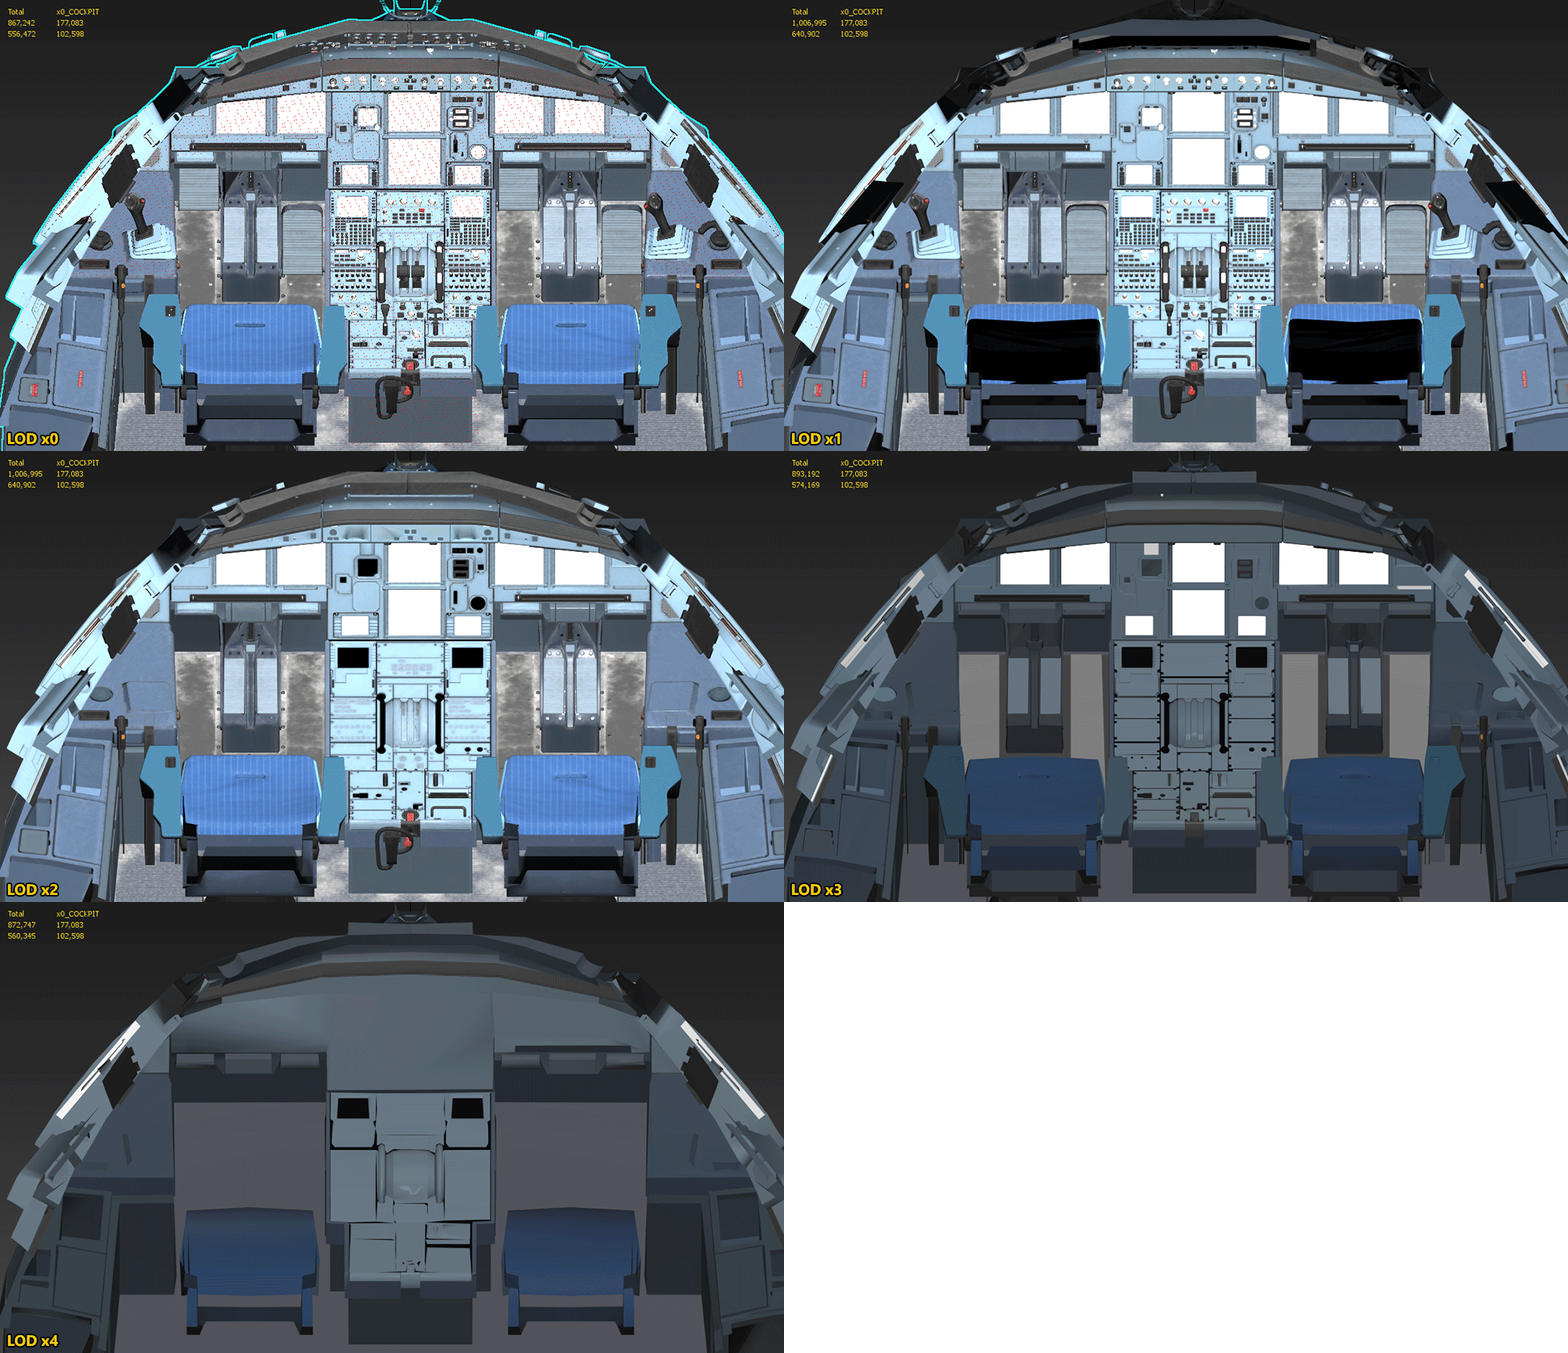
For the cockpit we have the following examples, starting with the interior of the A320 Neo:
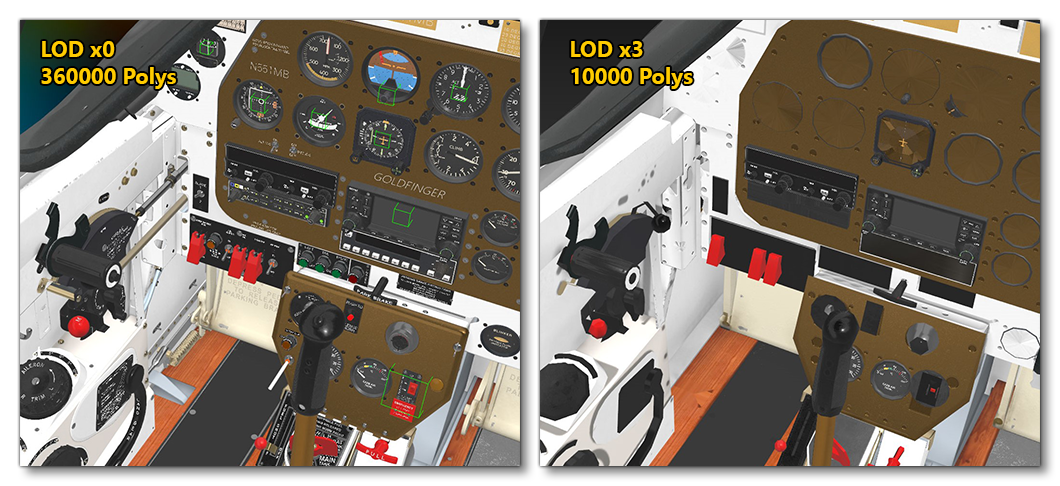
The following image illustrates just how much you can reduce the cockpit LOD detail when you reach LOD x3. First let's look at the Cap10:
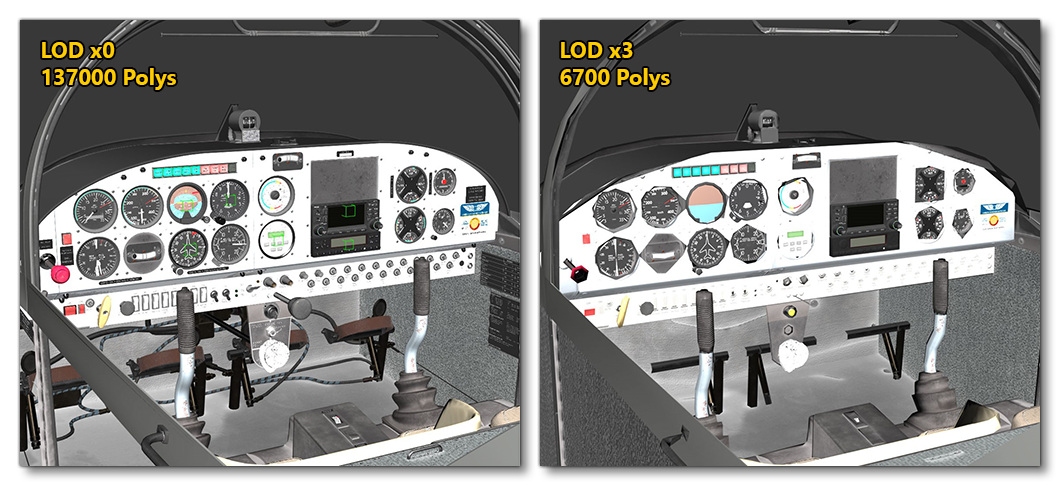
And here is the same LOD x3 reduction for the P51 Goldfinger:
