STATIC LIVERIES (WIP)
A static livery in Microsoft Flight Simulator 2024 is one which does not have any dynamic or adaptive elements, ie: it has the colours and textures included in the aircraft model and cannot be changed by the different customisation or adaptive options within the game. In general this type of livery is supposed to be used in specific cases where you are trying to recreate a particular "look" for an aircraft and don't intend for it to be used in more than a single career or freeflight or as a passive aircraft. When creating this kind of livery please keep the following recommendations in mind:
- The livery should use the lowest number of textures and triangles while maintaining the best visual fidelity possible.
- The simulation engine prefers triangles over textures, so use vertex colours over textures where possible.
- Alternatively, for a simple color, the color can be picked in a square of 32 pixels with the UVs all grouped in that colour square.
- We recommend a maximum of 1 texture at 2048x2048px for a livery.
- You should only have one material for the livery, and this should not be a part of the multi-material used for the aircraft. If you need to create more than one material - for decal order purposes for example - we recommend that you then create a dedicated multi-material for the livery.
- If the livery has text, this can be created as a mesh so that the user can zoom in as much as they want and not have resolution issues.
Workflow
The general workflow for creating a static livery begins with having good reference material and a base aircraft on which to work.

With the base aircraft finished you can then start blocking out the shapes required for the livery using splines:

These splines can then be transformed into meshes, keeping just the polygons so you can use them to cut the main airframe:
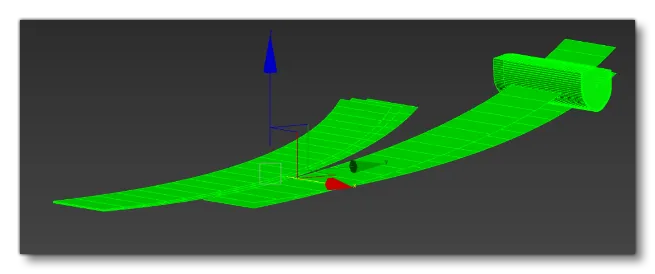
At this point you can use a "push" modifier on the livery mesh. Most of the time a push value of 2mm is enough, however after applying the modifier you should double check that the livery mesh doesn't clip through the fuselage anywhere. Once you are happy with the livery mesh, duplicate the fuselage or part that you are adding the livery to and then use the livery mesh to perform the cut. In the image below you can see how the duplicated model mesh looks after this has been performed:

From this duplicated and cut model you can then go ahead and remove everything that is not needed as part of the livery, giving you the livery mesh. This is then ready to have the texture applied:
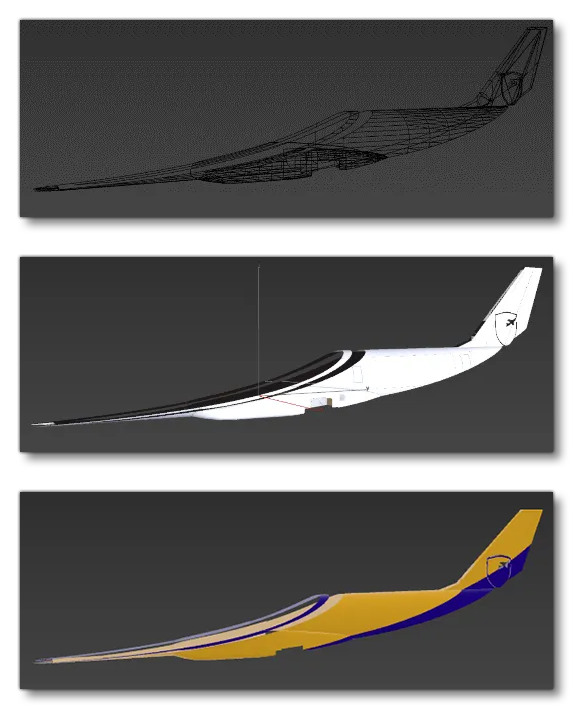
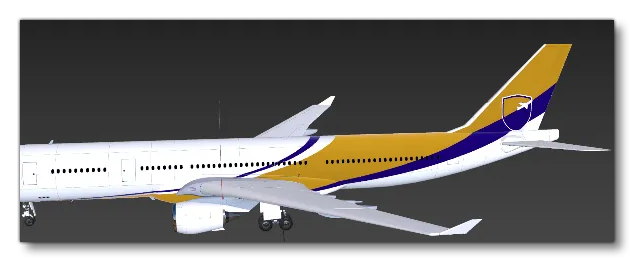
This can then be tested over the original model and any adjustments that need to be made can be made here to ensure the mesh looks good from all angles, and that there is no clipping or other issues.
Text
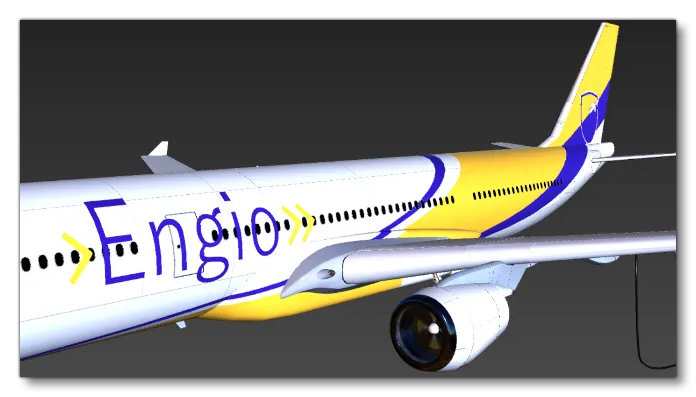
The process for creating text to be used in a static livery is very similar to that used for the rest of the livery elements, starting with taking the text element and converting it into a mesh. This mesh then needs to be conformed to match the geometry of the part that it is being placed on, and have a texture and/or colour applied to it. The final step is to ensure that it's placed correctly over the main model and doesn't clip into it (like the main livery parts, a space of about 2mm between the part and the text is ideal).
Final Touches
The final touches for the livery are to parent any of the moving parts to the animated dummies of the main model such that they share the same rig and will be animated correctly. After that you will want to ensure that the livery elements are all on the same layer and named appropriately, for example:
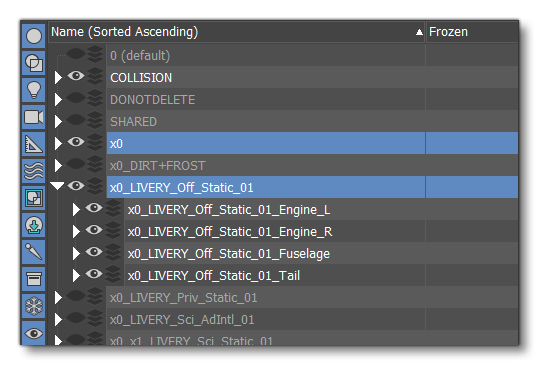
LODs
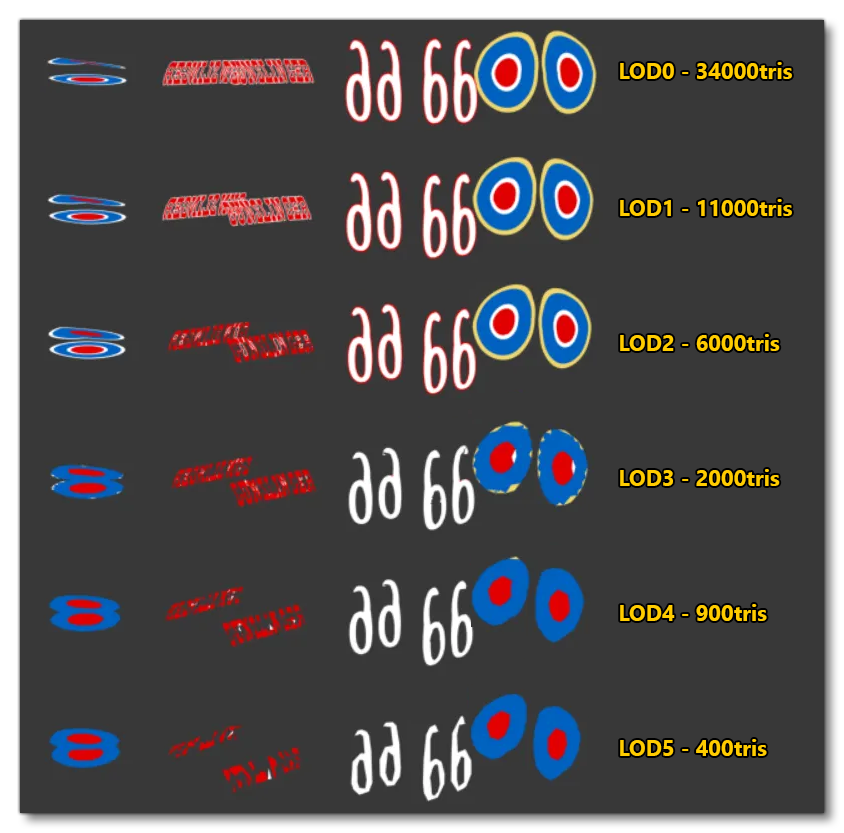
Having finalised the LOD0 for the livery, you will then need to carry it across the other LODs as well, trying to maintain quality and visual fidelity, without using too many resources. In general You want the livery to visible down to the second-to last LOD and on the last LOD you can then switch to simple vertex colours. The image below shows an example of what kind reduction to aim for through the LODs when creating a static livery:
Package Setup
Regardless of how many liveries the aircraft has, the first step you will need to take is to create a new project for the aircraft in The Project Editor, as outlined here: Creating An Aircraft Project. If the aircraft has a single livery then there is nothing more to do, however if it has multiple liveries then things are a little different, and you will first need to export the different liveries separately from 3DS Max, such that you have model and texture folders for each livery. Keep in mind that it's only the livery elements - all LODs - that you need to export, not the full aircraft.
Once you have the required livery assets, you can then add them into the package sources. The main aircraft package will have a set of texture, model, and panel folders, and now you need to add in your livery texture, model, and panel folders, using a string appended with a "." separater to identify them. For example, here is how the source files for an aircraft with two liveries could look:
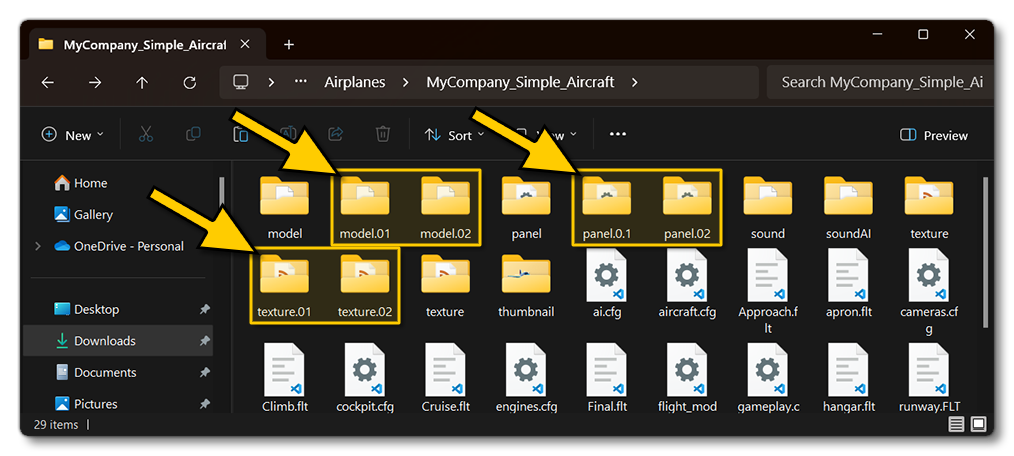
Note that if the livery is purely based on textures, you do not need the model folders, and likewise for the panel folder. If the livery does not require changes to the Vpainting or any other panel feature, the panel folders don't need to be included. Also note that the suffix does not have to be be a number as long as it's a valid alpha-numeric string. Having added the required folders you will need to set up the appropriate files in those folders.
The texture.cfg File And Thumbnails
The contents of the texture folders will look something like this:
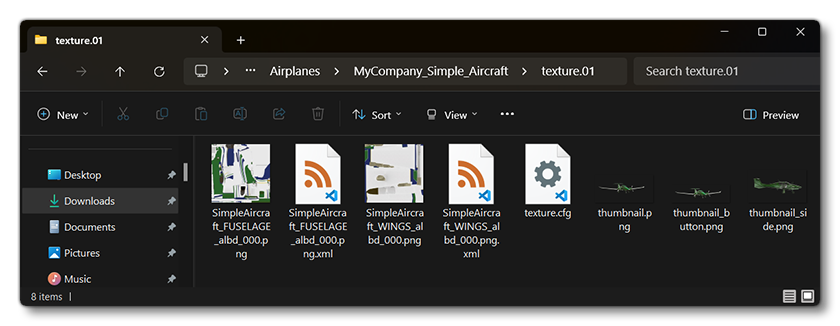
You'll notice that in the image above there is an additional texture.cfg file included along with the texture and thumbnail images. This file provides Microsoft Flight Simulator 2024 with fallback folders that will be used should there be any issues, or should the specified livery folder not hold complete texture data. In this file you would write the different folders to fallback to, using the [fltsim] header. Inside this section, fallbacks are defined via the following syntax:
fallback.<index>=<path>
Here the index must be incremented by 1 for each fallback path and must start at 1, for example:
[fltsim]
fallback.1 = ..\..\Mycompany_Livery_Aircraft\texture
fallback.2 = ..\..\Mycompany_Livery_Aircraft\texture.base
You should always include this file in the textures folder to give at least 1 fallback texture for the aircraft variation.
Thumbnails
You should also always include the three thumbnail images in the texture folder. These are authored as follows:
thumbnail.png- authored at 720px \(\times\) 344px without opacity.thumbnail_button.png- authored at 830px \(\times\) 260px, with opacity.thumbnail_side.png- authored at 930px \(\times\) 340px, with opacity.
You can use The Aircraft Thumbnail Capture Tool to create these images, and they will be used in the Microsoft Flight Simulator 2024 UI to show the livery being used. For more information see the page on .
The model.cfg And model.xml Files
The contents of the model folders will look something like this:
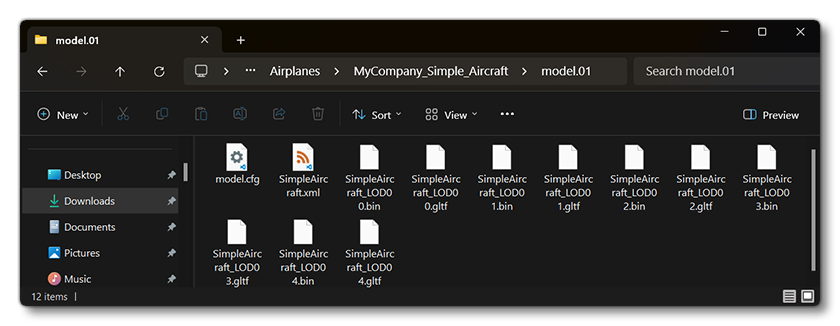
Within the livery model folders you will have the usual *.bin and *.gltf files, as well as as the model.cfg and <aircraft>.xml. The model.cfg file should be set up as you would normally (see here for details: Aircraft XML and Model CFG), however the model XML file does not require all the same information that the base model file has. In most cases, since static liveries are purely cosmetic, all this file needs to do is setup the LOD limits for the livery meshes and then link to the base aircraft using the <IncludeBase /> element. For example:
<?xml version="1.0" encoding="utf-8"?>
<ModelInfo>
    <LODS>
        <LOD minSize="80" ModelFile="MyAircraft_LOD00.gltf"/>
        <LOD minSize="30" ModelFile="MyAircraft_LOD01.gltf"/>
        <LOD minSize="20" ModelFile="MyAircraft_LOD02.gltf"/>
        <LOD minSize="13" ModelFile="MyAircraft_LOD03.gltf"/>
        <LOD minSize="8" ModelFile="MyAircraft_LOD04.gltf"/>
        <LOD minSize="5" ModelFile="MyAircraft_LOD05.gltf"/>
        <LOD minSize="1" ModelFile="MyAircraft_LOD06.gltf"/>
    </LODS>
    <Behaviors>
        <IncludeBase RelativeFile="..\..\MyAircraft\model\<AIRCRAFT>.xml"/>
    </Behaviors>
</ModelInfo>
The aircraft.cfg File
The aircraft.cfg file is what tells Microsoft Flight Simulator 2024 what aircraft liveries are available and will require a few details added into some sections so that the simulation can show all the different livery variations to the user. This is done using the [FLTSIM.N] section, where N is usually 0 and corresponds to the base aircraft and further sections will be added for each of the liveries. The most important parameters for the liveries are:
titletexturemodelui_variation
Optionally you may also edit the following entries (although this is not required):
paneldescriptionui_typeui_createdby
It is important to note that the name you give the texture / model / panel parameters is the name that you appended onto the end of the folder, not the full or relative path to the folder itself, as explained further up this page.
Here is a full example of the [FLTSIM.0] section for a variation:
[FLTSIM.1]
title = "My Aircraft Matte Blue Variant"
model = "blue_matte"
panel = "blue_matte"
sound = ""
texture = "blue_matte"
kb_checklists = ""
kb_reference = ""
description = "Matte blue paint variation of the Sample Aircraft"
ui_manufacturer = "My Manufacturer"
ui_type = "Simple Aircraft Variant"
ui_variation = "Matte Blue"
ui_typerole = "Single Engine Prop"
ui_createdby = "MyCompany"
ui_thumbnailfile = ""
ui_certified_ceiling = -1
ui_max_range = -1
ui_autonomy = -1
ui_fuel_burn_rate = -1
atc_id = "G-BAFM"
atc_id_enable = 1
atc_airline = ""
atc_flight_number = ""
atc_heavy = 0
atc_parking_types = "ANY"
atc_parking_codes = ""
atc_id_color = ""
atc_id_font = ""
isAirTraffic = 1
isUserSelectable = 0
You can see here that the path for the texture / model / panel folders have been set to be "blue_matte". This means that the variation will look in the folder texture/model/panel.blue_matte for the appropriate files to use for the livery.
The panel.cfg File
When creating the livery or aircraft variation, by default it will "inherit" the values from the panel.cfg file of the base aircraft. However, your livery can include it's own panel.cfg file too, in which case you can choose to either have this file completely overwrite the contents of the base aircraft, or simply add/modify specific parts of the base aircraft file.
When you include a panel.cfg file, the default behaviour is to overwrite everything in the base file, however you can add in the following to the file to then selectively add/overwrite information:
[VARIATION]
override_base_container = 0
This parameter is telling Microsoft Flight Simulator 2024 that the panel.cfg file should inherit the base file settings and then use them or overwrite them using any additional settings in the current panel.cfg file. For example:
[VARIATION]
override_base_container = 0
[VPainting02]
size_mm = 1024,256
texture = RegistrationNumber
location = exterior
painting00 = Registration/Registration.html?font_color=white, 0, 0, 1024, 256
The example shown above would be the total contents of the panel.cfg file for the variation, and all it's doing is flagging the base file to not be overwritten, and then supplying a change to the [VPainting02] section. If that section exists in the base, then it will be ignored in favour of the values used here, and if it doesn't exist then the values here will be added to the base panel.cfg.