DEBUGGING HTML/JS/CSS INSTRUMENTS
When making your instruments for a glasscockpit display, it's more than likely that you'll have the odd issue or bug to deal with. These things are complicated and require a lot of trial and error to get right! So here we'll outline some of the tools available to you for testing things and then give a couple of examples of how to use them to fix an issue.
Before continuing, it's worth noting that we'll be using the project that we made for the Creating An HTML/JS/CSS Instrument tutorial, so if you haven't done that we strongly suggest that you do. This page will be giving examples and instructions based on that project to illustrate some of the ways the debugging tools work.
SimVar Watcher
One of the primary debug tools for any VCockpit instrument is the SimVar Watcher.
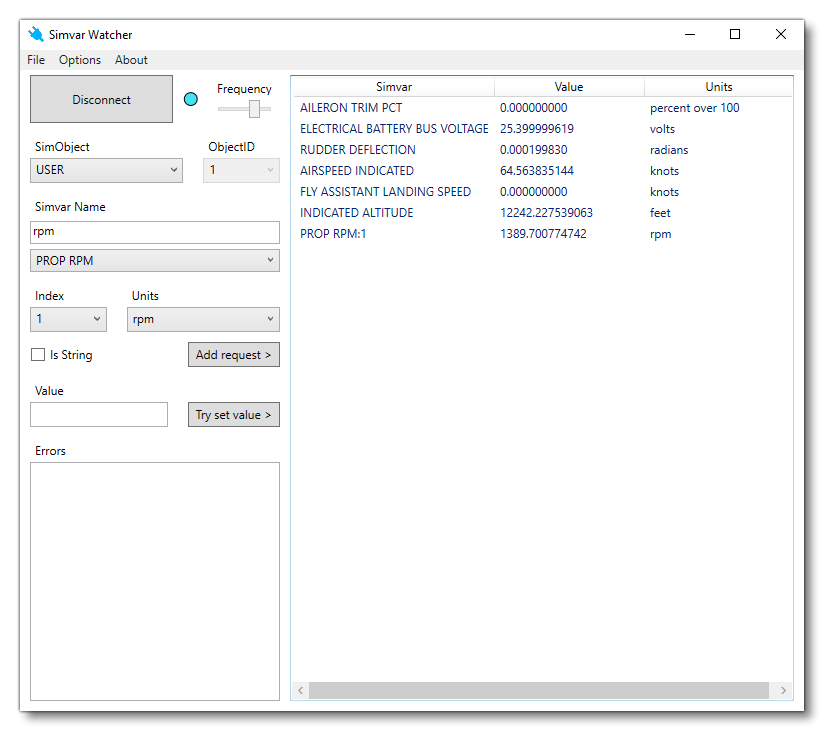
This tool permits you to view in real-time the values of any SimVar, and is particularly useful when creating instrument displays, since they are usually driven by these variables. Using this tool you can see how the various SimVars update while operating the display or as flying conditions change.
Coherent GT Debugger
Possibly the most important tool you have for debugging is the Coherent GT Debugger.
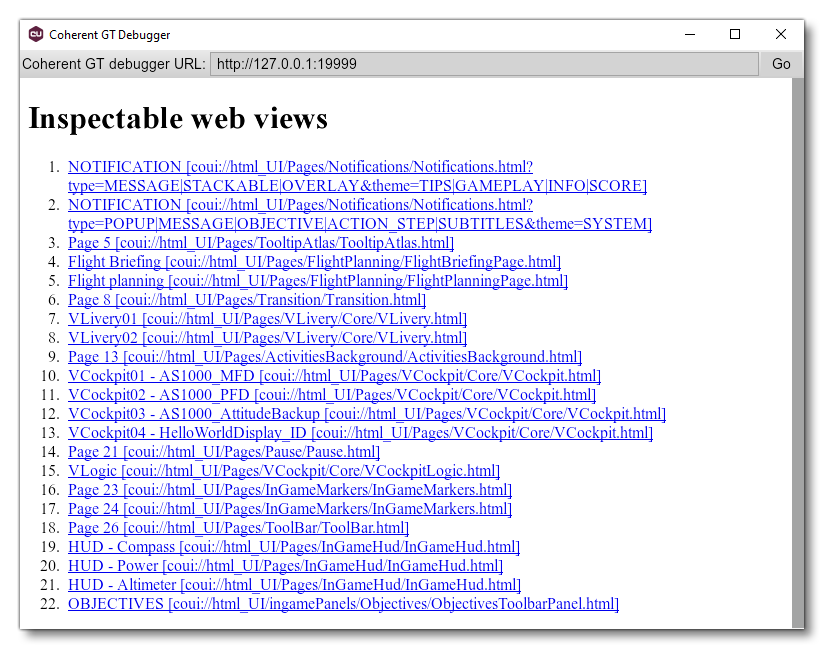
This tool should be used after you have started a flight with the aircraft that you want to debug, and the parts we are interested in here are the lines relating to the VCockpit, as shown on the startup screen:

If you've followed the tutorial, then VCockpit04 should be the "HellowWorldDisplay" that you created, and if you click on it you'll be taken to the main debugger that has various different tabs for Elements, Network, Resources, etc...:

We'll go into using this in a bit more depth in the Test, Edit, and Debug section, below. However if you've used any kind of HTML/Web inspector then you should be familiar with the way this works and the capabilities that it has.
Debugging Behaviours
The last debug tool that we'll be mentioning is the Behaviour Debug window, which is available from Tools DevMode menu.
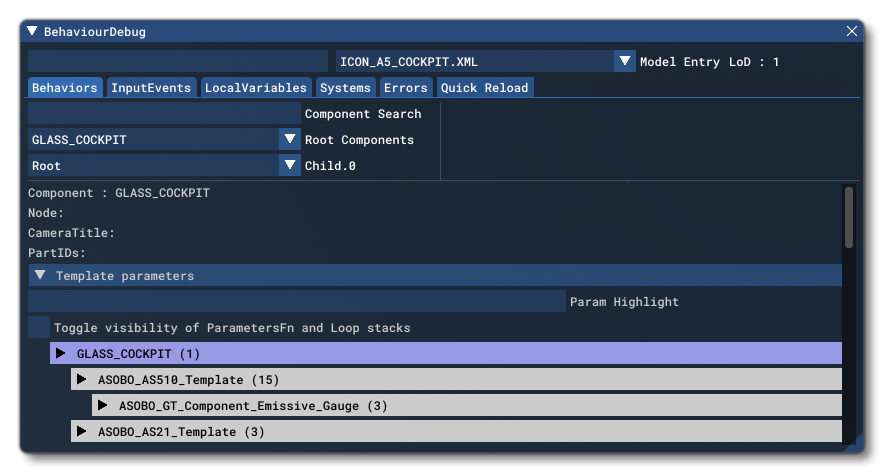
From this window you can check a lot of information related to how the aircraft is functioning. For example, you can see what templates (if any) the glasscockpit is using, you can check local variables created for the aircraft (which include those used by VCockpits), and you can check the electrical system and also any input events. We will be looking at this window again in the Test, Edit, and Debug section, below.
Test, Edit, and Debug
In this section we'll look at doing some simple editing of the glasscockpit display that we made following the Creating An HTML/JS/CSS Instrument tutorial. That tutorial has created a working glasscockpit display, but it's missing a couple of elements that will finalise the integration within the aircraft, so we'll use the debugging tools available to edit files and fix things.
To start with, you'll need to build the package with the DA62 sample and the tutorial "Hello World" glasscockpit, then start a flight using the tutorial DA62 aircraft. Once the flight has started, you need to start the Coherent GT Debugger, as you'll be using this to "live edit" some of the files that you have used to create our instrument. So, select the following item from the list of Inspectable Web Views:
VCockpit04 - HelloWorldDisplay_ID [coui://html_UI/Pages/VCockpit/Core/VCockpit.html]
Once that has loaded into coherent, it is very important that you turn off the Resource Cache so that each time you change a file it will be reloaded and used instead of a cached version without the changes. This is done from the Network tab (the icon should be blue):

Change The Styling
Now you've loaded the VCockpit into coherent, you can go to the Resources tab and select the helloworld.css file:

You can directly edit the CSS here and test how it affects the instrument within the aircraft without having to save or reload any files. For example, if you change the background-color element to "green", you'll see that the instrument changes color:
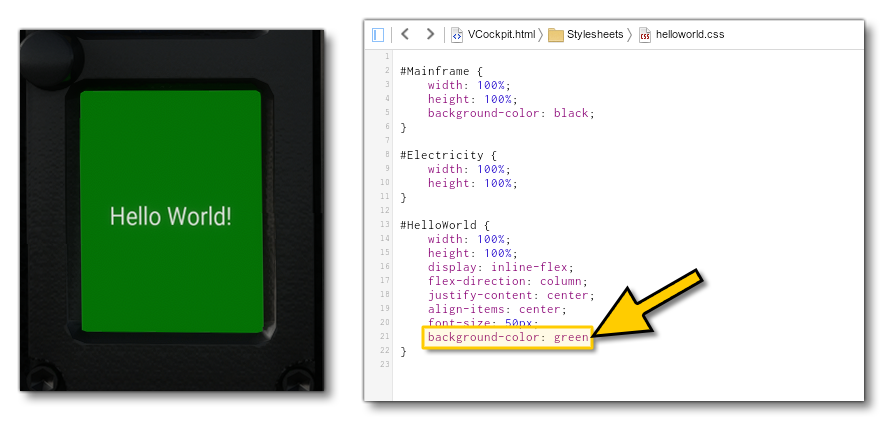
Let's take this a little further and add in the following to the CSS to get the instrument to display a background image:
background-image: url("https://source.unsplash.com/random");
background-size: cover;
Now our instrument will look like this:
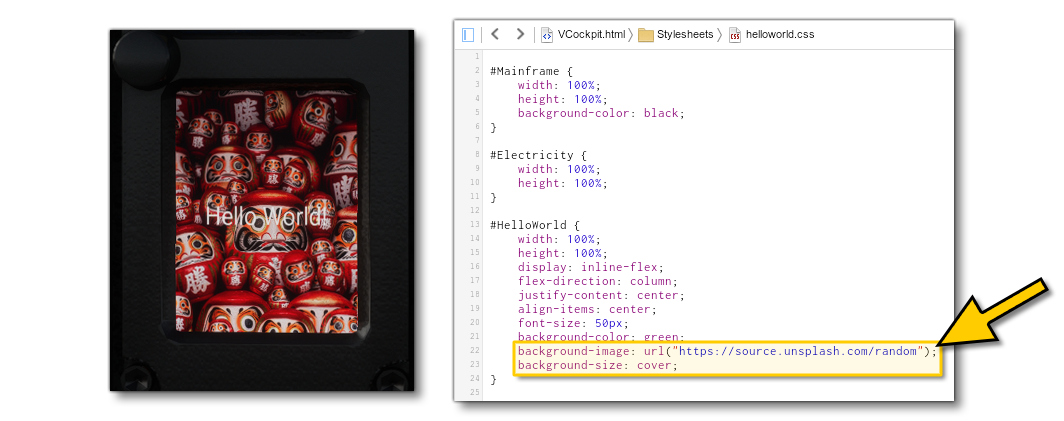
This is a very useful way to experiment and test how the different elements within your instrument will look, and it greatly reduces the iteration time required to position and style everything correctly.
Once you have the CSS styling done for the instrument, you'll need to make it "permanent", as right now if you refresh Coherent or rebuild the package then the changes will be lost. So, you need to go to the PackageSources folder and edit the helloworld.css file directly and include the changes that we've made above. Once that is done, you can go to the Project Editor in Microsoft Flight Simulator and click on the BuildAll button to rebuild the packages so they include the change.
Debugging The Electrical System
Let's look at resolving a bug with our tutorial glasscockpit. To start with, you need to open the Behaviour Debug window and go to the Systems tab, and select the Show Electrical System Debug option:
 A new window will open: Electrical System Debug.
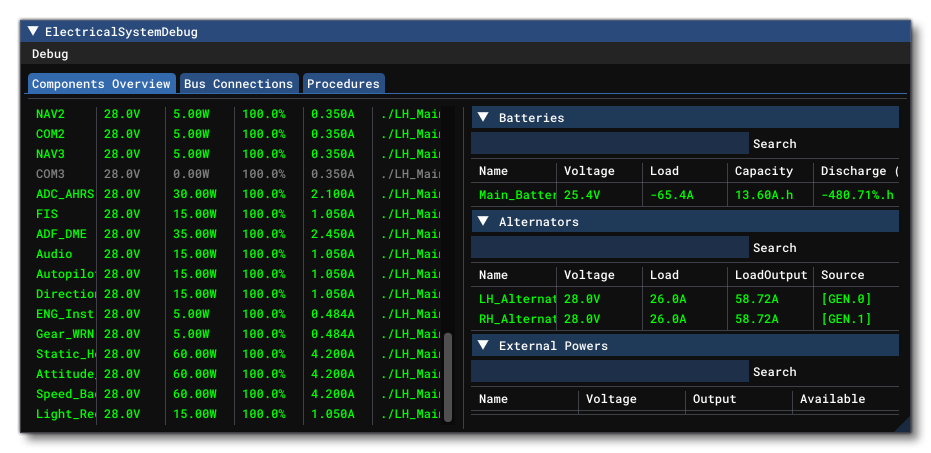
From this window you can revise all the components of the electrical system, and not only that, you can also test parts of it. This is done by going to the Debug option and selecting Enable Component Edition. When enabled you will then have additional options to enable/disable the different components:
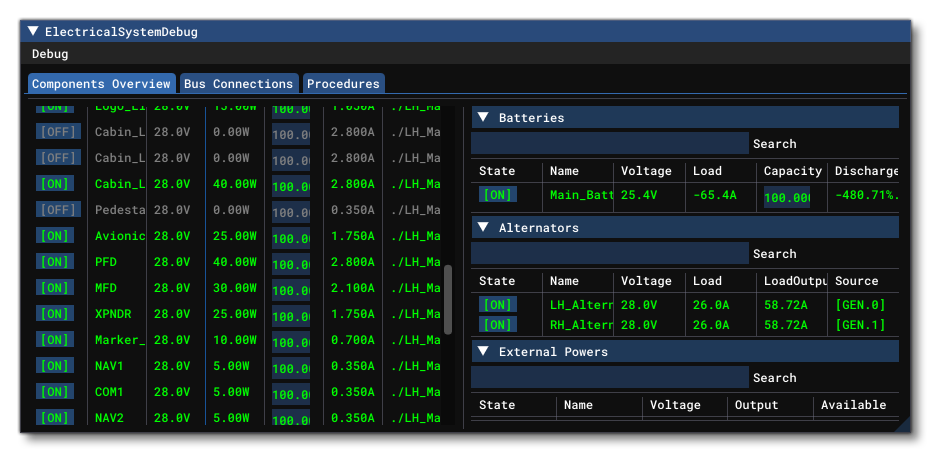
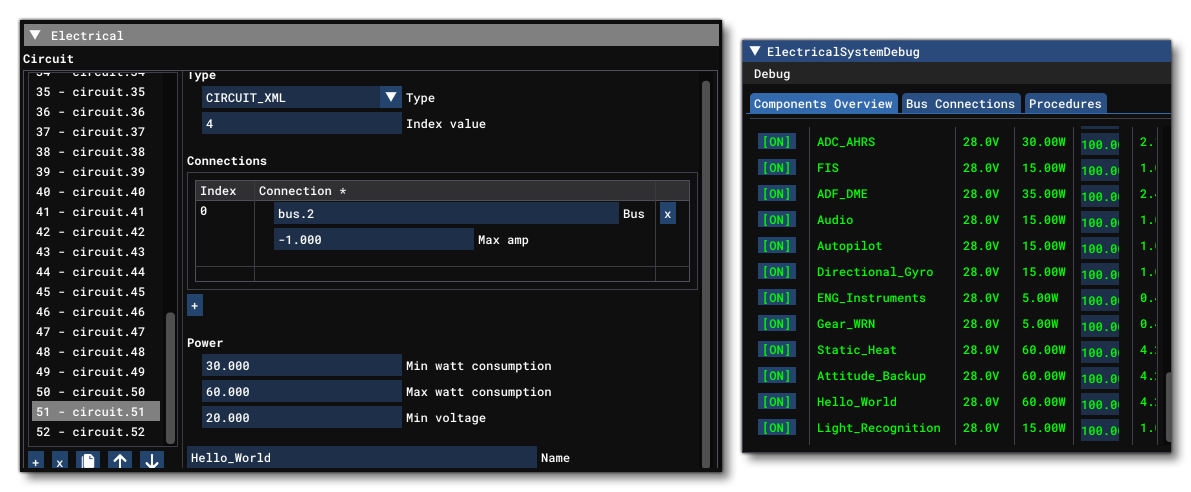
You need to scroll down the list of circuits (on the left) and find the one that represents the tutorial instrument. Notice that if you are looking for your "HelloWorldDisplay", you won't find it! Your instrument has replaced the AS1000 Speed Backup, so the circuit you are looking for is actually the Speed_Backup. This could be a bug, but it doesn't mean that the circuit doesn't work, so you should test it and see. Simply click on the [On] button so it switches to [Off] (the text will go from green to grey to indicate that the circuit has been switched off). Does changing the circuit status switch the display on or off? It doesn't, so this is definitely a bug, and we need to fix it.
NOTE: To see what should happen you can toggle the Attitude_Backup circuit on/off.
Debugging With The Coherent GT Debugger
To debug the problem with our electrical circuit, let's start by revising the places where the electrical system is mentioned. So, the aircraft system.cfg, the panel.xml, and the helloworld HTML, JS and CSS files.
You should start by checking the HTML file. We'll do this in the Coherent GT Debugger, so open that now - if you haven't already - and go to the Elements tab. Here you will need to expand the HTML so you can see the <div id="Electricity"> tag:

From the Electrical System Debug window, you can now enable and disable the circuit and see what happens:

You can see in the debugger that the HTML "state" changes as you change the circuit, which is what you want and would expect. So something else must be wrong!
Could it be the panel.xml file? We know that the panel.xml should be fine, as the only thing we changed was the <Name> tag. It worked before for the Speed Backup instrument, so it should work the same for our new instrument. However, just to be sure, ensure that the <Name> tag has the correct ID string in it (which should be HelloWorldDisplay_ID). We also need to make sure that this XML is being parsed by the JavaScript, which is done using the function parseXMLConfig(), which itself is defined in the BaseInstruments.js file. For this, let's find out where in BaseInstruments.js the function is called, which we can do directly from the Coherent GT Debugger by searching for the function:

Now you've found where the XML is parsed, you should add a breakpoint here and reload the instrument. You can reload the instrument without having to build the package again by clicking on the Reload button in Coherent:
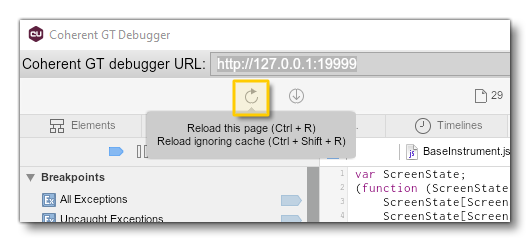
You'll notice when you do this that the breakpoint is never triggered, so something isn't right with the helloworld.js file. If you look at the contents of this file, you do call the Init() function, but we have forgotten to add in a line that extends it from BaseInstruments Init() meaning that our JavaScript is overwriting it! We can fix that easily by adding a single line into the Init() function:
Init() {
    super.Init();
}
Once you have edited the JS file in the PackageSources folder, you will need to rebuild the package again using the BuildAll button in the Project Editor. When you do this, you can see that the parseXMLConfig() function is now being called from our instrument, since the breakpoint is being triggered:
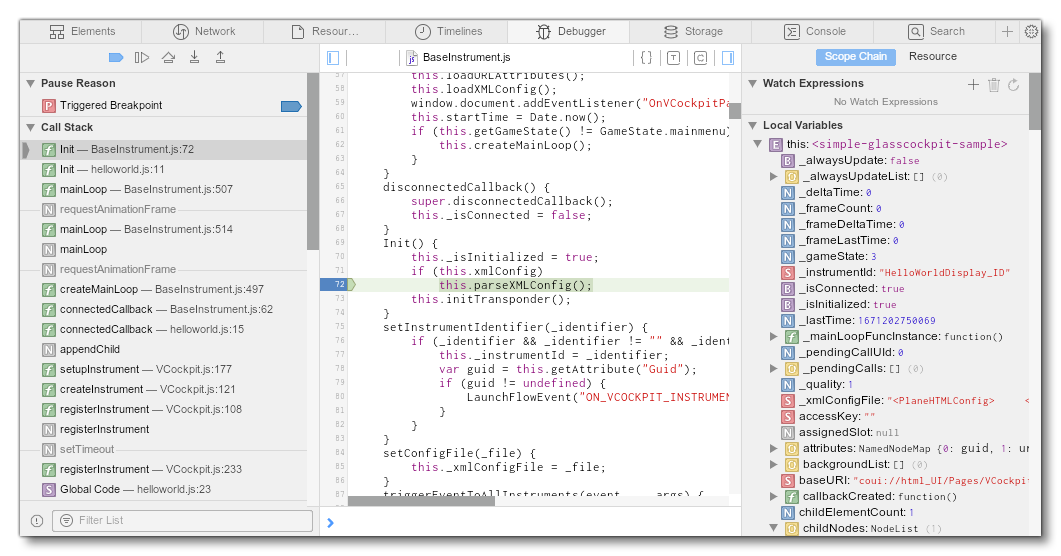
You can remove the breakpoint and unpause the Coherent Debugger now, and using the Electrical System Debug once more, you can test to see if that resolved the problem... which unfortunately it didn't. Maybe we need to examine the helloworld.css file since it has a class ID for electricity as well. You should know how to use the Coherent Debugger to search for terms by now, and using it to find where the "Electricity" class ID is used will show this:

You'll notice that the BaseInstruments.css has a class that is specifically related to when the electricity state is set to "off", and we've confirmed that the HTML state does toggle between "off" and "on" states. This could be the problem! Now, to fix this you have two choices:
- Copy and paste the class code into your instrument CSS
- Import the
BaseInstruments.cssinto your instrument CSS
Either solution is fine, however we recommend that you import the BsaeInstruments.css, since it will help prevent further bugs of this type when you are creating your instruments. This is done by simply adding the following line into helloworld.css, at the top:
@import '../Shared/BaseInstrument.css';You can actually remove all reference to the "#Electricity" class ID, since what you have currently is also in the BaseInstruments.css file, and there's no point replicating it.
Testing Again
Having made all the changes listed above, will you finally have the instrument correctly connected to the assigned circuit and will it behave as it should? Only one way to find out, so save your modified files and rebuild the package in the Project Editor. Once it's built, go back to the Electrical System Debug window and try switching the circuit off and on:

Success! Not only does your new instrument work, it is also correctly connected to the electrical system of the aircraft.
The only minor detail left to correct is to change the name of the circuit in the system.cfg file of the aircraft. This isn't essential and will have no effect on the functioning of the instrument, but for completeness it should probably be done. So, open the Aircraft Editor and in the Systems tab, edit the "Speed_Backup" circuit so it is named "Hello_World" instead. You can then save and rebuild the package, and check again in the Electrical System Debug window to ensure that the name is correct:
