THE CONSOLE
The Output Console is a useful tool when debugging add-on packages, either those you have created or those you are editing. It can be opened from the Debug menu, and the window itself looks like this by default:

Filters
At the very top of the window you have a filter input box, where you can input text to use as a filter on the actual output window and only see the lines relevant to you at the time. Clicking the "X" beside the filter input will clear the current filter. Additionally you have the ability to filter the output using the Group button:
 Using this button you can select the following main group filter options:
- All: Clear all group filters and show all the full console output.
- Virtual File System: Show only those output messages from the virtual file system.
- Builder: Show only those output messages related to building packages. This option has the following two sub-options -
- All: This will show all activity related to the building of projects and packages.
- Package Builder: This will show only the output for the subset of the builder that is related to local packages being built. This menu may have further sub-menus that can then be used to filter messages on a per-package or per-group basis depending on the packages that you have built in DevMode, for example:

- Data: Show only those output messages that have the Data category or one of the following sub-categories:
- MaterialLibrary
- VisualEffects
- glTF Models - This selection will present you with an additional set of options, where selecting All will show all output associated with glTF. If there are other items listed under the All option, it means that those are specific glTF files that have warnings or errors and you can select them to only show these issues for that specific file.
- GlobalFlow: These are general messages, often associated with the general flow of the simulation.
- Tools: Show only those options related to the DevMode tools. Selecting this item will show a further menu where you can choose to see the output only from the following tools -
- All: See messages related to all the tools that output information to the console.
- SceneryTool: See only messages related to The Scenery Editor.
- Edition: See only messages related to the edition of items in general in DevMode.
- MaterialEditor: See only messages related to The Material Editor.
It is worth noting that the different groups are shown in the actual console output, and if you click on any of these groups in the console window then that group filter will be applied to the output.
Beside the filter input box you have three buttons that can also be used to filter the output information in specific ways:
- Errors: Filter the output window to show the errors.
- Warnings: Filter the output window to show warnings.
- Info: Filter the output window to show information text.
These buttons act as "toggles" and are enabled by default (they have a blue box around them). Clicking them will disable them and hide that output from the console window, and clicking again will enable them again. Each of these buttons will also have a number which signifies how many of each type of message there are. For example, in the image at the top of this page we have "263 Errors", so you have 263 error messages currently in the console output.
You also have the following two buttons beside the different filters:
 - This button will clear the console of all output. This is an ideal option to use just before building a package so that most of the output shown will only relate to the package that was just built.
 - This button will copy the entire contents of the console to the clipboard.
You also have a convenience option at the top of the editor: Auto Set Package Builder Group. Checking this option will mean that the console output is automatcially set to the PackageBuilder when building a project or single package, so that only messages related to the build will be displayed in the console.
Finally, you can use the Search input box to create a search filter for the output of the console. The search results shown will also be filtered by all the options given above, so ensure that you have the correct filters selected (they can be changed while a search filter is active)
Output
The console output itself is split between two different views:
- Console: The general console output covering everything that's going on
- Details: Shows details relevant to the currently selected item from the console.

Note that any failed packages can be automatically filtered by clicking the link that will be shown in this details section of the console (should any packages fail).

The output can be ordered using the different column headers. Clicking on them will order the output based on the header type, for example, clicking the "Group" header will order the output based on the group that each line is assigned. Note that you can click the header again to invert the order. Headers can also be rearranged by clicking on them and dragging left or right. Both these options are shown in the following animation:

Lines within the console can be clicked on to be selected, and you can also use combinations of CTRL, Shift and the Left Mouse Button to select multiple lines in the console. Once you have one or more lines selected, you can click the right-mouse button on any line in the console and open the following menu:
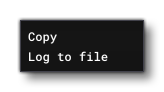 Here you can choose to copy the line(s) to the clipbopard or use the Log To File option to save the lines (and associated information) to a file. You can also double click on any line to expand the Details section at the bottom of the console window. In this window you will see two items:
- Source - The source path for the file that is associated with the message.
- Description - A short description of the issue/message shown in the output window.
There are also buttons available to Copy the souce and description to the clipboard, or to Log to File, which will open a file explorer and let you save all the information to a *.txt file.