THE MATERIAL EDITOR
Materials are used to describe how light should behave when it hits a surface and is reflected towards the camera. This is done by combining one or more textures and a specific "code", with the textures defining things like the albedo and the roughness, while the code tells the Microsoft Flight Simulator 2020 engine how the material should be rendered. For examples of elements that use materials, you can see the pages on Polygon Objects, Apron Objects, or Runway Objects, although there are others. You can also see a custom material being used in the SimpleAirport example project.
You may also find further information about this editor from the following pages:
Overview
The Materials Editor can be opened directly from the Tools menu, or - and this is the more common method for opening it - it'll be opened from The Project Editor when you create or edit a package (as explained below). The editor itself looks like this:
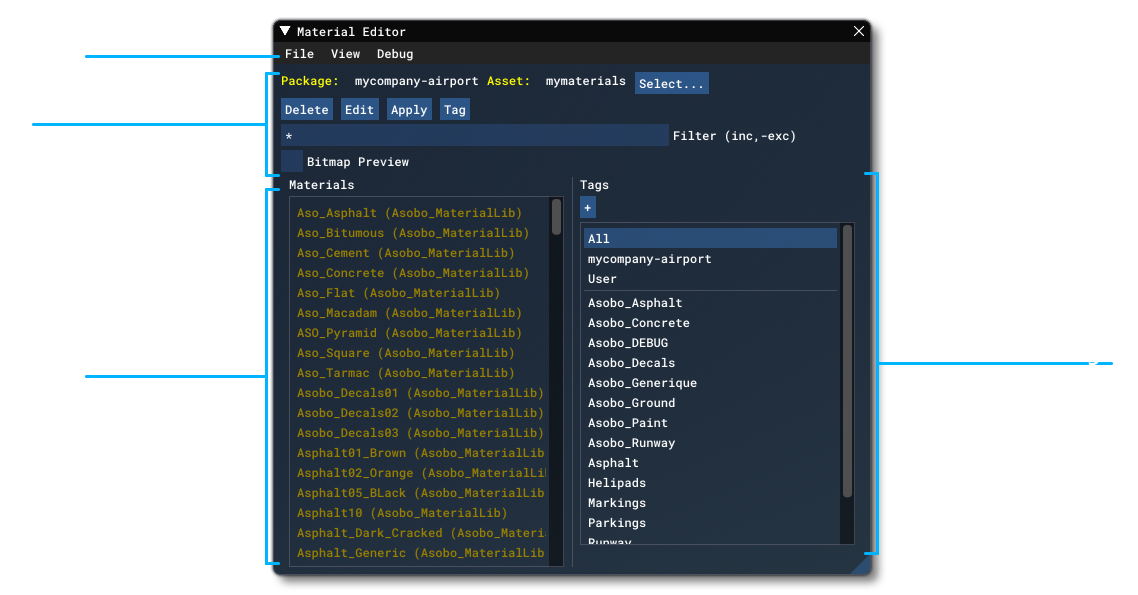
At the top of the window you have the various menu items (explained on the Menus page), and then underneath that you have the different Content Controls:
-
Package
The name of the package that you are currently exploring
-
Asset Group
The Asset Group within the package that the current MaterialLib is assigned to.
-
With this button you may change the asset group (and package) which is being explored. This will open the Asset Selector window:Select...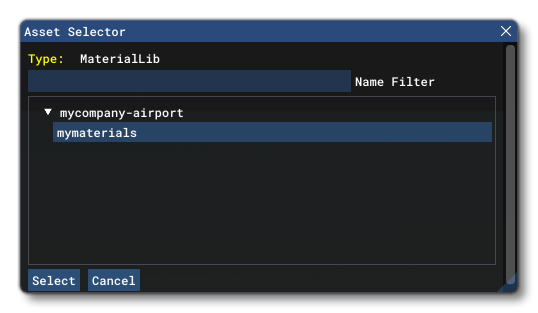
-
Selecting this will delete the currently selected material. When you click this button you will be shown a confirmation window that also explains that when you delete the material any texture images (bitmaps) that are no longer referenced will be removed as well from the package.Delete
-
This will open The Material Inspector so that you can edit the selected material properties.Edit
-
This button is only applicable if the materials you have in the package are used in some element within the project packages. It will re-apply all the materials, updating them in the simulation if they have been changed in the editor previously.Apply
-
This button will open the tag selection in the tag list on the right of the Material Window (mouse over the image below to see the change):Tag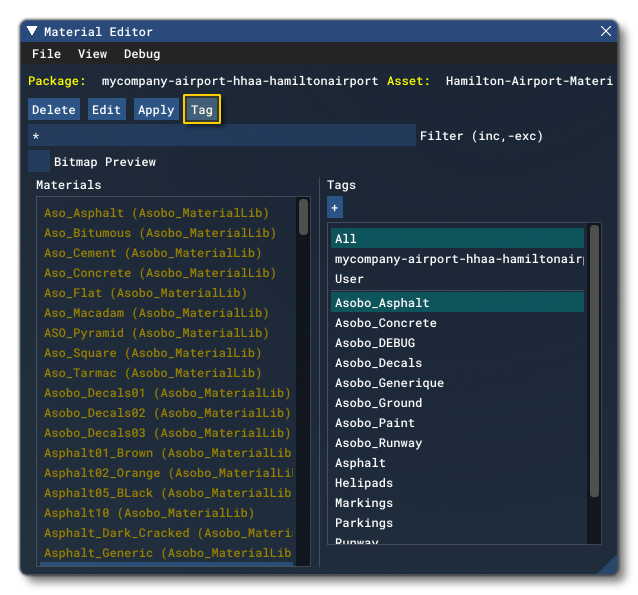
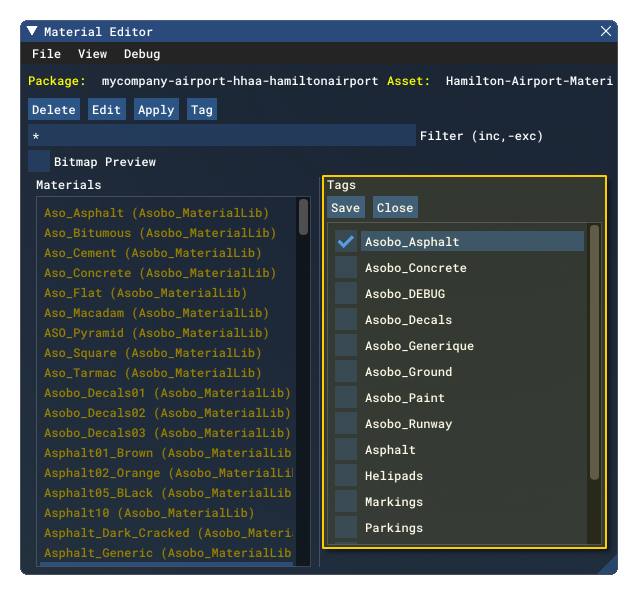
Savebutton to to save the changes, or theClosebutton to discard any changes and return to the regular tag list.
-
Filter
This input field lets you filter the list of materials based on some input text. This is cumumulative with the tags, and so you can do an initial filter using the tags to only show the materials tagged with "Concrete" (for example), and then add "Grey" to the filter to only show those concrete tagged materials with "Grey" in the title.
-
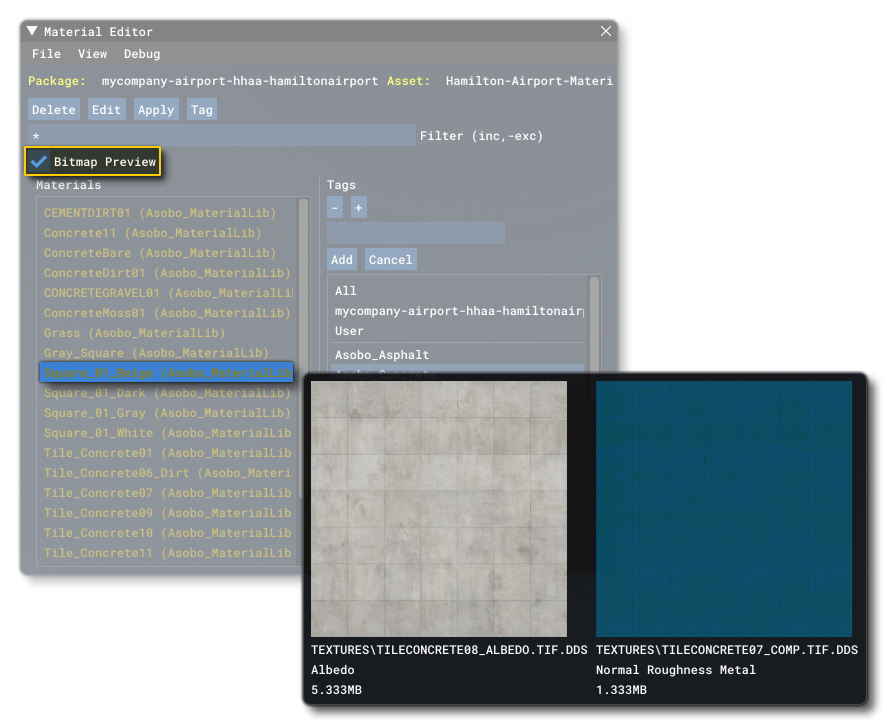
Bitmap Preview
This checkbox will - when enabled - show the different bitmaps (textures) used by the material when you mouse over them in the materials list:
The rest of the material editor is taken up with the Materials List, on the left, and the Tags List, on the right. Materials in the material list will be colored depending the factors listed below:
- Brown: These materials are locked and cannot be modified unless you have the original package for it (these are usually the ones that are part of Microsoft Flight Simulator 2020), but they can still be used in your own packages.
- White: These are materials that have been loaded correctly and can be used and edited.
- Grey: These materials can be modified but have not yet been loaded.
- Yellow: Materials that are this color are currently being loaded.
- Red: Any material that is this color is one that has suffered a load failure or some other kind of error, and cannot be used or edited.
The tags list is used to filter the materials shown in the Materials list, and selecting any tags on the right, will filter the list of materials on the left to show only those that have the selected tag. Note that the top of the tags list will always have at least two default "macro" tags (that cannot be removed or edited) for the User and All, and usually another for the package being edited. Tags can be added by clicking the add + button which will present you with an input field where you can write the tag name, and then an Add button - to add it to the tags list - and a Cancel button. Once a tag has been added, it can be applied to different materials using the Tag button.
IMPORTANT! Tags that you add will be "temporary" and won't be saved with the project unless a material is assigned to them. At that point they will become "permanent" and will be saved.
Note that when you select any any material from the left, the tag that it is associated with will also highlight on the right (if it has been assigned a tag):
Creating A New Material
Normally you would be adding a MaterialLib asset group to a project that already has another asset group that will be using the materials you are creating, for example a Scenery asset, or a VFX asset. So, for this example, we'll be adding a material library to a simple airport and using a custom material for a runway. You'll also need to have previously created the textures that you want to use for the material (you will need at least an albedo texture, although you may require others) as we'll be adding them to the project folder. Note that textures should be authored as PNG , BMP or DDS files, and should always be powers of two in size (eg: 512x512px, or 2048x2048px, etc...). So, before going any further, you should create a new airport, and add a runway to it. You can find a tutorial for that from the following page:
When finished, you should have a project that looks something like this:
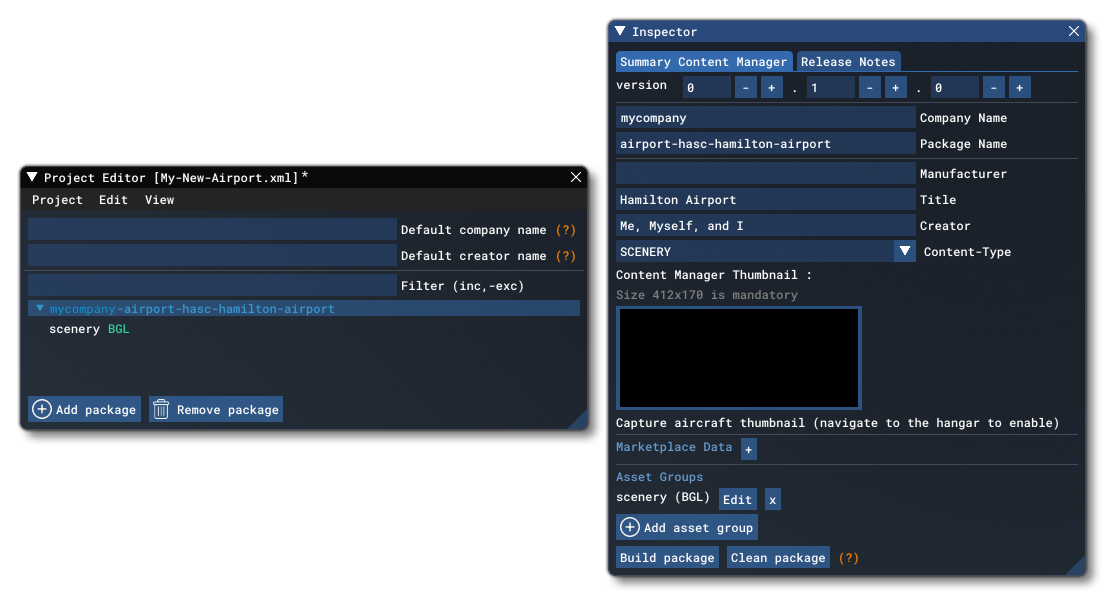
At this point we need to add a new asset group to the package for our materials. For that you'd click the Add Asset Group button at the bottom in the Asset groups section, which will open up the Package Wizard where you should select the Custom option:
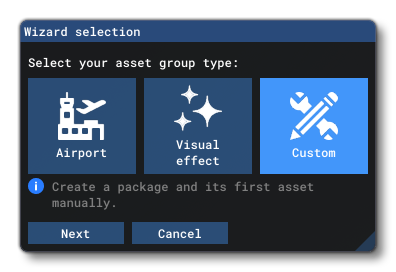
Clicking on the Next button will take you to the following window:
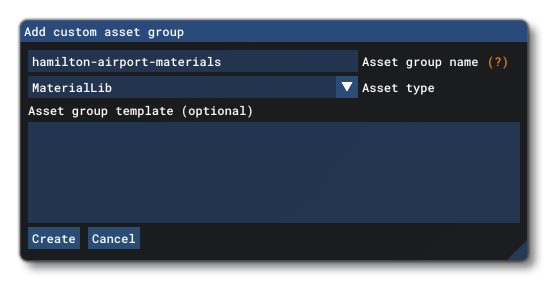
Here you need to give the new material asset group a name, and select the MaterialLib asset type before clicking the Create button. Once the asset group has been created, the main Material Editor window should open. If it does not open then you can open it from the Tools menu.
IMPORTANT! When giving an Asset Group name, this needs to be unique otherwise you face conflicts with libraries from other packages. For example, just calling it "MaterialLib" is not enough, and you should instead be using something like the following schema:
mycompany-packagename-materiallibname
The main editor shows a list of materials on the left, and a number of pre-created tags on the right that can be used to filter the list of materials. Currently there will only be materials that are used in the actual simulation listed here (these are colored brown and cannot be edited), so let's add a new material of our own to this list. For that, follow these steps:
- Go to the File menu and select the New option.
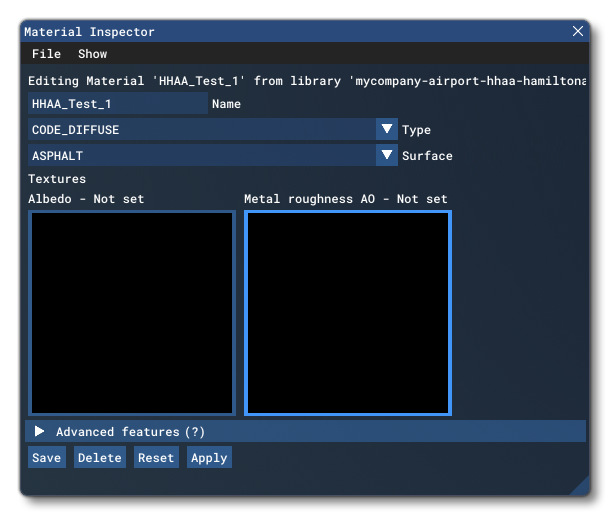
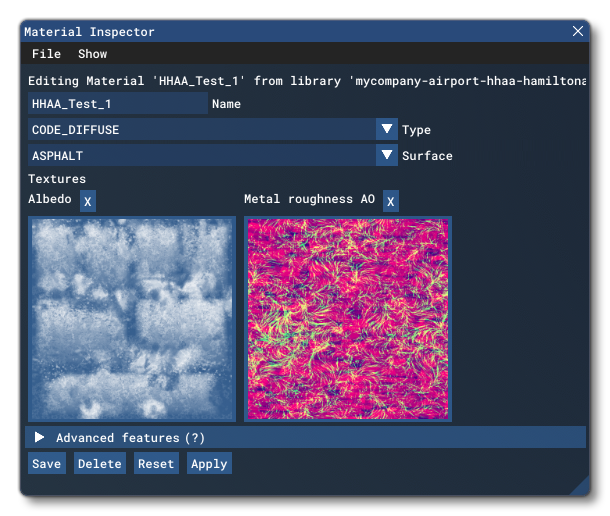
- This will open The Material Inspector where you edit the material

- Here you need to give the new material a name and a type. The name can be anything, but should be unique and easily identifiable, and the type should be "CODE_DIFFUSE" for now. This option is used to set how the material will be used by the engine and the type of textures it will require.
- You should also select a Surface for the material. In this case we will use the ASPHALT surface type. This option is for adding detail maps to the surface, as well as for editing how certain surface types interact with the base scenery. If this option is not visible, then you may need to open the Scenery Editor, as the setting is specific only for materials being used by that tool.
- Now you need to add the textures that are required by the material. By default the albedo texture is shown, but - depending on the type of material being created - you may be required to add more. In this case we also want to add a Metal Roughness AO texture. So, open the Show menu at the top of the Inspector and select that texture type from the list presented. It will be added to the inspector window:
 NOTE: Not all materials will require these two textures, and only the Albedo texture is obligatory. All others are optional and can be omitted.
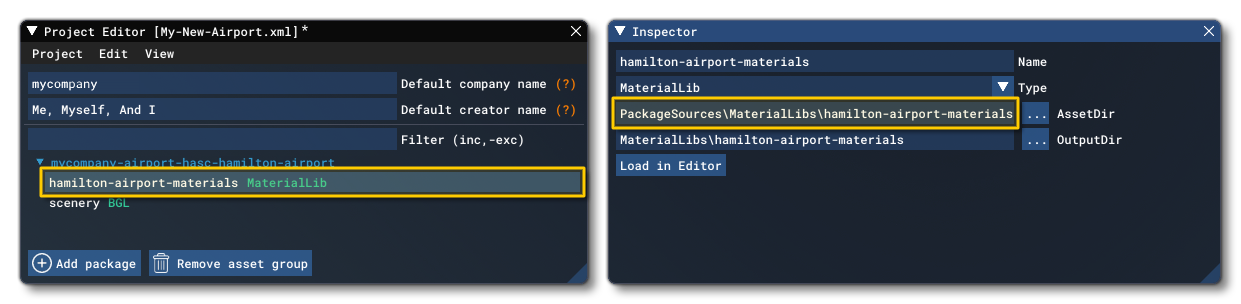
- The textures themselves need to be added to the project folder before they can be added to the material, so you will need to browse to the Asset Directory in an explorer window, create a "textures" folder, and then copy the necessary textures there. To find the correct base directory, simply click on the asset group in the Project Editor, and then in the Project Inspector, you can see (and copy) the asset directory "AssetDir":
 If you wish, you can download and use the two textures that we prepared for this example by clicking the following images:


- Once you have the textures in the correct directory, you can then go back to the simulation and add them to the material in the Material Inspector. For that, simply click on the texture that you want to add and select the texture bitmap from the explorer window that opens. Add both textures in this way.
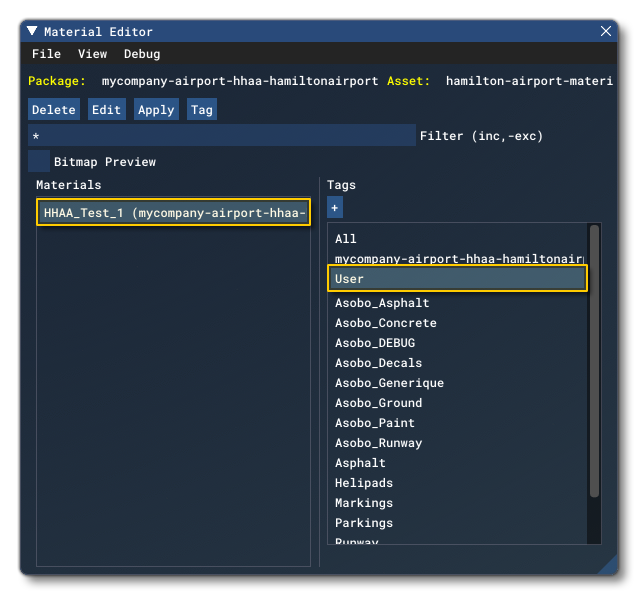
- The final step is to save the material so that it's added to the Material List in the main editor window. This is done by clicking the
Savebutton at the bottom of the Material Inspector window. You can quickly find the material by selecting the User tag:
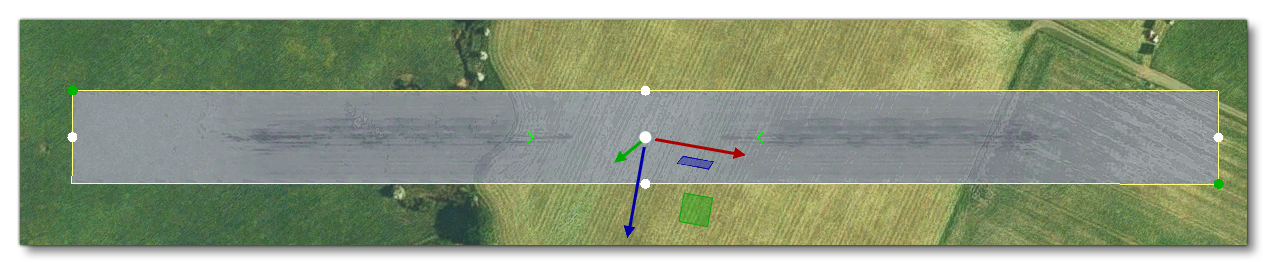
Now that we have created a new material it can be applied to something! In this case, we'll apply it to a runway that belongs to the airport that is part of the package. You can quickly move the camera to the runway object by double clicking on it in the Scenery Editor content list. It should currently look something like this:
The next step requires you to expand the Materials section of the Scenery Editor Properties window, and you'll see the material that is currently applied to the runway:
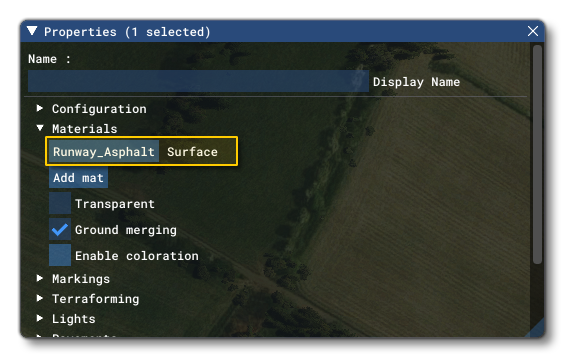
To apply the new material that we've just created, simply click (and hold) on it in the Material Editor, then drag it onto the material button in the runway Properties window:
When you've done that, the button will update to show the name of the material you've just added, and if you look at the runway in the scene, it too will have updated to use the new texture: