LIGHT ROW OBJECTS
A Light Row object is an object element that is used to add rows of lights within an airport. When you select this object type the Objects window will not show any different object elements as currently there is only one type of light row and what it does is defined through its :
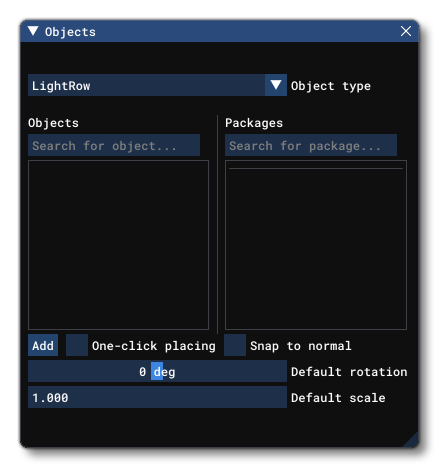
Light row object elements are a visual effect that can be used to better mark out areas and paths in your airport using lights. To add one to your airport, click the Add button, or select One-Click Placing. Either of those options will add a red dot to the mouse cursor in the world view and you can then use Ctrl + Left Mouse Click to place points in the world, creating a "path" for the lights. When you have added the points you require to create the path, you can then hit the Enter key to finalise the light row. Note that if you wish to remove the light row object from the world, you can select it and then press the Delete key.
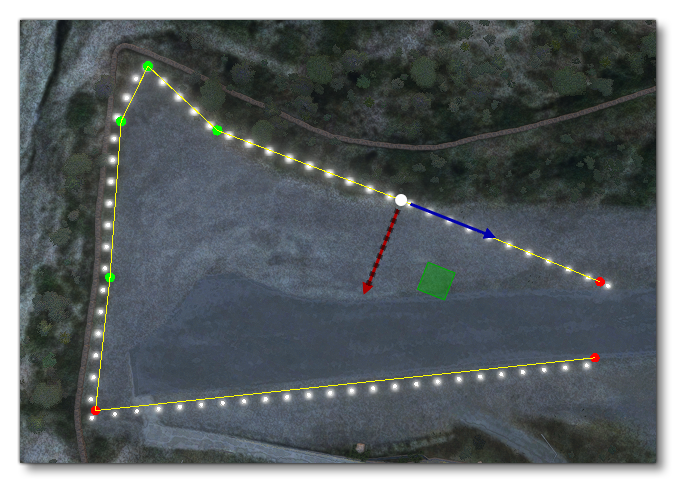
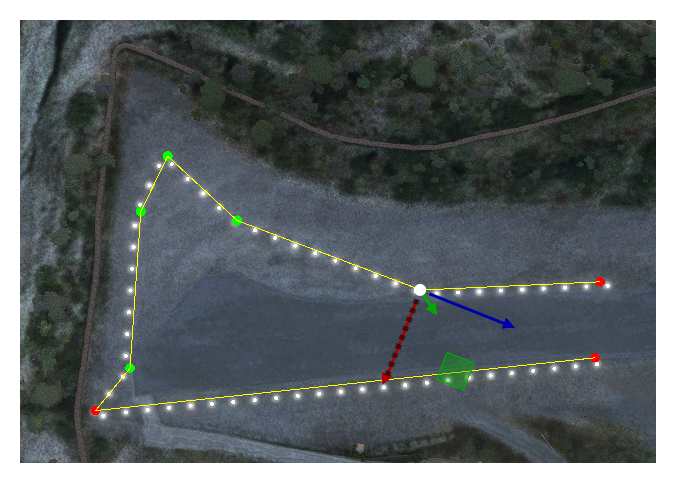
IMPORTANT! Light Row objects require one or more Airport Objects to be present in the scene, and must be added to an airport group in The Scenery Editor. If no airport is present then they cannot be used. Also note that if they are placed too far away (ie: outside the airport Object Test Radius) then they will not be rendered.Once placed in the world, the whole row can be moved using the Translate Gizmo or it can be rotated using the Rotate gizmo. It is also possible to click on any specific point along the row and then use the translate gizmo to move that point - the light row will update accordingly. You can also select various points together by using Ctrl + Left Click on individual points, or by using Shift + Left Click + Drag to select multiple points. Selected points will turn green and these points can then be edited together, as illustrated in the image below (mouse over the image to see the edition):
When editing Light Row objects, you will have the following additional options for the Right Mouse Button menu:
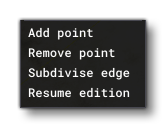
- Add Point: Clicking the RMB on a point or on the light row path itself and using this option will add a new point to the light path, which can then be edited as normal.
- Remove Point: Selecting one or more points on the light path and choosing this will remove the point(s) from the light row.
- Subdivise Edge: Clicking the RMB on the path of the light row and selecting this option will add a new point on the path, halfway between the existing points at either end of the selected edge.
- Resume Edition: Selecting this option will enable you to continue defining the light row path, using
Ctrl+ Click to add new points, and usingEnterto finalise the edition.
Properties
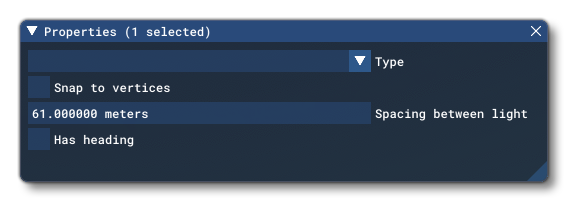
The Properties window for a Light Row object looks like this:
-
Type
This is the preset type that should be used to create the light row. Presets are defined per airport from the Light Presets (Not available for World Hub Airports) section of Airport Objects.
-
Snap To Vertices
When this option is checked, the lights will only be placed on the vertices (points) of the path that generates the light row. Enabling this will also remove the Spacing Between Lights option.
-
Spacing Between Lights
This option sets the spacing between each light along the row. The spacing is in meters, and the option will only be visible if the Snap To Vertices option is disabled.
-
Has Heading (Not available for World Hub Airports)
Enabling this will show the Headings option which permits you to set a direction for the lights in the row.
-
Headings (Not available for World Hub Airports)
Here you can set the heading value, in degrees. This option will only be visible when the Has Heading option is checked.