AIRFRAME DETAILS
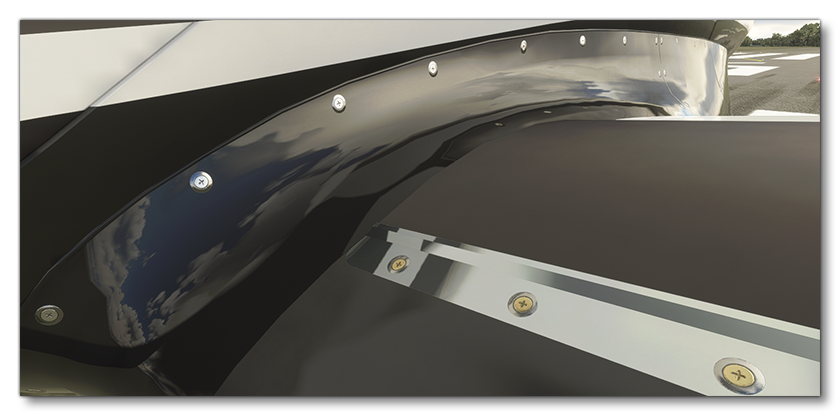
This page outlines the best way to apply different types of surface detail to the aircraft airframe using normal maps and decals. Note that you can find generalised optimisation guidelines for decal meshes of all types on the following page:
Normal Maps
Some aircraft have simple bodywork designs and require very little high-fidelity detail. These aircraft can have these small amounts of detail modeled, with little or no normal baking, and can still come in under the recommended triangle count. In general this is the most favourable way of dealing details. However, some other aircraft can have far more detail that needs to be represented in the model to be accurate and realistic, and this cannot possibly be done within the recommended triangle budget. Therefore these details needs to be baked down to a normal map.
As a general rule, if a detail area has a silhouette it should be represented with geometry to maintain that silhouette, however if it is inside a recess and does not add to the overall silhouette of the aircraft then this can be baked to a normal map. If animations are required in these recessed areas, then these elements will of course need to be modeled to do so.
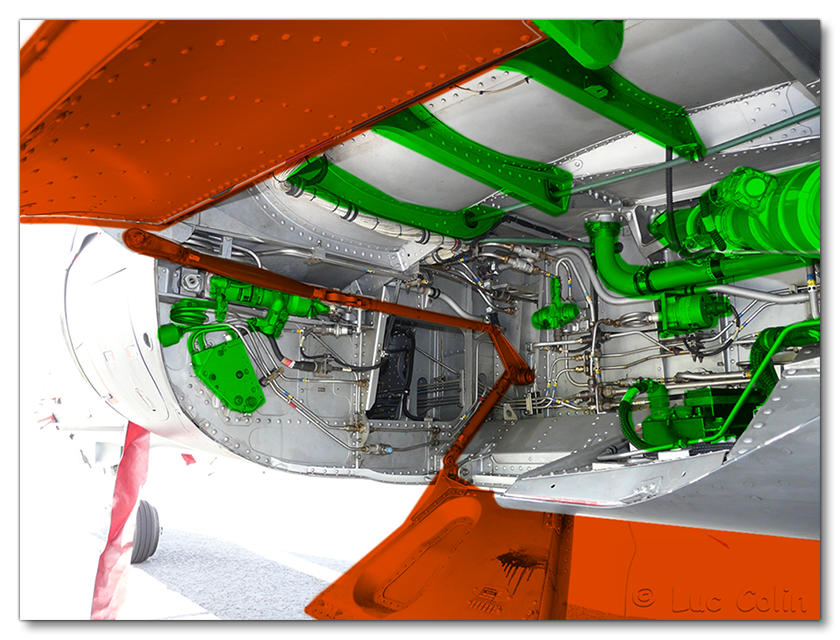
As an example, we'll look at an image of the interior mechanism of the landing gear housing - the different visible areas would be rendered as follows:
- the areas that are highlighted in orange are areas that will be required to be fully modeled, as they will need to be animated too.
- the areas that are highlighted in green are elements that are large, immobile, and/or close to the edges, and so these should be modeled with low resolution in order to support normal maps.
- all other areas can be textured purely with normal maps.
Rivets And Screws
When working on repeating details like rivets and screws, the most important question to ask is whether the detail should be a decal or a 3D object:
- Decal - In general these will see more use on larger aircraft. You should start by creating a bank of rivets as high-poly models and then bake them into normal maps to create decal textures.
- Object - In general you can use more objects than decals on smaller aircraft, especially if you have enough polygon budget available before hitting the limitations.
The actual decision on what to do will largely depend on the polygon budget for the size and style of aircraft being created, although ease of creation will also play part (since you may not want to manually place 200 rivets). If the aircraft is modern and has thousands of rivets which are perfectly aligned, then it is obviously more practical to use decal ribbons to make the creation - and the implementation in the simulation - faster. However if the aircraft is small and has been hand manufactured, then not all the rivets will be perfectly aligned, do it can be more visually interesting and accurate to place them one by one as objects.

To create these decal effects you will need to use the Decal material. To set up this material you need to do the following:
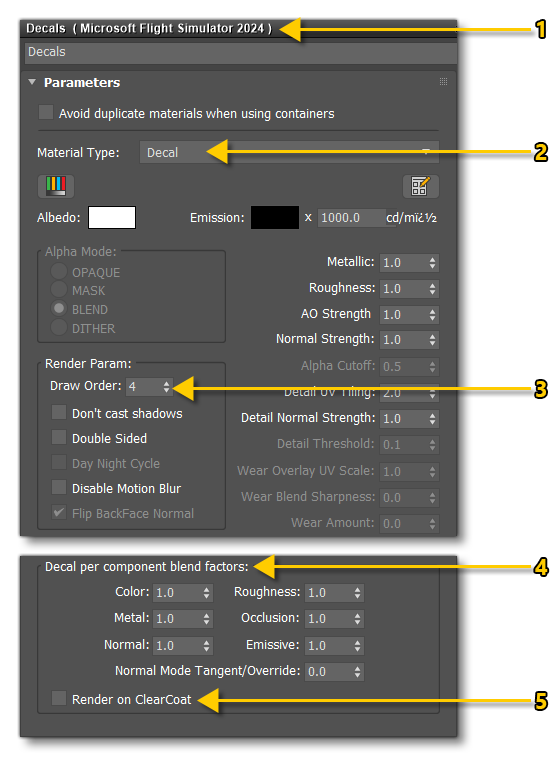
- Create a new FlightSim material
- Set the Material Type to decal as well
- Set the Draw Order appropriately (see below for more details).
- Set the blend factors to achieve the look you require (see below for more details)
- This is an optional setting which - when checked - will apply the decal on top of any clearcoat materials.
The only texture that is needed for this material is the albedo (Base Color) texture, however you can (and should) also supply Occlusion(R) Roughness(G) Metallic(B) and Normal textures. This material can then be applied to the decal mesh which is then placed multiple times across the aircraft to draw the rivets and screws.
Bump Mapping Rivets
Once you have placed all the rivet/screw decals and objects, you can use a program like Substance Painter to create the bumps and indentations that these items would have created in the metal of the aircraft fuselage. For that you would start with rendering the rivets from the fuselage to a texture:
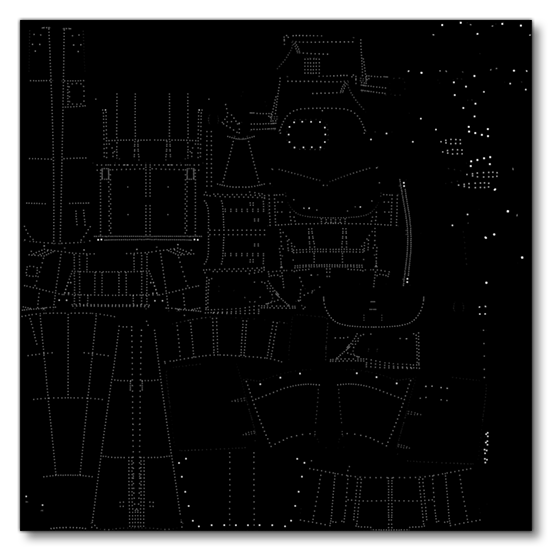
This texture will then be used in your program of choice (in the images below we show Substance Painter), to create the "dents" where the the rivets are. The general process would be to first apply the rivets texture in your program, like this: 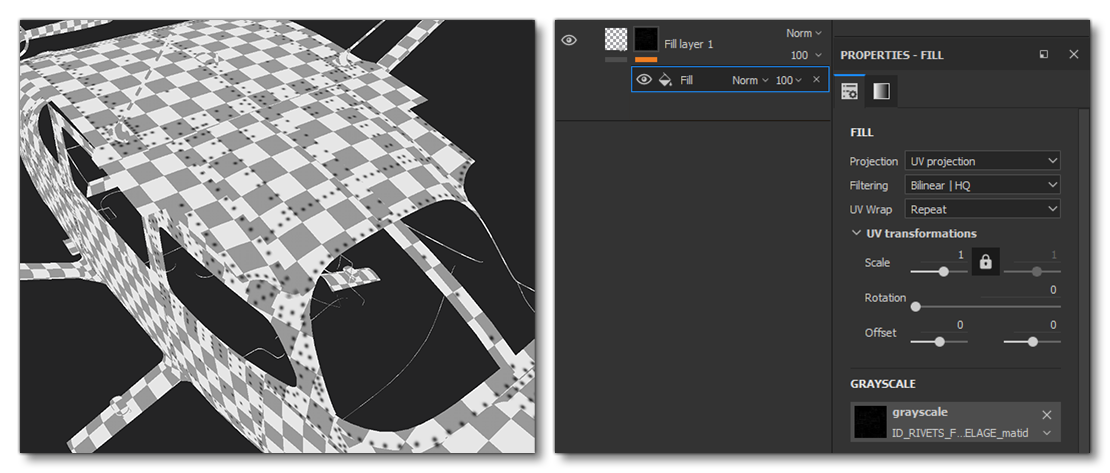
You would then blur the texture a little, and after that you will have a uniform bump effect under the rivets. However it's rather uniform, so you'd want to make it a little more random if you can. In Substance Painter this can be done easily by putting the layer in a folder, creating a mask on the folder, and then applying a cloud/random mask to it. By playing with the parameters of this mask you will be able to make the bump effect more or less visible.
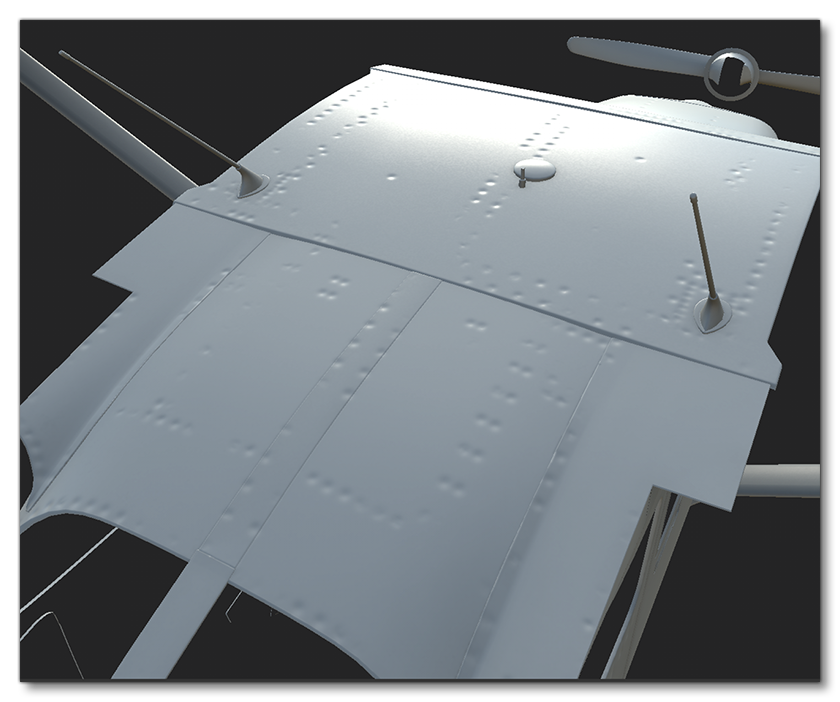
Warnings, Labels And Symbols
In order to add on the different text labels, warnings and symbols that can be found all over the airframe, you will need to use a decal mesh. These geometry based decals can also be used to create different liveries (discussed here), and can help avoid using massive textures. For example the following images featuring some XCub decals which were created in this way: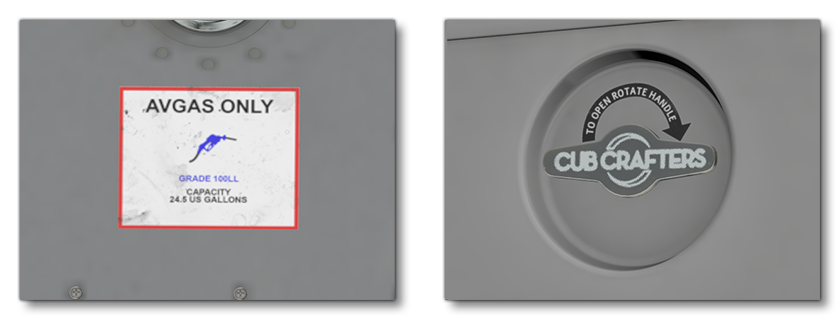
Note that when adding the decal mesh, the geometry of the decal must stay as close as possible to the underlying geometry. To avoid artifacts and "floating" decals that overlay the body of the aircraft, you will need to pay attention and closely stick to the underlying geometry leaving no more than a 1mm between the decal mesh and the object mesh it's being applied to.
To create these decal effects you will need to use the Decal material. To set up this material you need to do the following:

- Create a new FlightSim material
- Set the Material Type to decal as well
- Set the Draw Order appropriately (see below for more details).
- Set the blend factors to achieve the look you require (see below for more details)
- This is an optional setting which - when checked - will apply the decal on top of any clearcoat materials
The only texture that is needed for this material is the albedo (Base Color) texture, however you can (and should) also supply Occlusion(R) Roughness(G) Metallic(B) and Normal textures. This material can then be applied to the decal mesh which is then placed all across the aircraft to draw the various text legends and warnings.
Draw Order
If several geometry decals with the same material are overlapping, the Microsoft Flight Simulator 2024 engine won't be able to know which one to show first and that will cause texture flickering in the simulation. To avoid this, the material can be duplicated and put after the first one. For example, here you can see a decal material that has been duplicated 3 times:
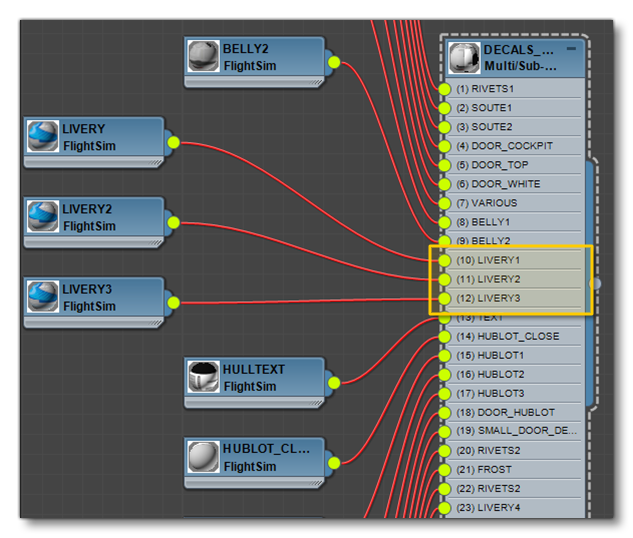
The image below illustrates the way these materials would be layered onto the airframe to get the correct draw order without any flickering issues.

Blend Factors
The decal material has Decal Per Component Blend Factors, and these can be set to different values to achieve different effects. In all cases a value of 1 will completely show this parameter, and a value of 0 will show the material underneath it, with values in-between will be multiplied by the draw shader with the decals underneath. This is useful to achieve specific effects - for example with some rivet decals we can have 2 different materials depending on the expected result. We may want to have the rivets color painted like the rest of the airframe (especially when there is a livery) like in this image:
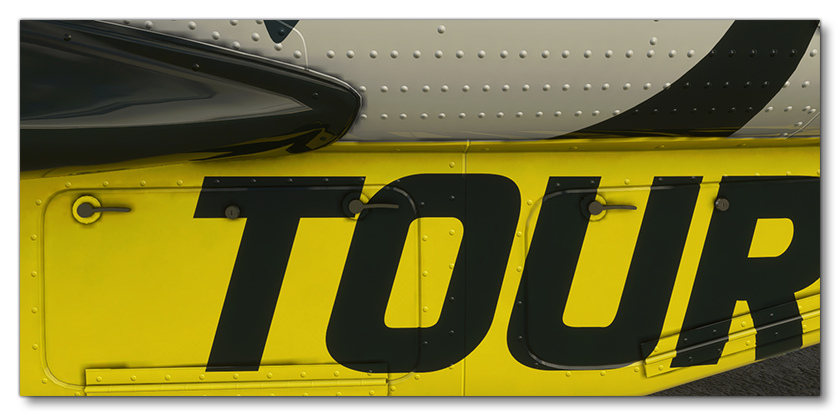
To have details painted like the rest of the aircraft you will need to set the Decal Per Component Blend Factors (Decal) parameters to 0 except the Normal parameter, which should be 1. Note that you will still need an albedo texture because the alpha value is used for the opacity (and the composite map will mainly used for the ambient occlusion).
If you wish the contrary and want to have non painted rivets with the original steel material, then you simply ensure that the Decal Per Component Blend Factors (Decal) parameters are set to 1 and the decals will be rendered as normal:
