LIGHTS
This page outlines the steps required to create scenery lights for Microsoft Flight Simulator 2024 using 3DS Max or Blender. These lights will then be visible when placed in the simulation using The Scenery Editor.
NOTE: Lights should be present on all LODs for the scenery element, otherwise users will see the lights "pop" into existence as the LODs change.
In Microsoft Flight Simulator 2024 there are three kinds of lights, and each one has a specific use-case in the simulation. These lights are:
-
Street Lights

The street light is a conical shaped light type that has multiple setup options permitting it to be synced with the day/night cycle of the simulation world, as well as have flashing/strobe effects and other parameters unique to this light type. These lights are also known as "fast lights" as they are highly optimised in the simulation and it's expected to be able to have multiple of them in any scene.
-
Advanced Lights

The advanced light type can be a point, a sphere, or a disk, giving you more lighting possibilities when using this type. This type of light is more computationally expensive than the street light type and is also not linked to the day/night cycle of the simulation. As such it is recommended for use in SimObjects for things like beacon lights or headlights, or punctually for specific scenery effects.
-
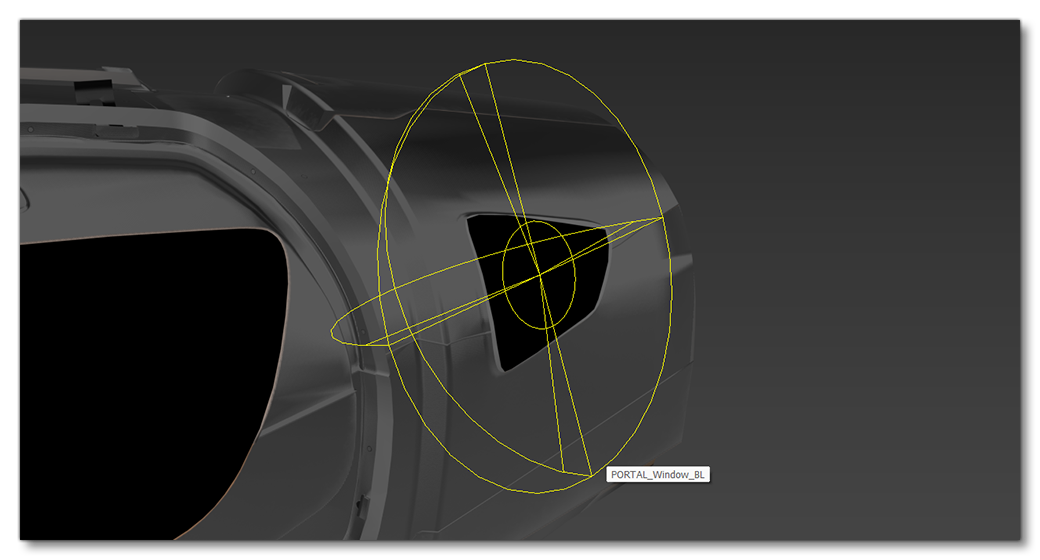
Sky Portal

The sky portal light is a very special light source that is only used on aircraft. It is designed to simulate the effect of the suns rays through the windows of the aircraft giving enhanced light/shadows on the objects within. A full description of how to create and use this light is given on the following page:
Creating Lights
Once you have created your model in 3Ds Max or Blender and are ready to start adding lights you should do the following:
In Blender you need to ensure you are in Object Mode, then go to the Add (1) menu and select the Microsoft Flight Simulator 2024 Lights (2) option:

This will open a further sub-menu where you can select one of the lights described in the section above to the scene:

In 3DS Max you must first go to the Create tab (1), then click on the Lights icon (2), and finally select MSFS2024 (3) from the dropdown list:

Next you need to select the type of light - either a street light, an advanced light, or a sky portal - and add it to the scene, then finally give it a name and select an identifying color for the mesh:

The differences between the various lights are explained below.
The light can then be positioned in the scene wherever it is needed, and you can modify the parameters related to it as required (explained below):
Modifying The Light
Once you have placed the light in the scene, you are free to modify it. This is done using the various parameters available in modelling software for the object:


The parameters available will change depending on the light type, however both street and advanced lights have the following parameters in common:
-
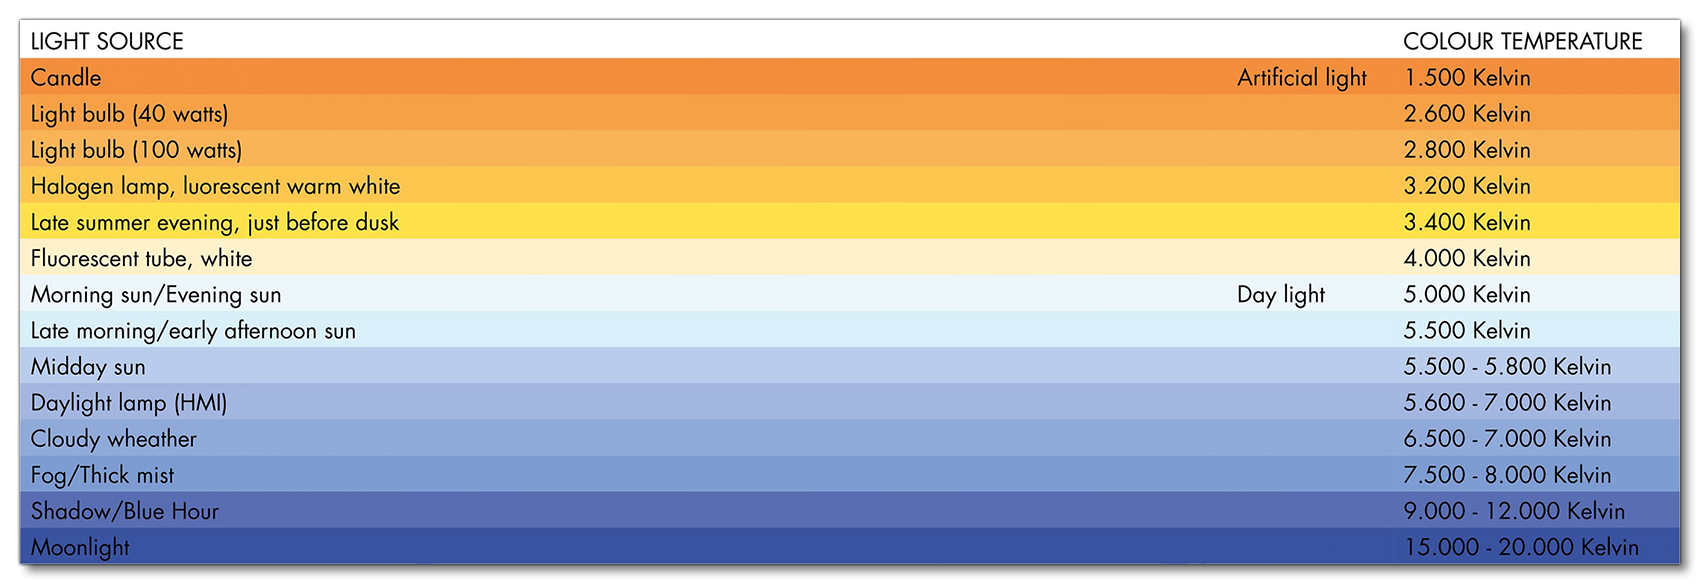
Kelvin (3DS Max) / Use Kelvin (Blender)
When this option is used, the light colour will be defined by it's temperature, in degrees kelvin. The approximate values and colours are shown in the following table:
-
RGB
This is used to set the light colour when not using the Kelvin option.
-
Intensity
This sets the intensity of the light, in candelacandela.
-
Lens Flare
When Lens Flare is checked, a flare effect will be added to the light.
-
Flare Only
Checking this will disable the light except for the flare effect (this option will not be available if Lens Flare is not checked and the light is of the type street light).
Street Light
The street light is a conical shaped light type that has multiple setup options permitting it to be synced with the day/night cycle of the simulation world, as well as set up flashing/strobe effects:
-
Night Only (3DS Max) / Day Night Cycle (Blender)
When this option is checked, the light will be on at night and off during the day. When not checked (or when always on is checked in 3DS Max) the light will be on all the time, regardless of the time of day.
-
Cone Angle
The spread angle of the light, from 0° to 360°. If you wish to simulate an omnidirectional light, then set the Cone Angle to 360°.
-
Symmetrical Cone (3DS Max) / Has Symmetry (Blender)
When this is checked, the light cone will be mirrored, so you have two cones facing opposite directions.
-
Frequency
This is the number of times that the light will "flash" in a second. Setting this to 0 means the light does not flash.
-
Duration
The duration of one flash in seconds.
-
Phase
The flash phase is the offset in seconds to the flash frequency. For example, if the frequency is set to 6 and the phase to 0, then there will be one flash every ten seconds and the flashing will start at zero seconds of the model being spawned (6 flash / 1 minute = one flash every 10 seconds). If the frequency is set to six and the phase is set to three, then there will be one flash every ten seconds but it won't start until three seconds after the model has spawned. This parameter is useful to synchronize or desynchronize several lights inside the same SPC or make the light flash at different intervals and give different effects.
-
Rotation Speed (RPM)
The number of revolutions per minute for the light. This value is only relevant when the light angle is under 360°.
-
Rotation Phase
The rotation phase is the offset in seconds to the rotation speed.
-
Random Phase
When this is checked, if multiple instances of the object with the lights is spawned in the simulation, the phase values will be randomised such that there is no synchronisation between the instances (for example, you don't want three police cars with lights that are all flashing with the same timing).
Advanced Light
The advanced light can be either a point, a sphere or a disk, and has the following options:
-
Source Radius
This sets the radius of the source light, in meters (sphere and disk only).
-
Outer Cone Angle
This sets the outer cone angle. The outer cone is where the light will be "feathered" from the maximum intensity of the inner cone angle, to the minimum intensity of the outer cone angle. This angle is also used to limit the directionality of the light (for example, setting this to 360 will give you an omni-directional light).
-
Inner Cone Angle
This sets the inner cone angle. The inner cone is where the light is at maximum intensity around the facing direction.
Related Topics