SETTING UP
Once you have your project files for the airport that you want to edit, you need to open them in Microsoft Flight Simulator, so we'll explain that process here (note that in general, you'll be following these same steps for every project that you want to edit).
To start with you need to begin Microsoft Flight Simulator and then find the airport you want to edit from the main map, before starting a flight from it. As mentioned on the page about the World Hub, we'll be starting from Epps Airfield in Alabama (the ICAO is 00AL), so you should go there from the world map:
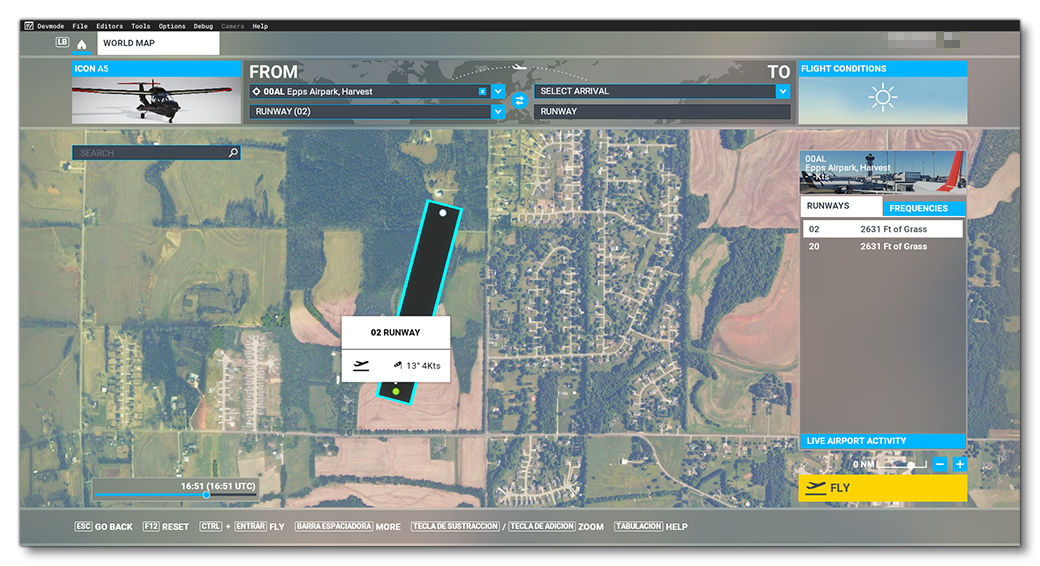 NOTE: You should have also enabled [DevMode] before starting your flight.
The Project Editor
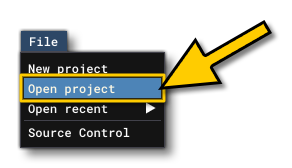
Once you have started the flight, you will need to load the project that you previously downloaded an unzipped to a safe location. This is done from the File menu, by selecting the Open Project option:
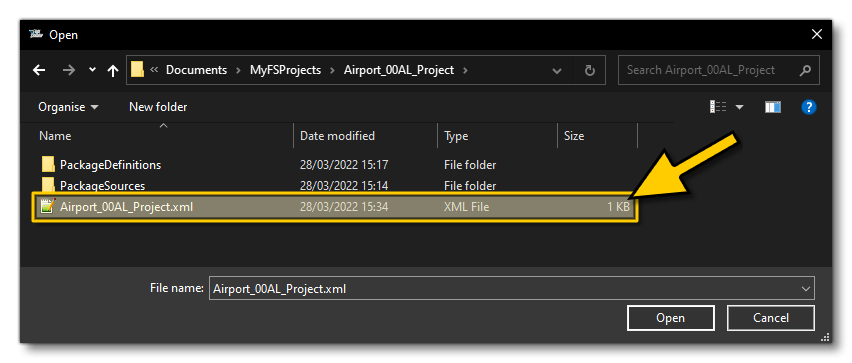
This will open a file explorer where you should browse to the XML file for the project:
The project will then be opened in The Project Editor, and you can see the package listed in the main window. You should click on the package to expand it, and you'll see the different asset groups that are contained within it. For our airport there is only one, which is the main BGL package for scenery:
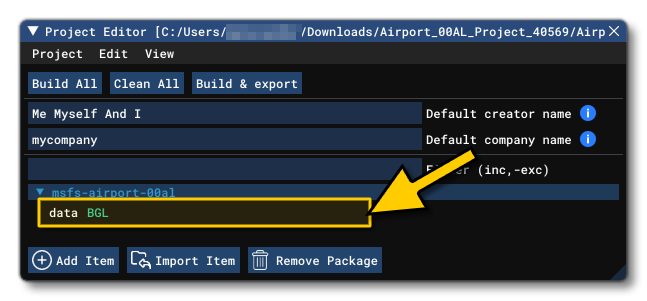
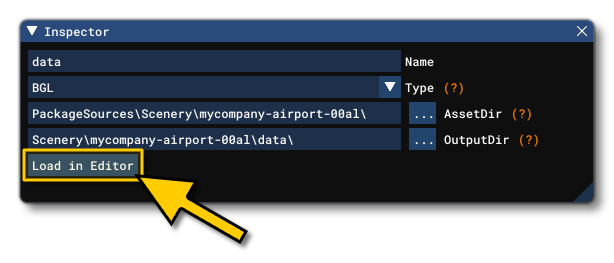
At this point we would click on the BGL and then open The Inspector window. We can then load the BGL into The Scenery Editor by clicking on the Load In Editor button:
Cameras
When you load the BGL from the Inspector, it will open up The Scenery Editor (in World Hub mode), which is where you will be able to edit the selected airport. However, before we look at the editor itself it's worth taking a moment to discuss the different cameras that you can use when editing your project. The different cameras can be selected from the Camera menu at the top:
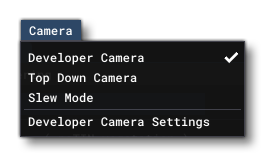
The two most important cameras for us to use when editing an airport are the Developer Camera and the Top Down Camera. The developer camera is similar to the "drone" camera in the simulation and gives you a way to freely fly around a scene and see how it looks from all angles. However, for most of the time you'll be editing the airport, you'll want to use the Top Down Camera. This fixes the camera into an orthographic plan view, or "top down" view, which makes editing things like runways, taxiways, aprons, etc.... a lot easier.
All the cameras (along with their controls) are explained in detail on the following page of the SDK documentation:
The Scenery Editor: World Hub Mode
Loading the project will open The Scenery Editor, which will be in World Hub Mode. Essentially this means that you will be using a "lightweight" version of the editor which is used to create and edit packages from the World Hub. This "lightweight" version of the tool simply contains a sub-set of tools from the "full" version which are designed to be used to create airport assets that are not package dependent, and as such any user can download them and use them in Microsoft Flight Simulator, regardless of the version they have or the other packages/add-ons that they have installed.
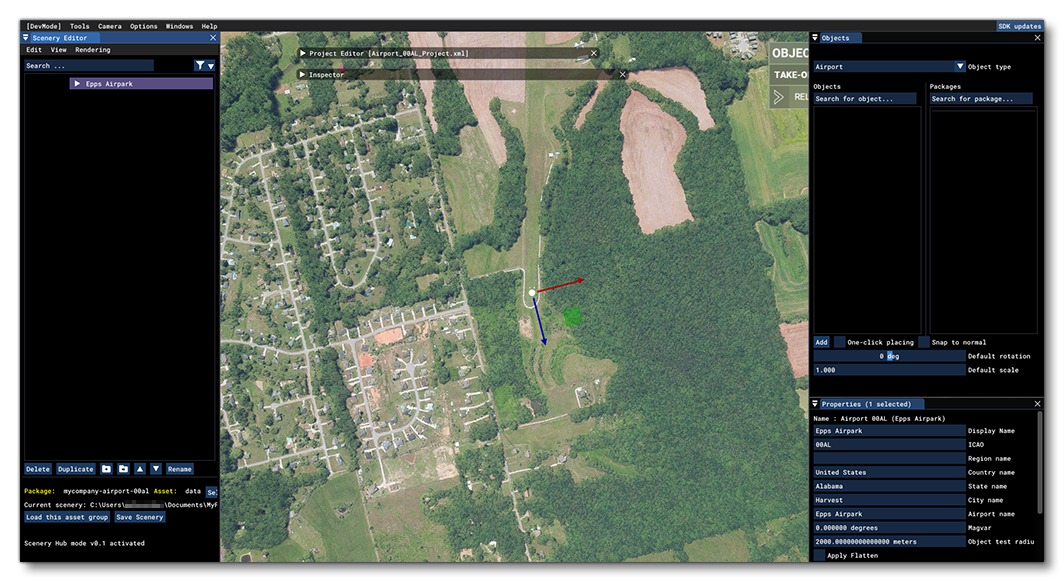
You can find all the information on the different options, windows and menus related to this tool from the link below, however we'll quickly go over the main component here and you can use the link for reference later should you need further details.
The main window that will open is the Scenery Editor itself which will look something like this:
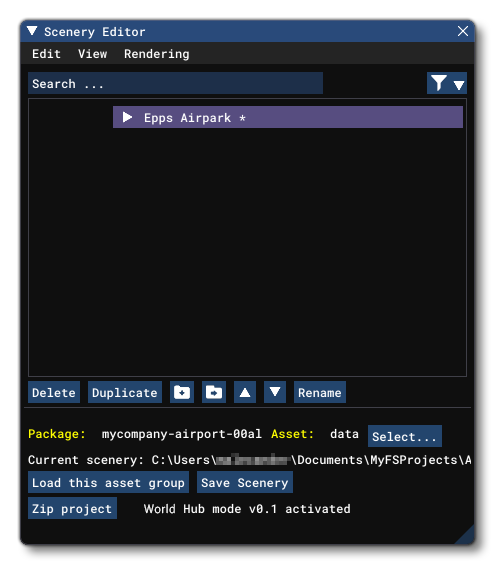
This will contain the list of elements that have been added to the airport you are editing and the menus at the top can be used to open other windows and tools that will help you when adding/editing elements.
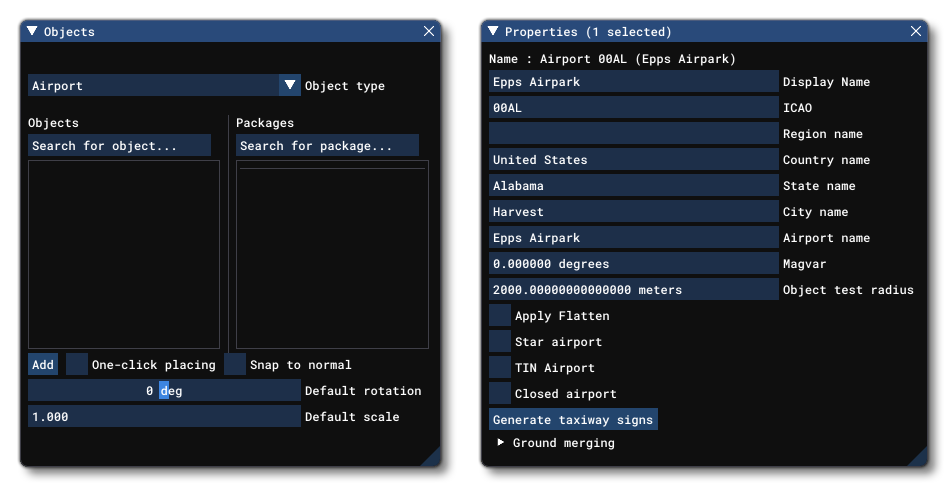
The other two windows that will open are the Objects window and the Properties window:
NOTE: Other windows may open when you open a project in the Scenery Editor when in World Hub mode, like the Material Editor. These can be closed and you generally only need the three windows mentioned above (Editor, Objects and Properties) to be open.
The Objects window is where you'll be selecting the objects that you want to place into the scene, and the Properties window is where you'll edit the different properties and attributes associated with each of the placed objects. You can find a list of objects that can be placed from the link below, and on each object page you can find the different properties that they have. We'll be covering the most important ones over the course of this tutorial, however.
It is worth noting that the various windows can be docked in multiple different ways around the screen. This means that you can set things up to suit your workflow, which doesn't necessarily have to be the same as that shown in this tutorial. For more information, please see here: