APRON OBJECTS
A Apron object is an object element that is used to add arbitrary sized paved areas to Airport Objects. When you select this object type the Objects window will show the following basic apron types:
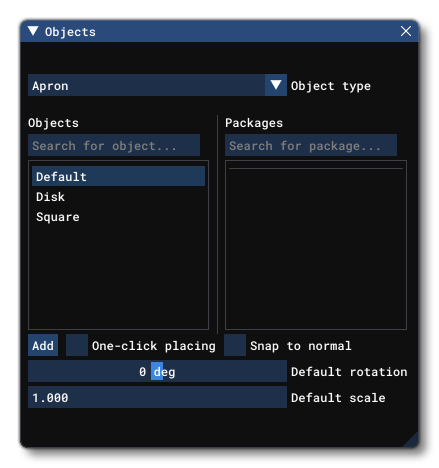
Apron object elements are simply arbitrary areas that you can add into the world - generally with a surface material - that define the parts of an airport where aircraft are parked, unloaded or loaded, refilled, or boarded, among other things.
IMPORTANT! Apron objects require one or more Airport Objects to be present in the scene, and must be added to an airport group in The Scenery Editor. If no airport is present then they cannot be used. Also note that if they are placed too far away (ie: outside the airport Object Test Radius) then they will not be rendered.
Default Aprons
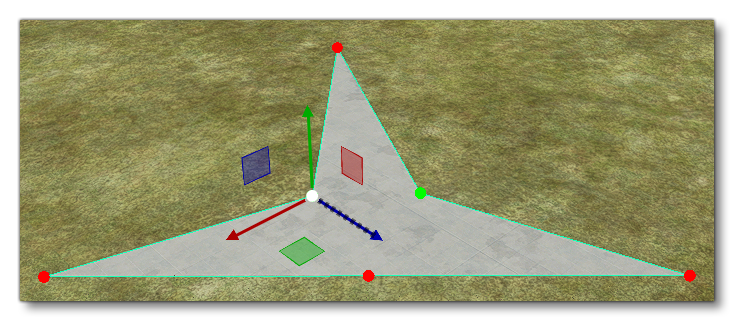
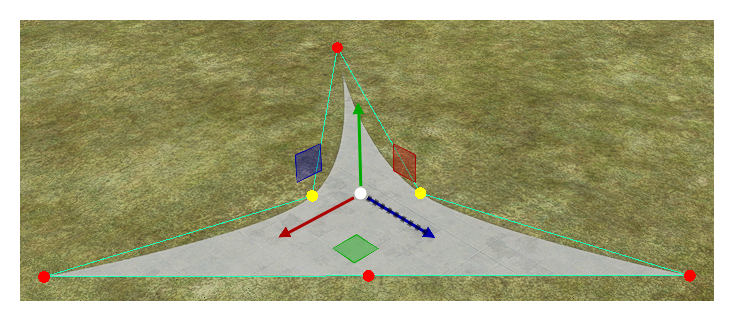
When you select the Default Apron object and click Add, the cursor will have a red dot attached to it, and if you then hold down Ctrl and use the Left Mouse Button you can start to place points on the world to outline the shape. When you are happy with the area you have delineated, you can press Enter to "fix" the shape, which will now look like this in the world:
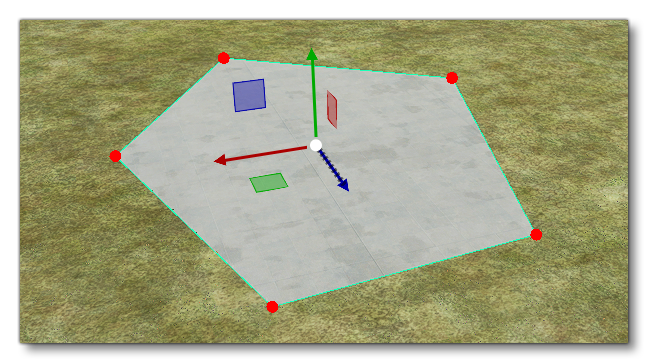 The polygon will have a Gizmo in its center and this can be used to change the position/rotation/scale of the apron. Note that the apron polygon can be convex or concave, so you can define just about any area, although the edges of the apron area should never cross, as this will lead to errors when rendering.
Disk Aprons
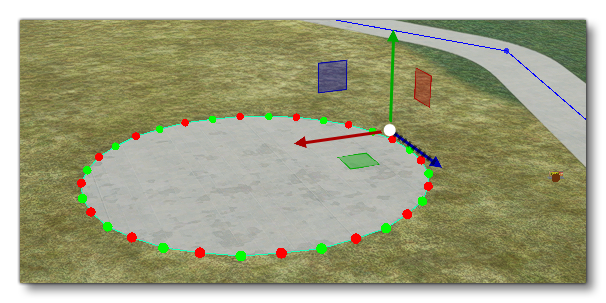
When you select the Disk Apron object and click Add, a disk apron will be added. This apron is defined using 32 individual points to create an approximately circular area which will look like this in thew world:
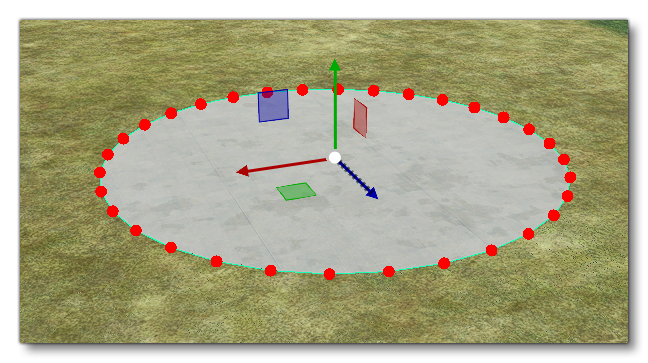 The disk apron will have a Gizmo in its center and this can be used to change the position/rotation/scale of the whole apron area.
Square Aprons
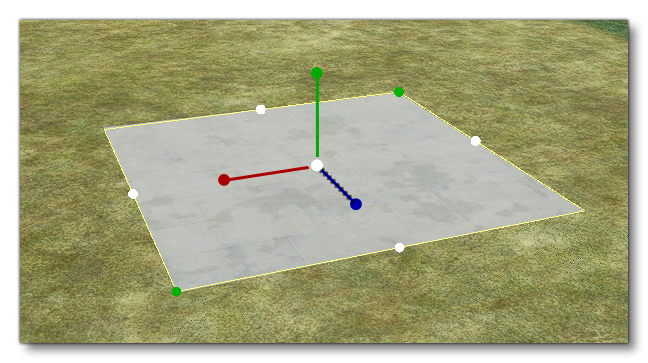
When you select the Square Apron object and click Add, a square apron will be created in the world, looking like this:
Editing Aprons
If you want to change the area that the apron covers after you have created it, you can edit the different points that make up the apron. The actual way this works will depend on the apron type.
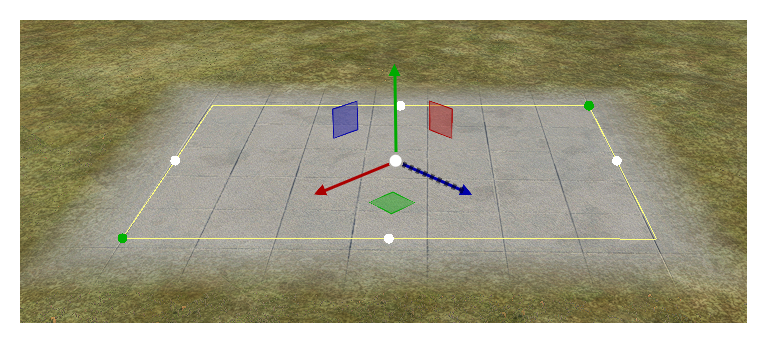
For the Default and Disk aprons, you can click the Left Mouse Button on any point to set the gizmo to that point, and this point can then be translated to a new position using the gizmo or by inputting new values in the gizmo window. You can also select various points together by using Ctrl + Left Click on individual points, or by using Shift + Left Click + Drag to select multiple points. Selected points will turn green and these points can then be edited together, as illustrated in the images below (mouse over the image to see the edition):
Editing the Default and Disk aprons will also give you access to extra options when you click the Right Mouse Button:
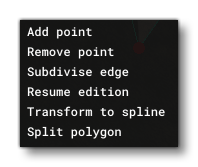 This menu has the following options:
- Add Point: Clicking the RMB on a point or on the edge of the Disk or Default apron and using this option will add a new point to the apron polygon, which can then be edited as normal.
- Remove Point: Selecting one or more points on the Default or Disk apron and selecting this will remove the point(s) from the apron.
- Subdivise Edge: Clicking the RMB on the edge of the Default or Disk apron and selecting this option will add a new point on the clicked edge, halfway between the points at either end.
- Resume Edition: Selecting this option will enable you to continue defining the apron shape, using
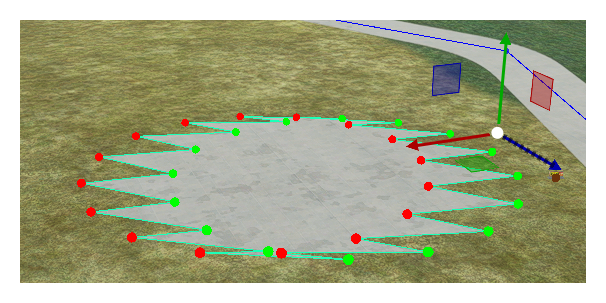
Ctrl+ Click to add new points, and usingEnterto finalise the edition. - Transform To Spline: When you select one or more points and choose this option from the RMB menu, the selected points will turn from red to yellow, and the material used to render the apron will be rendered using spline curves between the points, as shown in the images below (mouse over the image to see the effect):
If you do not wish to have spline rendering for a point, the RMB menu will have a Remove Spline option when clicked on it.
-
Split Polygon: This option will only be available when you have selected two or more points that are not adjacent. Selecting this option will then split the Apron object into two separate Default polygon aprons that can be edited independently.
The Square polygon edition is different to the other two element types as it is done using "handles" that are shown in the simulation UI:
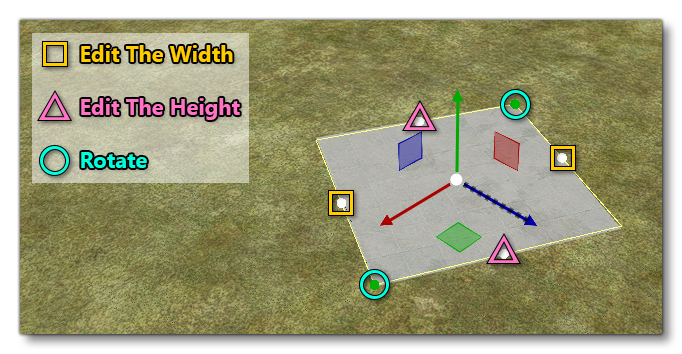 You can select any of the "handles" shown in the image then use the Translate Gizmo to edit them, or input values directly into the gizmo window.
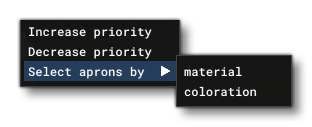
Finally, there are a couple of extra RMB menu options that can be used regardless of the apron element type:
 These options are:
- Increase Priority: With this option you can increase the apron priority, where higher priority aprons will render over lower priority aprons. See the section on Priority in the Properties section below for more details.
- Decrease Priority: This lowers the priority value for an apron so that it will render under any aprons with a higher priority. See the section on Priority in the Properties section below for more details.
- Select Aprons By: This option permits you to select ALL aprons in the airport that meet the specified criteria, either based on their Material or based on their Colouration values. Note that if selecting by colouration, only aprons with the exact same color settings will be selected. This option permits you to mass-edit certain properties for all aprons that meet the criteria.
Note that if you wish to remove the apron object from the world, you can select it and then press the Delete key.
Properties
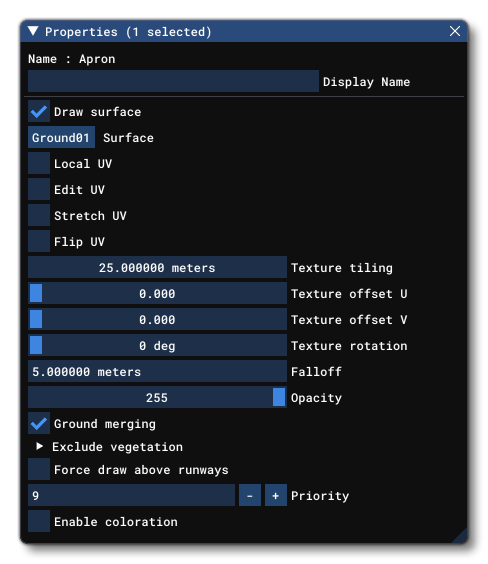
The Properties window for an Apron object looks like this:
-
Name
This is the name of the element as defined by its object type properties.
-
Display Name
This is the name of the element as it will be displayed in the The Scenery Contents List. This can be edited and is helpful for identifying elements when you have a lot of items in the content list.
-
Draw Surface
This option can be un-checked to disable drawing the surface material assigned to the apron object. It is checked by default.
-
Surface
This button shows you the material that has been selected for the apron object surface. To change the material, simply click the button to open The Material Editor, then drag a material onto the button. The button will change to show the name of the chosen material and it will be applied to the Apron in the world.
IMPORTANT! When being rendered, apron elements are baked into the terrain textures. This helps reduce the polycount and permits the element to be terraformed. However, it also means that the texture quality won't be any greater than the resolution of the terrain textures themselves. In general, this resolution is around 4cm/pixel at the equator, with the best/highest resolution terrain textures reserved for higher LODs so we have a better quality for airports. For users, they will experience the best resolution possible setting the "Terrain level of detail" option to its maximum value.
-
Local UV
When this option is checked, the surface material will be applied to the local coordinates of the apron. This means that moving the apron will also move the surface material, keeping it aligned with the position of the apron. Un-checking this means that moving the apron will not change the position of the surface material. By default this option is checked.
-
Edit UV
When this option is checked, you can use the Gizmo tool to change the different texture UV properties:- Texture tiling with the scale gizmo
- Texture X/Y offset with the translate gizmo
- Texture rotation with the rotate gizmo
-
Stretch UV
When checked, the surface material will be stretched to fit within the bounds of the apron area, such that changing the apron scale will also change the scale of the material being applied. Also note that when checked the Texture Tiling option will not be available. Un-checking this option means that the material will not be stretched when you change the size of the apron object. By default this option is un-checked.
-
Flip UV
This option permits you to flip the UV coordinates for the texture that the applied material is using.
-
Texture Tiling
This option permits you to change the tiling scale for the applied material texture. Note this option will not be visible if the Stretch UV option is checked.
-
Texture Offset U
This option permits you to offset the texture alignment along the U axis.
-
Texture Offset V
This option permits you to offset the texture alignment along the V axis.
-
Texture Rotation
This option permits you to rotate the surface material texture within the apron area, changing it's orientation without changing the orientation of the apron itself. Note that this value will be reset if you rotate the apron itself - or any points used to define the apron - and the rotation of the texture will be set to the new apron rotation. As such it is recommended that you first perform any transforms on the apron object then change the rotation of the texture.
-
Falloff
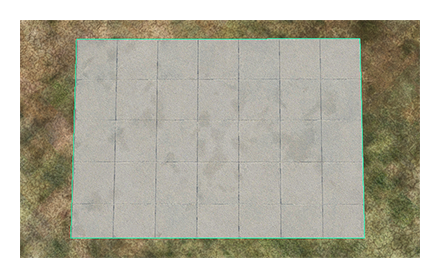
This value can be used to "feather" the edges of the apron, removing the hard edge where the apron ends and the terrain begins. Mouse over the image below to see the difference between a default falloff of 0m and falloff value of 10m: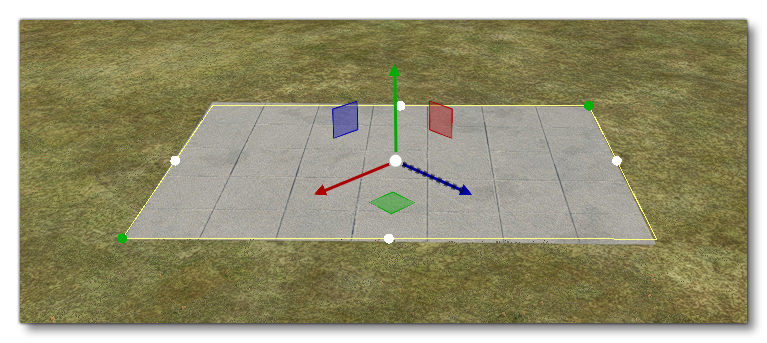
-
Opacity
This option can be used to make the apron surface texture more or less transparent.
-
Ground Merging
When checked, this option will merge the terrain textures with the material texture that is used for the apron. Mouse over the image below to see the difference: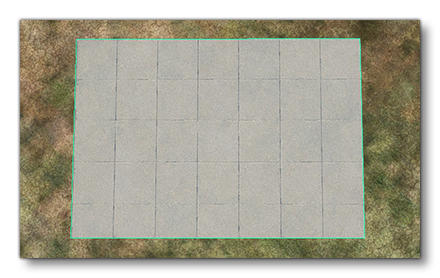
-
Exclude Vegetation
If you click on the Exclude Vegetation option, you will be presented with the following two check-boxes: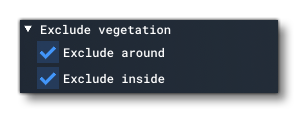
-
Exclude Around: When checked, this option will remove any vegetation that is near the edge of the taxiway path object.
-
Exclude Inside: When checked, this option will remove any vegetation that is within the bounds of the taxiway path object.
Both these options are checked by default.
-
-
Force Draw Above Runways
Checking this option will mean that the apron will always be rendered above any runway object elements, regardless of the priority.
-
Priority
This option sets the render priority for the apron. The default render priority is 0, which for most cases is fine. However, if you have overlapping aprons and want one to render over another one, then you will need to change this value clicking the+or-buttons to raise or lower the priority value. Higher priority values will render over lower priorities, for example, a polygon with priority 1 will render over one with priority 0, which in turn will render over one with priority -1. Note that the engine cannot guarantee the render order for aprons with the same priority, so if you need something to always render over or under something else, you need to set this value.
-
Enable Colouration
Checking this will open a further set of options that permit you to edit the RGB values for the materials being used to texture the apron, using the color picker or by editing the value fields directly.
 In this way you can change the color of the materials to better suit the environment and area that the apron has been placed in. Setting all the values to 0 will disable the colouration.