VFX EDITOR MENUS
This page outlines the different menu options available from The Visual Effects Editor main window:

File

From this menu you can do the following:
-
New Effect
Selecting this will open a window requesting you to input a name for the new effect you are creating. Once add the name and click the Create button, the new effect will be added to the effects list as<name>.xml.
IMPORTANT! The new effect file will not be created and the effect will not be saved to the file until you select the Save option.
-
Rename Effect
You can use this option to rename any selected effect.
-
Save
This option will save the current effects settings to the XML file for the effect in the package.
Edit
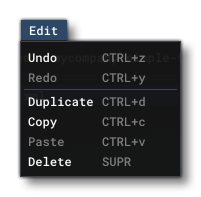
The Edit menu has the following options:
-
Undo
This option will perform a single Undo step for the Visual Effects Editor, or alternatively you can use the keyboard shortcutCtrl+ "Z". Note that you can see the Undo/Redo stack from the Undo History window, available from the View menu.
-
Redo
This option will perform a single Redo step for the Visual Effects Editor, or alternatively you can use the keyboard shortcutCtrl+ "Y". Note that you can see the Undo/Redo stack from the Undo History window, available from the View menu.
The other options are specifically for use with the Node Graph and will be available when you start to edit anything within that. These options simply replicate the standard keyboard shortcuts to Duplicate, Copy, Paste and Delete nodes.
Game
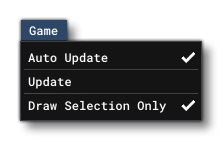
From the Game menu you can do the following:
-
Auto Update
This option can be checked or unchecked. When checked, any changes to the current effect in the Node Graph will also be reflected in any spawner for that effect in the simulation. Un-checking this option means that any spawned effects will not update. The option is checked by default.
-
Update
This option is only relevant when the Auto Update option is un-checked. Selecting this will update any particle spawners for the current effect being edited with any changes that have been made in the Node Graph.
-
Draw Selection Only
Lorem Ipsum
View
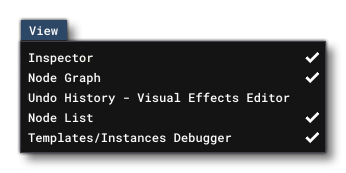
This menu can be used to open any of the additional windows that are used by the Visual Effects Editor. The options are:
-
Undo History
The Visual Effects Editor supports undo/redo functionality which can be accessed through this window, or alternatively using the keyboard shortcutsCtrl+ "Z" for undo, andCtrl+ "Y" for redo. From this window, however, you can select any item from the list and "reset" the editor to that state without having to go through each of the steps before or after. If you want to step through the state list, you can use the aforementioned shortcuts, or use theUndoandRedobuttons at the top.
-
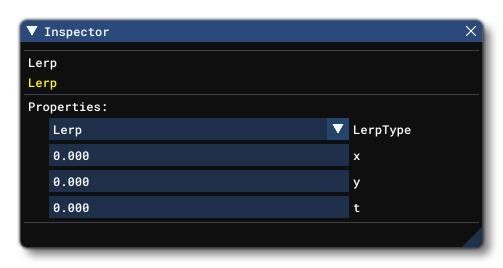
Inspector
The inspector window is used to "inspect" the different items in the effect, whether it is an Edition, Block or Node item. The actual contents of this window will change depending on the item selected, and each is documented on the relevant page, links to which can be found from the VFX Node Graph page:
-
Node Graph
This will open the Node Graph window where you can create your effects. This window is explained in full on the VFX Node Graph page.
-
Node List
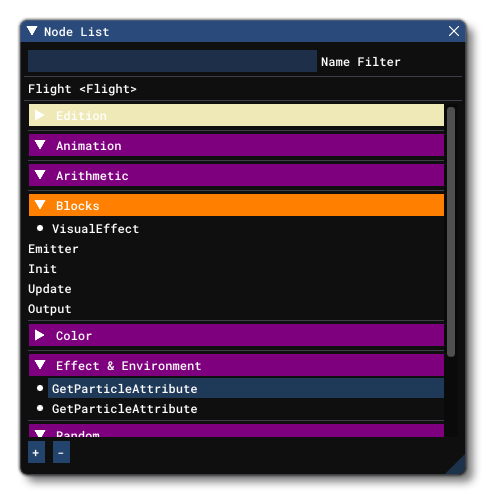 This window provides a sectioned list of all the Edition, Block and Node items that comprise the current effect. Unlike the Items Tree this is not a hierarchy and simply lists the different items by type. You can, however, click on any item and the Node Graph window will pan to that item, and also open the item details in the Inspector window. Note that any item listed in this window that is red, is an item that is incorrectly configured. For example, an Update node with no Output would show up as red in this window.
-
Template/Instance Debugger
This window is used to debug the visual effects system and package that is currently being edited. It is split into 4 different tabs each of which is explained below:- Instances
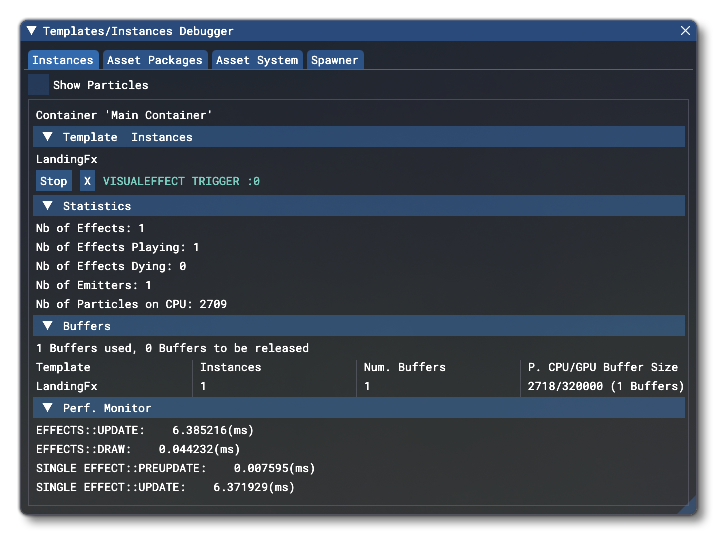 This tab gives you all the information about the total number of instances of effects currently available as well as information about the VFX system itself. It's split into 4 main groups:
- Template Instances: This shows what effects are currently being spawned as instances int he world. You can also immediately stop and remove the effect by clicking the
Xbutton, or simply stop the effect spawning any further particles by using theStopbutton (the effect will be removed when no further particles are in the system after it is stopped).
- Statistics: This section shows some of the statistics associate with the Visual Effects system.
- Buffers: This gives you an overview of the buffers that are being used to created the particles in the Visual Effects system, as well as the effects file that is associated with them.
- Perf. Monitor: This is the section that monitors overall performance of the Visual Effects system, giving you different system timings to help see the impact that any effects you create have.
- Template Instances: This shows what effects are currently being spawned as instances int he world. You can also immediately stop and remove the effect by clicking the
- Asset Packages
 This tab shows the different packaged and effects available to the editor for the project. This is a hierarchy view, with the top level being the package, then the effects within the package, then the GUID for each package.
- Asset System
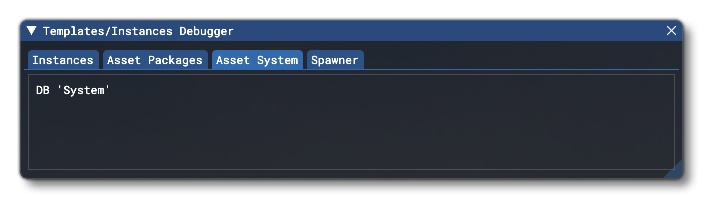 This tab is for showing any system effects. These are effects that have been added and/or created using means other than the Visual Effects Editor and the XML templates (eg: from a DLL or within the actual Microsoft Flight Simulator 2020 code base).
- Spawner
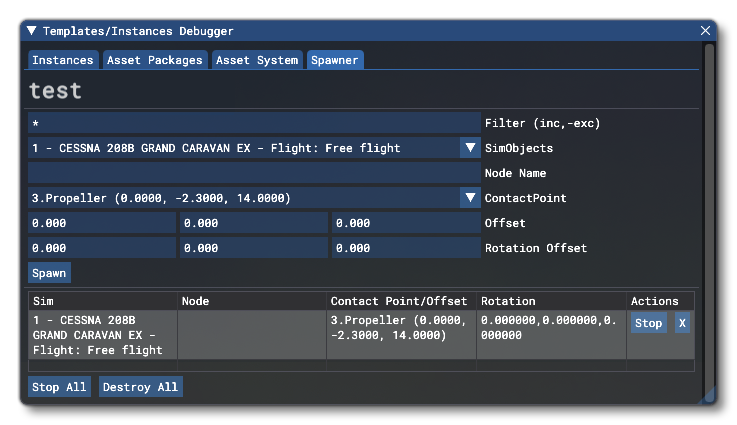 This tab is for controlling and debugging a single particle effect within the simulation itself. At the top is the name of the currently selected effect file, and then you have various options for choosing how and where to spawn it for testing in the world. Since all effects need to be attached to a SimObject that's the first option, and you can select any of the available SimObj from the current camera position. If the object is a custom model that is part of the package, you can specifiy a Node Name to attach the effect to. If you are using an aircraft SimObject, then you can - instead of a node - select a Contact Point to spawn the effect on. You may also set the Offset and the Rotation Offset relative to the chosen spawn point.
Once set up, clicking theSpawnbutton will spawn the particle effect in the world, and add an extra section to the tab with information about the spawn point. Note that you can change the current effect at any time by clicking on it in the Effects Editor window, and the information on this tab will change permitting you spawn multiple different effects at the same time in the simulation for testing.
If you wish to stop or remove an effect at any time, you may use the individualStoporX(remove) buttons for the effect, but you can also use theStop AllandDestroy Allbuttons to stop and/or remove all the current effect spawners at once.
- Instances