TAXIWAYS
The next stage of editing our tutorial airport involves setting up the taxiways and aircraft parking spots. Taxiways are comprised of two different objects: TaxiwayPoints and TaxiwayPaths. You place the taxiway points throughout the airport, and then they are connected by taxiway paths to create a complete taxiway network. Then, after you create the paths, you'll add in the parking spots.
Before going any further, we should probably disable editing for the polygon and runway objects that we have already placed. This will make placing the taxiway simpler as we won't need to worry about accidentally selecting an object that is "under" the taxiway, and it also reduces the visual noise. For that you should open the Hide/Lock By Type window, and then click on the "hide" icon for the polygon and the "lock" icon for the runway:
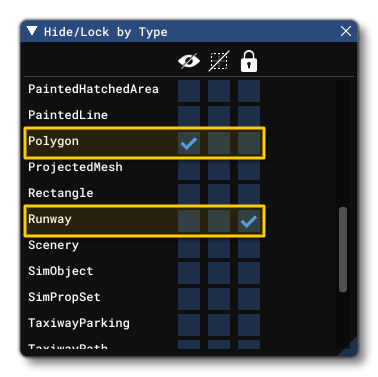
We could just hide everything, but we need to be able to see the Runway area to properly place the taxiway path, so we simply lock it to prevent edition. This permits us to still see the bounding box for positioning things without having to worry about accidentally editing it. Note that this window is very helpful throughout the entire edition process and we recommend that you keep it docked along with the other windows so you can quickly enable/disable the edition and visibility of objects, as it makes editing specific things much simpler.
Runway Taxiway
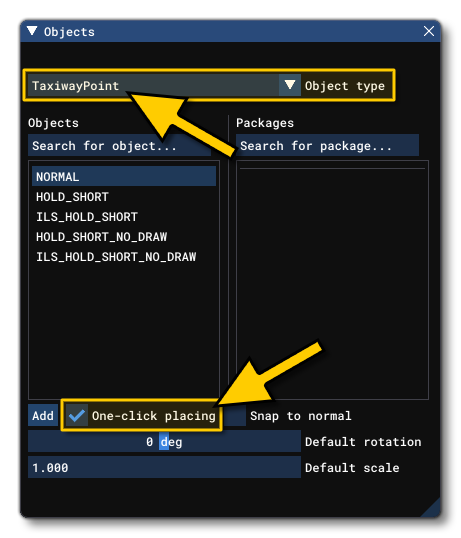
We first need to add the taxiway that follows the runway. In general, this should always be the first taxiway you create as all others will branch off from this. So to create this path, you need to first select the TaxiwayPoint object and activate the One-Click Placing option:
You can now click on the scene and place the points you need. In our tutorial airport, we need to add 3 points to start with, one for the start of the path, one for the position on the runway where other taxiways will be joined, and then one at the end of the runway:
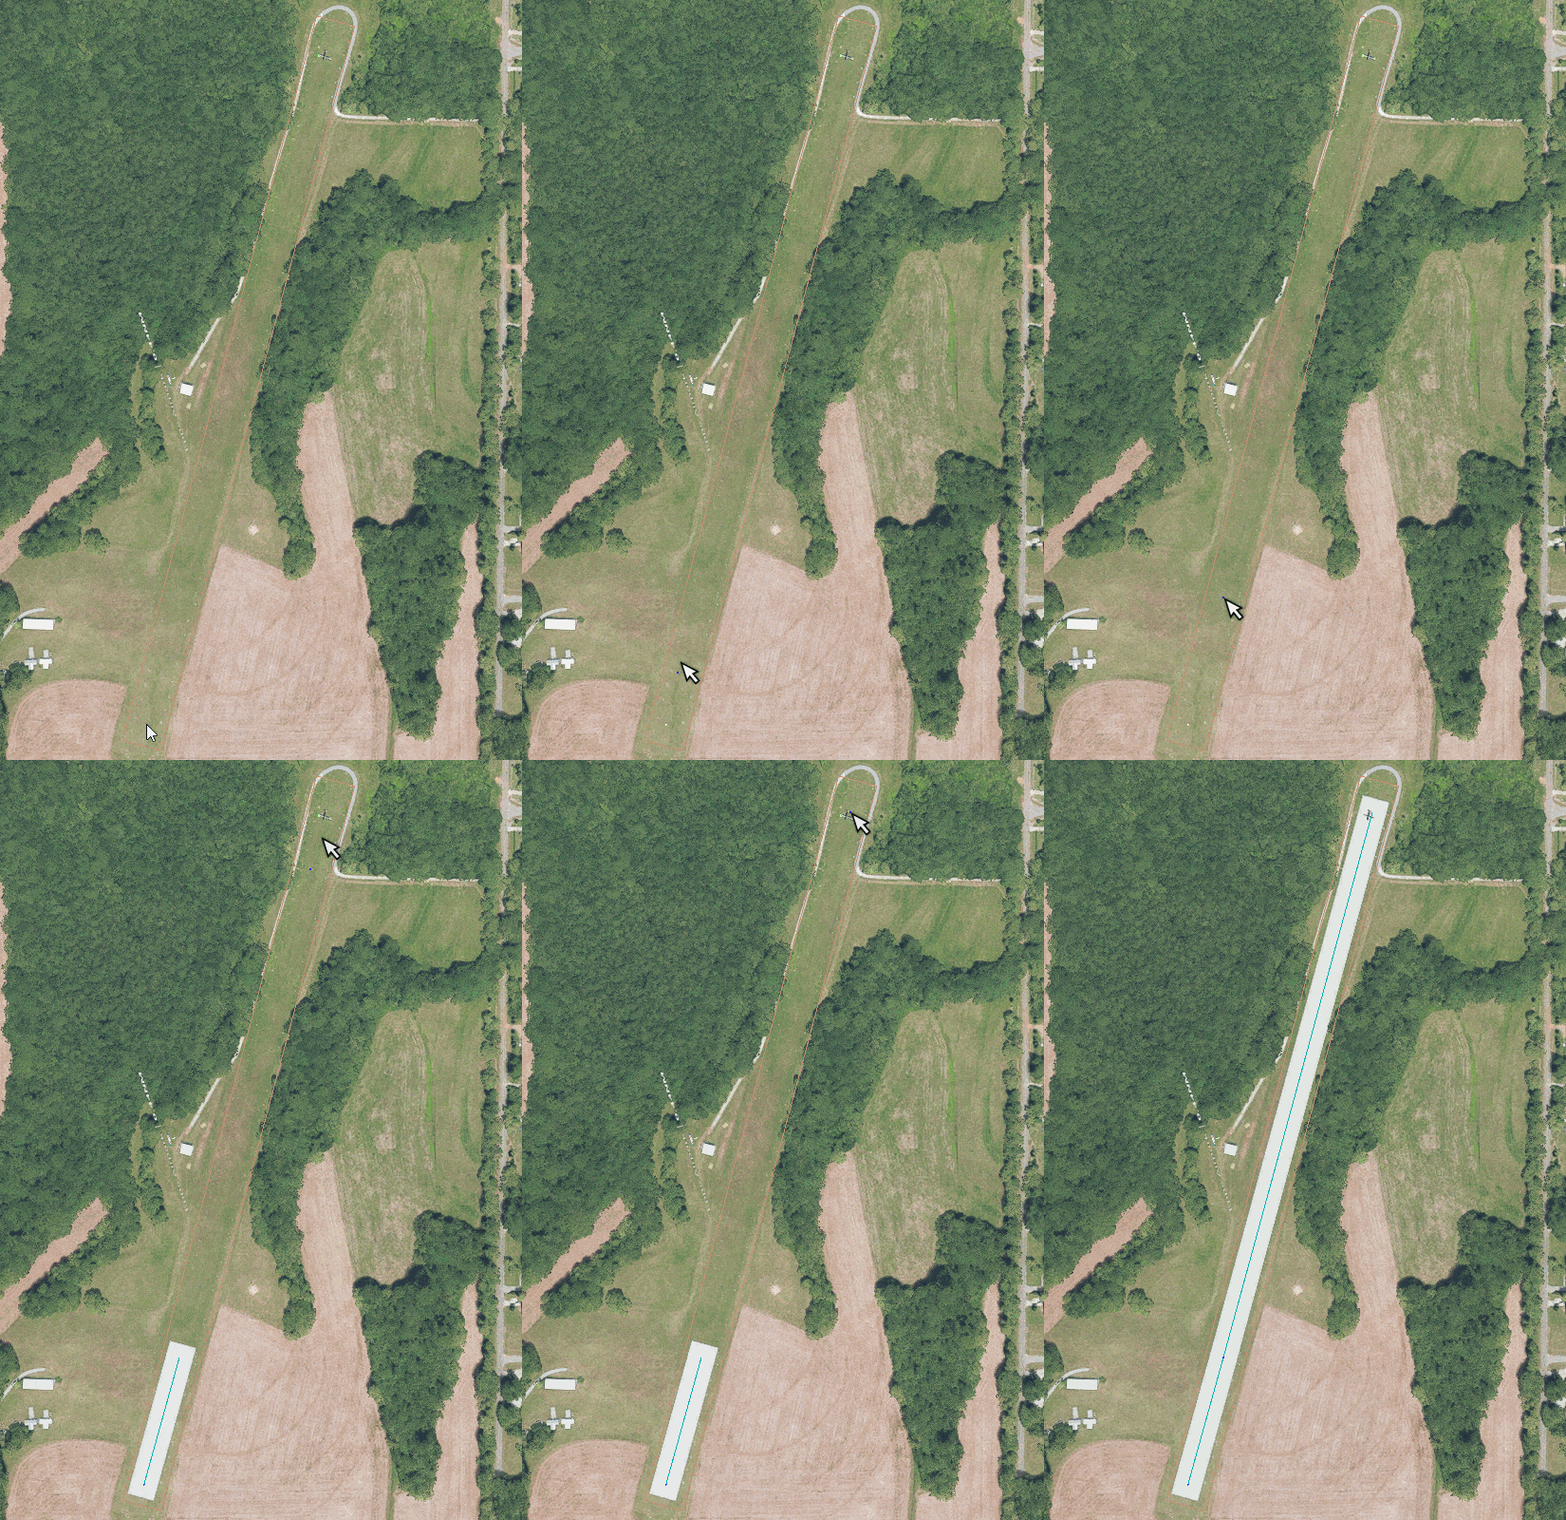
Once you've add the final point, you should disable One-Click Placing so you don't accidentally create any further points. The scenery editor will now show the points that you've added, and you'll notice that there are also TaxiwayPath objects. These are added automatically by the Scenery Editor and will now need to be edited, since by default they will created as generic taxiways which have a material added to them. So, in the The Scenery Contents List select the first TaxiwayPath object, then in the Properties window, set the Taxiway Type to Runway:
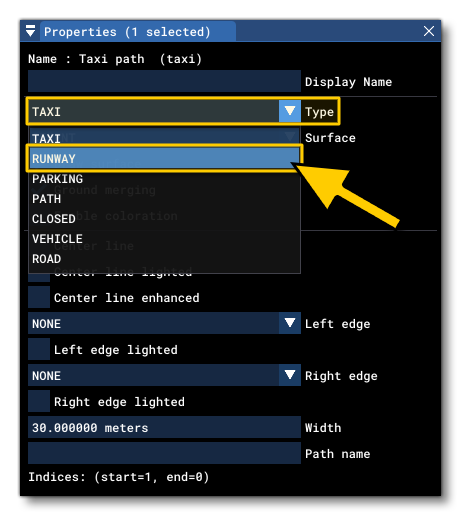
Runway paths have no material by default since you would almost always want to maintain the original Runway Material.
Connecting Taxiways
We can now add further subsidiary taxiways that connect to the runway taxiway from the areas where the aircraft can be parked. To start with, select the "middle" taxiway point that we added as a connection node. Once selected, you can enable One-Click Placing again for the taxiway point object, and then add a couple of points that go off towards where we want the aircraft to park:
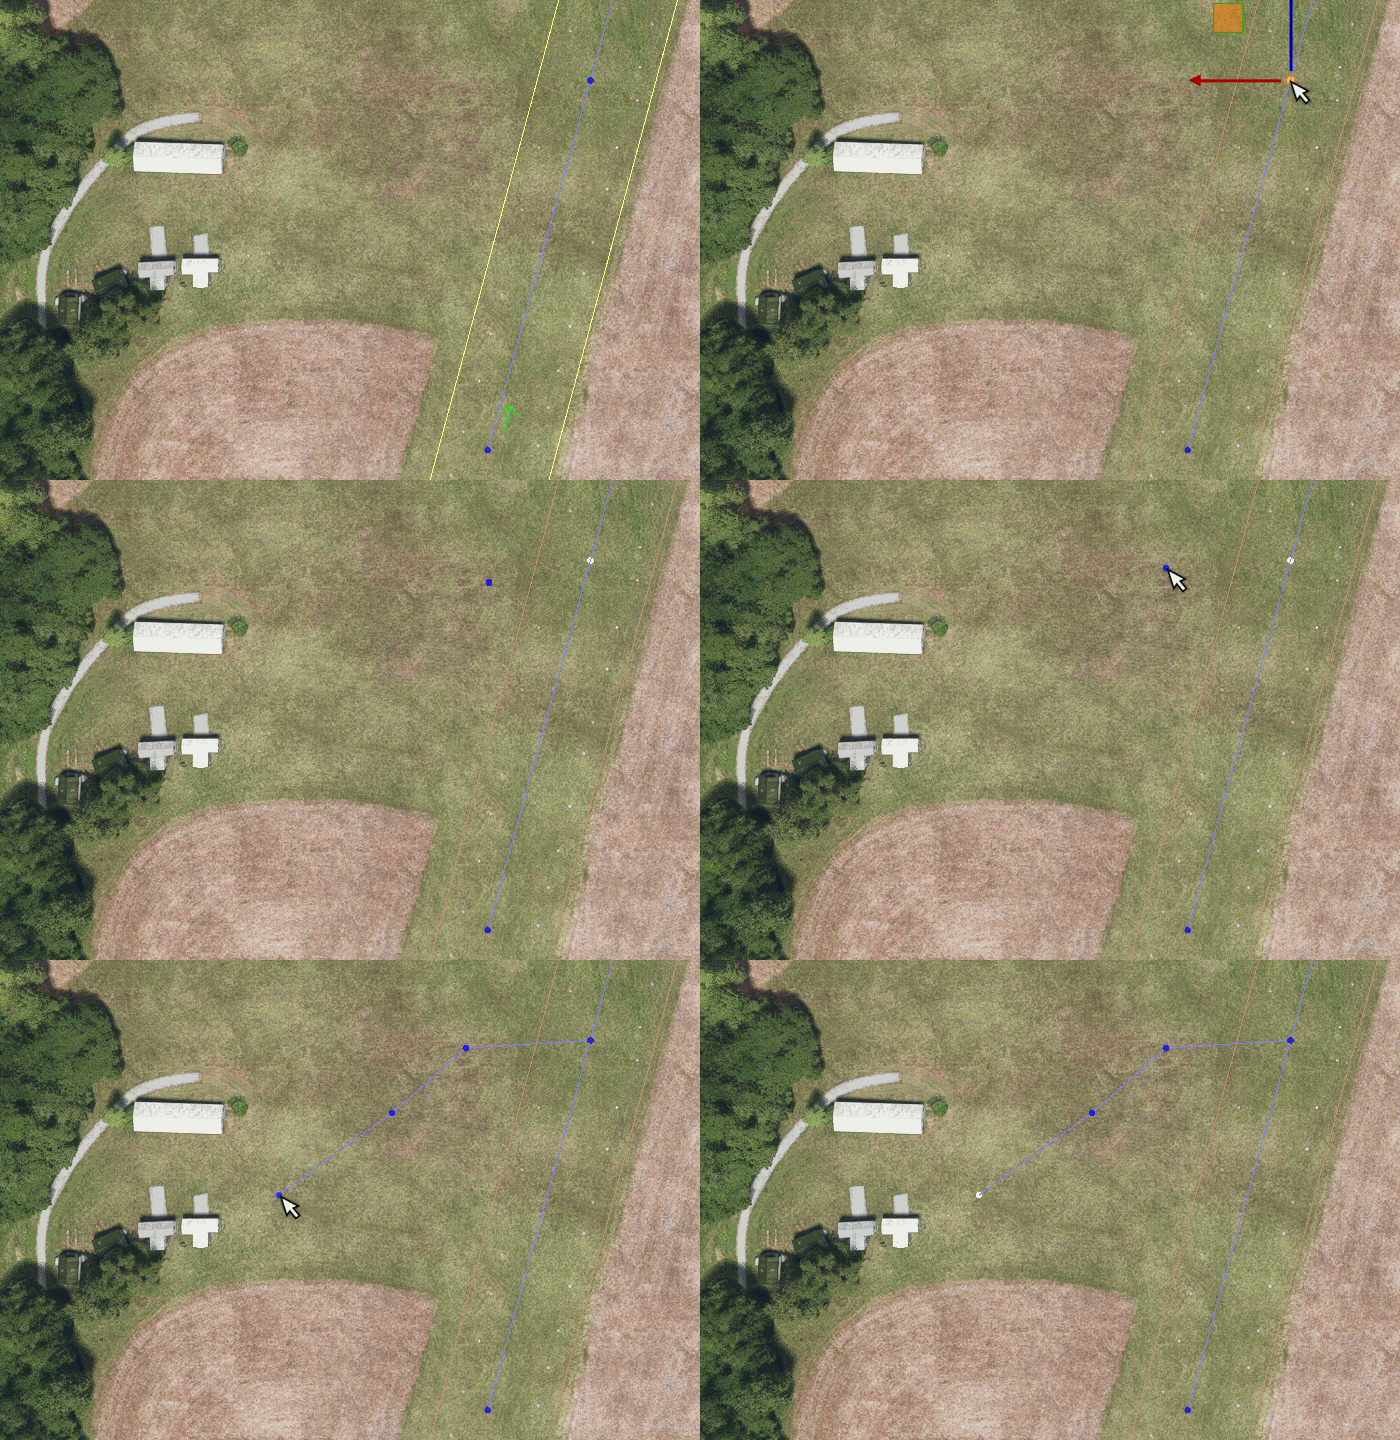
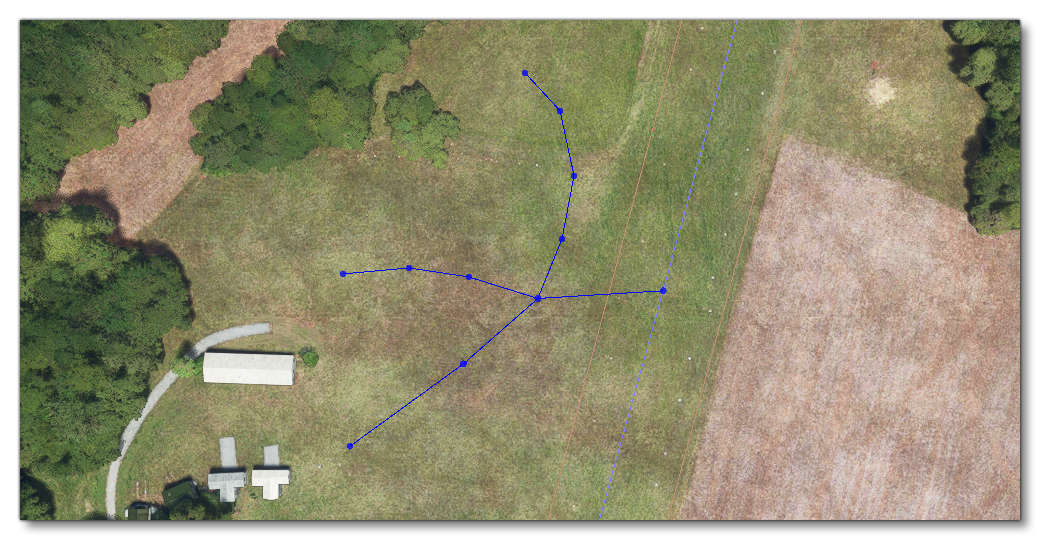
At this point, you should select the different TaxiwayPath objects and ensure that their Type is set to Path. Once you have done that you need to repeat this process two more times so we have three connecting taxiways that look something like this:
Errors And Warnings
At this point, it's more than likely that you'll have at least one warning in the Scenery Editor, although you may also have errors, depending on how you've connected things up. In the editor, a warning will mean that you can save the airport, but it may be mis-configured, while an error will mean you can't save the scenery until the errors have been resolved. The image below shows how both types of issue will be shown in the Scenery Editor:
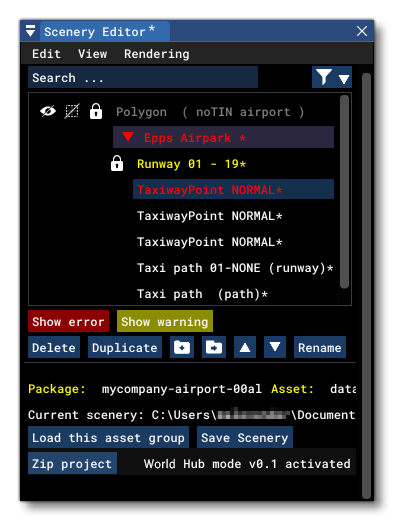
The error shown here is a stray Taxiway Point that we can simply delete (you can double-click on the point object in the list to be taken to it in the scene and see what the exact issue is) and the warning is related to the Runway object. If you mouse over the runway object in the list, you will get a message that tells you what the issue is:

In this case, the warning is that there is no taxiway hold short close enough to the runway to be usable, so we'll add that in now.
Setting A Hold Short
Since we have a taxiway point leading onto a runway, we need to set a point to be the hold short position for aircraft (this is the point where aircraft should stop before crossing or entering a runway). For this we need to add another point into the path between the one on the runway, and the one that splits into different connecting taxiways. This is easily done by first selecting the path, then right clicking and selecting Split Path to create an extra point on it:
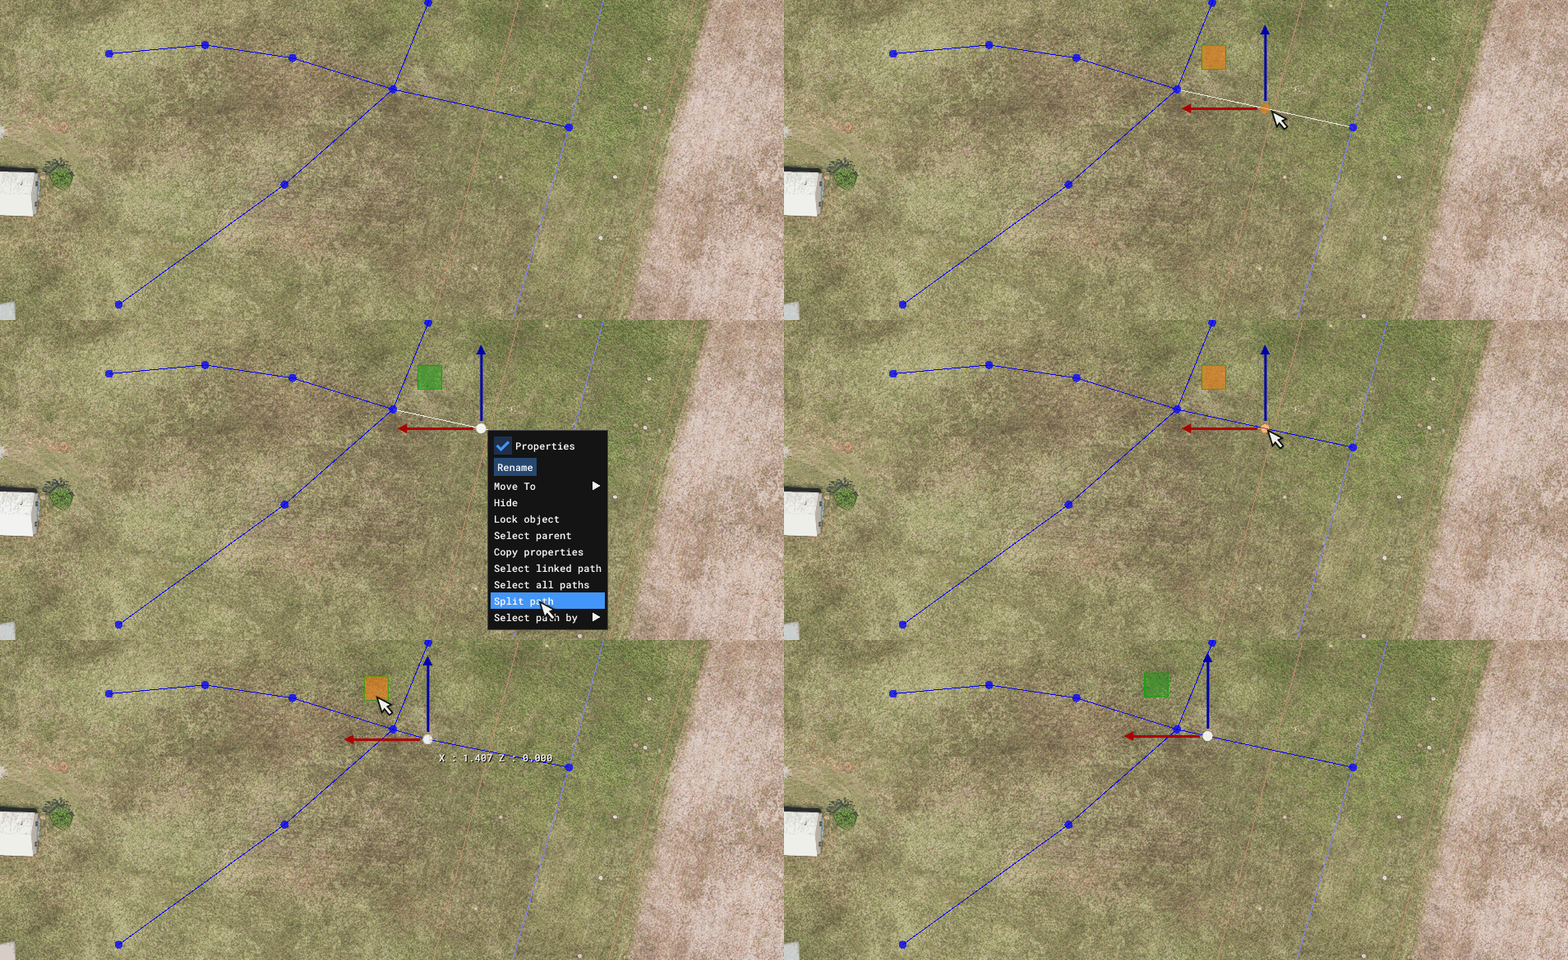
If you click on this point, you can then go to the properties and change the type to be HOLD_SHORT:
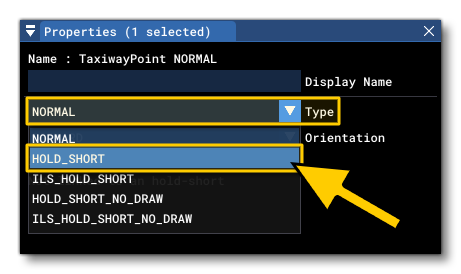
You will then be shown in the scene the painted lines associated with the hold short, and an arrow showing the facing direction when stopped. We don't actually want these painted lines for this airport, but they make an excellent visual indicator for the hold short position and orientation:
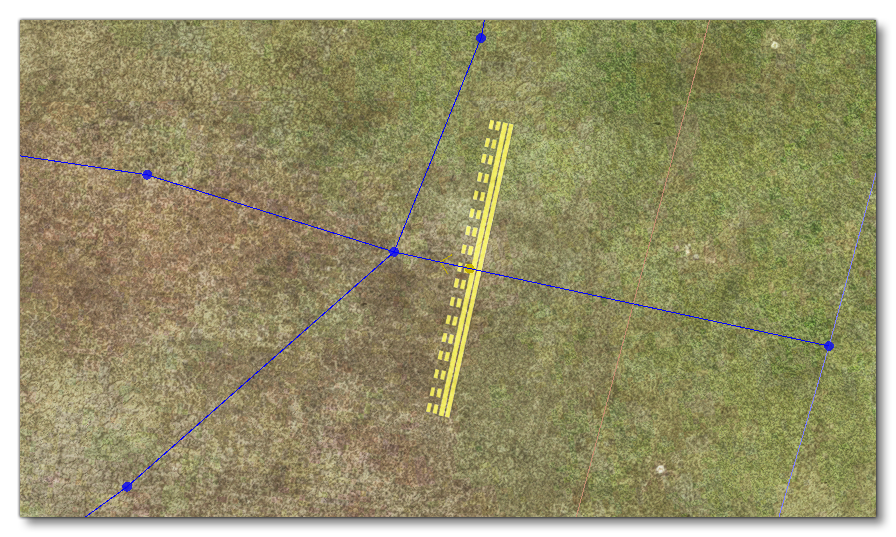
In our example you can see that the hold short is orientate wrongly, and should be facing the runway. This is easily solved by going back to the properties and changing the Orientation to be Reverse.
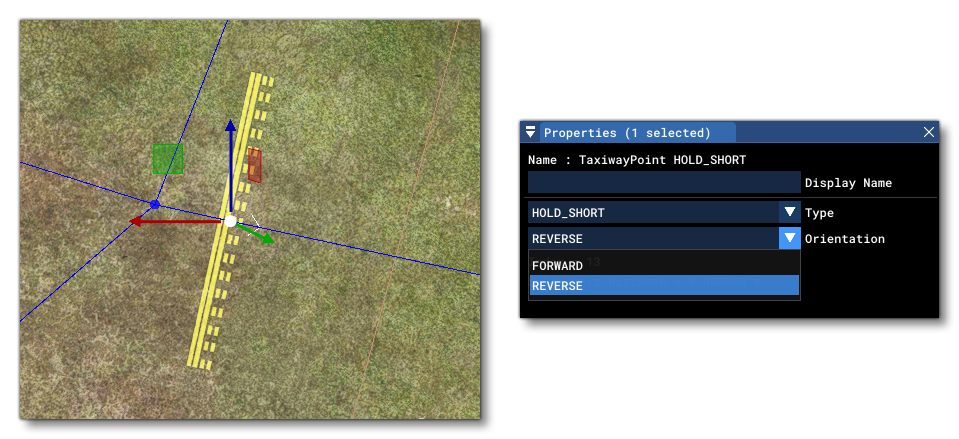
You can also take this time to move the hold short taxiway point using the Gizmo and make sure it is positioned appropriately. When ready, you should go back to the Properties for this point and set it to be the HOLD_SHORT_NO_DRAW type, which will keep the point as a hold short position, but remove the painted lines associated with it.