TAXIWAY PATH OBJECTS
A Taxiway Path object is an object element that is used to connect Taxiway Points and Taxiway Parking within an airport as well as to create different paths for things like ground vehicles. When you select this object type the Objects window will not show any object elements as the type of path created will depend on the properties and the use it is put to:
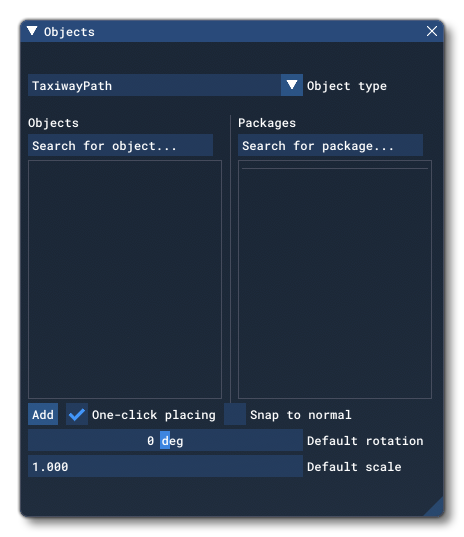
In general, Taxiway Path objects will be added automatically when you add TaxiwayPoint Objects into the scene, and simply clicking the Add button with no taxiway point selected will not do anything. Taxiway path objects can also be used with TaxiwayParking Objects and with Taxiway Sign Objects. Please see those pages of the documentation for more information on how they are created and used in a scene.
IMPORTANT! Taxiway Path objects require one or more Airport Objects to be present in the scene, and must be added to an airport group in The Scenery Editor. If no airport is present then they cannot be used. Also note that if they are placed too far away (ie: outside the airport Object Test Radius) then they will not be rendered.
Properties
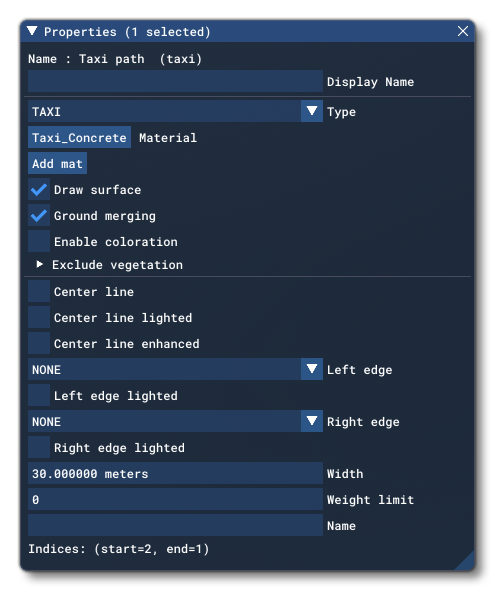
The Properties window for a Taxiway Path looks like this:
-
Name
This is the name of the element as defined by its object type properties.
-
Display Name
This is the name of the element as it will be displayed in the The Scenery Contents List. This can be edited and is helpful for identifying elements when you have a lot of items in the content list.
-
Type
This sets the type of path that is being created. You can select from the following options:- Taxi - This is a general taxiway path showing a surface and (optional) markings. These will be drawn in green/blue in the scene.
- Runway - This one would be used on a runway center line for traffic to taxi on a runway. Note that any assigned marking will not be shown with this path type. These will be drawn in light blue in the scene.
- Parking - This path type is used to connect the taxi network to TaxiwayParking Objects. This, like the Path type, does not show any surface material, so will show whatever is "under" it (ie: Apron Objects). These will be drawn in dark green in the scene, but only when connected to TaxiwayParking object.
- Path - This is a basic path that has no surface material of its own showing, so will show whatever is "under" it (ie: Apron Objects). Note that assigned markings will still be shown even though the surface is not. These will be drawn in blue in the scene.
- Closed - This flags the path as being closed and may show extra markings on the surface. These will be drawn in red in the scene.
- Vehicle - This path type is specifically for airport support vehicles, and aircraft won't use them. Vehicles will use them if they are available and link correctly, but note that vehicles will also use other path types if a vehicle path is not available. If you have assigned any markings to this path type, they will be different to the rest of the types, showing that the path is purely for vehicles. These will be drawn in dark blue in the scene.
- Road - This marks the path as an external road for general ground traffic. This path type will have different markings to the other path types to signify it is a road. These will be drawn in cyan in the scene.
Material
This Material button shows the current material being used for the surface of the taxiway path. You can change this at any time by clicking on it to open The Material Editor, and then dragging a new material onto the button (which will then change to the name of the new material being used). Beneath this you also have the Add Mat button. This is used when you want to "layer" materials on the taxiway - as you can add multiple materials using this button - or use specific tiling options for a material. When you click this the Material option will change to the following:
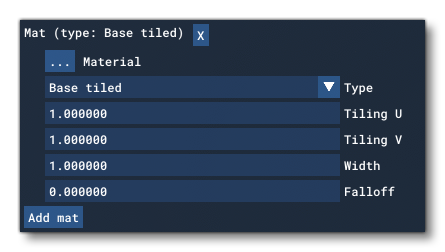
IMPORTANT! If you are editing a World Hub airport, you will only be able to apply one of the predefined materials shown in a drop-down list.
As before, you can add a material by dragging it onto the ... button, and then you can set the various different options:
-
Type (Not available for World Hub Airports)
The following material types can be selected for the taxiway path:- Base Tiled - This is the base texture tiled across the whole path. Note that the orientation of the texture cannot be changed and will be the same for all paths, regardless of their direction.
- Border - This adds the material texture to only the borders of the taxiway path object.
- Center - This adds the material texture only to the center strip of the taxiway path object.
-
Tiling U (Not available for World Hub Airports)
This sets the the texture to tile across the U axis (the runway width). By default this is set to 1.0 but you can change the value to alter the number of times the texture will be tiled.
-
Tiling V (Not available for World Hub Airports)
This sets the the texture to tile across the V axis (the runway length). By default this is set to 1.0 but you can change the value to alter the number of times the texture will be tiled. Note that this may behave differently depending on the Type of surface material being added.
-
Width (Not available for World Hub Airports)
Sets the width of the material texture in relation to the width of the path. A value of 1.0 means the texture will be applied to fit the width of the path, while a value larger than 1 will mean the texture will be stretched outside the bounds of the path width. A value less than 1 will have the texture applied to a space smaller than the width of the path.
-
Falloff (Not available for World Hub Airports)
The falloff value is used to add "feathering" to the outer edges of the material after it is applied to the path, creating a smoother transition between the path material and the surrounding terrain or other objects.
-
Draw Surface
Un-checking this will make the path materials transparent so they won't be rendered in the scene, although the path will still be valid and usable. Also note that even when a path is flagged as transparent, its Markings will still be rendered.
-
Ground Merging
When checked, this option will merge the terrain textures with the materials that are used for the path. Mouse over the image below to see the difference:
-
Enable Colouration
Checking this will open a further set of options that permit you to edit the RGB values for the materials being used to texture the path, using the color picker (opened by clicking on the color swatch) or by editing the value fields directly.
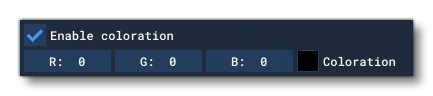 In this way you can change the color of the materials to better suit the environment and area that the path has been placed in. Setting all the values to 0 will disable the colouration.
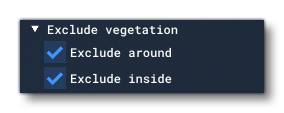
Exclude Vegetation (Not available for World Hub Airports)
If you click on the Exclude Vegetation option, you will be presented with the following two check-boxes:
-
Exclude Around
When checked, this option will remove any vegetation that is near the edge of the taxiway path object.
-
Exclude Inside
When checked, this option will remove any vegetation that is within the bounds of the taxiway path object.
Both these options are checked by default.
Markings
The following options are related to the different markings available to you when editing Taxiway Paths.
-
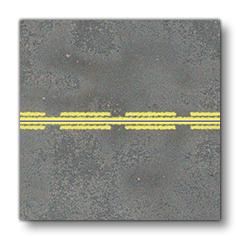
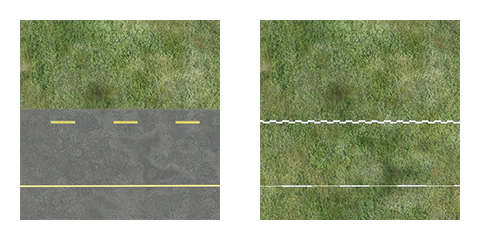
Center Line
This will add a center line to the path (only visible for Taxi, Path, Closed, Vehicle and Road types of path). The line will be different depending on the type of path it is:
-
Center Line Lighted
Selecting this will add lights along the center line of the taxiway path object. Note that this option will do nothing for Runway, Path or Road type paths, which will never have lights.
-
Center Line Enhanced
This option will show an "enhanced" center line. The option will only have any effect when used on a Taxi, Path or Closed type paths:
-
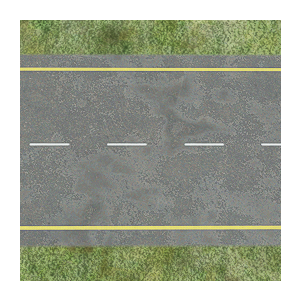
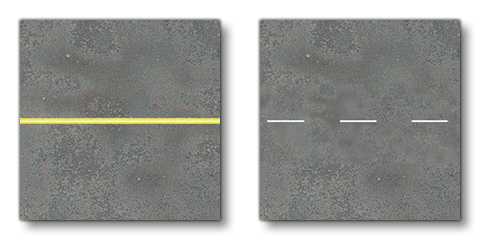
Left Edge
This will add a line to the left-hand edge of the path. The line can be either SOLID or DASHED, and will be applied to all path types except Runway and Path. Mouse over the image below to see the difference between solid and dashed edge lines: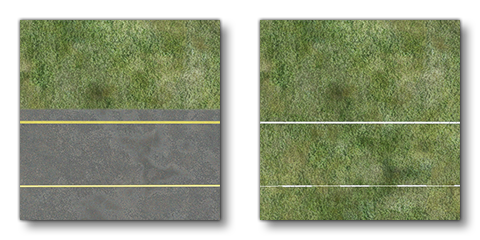
-
Left Edge Lighted
When checked, lights will be added along the left edge of the pathway. This option will do nothing for Runway, Path or Road type paths, which will never have lights.
-
Right Edge
This will add a line to the left-hand edge of the path. The line can be either SOLID or DASHED, and will be applied to all path types except Runway and Path (see the image for the Left Edge for examples)
-
Right Edge Lighted
When checked, lights will be added along the right edge of the pathway. This option will do nothing for Runway, Path or Road type paths, which will never have lights.
Miscellaneous
The final properties available for Taxiway Path objects are:
-
Width
This defines the width of the taxiway path, in meters. The default is 30m.
-
Weight Limit (Not available for World Hub Airports)
This defines a weight limit for the path. Settings other than 0 will limit the type of aircraft that can use the taxiway based on the aircraft weight. A setting of 0 means any aircraft can use it.
-
Name
This is a common name for the taxiway path.
-
Indices
This shows the indices of TaxiwayPoint Objects at either end of the taxiway path.