WINGFLEX
Wingflex is what we call the ability for a wing to bend and flex as the different aerodynamic pressures are applied to it. This feature is really only something you need to worry about for larger aircraft like airliners, but it is something that can be modelled and simulated within Microsoft Flight Simulator.
Setting Up
To start with, we'll need to create a helper and name it something like WingLeft. We will need to make sure that it's placed on the origin of the scene (0, 0, 0), as that way it be simpler to mirror what we are going to do with perfect symmetry. This helper should be a child of the main helper, HIPS.
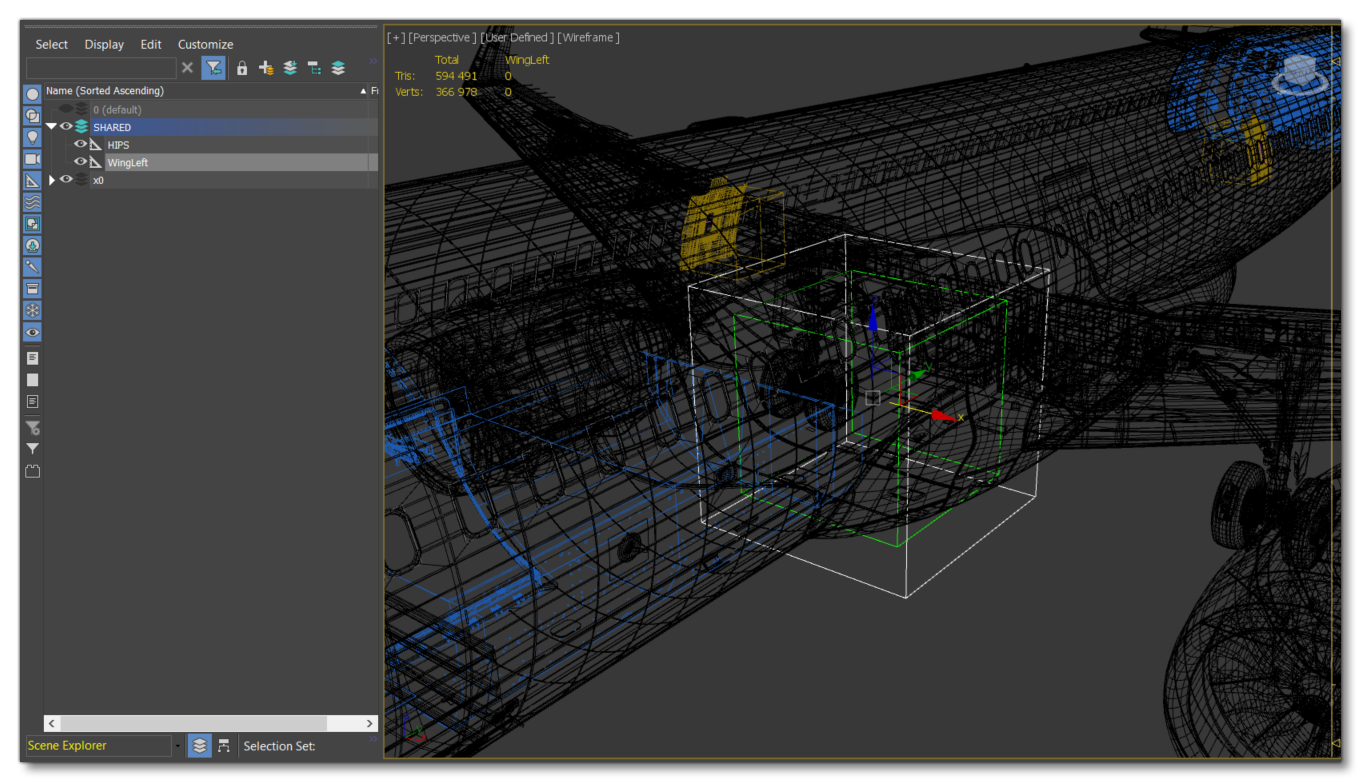
In the helper WingLeft, we will put all the other helpers linked to the wing that we are going to skin and animate. For this example, it will be the left wing of the A320.
Bones And Helpers
For creating a model that permits wingflex, we need to have a hierarchy of bones placed in such a way as to get the most realistic deformation. So, we recommend that you place your viewport in topview and focus on an aircraft wing, then imagine a straight line along the wing, from the fuselage to the start of the wing tip, along the center:
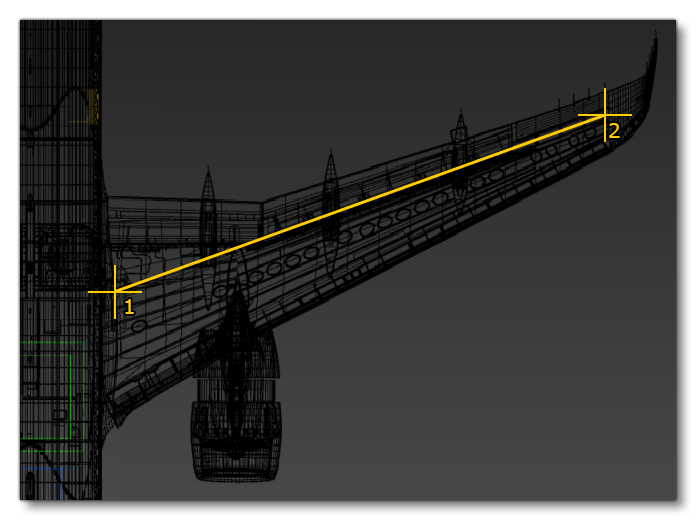
This imaginary line will be what we follow when aligning the the hierarchy of bones that we are going to create. So, create the starting point bone (1 in the image above), and name it WING_Bone_Start_Left, then create the ending point bone (2 in the image above), and name it WING_Bone_End_Left.
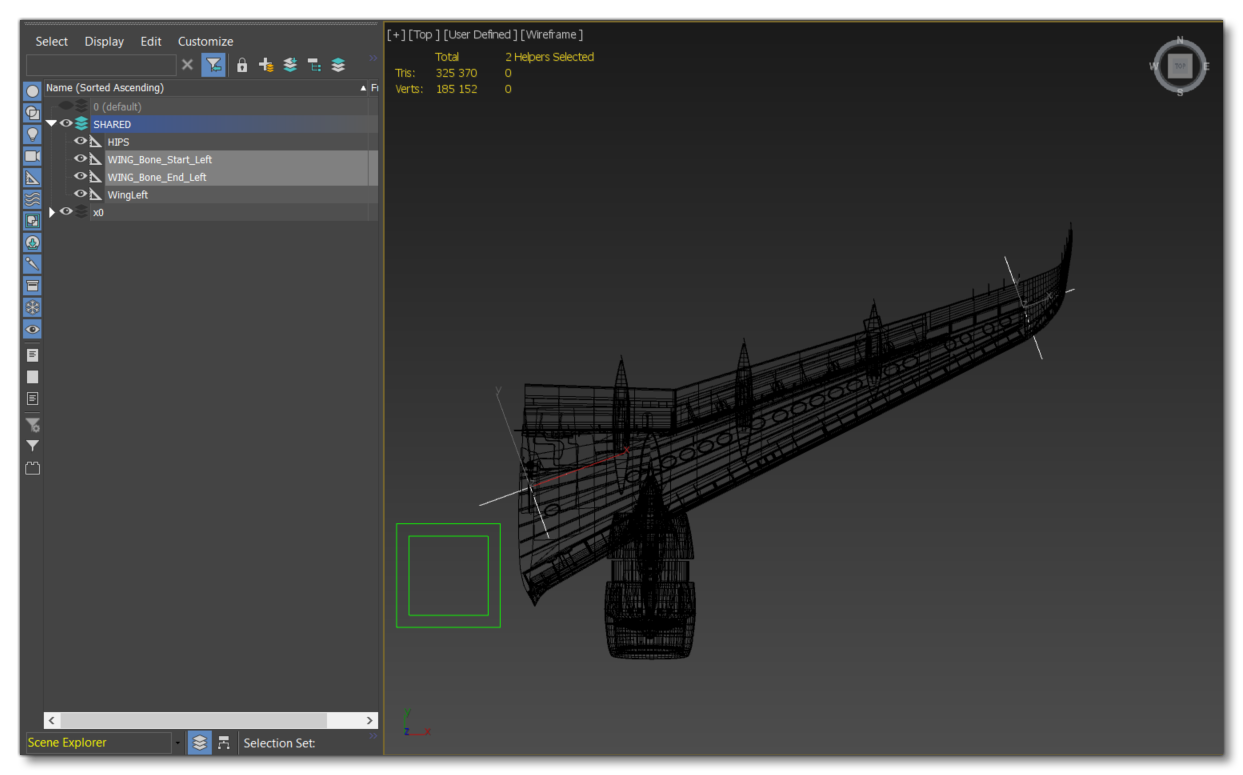
For this example, we will use five bones to skin the wing: the two we already created, and then another three between them. We need these five bones to be carefully placed along the wing to help us to skin the flaps, ailerons etc... in the future. We could add more helpers, but that would complicate skinning the elements related to the wing, and we could have less helpers, but that would then make the wing distort in a way too far removed from reality and with an insufficiently qualitative rendering. So, we need five helpers only!
To create these new helpers, and to stay aligned with those already created, you can duplicate the first one a few times and then simply translate them. So, create new helpers and rename them as: WING_Bone_1_Left, WING_Bone_2_Left, WING_Bone_3_Left. The bones will need to be spaced along the wing going from WING_Bone_Start_Left to WING_Bone_1_Left to WING_Bone_2_Left etc... When placing these bones they should be positioned so that:
WING_Bone_1_Leftis placed at the end of the first flap, and the beginning of the second.WING_Bone_2_Leftis placed in the middle of the second flap.WING_Bone_3_Leftis placed at the end of the second flap and the beginning of the aileron.
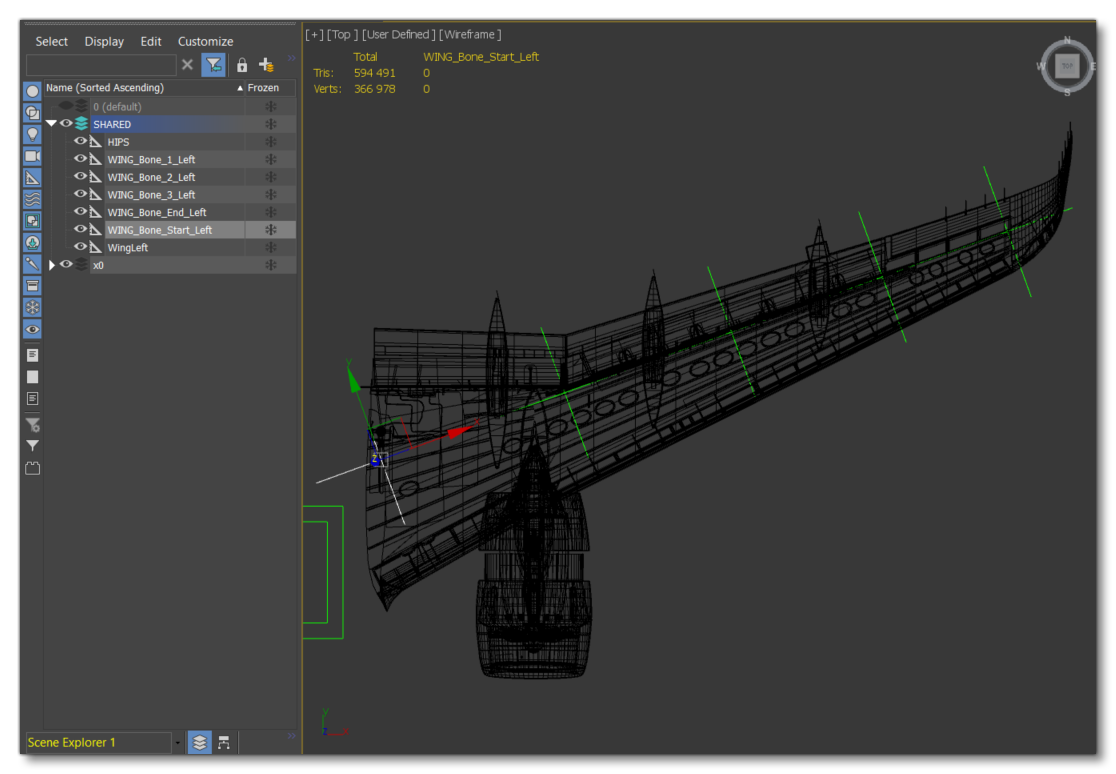
Now you have created your 5 bones, you need to prioritize them:
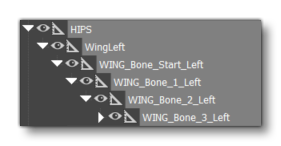 |
|
Whith these helpers now aligned in the topview, we now need to change to a frontview. When doing this you can see that all the helpers are not aligned with the wing in this view.
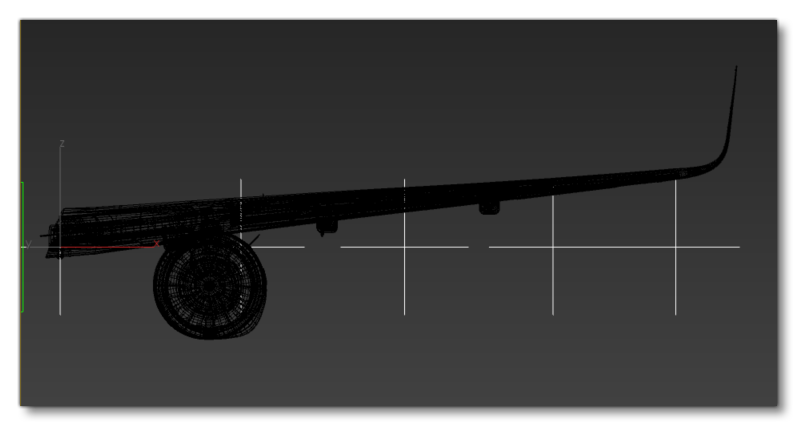
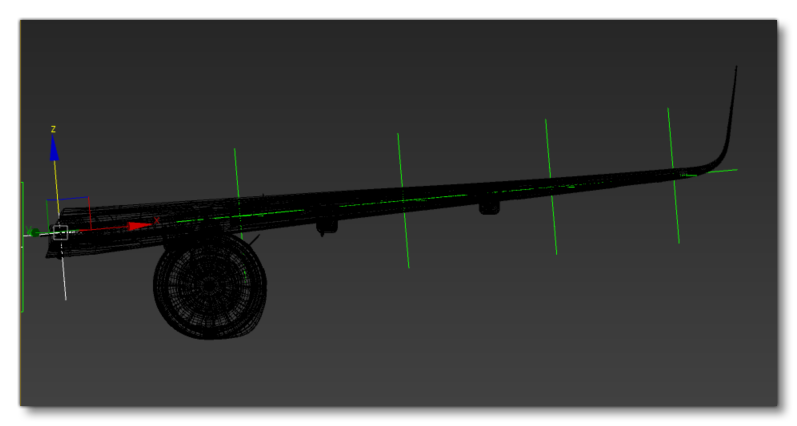
Fixing this is simply a case of selecting the main bone - WING_Bone_Start_Left - and then rotating it to align everything else up with the wing. If necessary, you can translate up the main helper to re-position it in the center of the wing.
Skinning
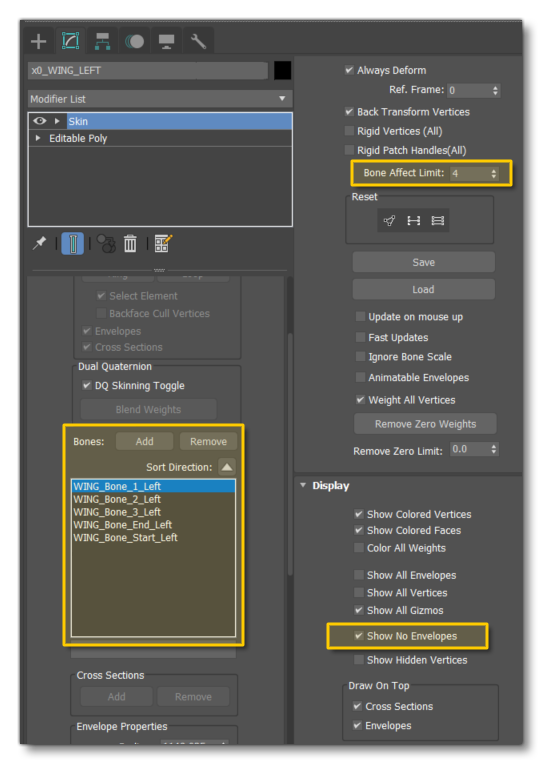
Now we have all the helpers we need to skin the main part of the wing. For that we need to select all your helpers along with the wing's node. We recommend that you isolate them to have a clean viewport. Next, we select our wing and add a skin modifier, and to that we add all the helpers we've created to "Bones" in the modifier. We also set the bone affect limit to 4, and check "Show No Envelopes":
Before going into further detail, let's quickly give some guidelines for skinning:
- Try to skin vertices with maximum influence for each bone. With that, you will be able to move the wing with deformations, and then you can smooth the influences to get more realistics deformations.
- Set 2 main keys to deform the wing. These will allow you to modify the influences with a deformation and an animation. You will see how the wing is influenced on each vertex.
- Polish and tweak your skin values to get a nice deformation and a nice movement curve.
Also, take into consideration the following:
- The maximum deformation/movement is located on the tip of the wing. The start of the wing doesn't move that much because it is so close to the airframe.
- The deformation of the wing cannot be too great as this would lead to the wing physically breaking.
- Make sure to just animate from the
WING_Bone_1_Leftto theWING_Bone_End_Left, but not to much.
Now follow these steps to skin the wing correctly:
Step 1
First is Skinning the vertices with the maximum influence for each bone:
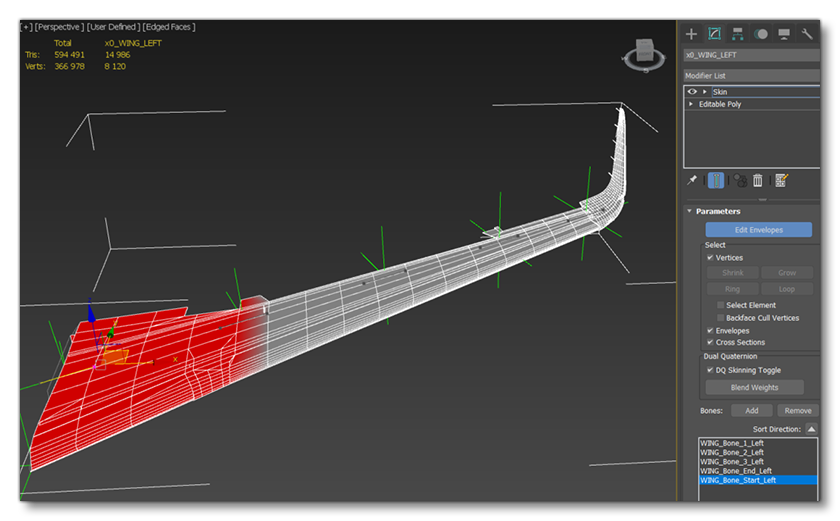 |
WING_Bone_Start_Left skinWith max influence on all vertices |
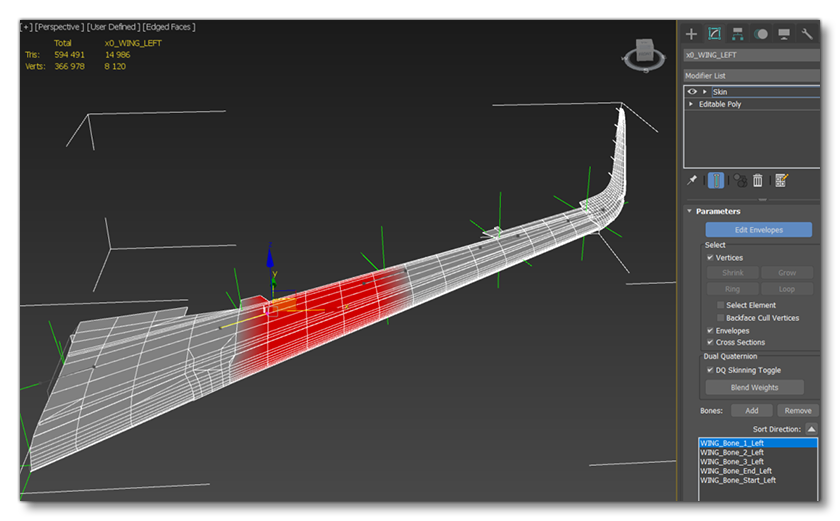 |
WING_Bone_1_Left skinWith max influence on all vertices |
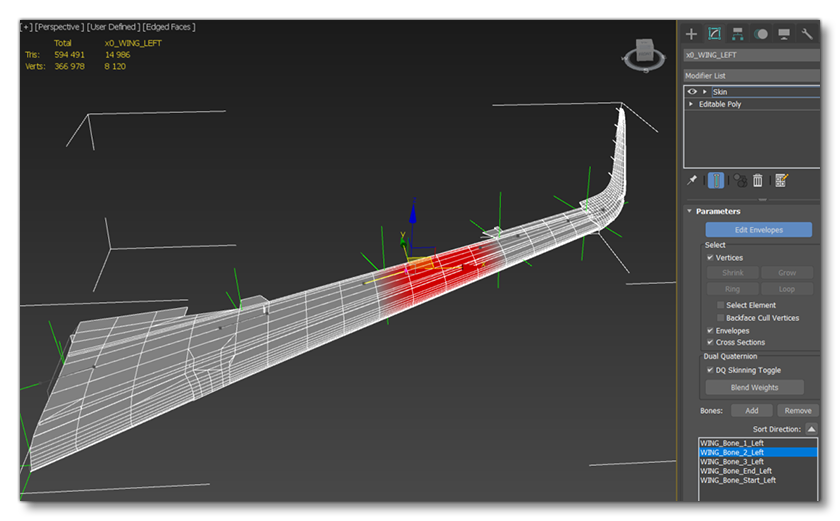 |
WING_Bone_2_Left skinWith max influence on all vertices |
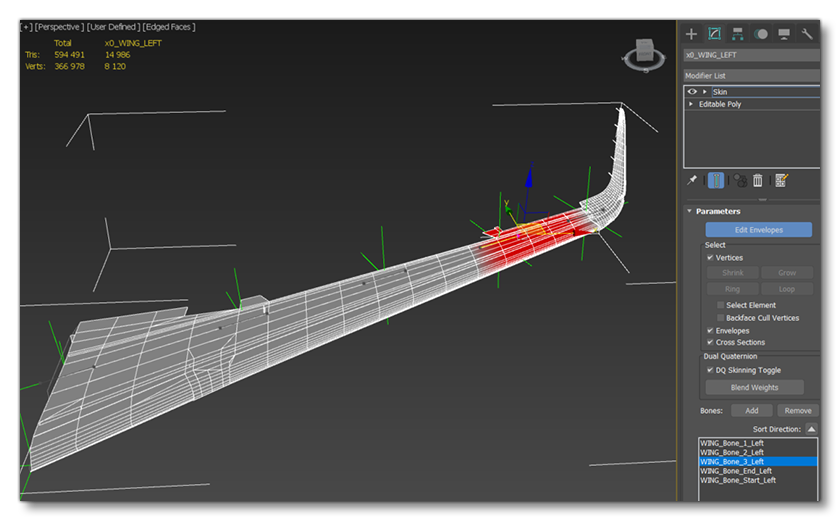 |
WING_Bone_3_Left skinWith max influence on all vertices |
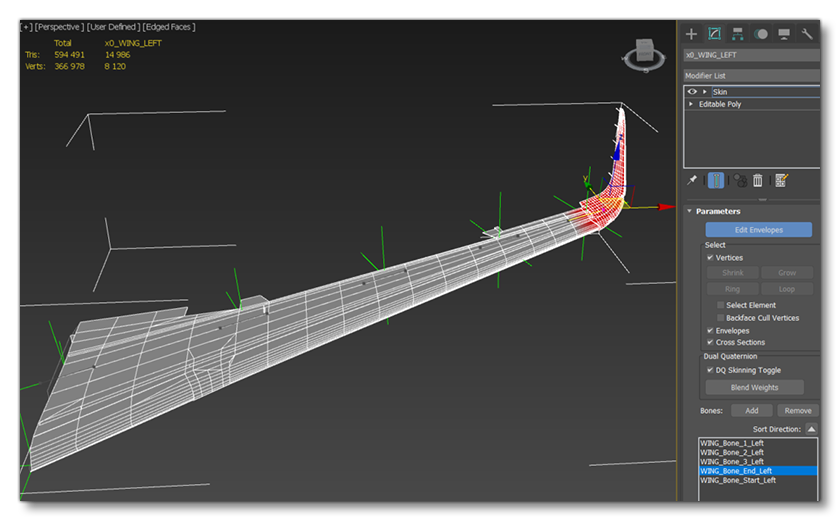 |
WING_Bone_End_Left skinWith max influence on all vertices |
Step 2
Set the main keys to deform the wing:
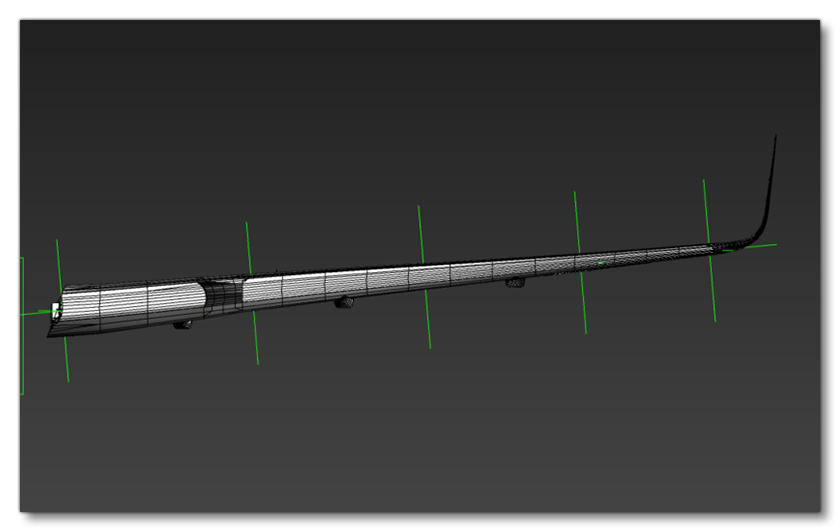 |
Frame 1 Default position of the wing |
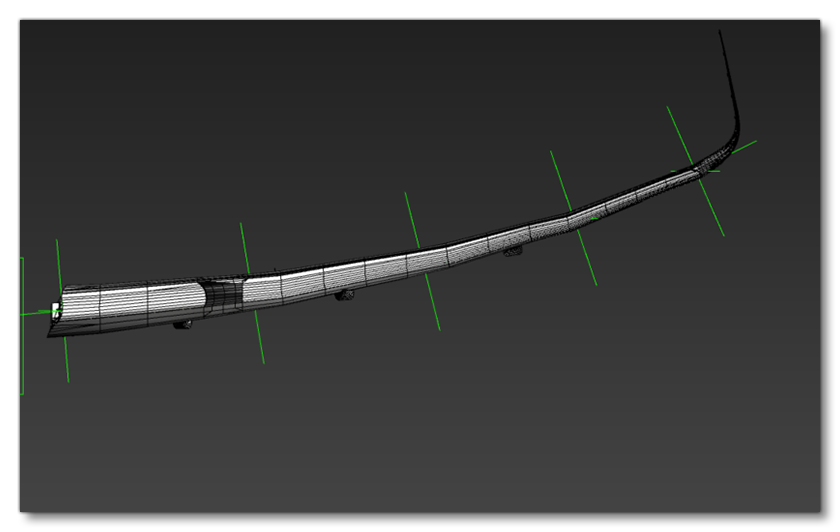 |
Frame 2 Rotation of 5° UP on each helper |
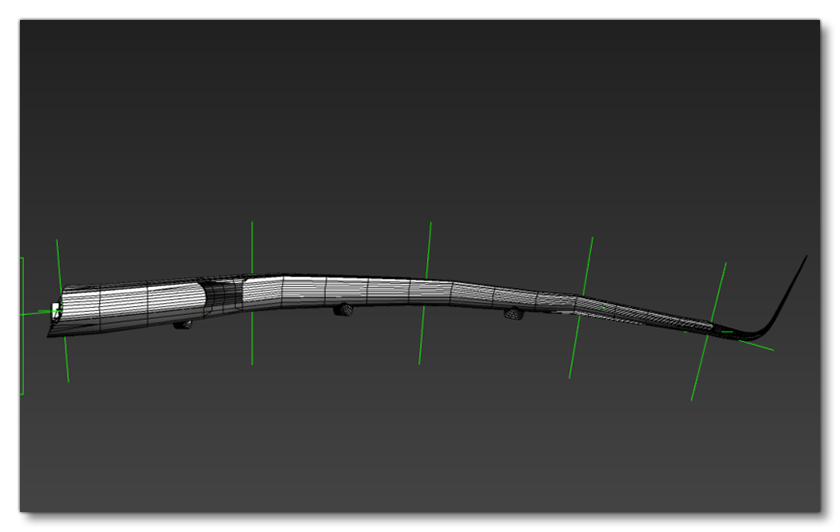 |
Frame 2 Rotation of 5° Down on each helper |
Step 3
Polish and tweak the skin values:
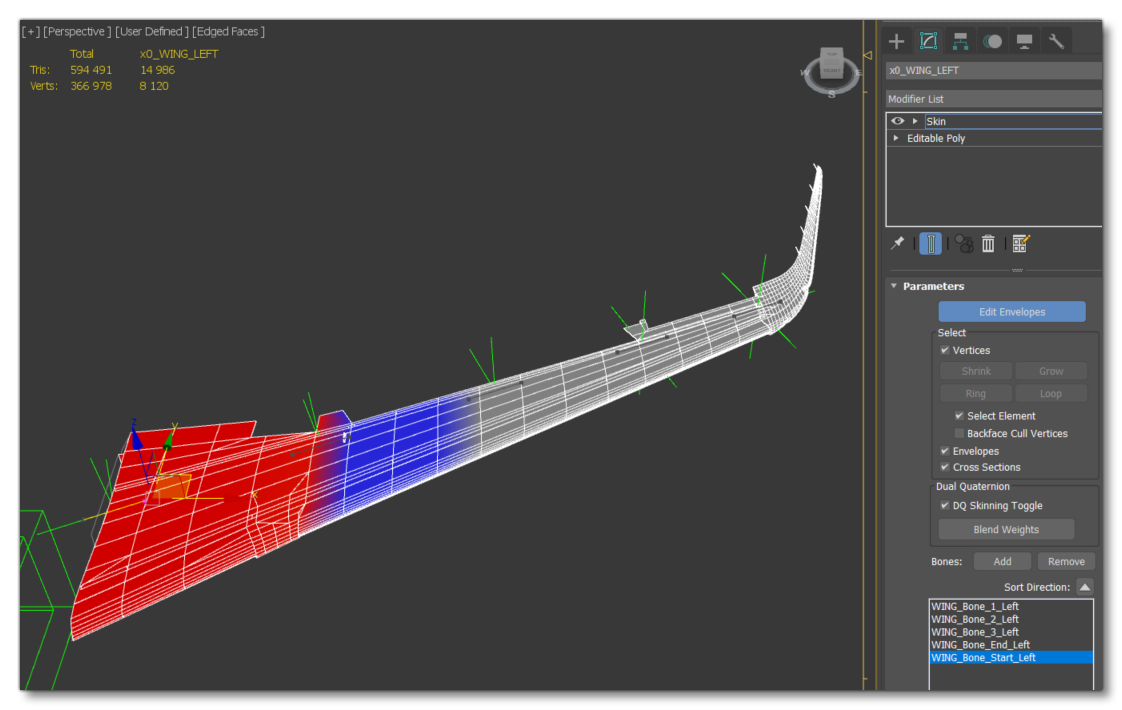 |
WING_Bone_Start_Left skinAfter smoothing skin and retakes |
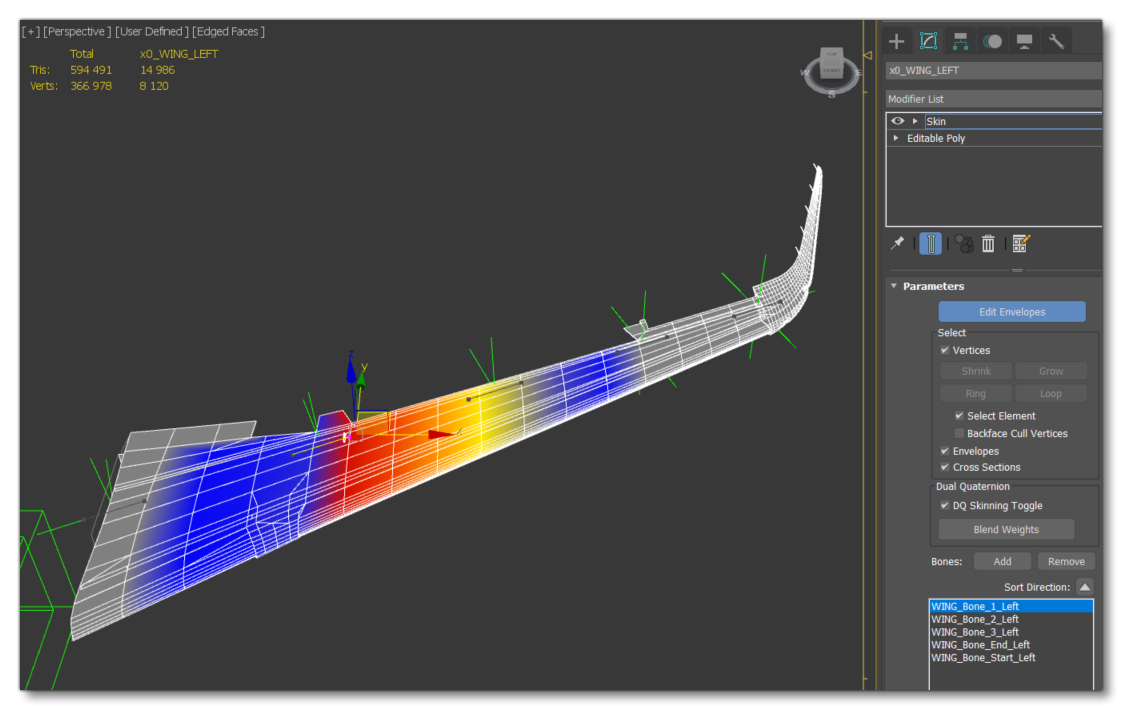 |
WING_Bone_1_Left skinAfter smoothing skin and retakes |
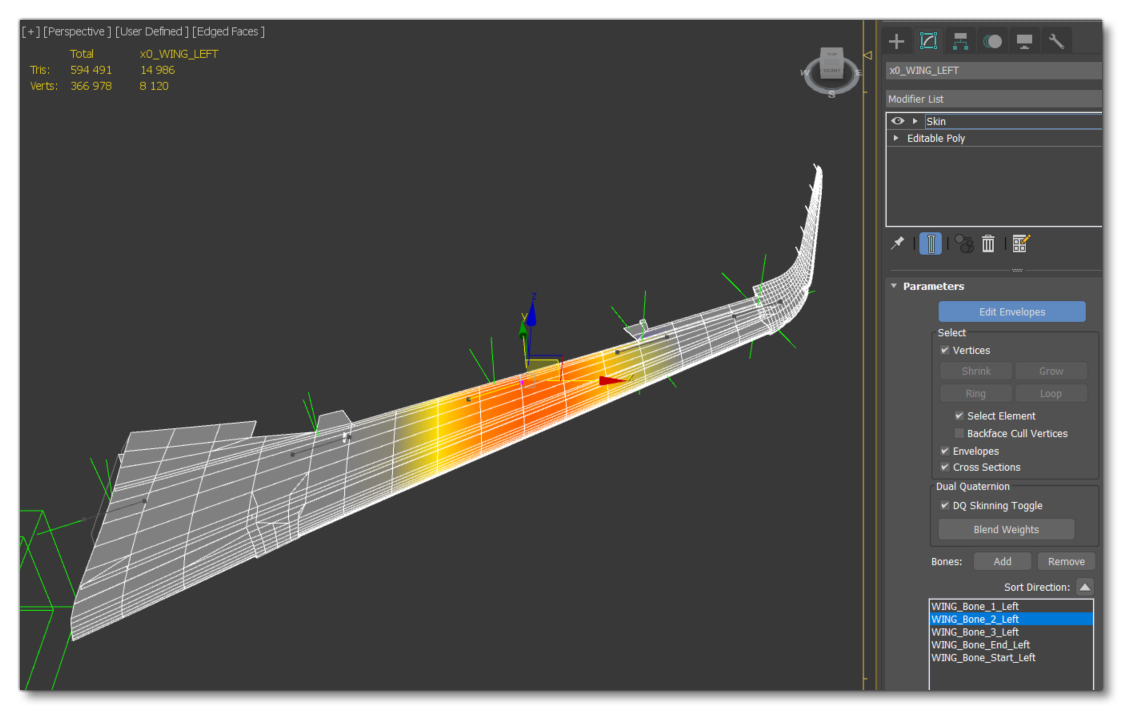 |
WING_Bone_2_Left skinAfter smoothing skin and retakes |
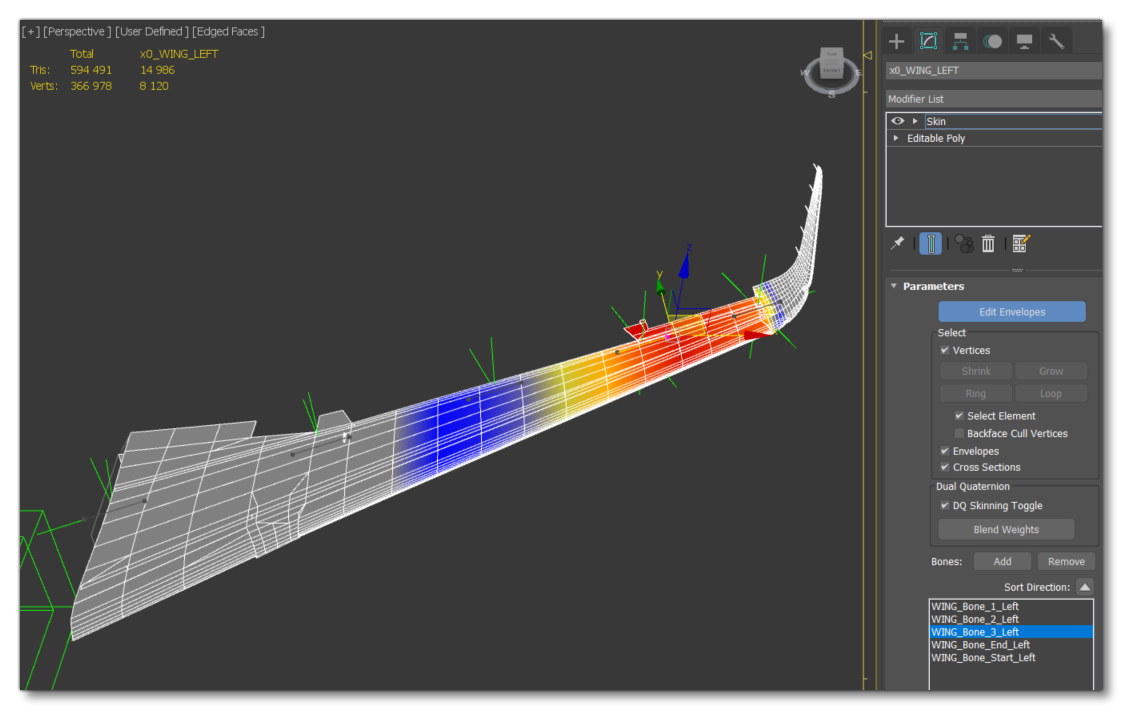 |
WING_Bone_3_Left skinAfter smoothing skin and retakes |
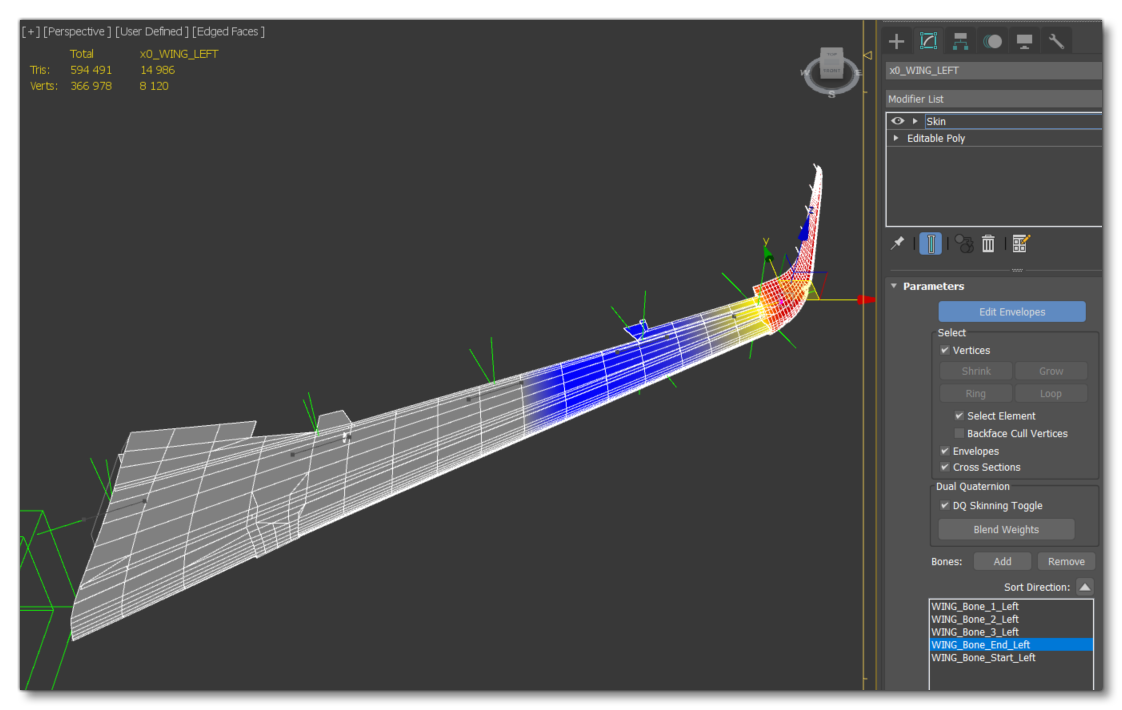 |
WING_Bone_End_Left skinAfter smoothing skin and retakes |
Other Wing Elements
The other elements that go into creating a wing - slats, aileron, etc... - will need to flex along with the wing itself. Animating these elements is discussed on the following pages: