THE BLENDER EXPORTER
The Blender plugin also has a multi-export tool for glTF files. This tool can be accessed from the sub menu available from the side of a scene in any of the views by clicking the tiny arrow button shown in the image below (mouse over the image to see an example):


Here you have the following three sub-panels:
- Objects: This panel has been developed for environmental artists that like to organize their scenes as a selection of root objects and their children. Each object that is direct child of the scene represents a glTF that will normally be part of some environment package.
- Presets: This panel has been developed with the plane modeler in mind, as they tend to organise their scenes using multiple layers. A glTF is then exported for every LOD of the plane - adding/subtracting the required layers.
- Settings: Here you can find the various different export settings for geometry, animation, etc...
General Features
The sections further down this page outline the different export options that you have from this window, but there are some general tools available regardless of whether you are using the Objects or Presets panel:
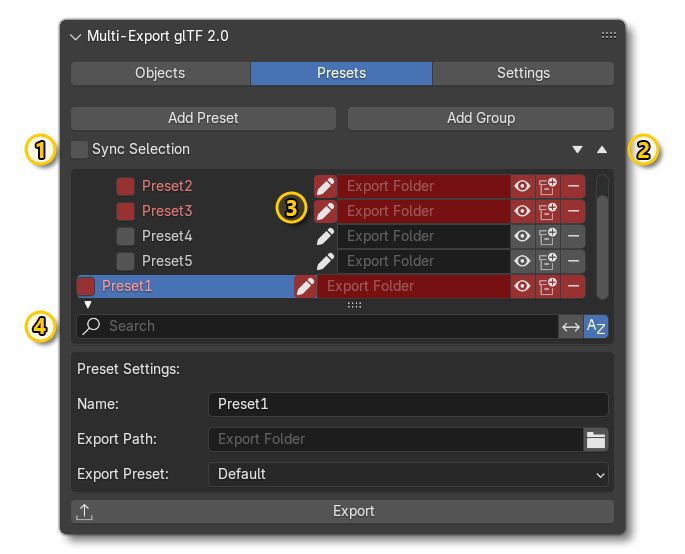
-
Sync Selection
When this option is enabled, selecting one or more object in the multi-exporter will also select the corresponding objects within the scene.
-
These buttons can be used to expand and contract the different lists that are shown in the Presets and Objects tabs.🞃(Expand) /🞁(Collapse)
-
Multi-Select
Within the different lists, you can useAlt+ click andShift+ click to select multiple items in the lists. All selected items will be highlighted in red, and if the selected items share properties, setting a value on one of them, will set the same value for all of them.
-
Item Filter
Any text added into this input box will filter the items listed for the preset or object. The filter can be inverted using the⟷button, and you can choose whether to sort the list alphabetically or not using theAZbutton (this option is only applicable to the presets tab).
Finally, you can access a context menu by right clicking on any item in the list:
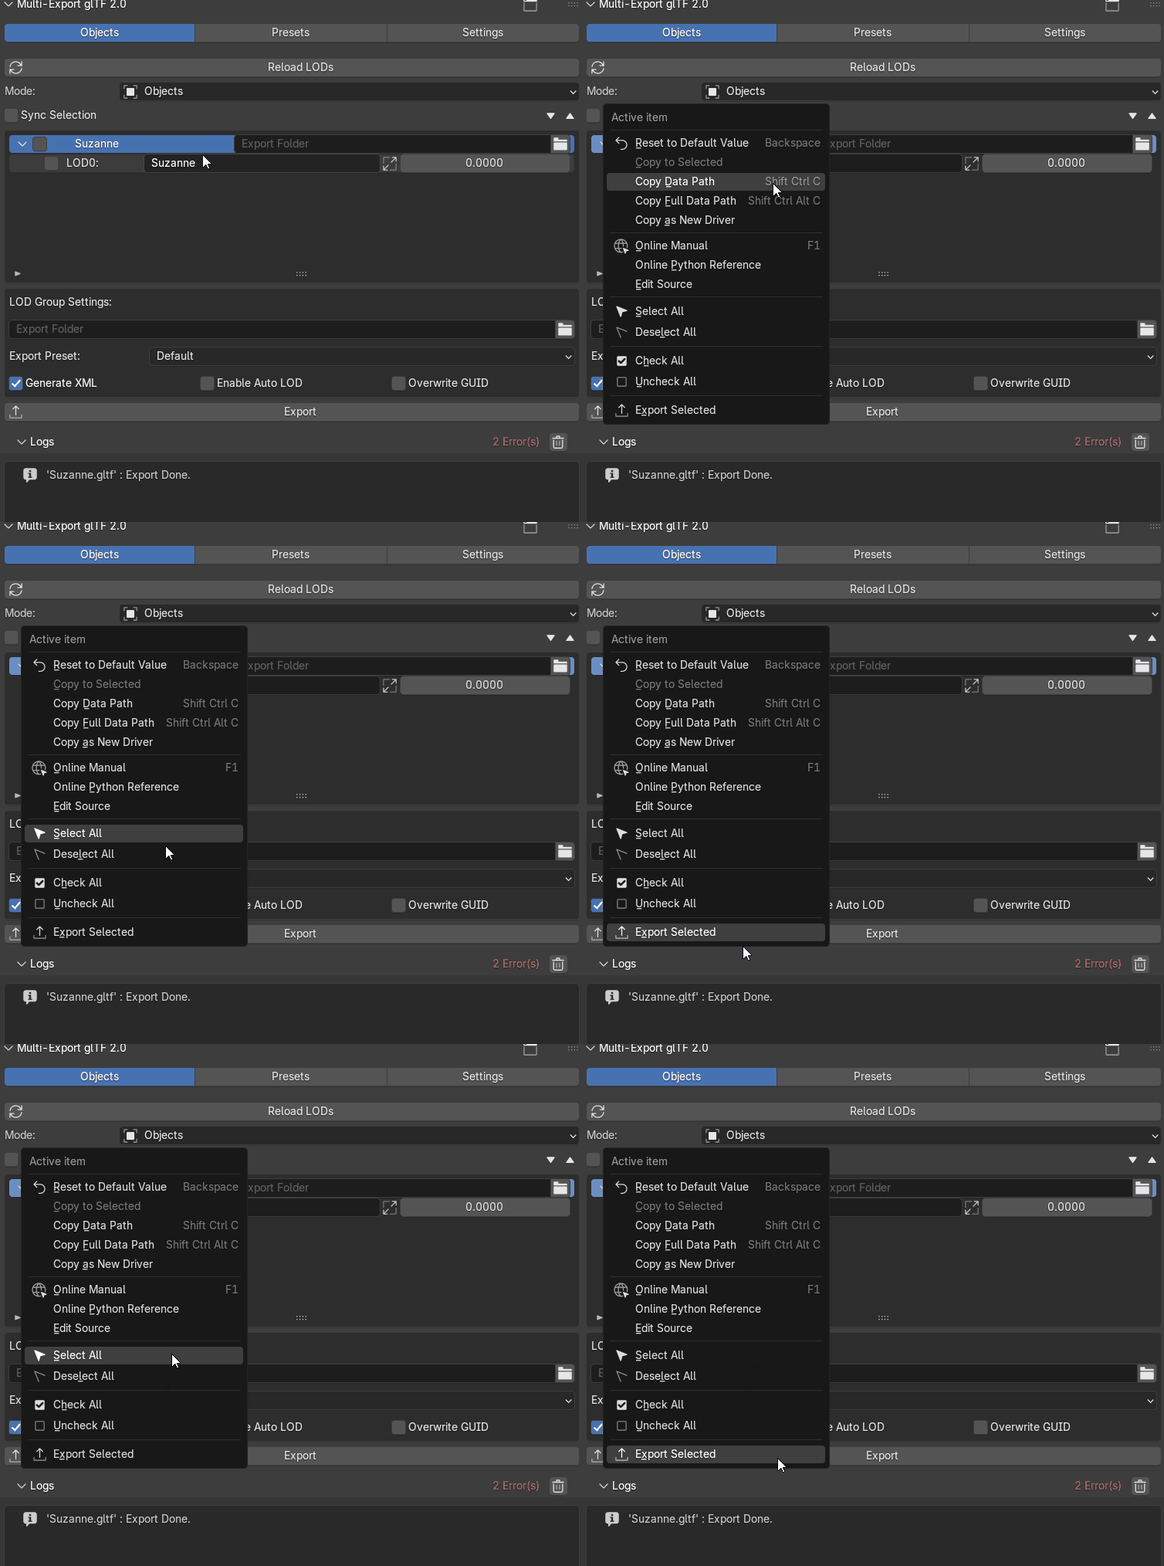
From this menu you have access to:
- Select All and Deselect All .
- Check All and Uncheck All .
- Export Selected, can be faster in some cases since you don’t need to manage the item check states.
Exporting Using The Objects Panel
This panel relies on the names of your root nodes in the scene. If your object's name starts with x0_ or ends with _LOD0 it will be considered a LOD0 (x1_ and _LOD1 will be LOD1, etc...). The rest of its name defines its category so that all the objects from the same family (ie: different LODs of the same asset) will be sorted together. This window is designed principally for those people that are making models for scenery.
By default, LODs list is generated using objects names:
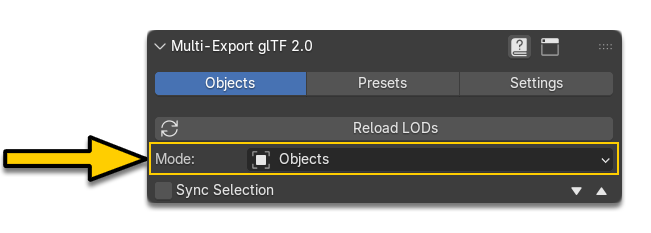
This mode can also be set to Collection. In this case LODs list will be generated using collection names.
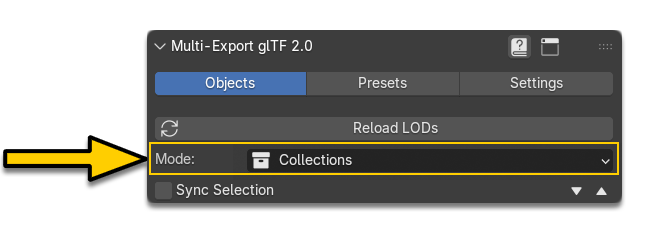
If you click on Reload LODs button, it will group your objects with LOD(s) as shown down bellow:

After that you will need to set the Export Path to define where you want the LODs exported to. Note that Export paths can be defined either individually for each object or all at once using the LOD Group Settings.:
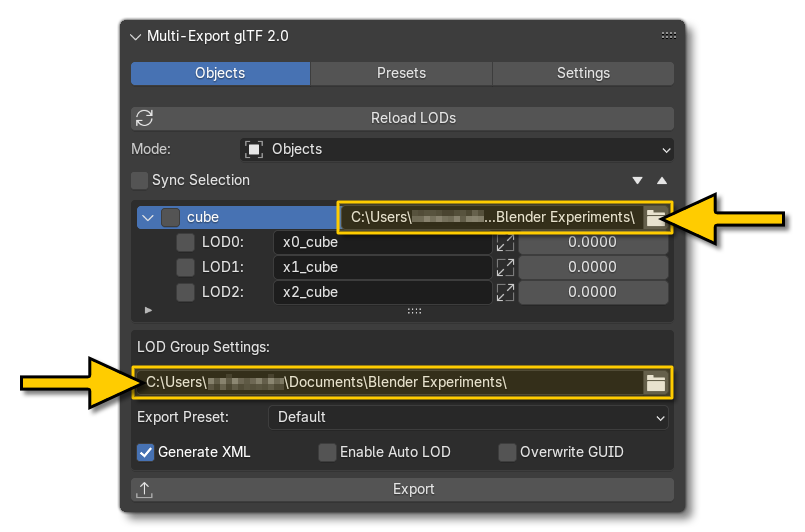
If you tick the "Generate XML" checkbox, the exporter will also create the XML file for the families of LOD selected. For example, in the images above, selecting cube, x0_cube or all of the cube LODs will produce the same result and generate one single XML file - "Cube.XML" - for the cube family of objects. Note that you can also work with multiple families at once.
Below you can see a sample of the XML output which can then form the basis for the model.xml file used by the final Microsoft Flight Simulator 2024 add-on (as explained here: Scenery XML And Model CFG):
<?xml version="1.0" encoding="utf-8"?>
    <ModelInfo guid="{1b7127b5-7223-4980-8cc0-3b5417cb2412}" version="1.1">
        <LODS>
            <LOD minSize="0" ModelFile="Cube_LOD0.gltf"/>
            <LOD minSize="1" ModelFile="Cube_LOD1.gltf"/>
            <LOD minSize="2" ModelFile="Cube_LOD2.gltf"/>
        </LODS>
    </ModelInfo>
Once you have set up all the objects for exporting, you can click the Export button, and the exporter will create the *.gltf, *.bin and *.xml files required for a MSFS 2024 package.
Auto LODs
Within the Lod Group Settings you also have the Enable Auto LOD option. When this is checked, only the LOD0 of your model will be exported. The other LODs will be generated using the Simplygon SDK when you will build your package in Microsoft Flight Simulator 2024. The Auto LOD system generates 7 LODs and you can switch between them using the Enable Force Active LOD option in DevMode. The minSize for each of the created LODs will be:
- LOD1: 70%
- LOD2: 50%
- LOD3: 35%
- LOD4: 20%
- LOD5: 10%
- LOD6: 5%
- LOD7: <=1%
The resulting model.xml generated for the LODs will look like this:
<?xml version="1.0" encoding="utf-8"?>
    <ModelInfo guid="{1b7127b5-7223-4980-8cc0-3b5417cb2412}" version="1.1">
        <LODS autoGenerate="true"/>
    </ModelInfo>
IMPORTANT! You must be in possession of a licensed copy of the Simplygon SDK to be able to use this feature. The Simplygon Licence should be installed here: C:\Users\<Username>\AppData\Local\Microsoft\SimplygonSDK
Additional Filter Options
In addition to the , the Objects tab has the following additional filter options:

- LODs Only - Only show objects or collections with suffixes "LOD0", "LOD1" etc. Or with prefixes "x0", "x1" "x2" etc...
- Active Only - Only show LOD groups containing active objects or active collections.
- Visible Only - Only show objects that are currently visible in the scene.
- Checked - Only show checked objects (also available in presets view).
- Unchecked : Only show unchecked objects (also available in presets view).
You can reset filters with this button:

Exporting Using The Presets Panel
The Presets panel allows you to create Export Presets that will make it easier to export a large numbers of different objects, animations and more, without having to constantly repeat the same steps over and over. This exporter relies on Collections to be selected and added to a Preset, so you will need your scene to be split into relevant collections. This panel is setup such that it is ideal for those people creating aircraft and other modular SimObjects.
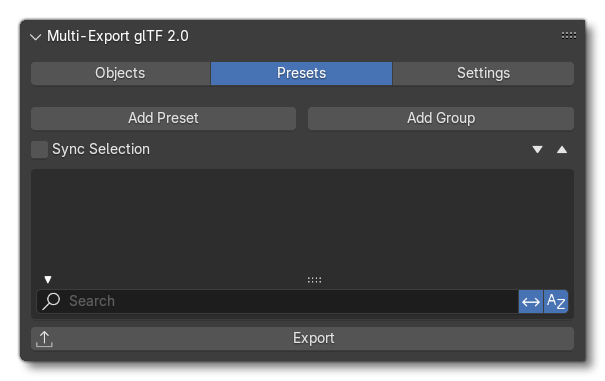
Initially the panel list will be empty and you will be presented with two buttons at the top:
Add Preset- Clicking this button will add a new preset element to the view, and you can set its name✎, the collections it contains☐⊕, and also enable / disable it for export (by checking/unchecking the box next to the preset name). You can also remove the preset by clicking the minus-button.
NOTE: Adding a preset this way means that it cannot be added to a group. If you want a preset in a group, create the group first then use the+of the group to add the preset.
Add Group- Clicking on this element will add a new group element to the view. Groups are supplied as a way to organise your presets into logical groups of parts, where the you would have - for example - one group per model, and in each group, a preset per-LOD of the model. You can use the✎to name the group and the+button is used to add a new preset to the group, and the-button will delete the group. You can enable / disable the group for export by checking/unchecking the box next to the group name.
IMPORTANT! Deleting a group will also delete all the presets it contains, so use with caution
General workflow would be to add a group for the part you want to export, and then in the group create the required presets. For each preset you will need to click the collections ☐⊕ button and add the required items into the preset:
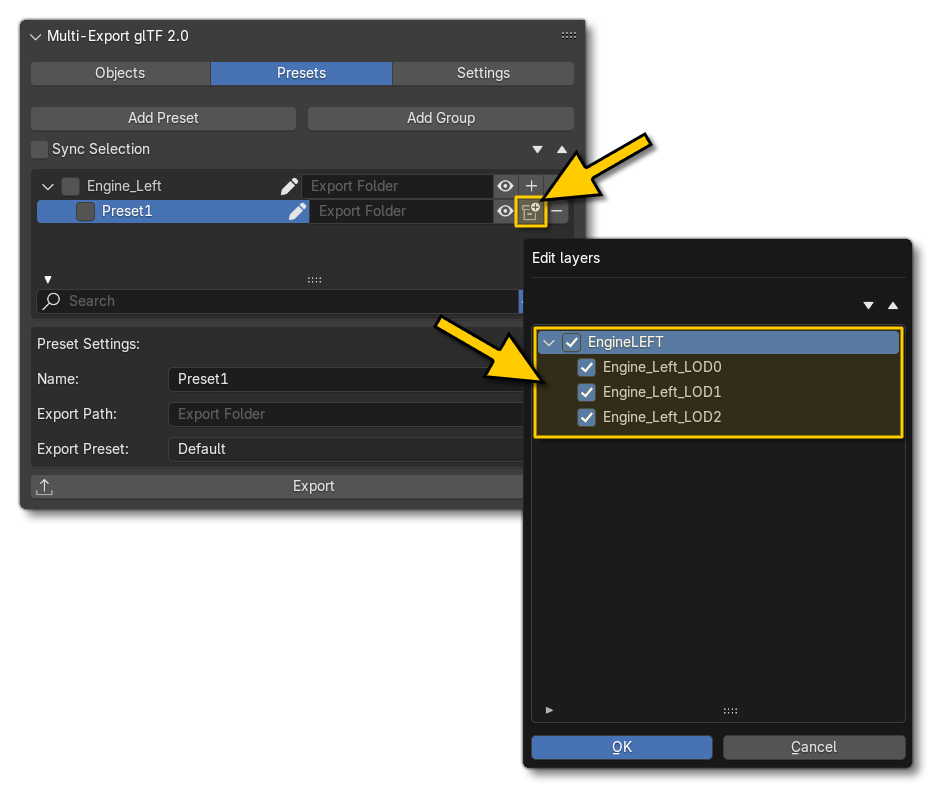
Once you have set up your groups and presets, you should set the Export Path from the group / preset Settings. These settings will be shown when you have selected one or more presets, or when you have selected a group (note that if you have selected multiple groups or multiple presets, changes here will be applied to all of them):

- Name: Name the preset(s) or group(s).
- Export Path: Give the path to export the preset/group contents to. If you click the folder
🖿button, an explorer window will open and you can select the export path from that. - Export Preset: From here you can select one of the available export presets to configure how the files will be exported.
Once you have set up all your presets for exporting, you can click the Export button, and the exporter will create the *.gltf and *.bin files required for a MSFS 2024 package. However, it is important to note that using presets means that no XML files are generated. This is due to the nature of the export as you may require multiple XML files and it's impossible for the plugin to know how they should all be named and structured for any given preset. You can find how to create your own XML for the model(s) here:
Logs
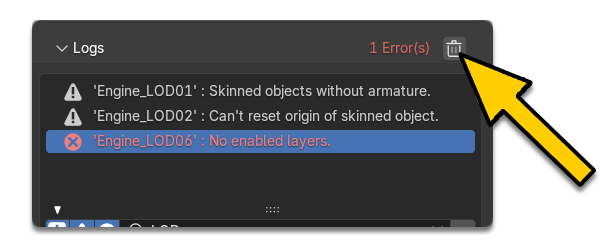
Under the exporter, you can find the Logs panel.
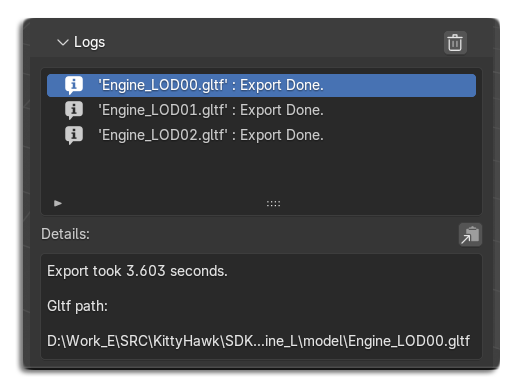
The objective of this window is to provide readable log output and avoid relying on Blender’s black-and-white terminal, which can sometimes be difficult to read.
Logs are divided into three levels:
- ℹ️ Information
- ⚠️ Warning
- 🛑 Error — blocks the export. Carefully read the error message.
You can click a log entry to display a detailed message: alt text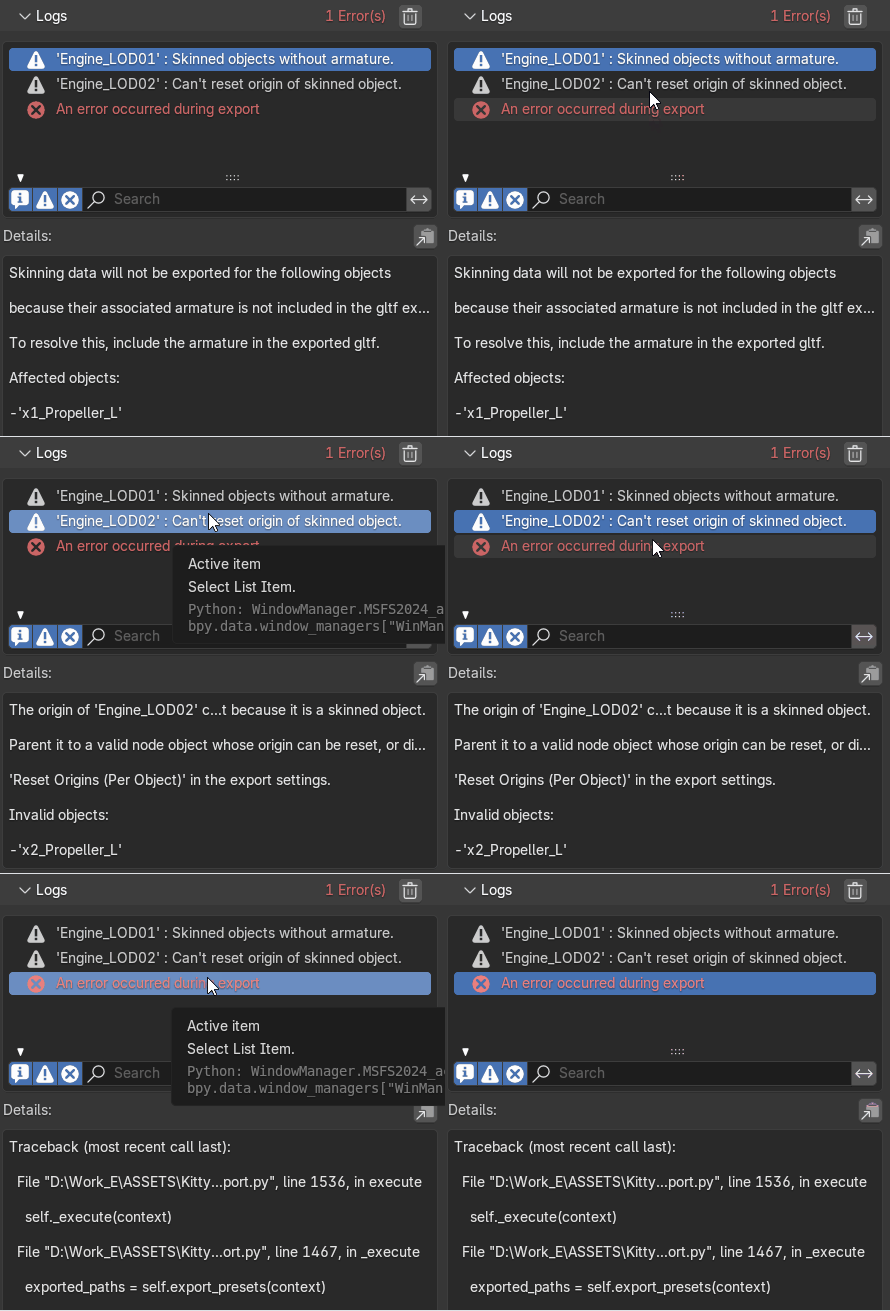
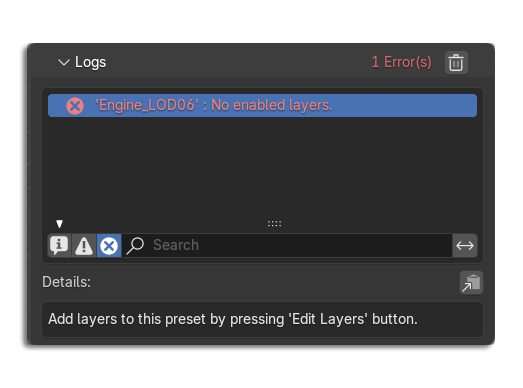
For example, here we have an error: we cannot export a preset because no layers are enabled.
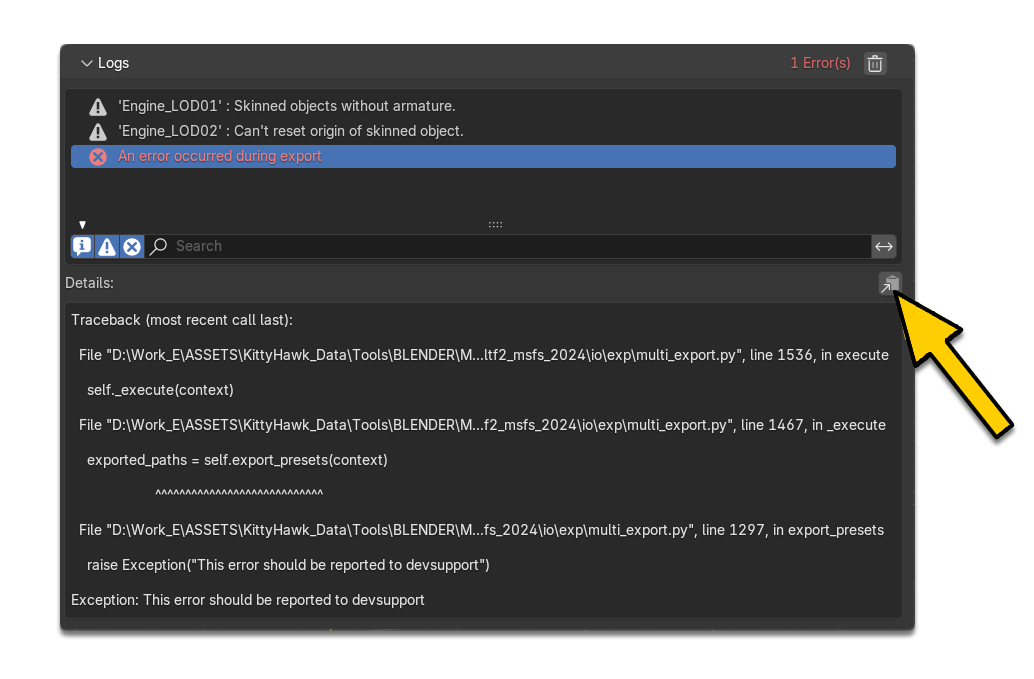
You can copy the log report details to the clipboard using this button.
This can be useful when reporting a crash on DevSupport:
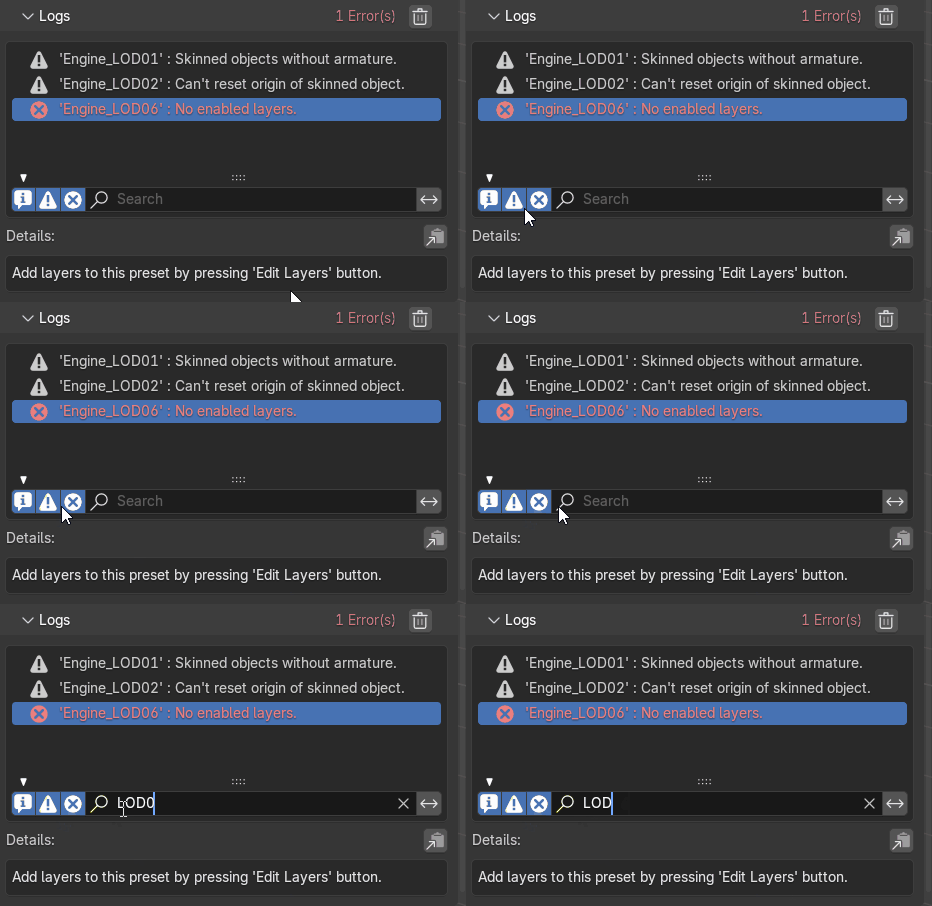
Logs can be filtered by level or by text using the filters:
Logs are automatically cleared between each export, but you can also clear them manually using this button:
The Settings Panel
Here you can find the various export settings like geometry, animations, materials, etc... for the Blender glTF export, and these can be edited as required for the project being exported.

At the top of this tab you can click on the + button to create a new Export Preset. After adding the preset, you can then set up the various options for it and it can be selected in the Presets tab for use. The rest of the tab is taken up with various sub-sections and options that you can use to configure your exports.
NOTE: If you want to export your models as pure glTF that follow the Khronos Schemas, you can uncheck the Microsoft Flight Simulator 2024 settings.
General
- Export in Background: When enabled, export is done in a background process, allowing you to continue working in blender.
IMPORTANT! This setting is global and common to all presets. - Copyright: Legal rights and conditions for the model
- Remember Export Settings: Store glTF export settings in the Blender project.
Textures
- Keep original: Keep original textures files if possible.
IMPORTANT! If you use more than one texture - where PBR standard requires only one - only one texture will be used. This can lead to unexpected results. - Textures (Visible when keep original is off): Folder to place texture files in. If you don't set an absolute path, it will be relative to your exported models.
Microsoft Flight Simulator 2024
Enable Microsoft Flight Simulator 2024 glTf extensions.
Textures
- Generate TextureLib: Generate Texture XML files for the textures after the export.
Export process
- Reset Origins: From this drop-down menu you can select the following:
- Disabled - Node origins will remain "as is" in the model.
- All roots - All root nodes will be reset to (0, 0, 0) on export.
- Per Object - Node origins will be reset on a per-object basis, based on the object settings themselves (see the object Transform Properties description for more information).
- Remove LOD prefix: Remove LOD prefixes 'x0_/x1_...' on node names.
- Merge nodes: Merge glTf Meshes into one root node.
- Export as submodel: This option is dedicated to "Merge models". Only use it for models contained in
<MergeModel>xml elements.
Include
- Selected Objects: Export selected objects only. You can ignore this setting since it is disabled by the MultiExporter addon.
- Visible Objects: Export visible objects only.
- Cameras: Export Cameras.
- Punctual Lights: Export Lights.
Transform
- +Y Up: Up axis orientation. Always enabled when using MSFS2024 extension.
Mesh
Enable/Disable meshes export (useful for exporting animations only).
- Apply Modifiers: Apply modifiers (excluding Armatures) to mesh objects.
IMPORTANT! This option prevents the ecport of shape keys. - UVs: Export UVs (Texture Coordinates) with meshes.
- Normals: Export vertex normals with meshes.
- Tangents: Export vertex tangents with meshes.
- Attributes: Export Attributes (when starting with underscore).
- Loose Edges: Export loose edges as lines, using the material from the first material slot.
- Loose Points: Export loose points as glTF points, using the material from the first material slot
Vertex Colors
- Use Vertex Color
- MATERIAL: Export vertex color when used by material.
- NONE: Do not export vertex color.
- Export all vertex colors: Export all vertex colors, even if not used by any material. If no Vertex Color is used in the mesh materials, a fake COLOR_0 will be created in order to keep material unchanged.
- Export active vertex color when no material: When there is no material on an object, export active vertex color.
Material
-
Export: Export all materials used by included objects.
-
Placeholder: Do not export materials, but write multiple primitive groups per mesh, keeping material slot information,
-
No export: Do not export materials, and combine mesh primitive groups, losing material slot information.
Shape Keys
Export shape keys (morph targets).
- Shape Key Normals Export vertex normals with shape keys (morph targets).
- Shape Key Tangents: Export vertex tangents with shape keys (morph targets).
Armature
- Use Rest Position Armature Export armatures using rest position as joints' rest pose. When off, current frame pose is used as rest pose. Always enabled when using MSFS2024 extension.
- Export Deformation Bones Only: Export Deformation bones only (and needed bones for hierarchy).
- Remove Armature Object: Remove Armature object if possible.If Armature has multiple root bones, object will not be removed
- Flatten Bone Hierarchy: Flatten Bone Hierarchy. Useful in case of non-decomposable transformation matrix
Skinning
Export Skinning Armature Data.
- Bone Influences: Choose how many bone influences to export.
Animation
- Animation mode
-
Actions: Exports active actions and NLA tracks as glTF animations. In blender 4.5 or superior, this is the default and advised mode. You can use it with the new Slotted actions features.
-
NLA Tracks: Export individual NLA Tracks as separate animation. In blender 4.2 or inferior, this is the default and advised mode.
-
- Bake All Objects Animations: Force exporting animation on every object. Can be useful when using constraints or driver. Also useful when exporting only selection
Rest And Ranges
- Use Current Frame: Export the scene in the current animation frame.
- Limit to Playback Range Check: Clips animations to selected playback range.
- Set all glTF Animation starting at 0: Set all glTF animation starting at 0.0s. Can be useful for looping animations
- Negative Frames
-
Slide: Slide animation to start at frame 0.
- Crop: Keep only frames above frame 0.
-
Armature
- Export all Armature Actions: Export all actions, bound to a single armature.
IMPORTANT! Option does not support exports including multiple armatures. - Reset pose bones between actions: Reset pose bones between each action exported. This is needed when some bones are not keyed on some animations
Shape Keys Animation
Export shape keys animations (morph targets).
- Reset shape keys between actions: Reset shape keys between each action exported. This is needed when some SK channels are not keyed on some animations.
Sampling Animations
Apply sampling to all animations.
- Sampling Rate: How often to evaluate animated values (in frames).
Optimize Animations
- Optimize Animation Size: Reduces exported filesize by removing duplicate keyframes. Can cause problems with stepped animation.
- Force keeping channels for bones: If all keyframes are identical in a rig, force keeping the minimal animation. When off, all possible channels for the bones will be exported, even if empty (minimal animation, 2 keyframes).
- Force keeping channel for objects
- If all keyframes are identical for object transformations, force keeping the minimal animation.
- Disable viewport for other objects: When exporting animations, disable viewport for other objects, for performance. This option can cause issue in some cases (complicated rigs with special constraints for example).
Related Topics